Making DIY moss wall art is an easy and fun project that adds a touch of nature to your space. I started with a simple wooden frame and gathered preserved moss, glue, and some decorative elements. Working with these materials was easy, and the entire process took just a few hours. I found the whole experience relaxing and rewarding, knowing I was crafting something unique for my home.
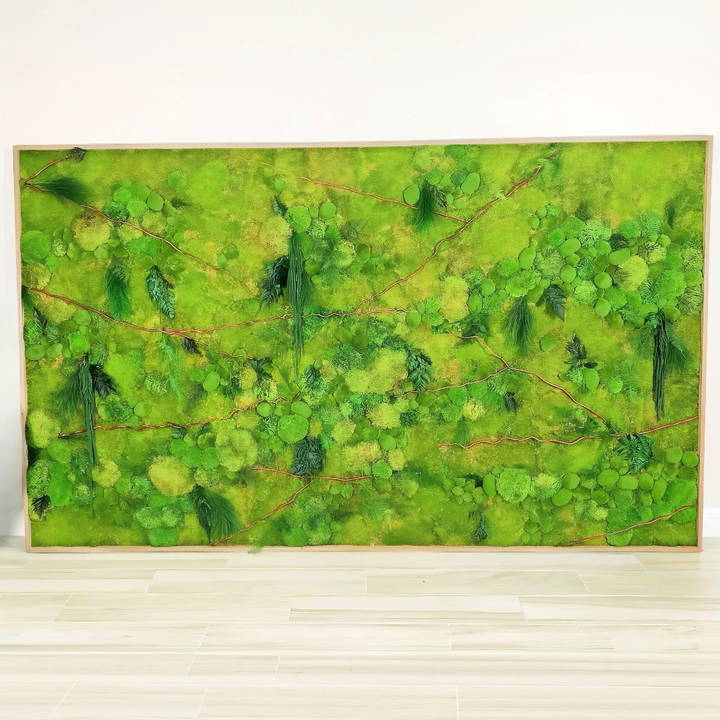
If you're curious about how to make a moss wall, it's as simple as following a few basic steps. The key is to design your layout before you start gluing the moss in place. I made sure to have everything ready before starting. This project is a great way to add greenery indoors without needing to care for live plants. I'm excited to help you get started with this guide.
By following these steps, you'll build your own moss wall art in no time. Trust me, the results are worth it!
What Are Moss Walls
Moss walls are a beautiful and sustainable way to bring a piece of nature into your home or office. They're not only visually stunning but also offer a range of benefits that make them a popular choice for green decorating.
- What is a Moss Wall? A moss wall is essentially a vertical garden that uses moss as its primary plant. Unlike traditional gardens, moss walls don't require soil to grow, making them a unique and low-maintenance option for indoor spaces.
- Why Choose a Moss Wall? Moss walls are known for their air-purifying qualities. They absorb carbon dioxide and release oxygen, just like other plants, which helps improve indoor air quality. Additionally, moss has natural sound-absorbing properties, making it an excellent choice for making a quieter, more serene environment.
- The Aesthetic Appeal One of the main reasons people choose moss walls is their aesthetic appeal. They provide a lush, green look year-round and can be designed in various shapes and sizes to fit any space. Whether you're looking to build a statement piece or add a touch of greenery, moss walls are versatile and stylish.
- Easy to Maintain Moss walls require minimal maintenance. They don't need regular watering like other plants because moss absorbs moisture from the air. This makes them perfect for busy individuals or those without a green thumb.
- Eco-Friendly Choice Choosing to install a moss wall is an eco-friendly decision. Moss is a renewable resource that grows quickly and doesn't require harmful pesticides or fertilizers. By incorporating a moss wall into your space, you're making a positive impact on the environment.
Moss walls add beauty, function, and sustainability to any space. They're easy to install, maintain, and turn a plain wall into vibrant art. Perfect for eco-conscious people or those wanting to enhance décor.
Getting Started: Materials List
- Plywood: I chose 4x8 sheets, which I later cut down to the size I preferred for my wall. Plywood serves as a sturdy base for the moss.
- Preserved Moss: The star of the show. I opted for preserved moss for its longevity and low maintenance.
- Sketching Materials: To plan out my design beforehand.
- Adhesive: An essential for attaching the moss securely to the plywood.
- Paint (Optional): If you want to add a background color to your moss art.
- Safety Gear: Gloves, goggles, and a mask for protection during the crafting process.
Why These Materials?
Choosing the right base and moss type was crucial. Plywood was durable yet easy to work with. Preserved moss, while initially expensive, was perfect for a long-lasting artwork without the ongoing care live moss would necessitate. The sketching materials allowed for pre-visualization, ensuring a cohesive look before the actual application.
Step by Step Instructions
Discover clear instructions on making a DIY moss wall, from planning and sketching to final installation. Transform your space with this step-by-step guide.
Step 1: Planning and Sketching
My first step was to visualize my final piece. I spent time sketching various designs and playing around with different shapes and flows until I found one that resonated with me. This step is vital as it guides the entire project, ensuring a structured approach rather than winging it.
Step 2: Preparing the Plywood
Once I settled on my design, it was time to get my plywood ready. Cutting it into my desired size was something I approached with care – after all, this would form the canvas of my art. I ended up with a size that I felt was perfect for the space I intended to hang it.
Step 3: Layout
Laying out my moss according to the sketch was next. This step was about translating my vision onto the actual plywood, adjusting as necessary. It was fascinating to see how the sketch came to life with the textures and colors of the moss.
Step 4: Attaching the Moss
Using a strong adhesive, I started to carefully attach each moss piece onto the plywood, following my initial layout. Patience was key here, ensuring each piece was securely attached while also maintaining the overall design aesthetic.
Step 5: Final Touches
After all the moss was attached, I stepped back to admire my work. It was here I made minor adjustments, adding small pieces of moss to fill any gaps, ensuring a lush and full appearance.
Step 6: Installation
The final step was to securely install my moss art on the wall. It was a moment of pride to see the piece that I had envisioned and worked on so diligently finally hanging in my space.
Types of Moss
Choosing the right moss is key for a healthy and attractive moss wall. Here's a simple guide to common moss types for moss walls.
- Sheet Moss (Hypnum): This type is often called carpet moss because of its ability to form dense and lush green mats. It's perfect for covering large areas smoothly and is one of the most popular choices for moss walls.
- Pillow Moss (Leucobryum): Known for its thick, cushion-like appearance, pillow moss adds a three-dimensional texture to moss walls. It's great for making a varied landscape on your wall.
- Reindeer Moss (Cladonia): Despite its name, reindeer moss is actually a lichen. It's known for its delicate, branching structure and is often used to add intricate details and depth to moss wall designs.
- Caribou Moss (Rangiferina): Similar to reindeer moss, caribou moss is also a lichen and is used for its fine, detailed texture. It can give a moss wall a more rugged, natural look.
- Preserved vs. Living Moss: It's important to note that most walls can be made with either preserved or living moss. Preserved moss has been treated to maintain its color and texture without the need for light or water, making it virtually maintenance-free. Living moss, on the other hand, is still alive and will require some care, such as proper lighting and moisture levels.
Maintenance Tips:
- Living Moss: If you opt for a living moss wall, ensure it receives low-level lighting to prevent drying out and mist it regularly to maintain moisture.
- Preserved Moss: For preserved moss walls, occasional dusting is all that's needed to keep the moss looking fresh and vibrant.
Choosing the right moss for your wall builds stunning, calming art. Whether you like preserved or living moss, there's an option to enhance your space.
Design Ideas for Moss Walls
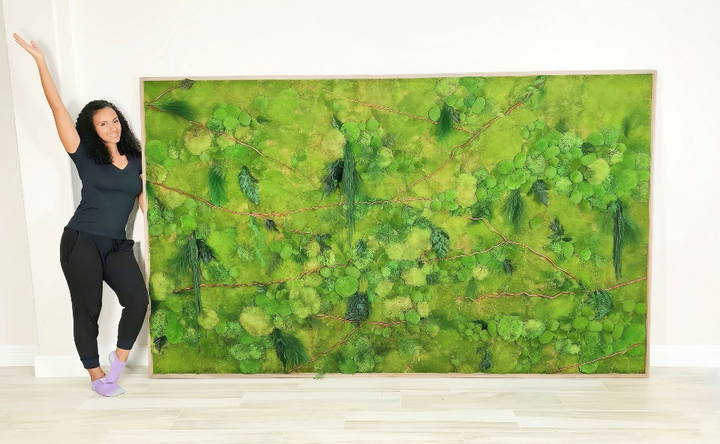
Making a moss wall is about making a living artwork that reflects your style and enhances your environment. Here are some design ideas for your project:
- Accent Walls: Transform an ordinary wall into a focal point by covering it entirely with moss. This can build a stunning backdrop for a living room, reception area, or even a tranquil bedroom setting.
- Logos and Signage: Moss can be used to build natural, eco-friendly logos or signage for businesses. This not only looks impressive but also conveys a commitment to sustainability.
- Framed Moss Art: If you're not ready for a full wall, consider smaller framed moss pieces that can be hung like paintings. These can be customized in various shapes and sizes.
- Mixed Media: Combine moss with other elements like wood, stones, or even metal to add texture and contrast. This approach can give your moss wall a more dynamic and modern look.
- Geometric Patterns: Use different types of moss to build geometric patterns or abstract designs. This can add a contemporary touch to any space.
- Seasonal Themes: Incorporate seasonal elements into your moss wall design. For example, add autumn leaves in the fall or bright flowers in the spring to keep the wall looking fresh and timely.
- Interactive Walls: Make a moss wall that invites interaction, such as a herb garden where visitors can pick fresh herbs or a sensory wall with various textures to touch.
- Educational Displays: For schools or environmental centers, moss walls can be educational tools, showcasing different types of moss and providing information about their habitats and benefits.
- Themed Rooms: Design a moss wall that complements the theme of a room, like a tropical oasis with lush green moss and hanging vines, or a serene spa-like bathroom with soft, feathery moss.
- Minimalist Designs: For a minimalist look, use moss sparingly to build simple, clean lines or small clusters that serve as natural accents in a modern space.
Creativity and personalization are crucial for a great moss wall. Consider the desired mood, complementing colors, and your maintenance effort. Start with these tips to build a beautiful, beneficial moss wall.
Troubleshooting Common Issues with Moss Walls
Moss walls are generally low-maintenance, but like any living feature, they can sometimes face issues. Here's a guide to troubleshooting common problems, ensuring your moss wall remains vibrant and healthy.
Moss Turning Brown
If your moss starts turning brown, it's usually a sign of dehydration. To fix this:
- Mist the moss more frequently with water.
- Ensure the humidity in the room is adequate.
- Check if the moss is getting too much direct sunlight, which can dry it out.
Moss Is Overly Wet
Overly wet moss can lead to mold or rot. If the moss feels soggy:
- Reduce the frequency of misting.
- Improve air circulation around the moss wall.
- Consider using a dehumidifier if the room is naturally damp.
Moss Falling Off the Wall
If moss starts to fall off the wall:
- Check the adhesive used to attach the moss. It may need to be reapplied or replaced with a stronger option.
- Ensure the base of the moss wall is secure and not deteriorating.
Color Fading
Moss can lose its vibrant green color if it's not cared for properly. To maintain the color:
- Avoid exposing the moss to too much bright light.
- Use UV lights if the moss isn't getting enough natural light.
- For preserved moss, ensure it's not in a location with high UV exposure, which can fade the color.
Pest Problems
While uncommon, pests can sometimes be attracted to moss walls. If you notice pests:
- Identify the type of pest and use a natural repellent suitable for that species.
- Regularly inspect your moss wall for early signs of infestation.
- Keep the area around the moss wall clean and free of debris.
Moss Growth Is Slow
If living moss isn't growing as expected:
- Check that it's getting the right amount of light and moisture.
- Consider adding a fertilizer formulated for moss to encourage growth.
By promptly dealing with these issues, your moss wall will stay beautiful and vibrant.
FAQs About DIY Moss Wall
Discover all you need to know about DIY moss wall projects in our comprehensive FAQs. Tips, tricks, and expert advice for stunning results.
A DIY moss wall is a vertical garden that uses moss as the main feature. It’s a way to incorporate greenery into your home or office without needing pots or soil. Moss walls are known for their beauty and air-purifying qualities.
While you can use live moss, it’s important to note that it requires more maintenance, including regular misting and a suitable environment to thrive. For indoor use, preserved moss is often preferred due to its ease of care and longevity.
Moss walls have several benefits:
They improve air quality by absorbing pollutants and releasing oxygen.
Moss walls add visual interest and a natural element to your space.
They require little to no maintenance, especially if you use preserved moss.
If you’re using preserved moss, maintenance is minimal. Keep it out of direct sunlight to prevent fading and gently dust it occasionally. If you opt for live moss, you’ll need to mist it regularly and ensure it’s in an environment with adequate humidity and indirect light.
Selecting the right type of moss is crucial for your moss wall. Consider these factors:
Preserved vs. Live: Preserved moss is maintenance-free and ideal for indoor walls, while live moss requires more care and is better suited for outdoor walls.
Texture and Color: Look for moss that complements your space in terms of texture and color. Preserved moss often comes in various colors and can be arranged artistically.
Size and Coverage: Estimate the amount of moss you'll need to cover your wall area. It's better to have a little extra than to run short during installation.
Reflections and Advice
In conclusion, making your own DIY moss wall art is a simple and creative way to bring a natural element into your home. With just a few materials and some time, you can craft a beautiful, low-maintenance piece that adds character to any space. By following these steps, you'll have your own unique moss wall art that requires little upkeep and provides a stunning visual impact.


