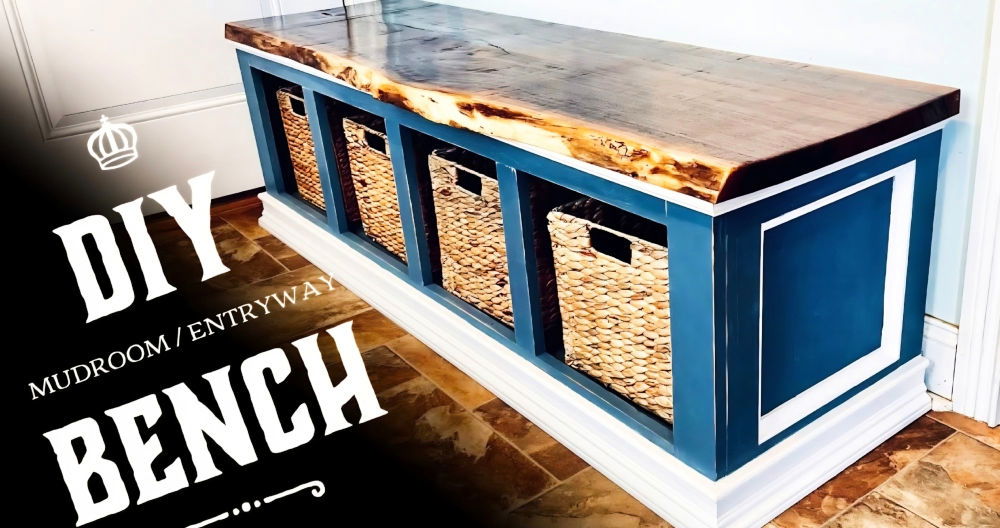
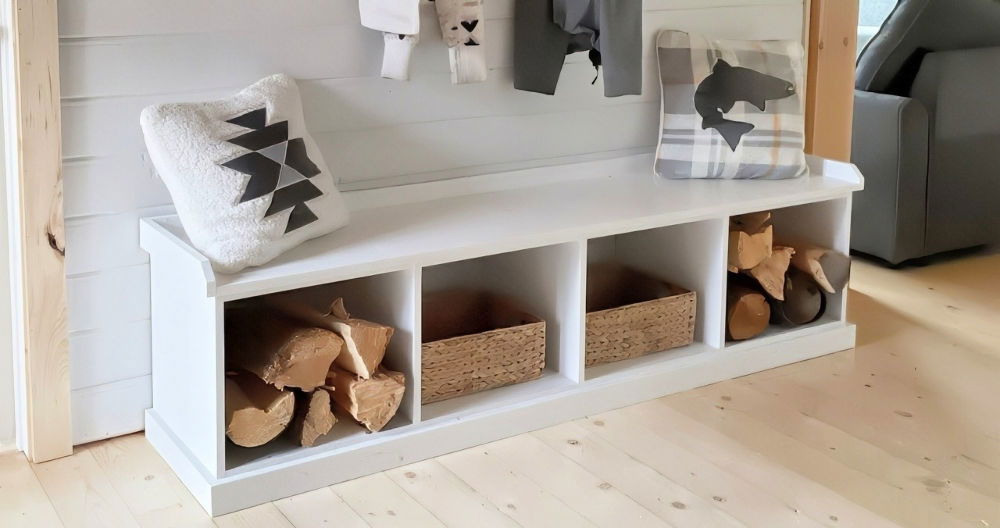
Getting your entryway organized with DIY mudroom lockers can be a game-changer for your home. I wanted a neat and tidy space where coats, shoes, and bags would have a place, and this project helped me achieve exactly that. With some basic tools and materials, I was able to build custom lockers that suited my family's needs. It made coming home feel so much more organized.
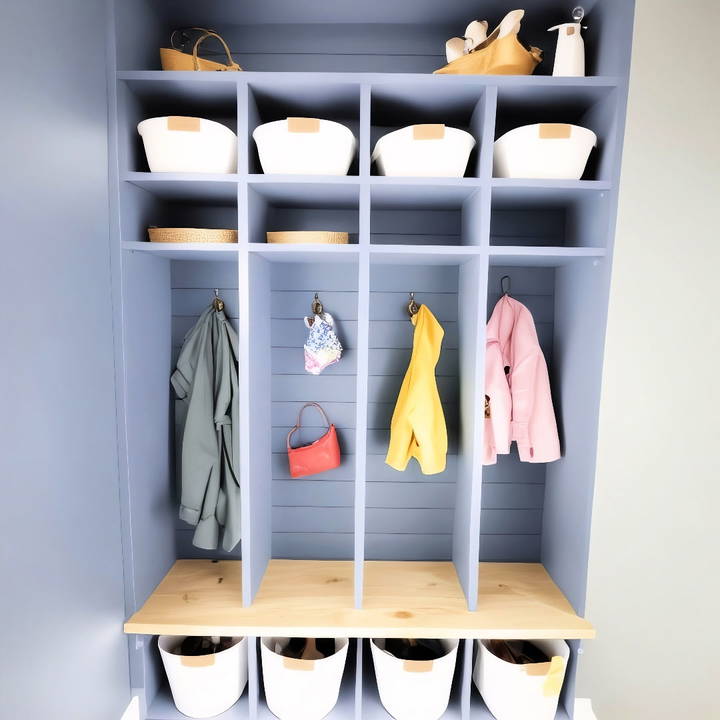
I'm sharing this because I know how much easier life gets when everything has its place. DIY mudroom lockers don't just organize, they also add a touch of style to your entryway. This guide will help you get started, step-by-step, and you'll soon see the difference.
Materials Needed and Their Significance
- Shiplap: To ensure cohesiveness with our existing decor.
- Plywood (3/4 inch): The core material for building the lockers, chosen for its durability.
- Paint: To complement the room's color scheme.
- Butcher Block Countertop: For the bench seat, add a touch of warmth and elegance.
- Wood Glue & Pocket Hole Screws: Essential for assembling the lockers securely.
- Walrus Oil (for the bench): To protect and enhance the wood's natural beauty.
- Decorative Hardware (Rope Hooks): To provide functional storage with a stylish flair.
Step by Step Instructions
Build custom DIY mudroom lockers with our step-by-step guide. Add style and function with shiplap and easy installation tips. Transform your space today!
The First Steps Toward Change
Discover the power of "the first steps toward change" with tips for clearing the canvas and embracing the shiplap in your home makeover.
Clearing the Canvas
Our journey began with the necessary prep work—removing old baseboards, crown molding, and preparing the wall for the shiplap installation. This step was crucial as it laid the groundwork for the new design.
Embracing the Shiplap
Installing the shiplap was surprisingly straightforward. The tongue and groove design made it manageable, but ensuring the boards were level from the get-go was paramount. This process not only required patience but also a keen eye for detail.
Cutting and Drilling
With all the pieces of plywood cut to size, the real challenge was drilling the numerous pocket holes. This stage was time-consuming, yes, but the payoff of a robust construction was worth every minute.
Assembling with Precision
We started with the shoe cubbies and worked our way up to the locker dividers. Each piece was joined with wood glue and pocket hole screws, ensuring a sturdy build. The precision needed here cannot be overstated—each component had to be perfectly aligned for the final structure to be both functional and aesthetically pleasing.
The Bench: A Labor of Love
Choosing a butcher block countertop for our bench added a rich, natural element to the room. Cutting it to size, sanding, and treating it with Walrus Oil not only fortified the wood but also highlighted its beautiful grain. This process felt less like a task and more like an ode to craftsmanship.
The Painting Saga
Opting to paint the components before assembly was a tactical choice. It made application easier and ensured a more uniform coverage. However, it did require touch-ups post-assembly, a small price to pay for a smoother overall process.
The Joy of Installation
Fitting everything together in the room was akin to the final act of a well-orchestrated play. Each piece found its place, with the lockers, bench, and cubbies coming together in harmony. Even my toddler found joy in "helping," making the experience all the more memorable.
The Finishing Touch: Decorative Hardware
Installing the brass rope hooks was the crowning moment. These hooks not only served a practical purpose but also added a touch of elegance to the lockers. Their installation was simple yet satisfying, marking the completion of our project.
Lessons Learned and Tips for Fellow DIYers
- Preparation is Key: Investing time in prep work pays dividends.
- Measure Twice, Cut Once: This age-old adage never fails, especially in DIY projects.
- Involve the Family: Even the smallest helpers can make the project more enjoyable.
- Patience Pays Off: Each step, from drilling to painting, requires patience. The final product is worth the wait.
Customization Ideas for DIY Mudroom Lockers
Building a mudroom space that is both functional and personal involves thoughtful customization. Here's how you can tailor your DIY mudroom lockers to fit your unique style and needs:
Personal Touches
- Paint and Color: Choose a color that complements your home's palette. Whether it's a soothing neutral or a vibrant hue, the color of your lockers can set the mood for your entryway.
- Hardware Choices: Select knobs and hooks that reflect your style. From vintage brass to sleek modern chrome, these small details can make a big impact.
Functional Design
- Adjustable Shelves: Incorporate shelves that can move to accommodate items of various sizes. This flexibility allows you to store seasonal gear effectively.
- Locker Dividers: Use dividers to assign a space for each family member. This helps keep everyone's belongings organized and easily accessible.
Creative Additions
- Chalkboard Labels: Paint a section of your locker doors with chalkboard paint for easy labeling and notes. It's a fun way to keep track of items and leave messages for family members.
- Decorative Trim: Add molding or trim to give your lockers a finished built-in look. This can elevate the overall appearance and add character to your space.
Smart Organization
- Hooks and Baskets: Install multiple hooks for hanging coats and backpacks. Use baskets within the lockers to store smaller items like gloves and scarves.
- Hidden Compartments: Consider adding a secret spot for valuables or items you want to keep out of sight. This can be a small drawer or a hidden shelf.
Comfort Features
- Seating Area: If space allows, build a bench into your lockers for a convenient spot to sit and put on shoes.
- Cushions and Pillows: Add cushions for comfort and an extra splash of color or pattern. Choose durable, washable fabrics for easy cleaning.
Incorporate these ideas to design practical mudroom lockers that reflect your taste and lifestyle. Choose customizations that suit your family's needs to aim for a welcoming, efficient entryway.
Optimizing Storage Space
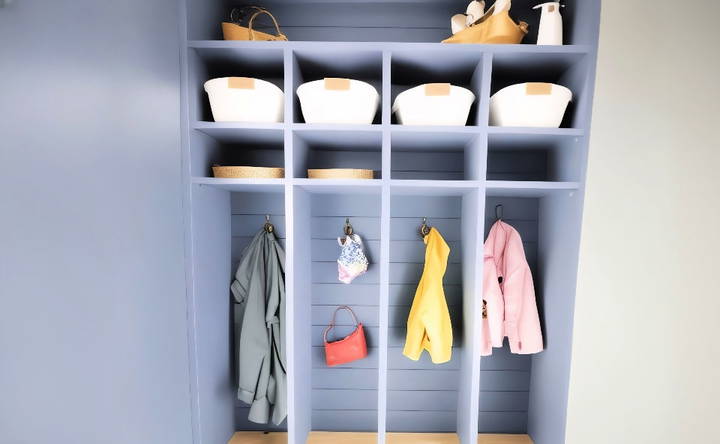
Maximizing storage in your mudroom lockers is key to maintaining an organized and clutter-free area. Here's how you can optimize the storage space:
Use Vertical Space
- Install Hooks: Utilize the height of your lockers by installing hooks at different levels to hang coats, scarves, or bags.
- Stackable Bins: For items used less frequently, stackable bins placed on the top shelf can keep things tidy and out of the way.
Smart Shelving
- Adjustable Shelves: Incorporate shelves that can be adjusted to fit items of various sizes, making your storage more versatile.
- Shelf Dividers: Use dividers to keep items upright and separated, which can help in quickly finding what you need.
Hidden Storage
- Drawer Units: If space allows, consider adding drawer units at the bottom of the lockers for items like shoes or sports equipment.
- Pull-out Baskets: Baskets that slide out can make it easier to access and organize smaller items without having to dig through piles.
Built-in Seating Solutions
Incorporating seating into your mudroom lockers adds not only functionality but also comfort. Here's how to build a built-in seating solution:
Comfortable Bench
- Cushioned Seat: Add a cushioned seat to the bench for comfort while putting on or taking off shoes.
- Durable Material: Choose a fabric that is easy to clean and can withstand daily wear and tear.
Storage Bench
- Lift-up Seats: Consider a bench seat that lifts to reveal storage underneath, perfect for hiding away seasonal items.
- Shoe Rack: A shoe rack under the bench can keep footwear organized and easily accessible.
Design mudroom lockers with storage and seating, making it functional and welcoming. Measure carefully and plan to fit your needs and items.
Finishing Techniques for DIY Mudroom Lockers
The final touches on your DIY mudroom lockers can transform them from mere storage solutions to standout pieces in your home. Here's how to apply finishing techniques that are both practical and stylish:
Preparing Your Lockers
- Sanding: Start by sanding down all surfaces with medium-grit sandpaper. This will smooth out any rough spots and prepare the wood for painting or staining.
- Cleaning: Wipe down the lockers with a damp cloth to remove all dust from sanding. Ensure the wood is clean and dry before proceeding.
Painting
- Primer: Apply a primer to help the paint adhere better and to achieve a more uniform color.
- Paint: Choose a semi-gloss or gloss paint for durability and easy cleaning. Apply with a roller for a smooth finish, and use a brush for smaller areas.
Staining
- Wood Conditioner: If you're staining the wood, use a pre-stain wood conditioner to ensure even color absorption.
- Stain: Apply the stain with a brush or rag, following the grain of the wood. Wipe off any excess stain and allow it to dry completely.
Protective Coatings
- Sealer: For painted lockers, apply a clear sealer to protect the paint from chips and scratches.
- Polyurethane: For stained lockers, a coat of polyurethane will add shine and protect the wood from moisture and wear.
Decorative Finishes
- Distressing: For a rustic look, lightly sand edges and corners after painting to build a distressed finish.
- Glazing: Apply a glaze over painted lockers to accentuate details and give depth to the color.
Hardware Installation
- Knobs and Hooks: Once the finish is dry, install hardware like knobs and hooks. Choose styles that complement your home's decor.
Final Touches
- Adjustments: Check all doors and drawers for proper alignment and make any necessary adjustments.
- Inspection: Do a final inspection to ensure all surfaces are smooth and the finish is even.
Follow these steps to make your DIY mudroom lockers functional and beautiful. Proper preparation is key, so take your time for a great finish. Your mudroom will thank you!
Safety Considerations
When building your DIY mudroom lockers, safety is paramount. Not only do you want to build a functional space, but you also want to ensure it's safe for all family members to use. Here are some safety considerations to keep in mind:
Secure Mounting
- Wall Anchoring: Ensure your lockers are securely anchored to wall studs. This prevents tipping, which is especially important if you have children.
- Proper Brackets: Use heavy-duty brackets and hardware designed for the weight of the lockers and their contents.
Safe Materials
- Non-toxic Paints and Finishes: Choose paints and finishes that are non-toxic and safe for indoor use, particularly if you have pets or small children.
- Smooth Edges: Sand all edges and corners to be smooth to the touch to prevent scrapes or cuts.
Childproofing
- Latch Options: If you have young children, consider adding latches to locker doors to keep them closed when not in use.
- Soft-Close Hinges: Install soft-close hinges to prevent fingers from getting caught when doors close.
Ventilation
- Airflow: Design your lockers with ventilation in mind to prevent mold and mildew, especially if storing damp items like shoes or coats.
Lighting
- Good Visibility: If your mudroom is dimly lit, consider adding integrated lighting to your locker design for better visibility and safety.
Regular Inspections
- Check for Wear and Tear: Periodically inspect your lockers for any signs of damage or wear that could pose a safety risk, such as loose screws or splintering wood.
Adding these safety features to DIY mudroom lockers will build an organized, efficient, and safe space for your family.
FAQs About DIY Mudroom Lockers
Discover answers to FAQs about DIY mudroom lockers. Learn about design tips, materials, and step-by-step guides for building your own mudroom locker.
Mudroom lockers are storage units designed to organize and store items like coats, shoes, and backpacks. They are incredibly useful for keeping entryways clutter-free and providing a designated spot for each family member’s belongings.
To choose the right size, measure the space where you plan to install the lockers. Consider the number of people in your household and the items you need to store. Ensure there’s enough room for lockers without overcrowding the space.
Yes, you can! There are many DIY plans available that cater to different skill levels. Look for plans that offer step-by-step instructions and use tools that you’re comfortable with or can easily learn to use.
Customize your lockers by choosing paint colors that complement your home, adding decorative trim, or using unique hardware. Consider adding cushions to benches or using baskets for storage to add both function and style.
Maintaining your mudroom lockers is essential for their longevity. For wooden lockers, use a damp cloth to wipe down surfaces and avoid harsh chemicals that can damage the finish. A mild soap solution can be used for metal or plastic components. Regularly check for loose screws or hinges and tighten them as needed.
Final Reflections
In conclusion, getting organized doesn't have to be complicated. You can build a practical and stylish space with a little effort. Let's make your entryway the best it can be!


