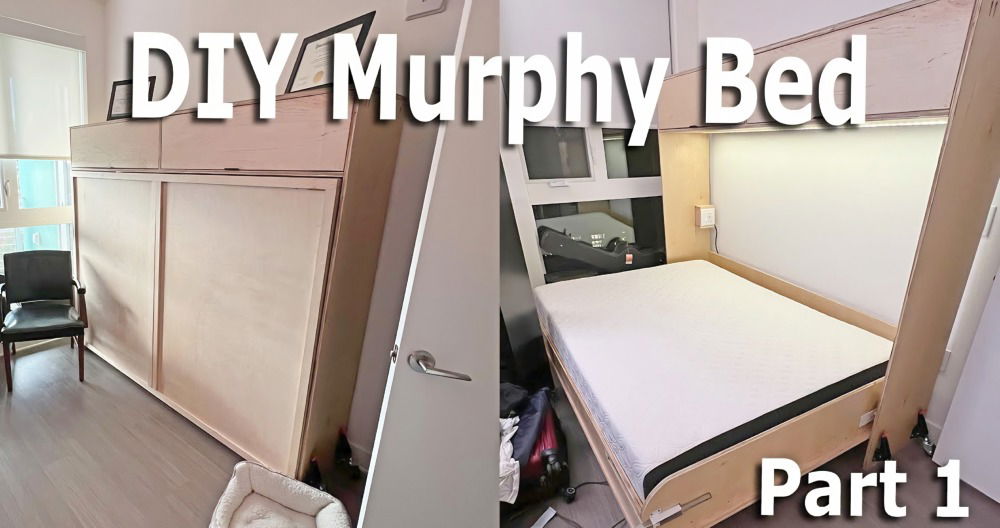
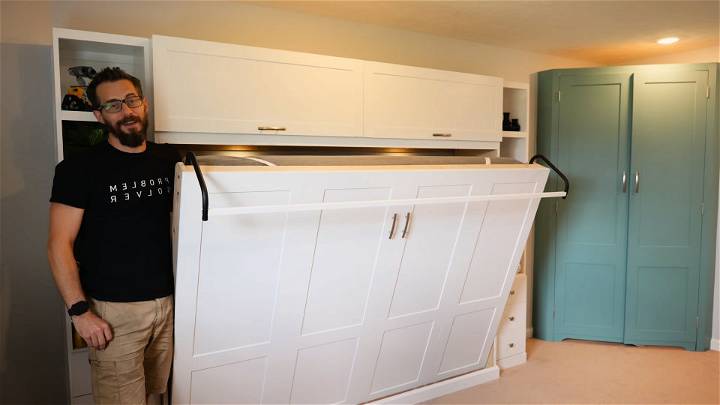
Hello, I'm someone who enjoys diving into DIY projects, especially ones that transform a space entirely. When the need arose to add a guest bed without sacrificing precious square footage, I embarked on the adventure of building a Murphy bed. I drew inspiration and guidance from a comprehensive tutorial and the support of Rockler's specialized kit. Here's a step-by-step recount of my experience, aiming to guide and inspire fellow DIY enthusiasts.

Choosing the Right Kit
The first step was finding the right Murphy bed kit. Given the unique space constraints of the room (a ceiling too low for a traditional vertical Murphy bed), I opted for a horizontal Murphy bed kit from Rockler. This choice was influenced by their reputation and the all-inclusive nature of their kits, which come laden with all necessary hardware and detailed plans.
Materials Needed
- Rockler horizontal Murphy bed hardware kit
- Plywood sheets for bed frame and cabinets
- Edge banding for plywood edges
- Pocket hole screws
- Paint and primer
- Tools: circular saw, pocket hole jig, drill, among others
Why each is needed:
- Murphy bed hardware kit: Serves as the bed's foundation, ensuring smooth operation and safety.
- Plywood: The primary building block for the bed frame and additional cabinets.
- Edge banding: For a clean, finished look on all visible plywood edges.
- Pocket hole screws: For sturdy assembly of wooden pieces.
- Paint and primer: To match or accent the room's decor, making the bed both a functional and aesthetic addition.
Cutting and Assembling the Pieces
After marking the plywood according to the cut lists provided with the Rockler kit, I carefully cut each piece, ensuring accuracy for a seamless assembly later. Converting raw plywood into the numerous components of our Murphy bed and the side cabinets seemed like a puzzle waiting to be solved.
I meticulously applied edge banding to the appropriate pieces, prepped for a professional finish. The actual assembly began with the outside cabinets, using a pocket hole jig to secure the joints. The simplicity of these cabinets belied their importance in the overall structure, housing blankets and acting as bookcases for extra storage.
Installing the Bed Mechanism
The heart of the project was installing the Murphy bed mechanism. This step required precision and attention to detail, as the counterbalance system dictated the bed's ease of use and safety. Following the Rockler instructions, we constructed the bed frame, ensuring it was robust and perfectly sized for a full mattress.
Adding Personal Touches
To make the bed truly custom, additional features were integrated:
- Charging drawer: A drawer with built-in power outlets, allowing guests to charge devices conveniently.
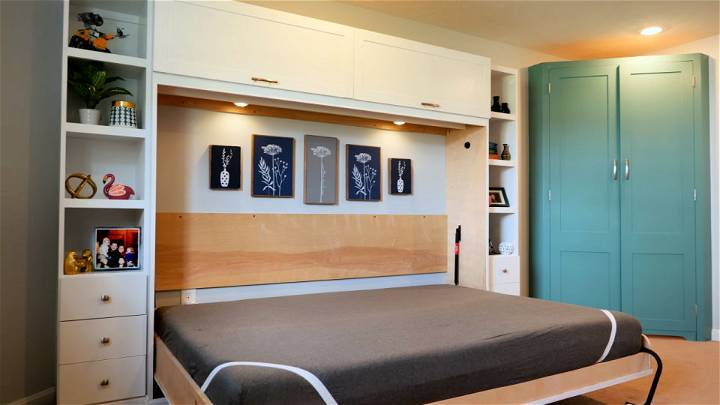
- Cabinetry and shelving: To flank the bed, providing practical storage without compromising style.
Final Assembly and Painting
With all components ready, the final assembly commenced. This phase was about bringing together the pieces to form a cohesive unit that blended seamlessly into the room's aesthetics. Painting was a critical step – it not only protected the wood but also gave the entire structure a polished look that matched the existing decor.
Lessons Learned and Tips
- Planning is crucial: Measure twice, cut once, and ensure all components fit together as intended before final assembly.
- Personalization: Think about how you can add features (like the charging drawer) to enhance the functionality and appeal of your Murphy bed.
- Quality materials matter: Opting for a high-quality hardware kit from a reputable company like Rockler can significantly simplify the process and ensure longevity.
Safety Considerations and Precautions
Discover essential safety tips for DIY murphy beds. Learn the precautions to ensure a secure and stable installation process.
1. Secure Installation for Peace of Mind
When embarking on your DIY Murphy bed project, safety should be your top priority. A properly secured Murphy bed ensures not only a good night's sleep but also peace of mind. Follow these safety guidelines to ensure a secure installation:
a. Wall Anchoring:
- Use Sturdy Wall Anchors: Murphy beds rely on wall anchoring to support their weight. Choose high-quality wall anchors that can handle the load. Consult the manufacturer's instructions for recommended anchor types.
- Locate Wall Studs: Locate and mark the wall studs before drilling. Anchoring the bed frame directly into the studs provides maximum stability.
- Avoid Drywall Alone: Avoid relying solely on drywall anchors, as they may not withstand the bed's weight over time.
b. Hardware Quality:
- Invest in Quality Hardware: Don't compromise on hardware quality. Purchase a reliable Murphy bed hardware kit from a reputable supplier. Look for heavy-duty hinges, gas springs, and locking mechanisms.
- Weight Capacity: Ensure that the hardware kit can handle the weight of the bed, mattress, and any additional features (such as shelves or cabinets).
c. Follow Manufacturer Guidelines:
- Read the Instructions: Thoroughly read the manufacturer's instructions provided with the hardware kit. Each kit may have specific requirements and assembly steps.
- Torque Specifications: Pay attention to torque specifications for screws and bolts. Over-tightening or under-tightening can affect stability.
2. Safety Features in Hardware
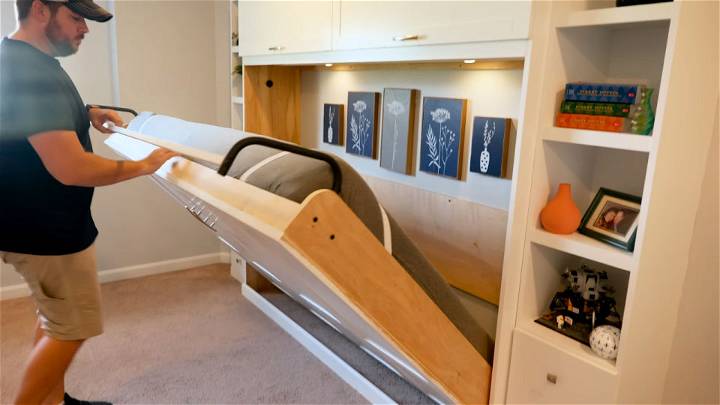
Modern Murphy bed hardware includes safety features designed to prevent accidental folding or collapsing. Look for the following:
a. Locking Mechanism:
- Locking Pins or Straps: Most hardware kits come with locking pins or straps. These prevent the bed from folding down unexpectedly. Always engage the lock when the bed is in the upright position.
b. Counterbalance System:
- Gas Springs or Piston Lifts: Gas springs (also known as piston lifts) assist in smoothly lifting and lowering the bed. They counterbalance the weight, reducing the risk of sudden drops.
3. Regular Maintenance
a. Lubrication:
- Hinge Lubrication: Periodically lubricate the hinges and moving parts. Use a silicone-based lubricant to keep them functioning smoothly.
- Check for Wear: Inspect hinges, bolts, and other components for signs of wear. Replace any damaged parts promptly.
b. Mattress Compatibility:
- Choose the Right Mattress: A heavy or oversized mattress can strain the hardware. Ensure your chosen mattress is compatible with the bed's lifting mechanism.
FAQs About DIY Murphy Bed
Answer all your FAQs About DIY Murphy Beds - from how to build, costs, space-saving benefits, to design ideas. Start your project today!
Is it Cheaper to Build a Murphy Bed?
Yes, building a Murphy bed can be significantly cheaper than buying one. While a store-bought Murphy bed can cost upwards of $3,000, a DIY project typically ranges from $600 to $700.
How Hard is it to Make a Murphy Bed?
It's an advanced DIY project. You'll need some woodworking skills and tools, but with detailed instructions and patience, it's definitely achievable.
How Much Does it Cost to Have a Murphy Bed Built?
Having a custom Murphy bed built can be quite expensive, often costing as much as buying one. Doing it yourself can save you a considerable amount of money.
Can I Turn My Existing Bed into a Murphy Bed?
Yes, with the right hardware kit, you can convert your existing bed into a Murphy bed. This might involve some additional steps and customization.
Do Murphy Beds Need Special Sheets?
No, Murphy beds do not require special sheets. However, you might need mattress straps to keep the bedding in place when the bed is folded up.
Conclusion
Building a Murphy bed from scratch was a challenging yet incredibly rewarding project. It wasn't just about making a space-saving solution for guests but also about adding a feature-packed piece of furniture that enhanced the room's functionality and aesthetic.
For anyone looking to embark on a similar DIY journey, remember patience, precision, and creativity are your best tools. And with the right kit in hand, like the one Rockler offers, you're well on your way to making your space-saving dreams a reality. Happy building!


