Growing your own mushrooms at home can be a rewarding hobby, allowing you to enjoy fresh fungi without needing to rely on store-bought varieties. A crucial component of this process is a mushroom fruiting chamber—a controlled environment where mushrooms can grow and thrive. One popular and effective design for home growers is the Shotgun Fruiting Chamber (SGFC). In this guide, you'll learn how to build a DIY mushroom fruiting chamber from scratch, the materials you'll need, and tips for maintaining ideal conditions to ensure a successful mushroom harvest.
What Is a Shotgun Fruiting Chamber?
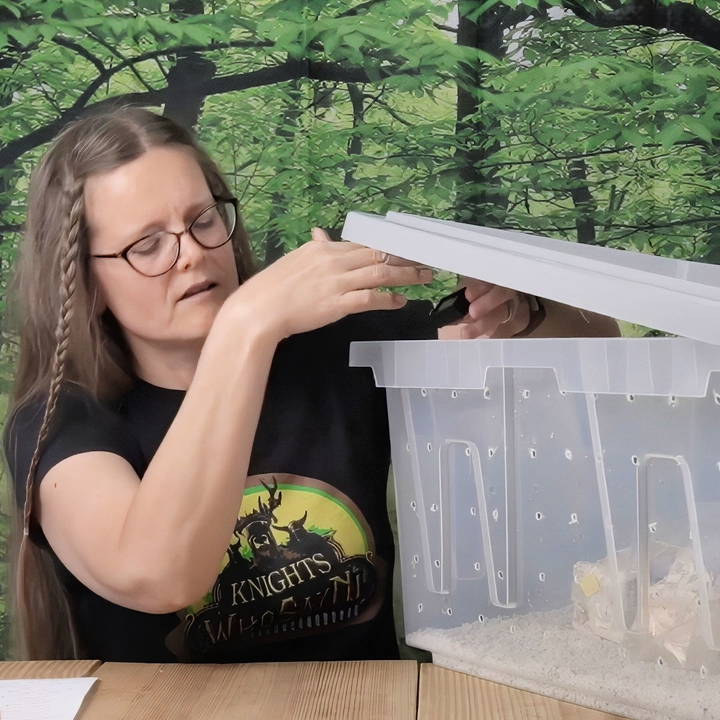
A Shotgun Fruiting Chamber is a simple, low-tech method to build the perfect environment for mushrooms to grow. It's named after the numerous holes drilled into it, resembling the spray pattern of a shotgun. These holes allow for proper airflow, helping to regulate humidity and provide the oxygen that mushrooms need to grow. This design is especially suited for beginners who are expanding from pre-made mushroom kits to a more hands-on approach to growing.
Materials Needed
Before you begin building your fruiting chamber, gather the following materials:
- Plastic Tote: Ideally, choose a clear plastic tote so that light can enter from all sides, including the lid. A clear lid is optional but recommended for better light penetration.
- Power Drill with a 1/4 Inch Drill Bit: This is used to build the necessary holes in the tote.
- Sharpie or Marker: For marking where to drill.
- Tape Measure: To ensure even spacing of the holes.
- Coarse Ground Perlite: This helps to maintain humidity within the chamber.
- Hygrometer (Optional): To measure humidity levels, which should ideally be between 75% and 90%.
- Spray Bottle: For maintaining moisture levels inside the chamber.
Step by Step Instructions
Make your own DIY mushroom fruiting chamber with our step-by-step instructions for perfect results. Learn about maintenance, challenges, and enhancements.
Step 1: Mark the Holes
Using a Sharpie and tape measure, mark a 2-inch grid pattern on all sides of the tote, including the lid. This pattern doesn't need to be perfect but try to space the holes evenly for consistent airflow.
Step 2: Drill the Holes
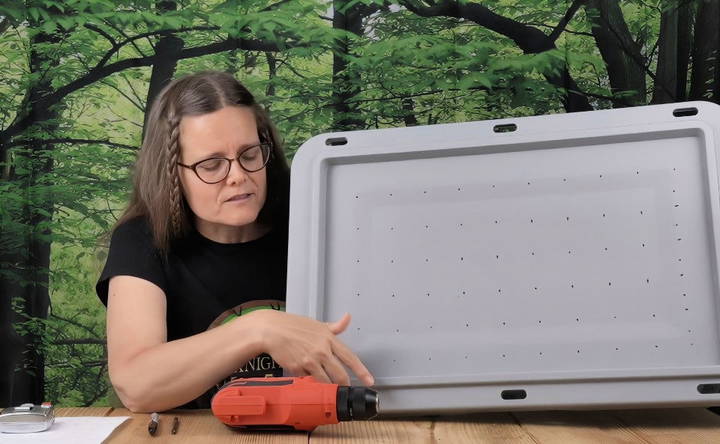
Using a 1/4-inch drill bit, carefully drill holes along the marked grid. Be sure to drill holes on all sides of the tote, including the top and bottom (if feasible). However, if you plan to place your chamber in an area where drainage might be an issue—like over a freezer—you can omit the holes on the bottom.
- Tip: When drilling into plastic, use moderate pressure to avoid cracking the material. Slow and steady wins the race!
Step 3: Clean Up the Edges
After drilling, you might notice some plastic bits around the edges of the holes. Clean these up with a knife or your hands to ensure smooth airflow and avoid blockages.
Step 4: Prepare the Perlite
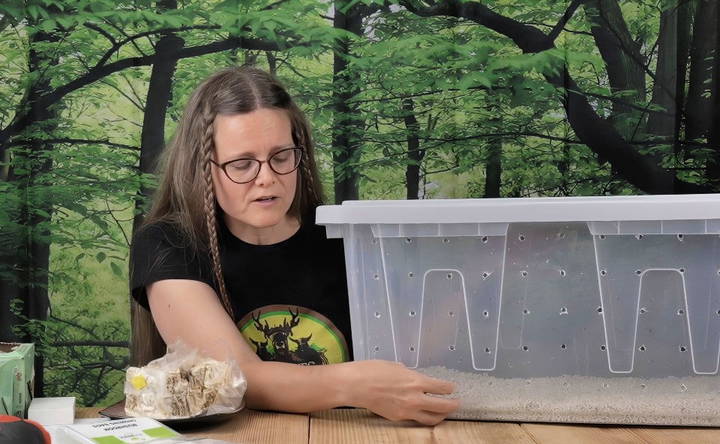
Add coarse ground perlite to the bottom of the chamber, filling it about 3-4 inches deep. If your perlite isn't already wet, soak it in water and then drain it to ensure it's damp but not waterlogged. The moist perlite will help maintain high humidity levels inside the chamber.
Step 5: Position the Mushroom Blocks
Place your mushroom grow bags or blocks on top of the damp perlite layer. These should be pre-inoculated bags, ready for the fruiting stage. Arrange them to ensure that air can circulate freely around each block, avoiding overcrowding.
Maintaining the Shotgun Fruiting Chamber
Once your chamber is set up, it's important to monitor and adjust the conditions to keep your mushrooms healthy.
Humidity Control
- Target Humidity: Aim for 75% to 90% humidity inside the chamber. Using a hygrometer can help you monitor this.
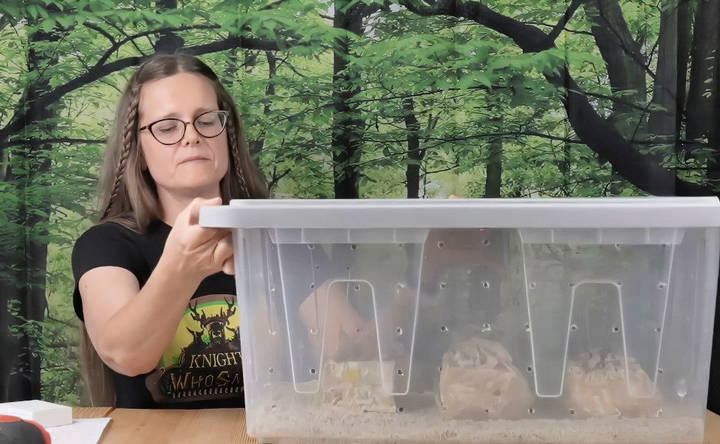
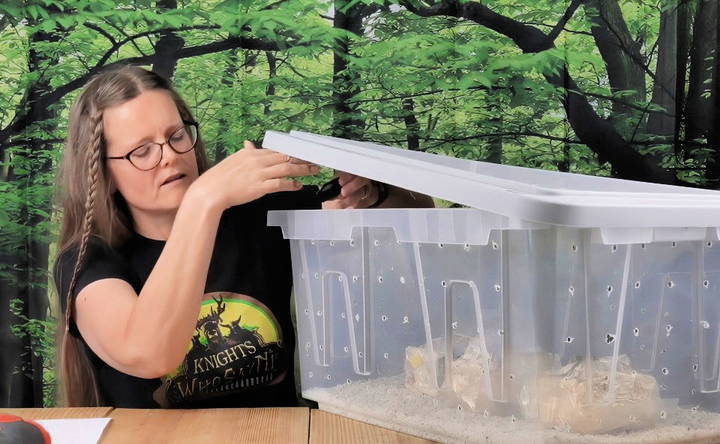
- Adjusting Humidity: Twice a day, remove the lid and use it as a fan to increase airflow inside the chamber. After fanning, mist the perlite with a spray bottle to keep it moist. Avoid spraying directly on the mushroom blocks, especially if they've started pinning (small mushroom growths).
- Avoiding Standing Water: While perlite should be moist, avoid letting water pool at the bottom of the tote. Excess water can lead to mold growth, which can harm your mushrooms.
Light Requirements
- Indirect Sunlight: Place the chamber in a spot where it receives indirect natural light, like near a window. Avoid direct sunlight, as it can cause the chamber to overheat.
- Artificial Light: If natural light isn't available, use grow lamps set on a 12-hour on, 12-hour off cycle. Position the lights far enough from the chamber to prevent heat buildup.
Temperature Management
- Ideal Temperature: Most mushrooms thrive in temperatures between 60°F and 70°F (15°C to 21°C).
- Avoiding Heat: Ensure that the chamber is not exposed to direct heat sources, as high temperatures can inhibit mushroom growth and cause stress to the mycelium.
Common Challenges and Solutions
Building and maintaining a fruiting chamber comes with its challenges. Here are some common issues and how to address them:
Low Humidity
- Solution: Mist the perlite more frequently and reduce the time the chamber is open during fanning.
Contaminated Mushrooms
- Solution: Ensure that you don't over-mist the mushroom blocks directly, as excess moisture can lead to mold. Maintain clean conditions and avoid introducing contaminants during fanning.
Slow Growth or No Pins
- Solution: Check the light exposure and ensure the humidity is high enough. Adjust the temperature to stay within the ideal range for your specific mushroom species.
Optional Additions: Enhancing Your Fruiting Chamber
To make your fruiting chamber even more effective, consider these optional enhancements:
- Digital Hygrometer: This device allows you to keep a close eye on the humidity levels inside the chamber, ensuring optimal conditions.
- Fan or Ventilation System: For larger chambers, a small fan can help automate air exchange. However, this requires more precise control to avoid drying out the chamber.
- Hydroponic Heat Mat: In colder environments, a heat mat can help maintain a steady temperature, but use it sparingly to avoid overheating.
Why Use a Shotgun Fruiting Chamber?
The Shotgun Fruiting Chamber is a great choice for beginners and intermediate growers because it balances simplicity and effectiveness. It is relatively inexpensive to build, easy to maintain, and produces consistent results. Additionally, it allows growers to gain a better understanding of the delicate balance of humidity, temperature, and airflow that mushrooms require.
Compared to more complex setups, like automated monotubs or greenhouse-style setups, the Shotgun Fruiting Chamber offers a hands-on approach that helps home growers learn and refine their skills. This makes it an ideal stepping stone for those looking to expand their mushroom cultivation hobby.
Conclusion: Ready to Start Growing?
Building a DIY mushroom fruiting chamber is an excellent way to take your home mushroom cultivation to the next level. With a little time and effort, you can build a controlled environment that promotes healthy mushroom growth, resulting in bountiful harvests of your favorite varieties. Whether you're looking to grow gourmet mushrooms or simply want to explore a new hobby, the Shotgun Fruiting Chamber offers a perfect blend of accessibility and effectiveness.
By following the steps outlined in this guide, you'll be well on your way to enjoying the satisfaction of growing your own mushrooms at home. Happy growing, and may your fruiting chamber be filled with thriving fungi!
FAQs About DIY Mushroom Fruiting Chamber
Discover essential FAQs about DIY mushroom fruiting chambers, including setup, maintenance, and tips for optimal mushroom growth at home.
It’s possible to skip the holes in the bottom if you regularly fan the chamber and maintain proper humidity levels. This method may be more suitable if your chamber is placed in a location where drainage is an issue. Regular monitoring is key to ensure good air exchange without bottom holes.
To avoid cracking, use a slow drill speed and moderate pressure. Alternatively, you can drill in reverse mode or use tape over the drill spot to reduce the chance of cracking.
Yes, you can use a smaller container if it fits your needs and provides adequate space for the mushroom blocks and air circulation. Just ensure the container allows for sufficient airflow and moisture retention.
Yes, if the perlite dries out significantly, it’s best to remove the grow bags, rehydrate the perlite, and then place the bags back inside. This prevents excess moisture from directly contacting the mushroom blocks.
While a hygrometer is recommended, you can maintain humidity by observing the condition of the perlite and the overall moisture in the chamber. Mist the perlite if it appears dry, and ensure the chamber stays humid but not wet.
Yes, you can melt holes using a heated metal object, such as a socket or screwdriver, to build the necessary openings. This method helps avoid plastic cracks and builds smoother holes.
Contamination risks are higher during the initial inoculation phase. At the fruiting stage, the risk is lower, but it’s still important to keep the chamber clean and maintain airflow to prevent mold.
Place the chamber in a cooler area of your home, away from direct sunlight. You can also use a fan nearby to promote air circulation without blowing directly into the chamber.
Some growers add hydrogen peroxide to the water used to moisten perlite to help control contaminants. However, it hasn't been extensively tested for its impact on mushroom growth.
If humidity exceeds 90%, try fanning the chamber more frequently and reducing the amount of water added to the perlite. Excess moisture can lead to mold, so aim to keep the chamber within the 75-90% range.


