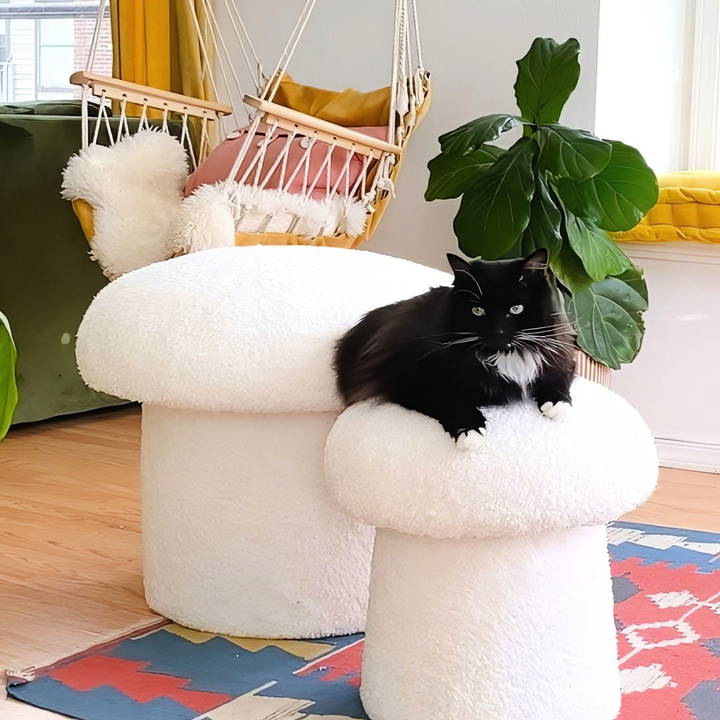
Have you ever scrolled through TikTok or Pinterest and stumbled upon one of those trendy, quirky mushroom stools? Maybe you've been intrigued by their playful shapes and earthy aesthetic, only to be turned off by the hefty price tag. Well, you're in luck because making your own DIY mushroom stool is easier and more affordable than you might think. This guide will take you through all the steps you need to build your very own mushroom stool, covering everything from choosing materials to the finishing touches. Let's dive in!
Materials You Will Need
Before getting started, you'll need to gather all the necessary materials. Some of these items might already be in your home, or you can find them at local thrift stores or hardware stores. Here's a list of what you'll need:
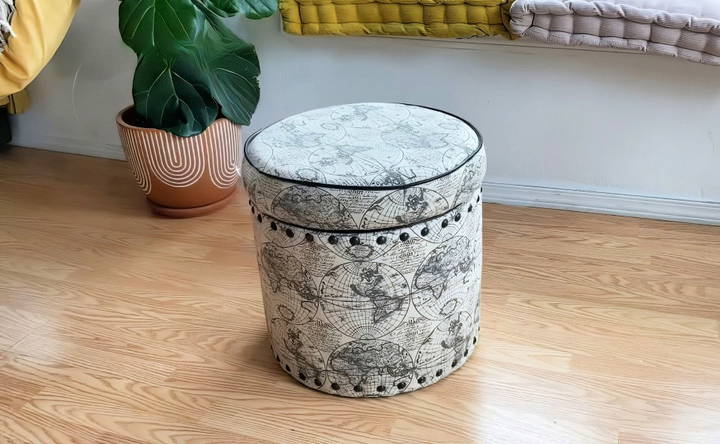
- Base material: This can be an old ottoman or stool that you want to repurpose. The key here is to find something sturdy that can be upholstered.
- Foam: You'll need foam to build the rounded mushroom top. The thickness depends on how big and round you want your stool to be.
- Dacron or batting: This will help cover any imperfections in the foam and add softness.
- Fabric: Choose fabric that will serve as the outer covering of the stool. Go for something durable and easy to clean.
- Hot glue gun: For attaching foam and other materials.
- Staple gun and staples: To secure fabric to the base.
- Screws and nails: For securing the base to the top if needed.
- Knife or scissors: To cut foam to size.
- Measuring tape and chalk: For precise measurements.
Step by Step Instructions
Make your own mushroom stool with our easy DIY guide. Follow step-by-step instructions to craft a functional and stylish piece for your home.
Step 1: Find the Perfect Base
The base of your mushroom stool is essential for stability, so it's worth taking time to find the right one. You can start by repurposing an old stool or ottoman that you may already have at home. If you don't have anything suitable, consider visiting thrift stores or secondhand shops to find something that fits your needs. The goal is to find a piece that's sturdy, easy to upholster, and fits the size and shape you're envisioning.
Step 2: Preparing the Foam
The foam will form the mushroom cap of your stool, and getting this part right is crucial for the final look. Here's what you need to do:
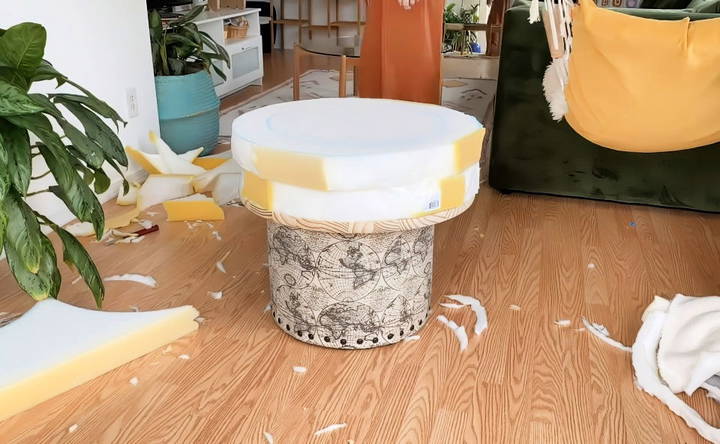
- Cut the foam: First, trace the size of the top of your base onto the foam using chalk. Cut the foam to size using a knife or scissors. This part may take some time, as cutting foam manually can be tedious. If you have access to a turkey slicer or foam-cutting tools, this can speed up the process considerably.
- Determine the height: Customize the height of the foam to get the mushroom shape you desire. For a smaller stool, around 4 inches of foam is usually enough. For a larger ottoman-style stool, aim for 6 inches of foam height.
- Shaping the foam: Once the foam is cut to size, it's time to trim the edges to build the iconic mushroom shape. You can build a gradual slope from the center to the edges, giving the stool its distinctive rounded top.
Pro Tip: It's a good idea to glue the foam to the base before you start carving to ensure everything stays in place. A hot glue gun works well for this, but you can also use any strong adhesive you have on hand.
Step 3: Smoothing Out Imperfections
Once you've carved the foam, you might notice some bumps or imperfections. Don't worry—this is where Dacron or batting comes in handy. Cover the foam with a layer (or two) of Dacron to smooth everything out and add an extra layer of cushioning. This step will also help the fabric lay smoothly when you upholster it later.
For larger stools, you may want to use two layers of Dacron for additional comfort and to further soften any uneven surfaces.
Step 4: Upholstering the Mushroom Top
Now comes the fun part—covering your stool with fabric. This is where you can really let your creativity shine. You can choose a fabric that fits your home décor, whether that's something bright and bold or more subtle and neutral. Here's how to do it:
- Cut the fabric: Lay your fabric out flat and place the foam-covered base in the center. Cut a large circle around the foam, leaving enough fabric to wrap around the edges and secure it to the underside of the base.
- Staple the fabric: Once the fabric is cut, start stapling it to the bottom of the base using a staple gun. Begin by stapling one side, then move to the opposite side, pulling the fabric taut as you go. Continue stapling in a clockwise or counterclockwise direction, making sure the fabric is smooth and free of wrinkles.
Step 5: Attaching the Base (Optional Storage Hack)
If you want your mushroom stool to be more than just decorative, you can make it functional by adding storage. Here's how to do it:
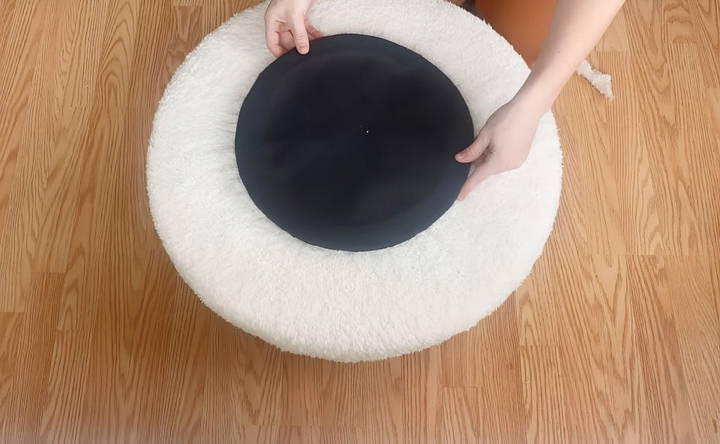
- Separate the top: If you're working with an ottoman that has a removable top, pry off the bottom part of the top using a flathead screwdriver. This will allow you to upholster the top separately and later reattach it to the base.
- Add a storage compartment: You can use a small basket or container inside the ottoman to build a storage space. Secure it to the bottom of the top using nails or screws.
- Reattach the top: Once your storage compartment is in place, reattach the upholstered top to the base. Make sure it opens and closes smoothly, so you have easy access to your new storage space.
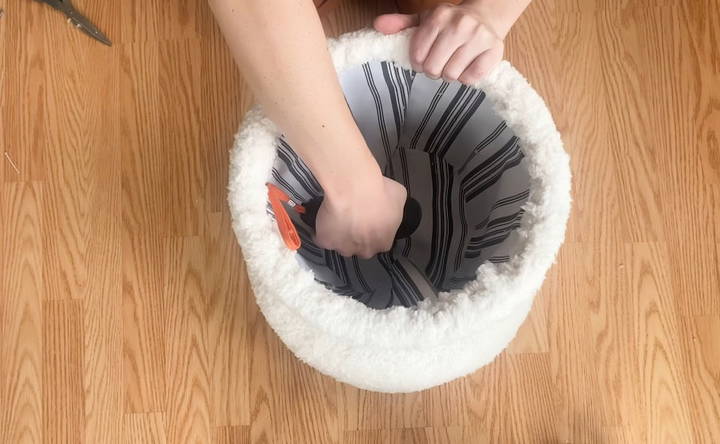
Step 6: Final Touches
Before you declare your mushroom stool complete, take a step back and assess your work. Are there any wrinkles in the fabric that need smoothing? Do all the staples hold the fabric tightly? If everything looks good, your stool is almost ready for use!
Troubleshooting Common Issues
Like any DIY project, things don't always go perfectly. Here are a few tips to help you troubleshoot common issues:
- Uneven foam carving: If your foam isn't perfectly smooth, don't worry too much. The Dacron will cover up most imperfections, and the fabric will help hide any remaining bumps.
- Stapling mishaps: If you accidentally staple the fabric too soon, like before attaching screws to the base, don't panic. You can always remove and re-staple the fabric after securing the screws.
- Loose fabric: If your fabric isn't as tight as you'd like, you can always add a few more staples to secure it in place. Just be sure not to overdo it, as too many staples can weaken the fabric.
Why DIY a Mushroom Stool?
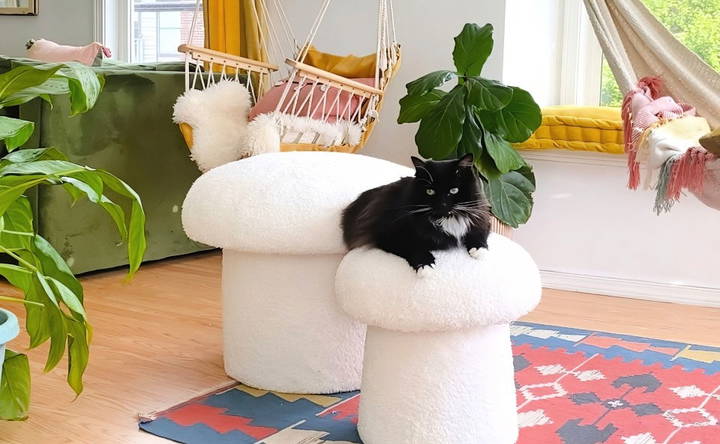
Aside from saving money, making your own mushroom stool allows you to customize it to fit your space and style. You can choose the fabric, size, and shape, which isn't always possible with store-bought furniture. Plus, there's something immensely satisfying about making a unique piece with your own hands.
Conclusion
Building your own DIY mushroom stool is a fun and rewarding project that allows for a lot of creativity and customization. Whether you want a small footstool or a larger ottoman with built-in storage, this guide covers everything you need to know to get started. With a few materials and some patience, you can make a whimsical and functional piece of furniture that will add charm to any room in your home.
So, what are you waiting for? Gather your materials, fire up the hot glue gun, and get crafting!
FAQs About DIY Mushroom Stool
Discover all you need to know with our FAQs about DIY mushroom stool. Learn how to build and maintain your unique stool project at home.
To shape foam evenly, draw a guide circle at the top and gradually trim from the edges down. Using an electric knife or turkey slicer can make the process easier. Always check symmetry as you go to ensure balance.
Use durable fabrics like upholstery-grade cotton, canvas, or faux suede. These are sturdy enough for frequent use and easy to clean, while still providing a soft, cozy feel.
To avoid wrinkles, pull the fabric taut as you staple it, working from opposite sides of the stool in sequence. If using stretchy fabrics, ensure even tension to prevent uneven bunching.
Yes, a planter can work as the base, but make sure it's sturdy and secure the fabric with strong staples. If the staples loosen, you can use screws or adhesive for better hold.
If your base has a removable top, you can build storage by adding a basket or container inside. Simply reattach the upholstered top after securing the storage component to the base.
If you don't have specialized foam-cutting tools, an electric turkey slicer or bread knife can work. These tools provide smoother cuts and make the process faster than using standard scissors.
Add non-slip furniture pads to the bottom of the base. This will prevent your stool from sliding on smooth surfaces like hardwood or tile.
The total cost depends on whether you can repurpose materials like an old ottoman. On average, the cost of foam, fabric, and other supplies may range from $30 to $60, which is significantly less than store-bought versions.
Yes! For a smaller version, you can use any sturdy base, like a thrifted stool or even a small planter. Customize the size by adjusting the foam thickness to suit the base.
For easy cleaning, choose machine-washable fabric or treat the upholstery with a fabric protector spray. Spot clean as needed using a mild soap solution and a soft cloth to prevent damage.


