Building a nail polish organizer was one of the best projects I did. I had my polishes scattered everywhere, which made finding the right color a hassle. To fix this, I decided to make a DIY nail polish organizer. I used a few simple materials that I found around the house. The process was fun and helped bring order to my collection.
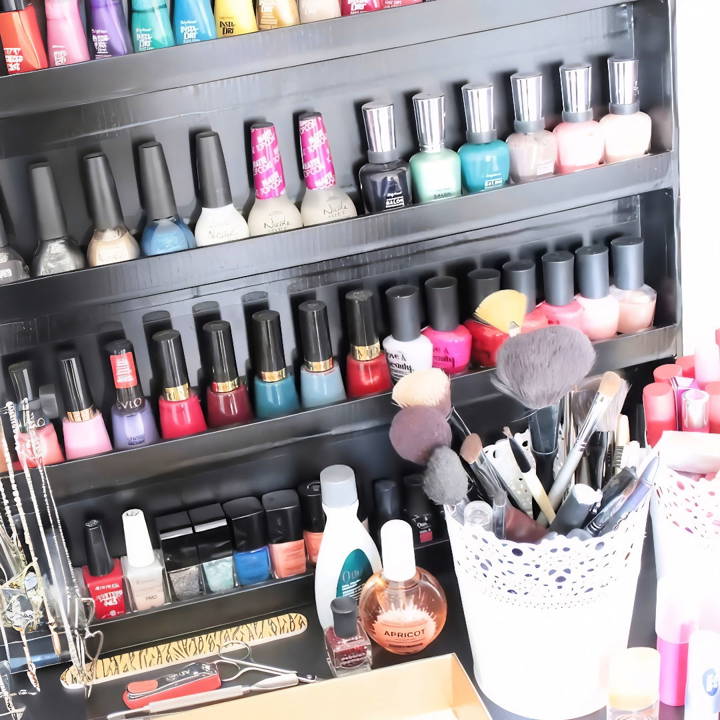
I picked up a small wooden box and a few wooden dowels. I measured the size of my nail polish bottles to ensure they would fit snugly. After some careful cutting and gluing, I had a perfect storage solution for my nail polish. Now, I can easily see and access all my colors, saving me time and frustration. If you try this, it will help you too.
I'm sharing this story to help you organize too. The steps below on how to organize nail polish are easy to follow and budget-friendly.
Materials You'll Need
Before we start, let's gather our materials. Each material has been carefully chosen to ensure a sturdy and functional rack.
- Foam Boards: You need two pieces of foam board, which can easily be found at Walmart in their school supply section. Foam boards are lightweight yet sturdy, perfect for a simple nail polish rack.
- Duct Tape: I used white duct tape mainly because it matches the spray paint color I selected. It helps keep all parts together securely.
- Hot Glue Gun: Essential for assembling the pieces. Be cautious, as hot glue can melt foam if not applied correctly.
- Spray Paint: I chose black spray paint, but feel free to pick any color that matches your decor.
- Ruler, Pencil, and a Box Cutter or Sharp Knife: These are for measuring and cutting your foam boards.
Step by Step Instructions
Learn how to make a DIY nail polish organizer with our step-by-step instructions, from cutting panels to assembling the rack, for a tidy nail polish storage solution.
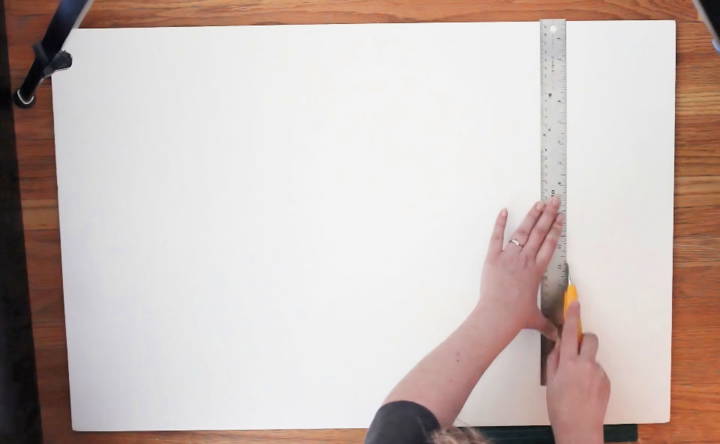
Step 1: Cut the Back Panel
First, we'll cut the back panel.
Dimensions: 20 inches by 26.75 inches
- Measure 26.75 inches on one of the foam boards. Since the board is already 20 inches wide, you only need to adjust the height.
- Use your ruler to draw a straight line.
- Carefully cut along the line with your box cutter.
Step 2: Cut the Side Panels
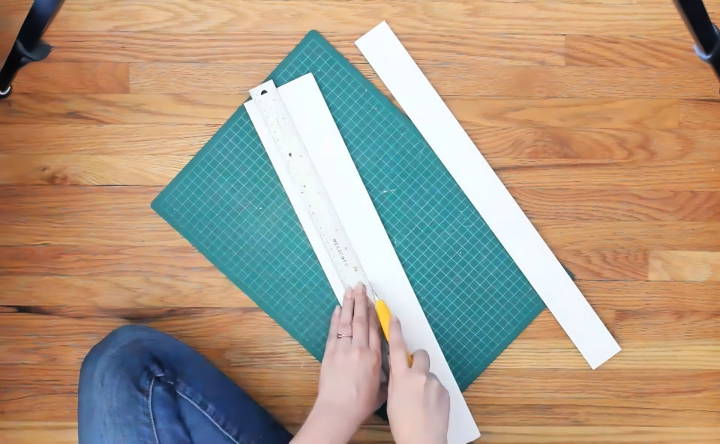
Next, we'll cut the two side pieces.
Dimensions: 2 inches by 26.75 inches
- Measure and mark these dimensions on the foam board.
- Use the ruler to ensure straight lines and cut carefully with the box cutter.
Step 3: Cut the Top and Bottom Pieces
Now, let's cut the top and bottom pieces.
Dimensions: 20.5 inches by 2 inches
- Measure and mark these dimensions on your foam board.
- Carefully cut out these pieces as well.
Step 4: Cut the Shelves
We'll cut five shelves next.
Dimensions: 1.75 inches by 20 inches
- Measure and mark these dimensions on the foam board.
- Cut out the five pieces accurately.
Step 5: Cut Shelf Lips
Finally, we'll cut the shelf lips. These will keep the nail polishes from falling off.
Dimensions: 0.75 inches by 20 inches
- Measure and mark these on the board.
- Cut out six pieces.
Step 6: Assemble the Rack
With all pieces cut, we're ready to assemble.
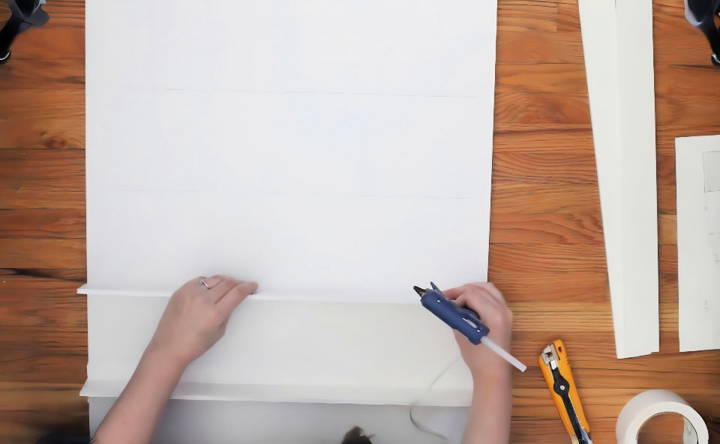
- Marking for Shelves: Lay the back panel flat and make horizontal marks from the bottom up at every 4.25 inches. These are the positions where each shelf will sit.
- Attach Shelves: Begin by hot-gluing each shelf piece on the marks you made, starting from the bottom. Apply a short strip of glue along the middle of the back edge of each shelf to avoid melting the foam.
- Tape Shelves: Once the glue is cool, secure the shelves with duct tape. Tape the bottom edge of each shelf first, then the back edge.
Step 7: Adding Side Panels
Once shelves are in place:
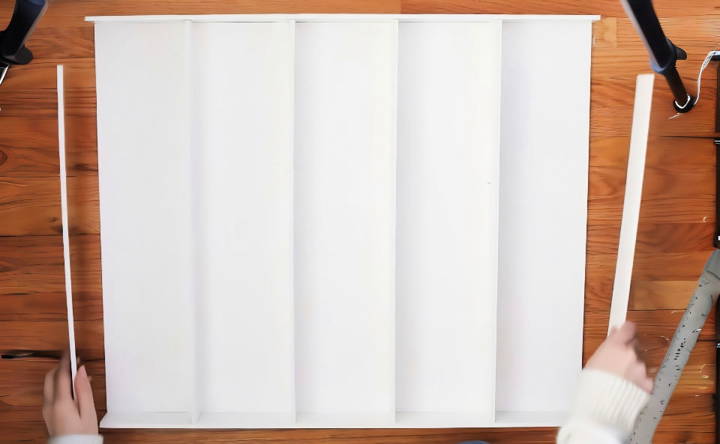
- Mark Sides for Shelves: Draw the same lines on the side panels as you did on the back panel to ensure the shelves will align.
- Attach Sides: Flip your rack over. Line up the side panel against the shelves and tape it in place. Put hot glue on the underside of each shelf where it meets the side panel and hold until cool.
- Repeat for the second side.
Step 8: Attaching Top and Bottom Pieces
- Attach Bottom Piece: Turn the rack over, align the bottom piece, and tape it in place. Use hot glue to secure it.
- Attach Top Piece: Do the same with the top piece.
Step 9: Add Shelf Lips
- Prepare Shelf Lips: Cut duct tape that extends one inch longer than each shelf lip piece.
- Attach Lips: Position the tape sticky side up, center the shelf lip on the tape, and attach it to the shelf.
- Finish Edges: Fold the excess tape over both the top and bottom of each shelf lip to secure.
Step 10: Finishing Touches
- Tidy Up Tape: Use longer strips of duct tape to cover any exposed foam edges and smaller tape sections for a cleaner look.
- Spray Paint: Now, it's time to spray paint the entire rack. Make sure you do this in a well-ventilated area. Apply a couple of coats for an even finish.
Step 11: Final Check
Make sure all pieces are securely fastened. If any components feel loose, reinforce them with additional hot glue or tape.
Customization Ideas for Your DIY Nail Polish Organizer
Building a DIY nail polish organizer is not just about storage; it's also an opportunity to express your personal style and creativity. Here are some customization ideas to make your organizer uniquely yours:
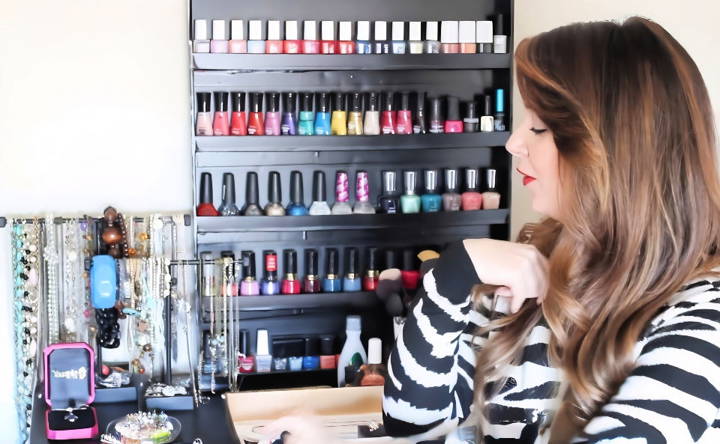
- Choose a Theme Start by selecting a theme that reflects your personality or the decor of the room where you'll display the organizer. Whether it's minimalist chic, vintage glamour, or bold and colorful, let your theme guide your choices.
- Color Coding Organize your nail polishes by color, making a visually pleasing gradient effect. You can paint the shelves or backgrounds of your organizer to match or contrast with the polished colors for an extra pop.
- Decorative Elements Add decorative touches such as stickers, washi tape, or decals to the edges or surfaces of your organizer. Consider seasonal decorations that you can change throughout the year.
- Personalized Labels Use a label maker or handwrite labels for each polish shade or brand. This not only looks neat but also makes it easier to find the color you want quickly.
- Functional Add-Ons Incorporate functional elements like small drawers for nail care tools or removable trays for easy cleaning and reorganization.
- Lighting If you're feeling adventurous, install LED strips or small fairy lights to highlight your nail polish collection and make it easy to choose colors in lower light conditions.
- Mix and Match Materials Don't be afraid to mix materials like wood, metal, or acrylic for a modern look. Use what you have at home or find inexpensive materials at local craft stores.
- Upcycling with Flair Repurpose items like picture frames, spice racks, or cake stands into unique nail polish holders. This is not only eco-friendly but also adds a story to your organizer.
The key to a great DIY project is to have fun and let your creativity shine. Your nail polish organizer should be as unique as your nail art.
Troubleshooting Your DIY Nail Polish Organizer
When crafting your DIY nail polish organizer, you might encounter a few hiccups along the way. Here's a troubleshooting guide to help you overcome common challenges:
Unstable Shelves
- Solution: Ensure that all shelves are securely attached. If they wobble, reinforce them with additional brackets or use a stronger adhesive. Check that the wall anchors are appropriate for the wall material.
Paint Peeling or Chipping
- Solution: Use a primer before painting to improve adhesion. Choose paint suitable for the material of your organizer, and apply a clear sealant for extra protection.
Difficulty Finding Colors
- Solution: Organize your polishes by color, brand, or frequency of use. Clear acrylic organizers can help you see all your colors at a glance.
Space Limitations
- Solution: If you're running out of space, consider vertical storage solutions or hanging organizers. Utilize the back of doors or inside cabinet spaces.
Dust Accumulation
- Solution: Regularly dust your organizer with a microfiber cloth. For intricate areas, use a soft-bristled brush or compressed air canister.
Organizer Doesn't Match Decor
- Solution: Customize the look of your organizer with paint, washi tape, or decorative paper to match your room's aesthetic.
Difficulty Accessing Polishes
- Solution: Arrange your polishes in a tiered fashion so each bottle is visible and reachable. Consider a rotating base for easy access.
Too Many Bottles, Not Enough Space
- Solution: Declutter your collection by removing old or unused polishes. Donate or recycle bottles responsibly.
DIY Skills Limitation
- Solution: Start with simple designs and gradually take on more complex projects as your skills improve. There are plenty of tutorials online for all skill levels.
Patience and creativity are key in DIY projects. Experiment to find your best solutions. Make your nail polish organizer both functional and stylish.
FAQs About DIY Nail Polish Organizer
Discover the answers to FAQs about DIY nail polish organizers. Organize your nail polishes effortlessly with our insightful DIY tips and tricks.
Consider wall-mounted racks or multi-tiered shelves that utilize vertical space. Empty crates can be stacked to create a larger rack and spice racks can be repurposed into chic organizers. If you’re working with limited space, a compact, portable holder might be the best solution.
Absolutely! You can paint or decorate your nail polish rack to fit the aesthetic of your room. Using metallic paint or decorative duct tape, like leopard print, can add a personal touch to your organizer and make it a statement piece in your decor.
Organize your bottles by color, brand, or frequency of use for easy access. Ensure that the shelves have lips or edges to prevent bottles from falling. You can also allocate space for related items like nail files and removers.
If you're using lightweight materials like foam boards, ensure they are securely attached with strong duct tape or glue. For wood or heavier materials, use proper brackets and nails to mount the organizer safely on the wall. Always check the weight capacity to prevent accidents.
For a portable nail polish organizer, consider using lightweight materials like foam boards or small wooden crates. You can build a handle on top of the organizer or attach wheels at the base for easy movement. Ensure the design includes secure compartments to prevent the bottles from spilling during transport.
Conclusion
Give this DIY nail polish organizer a try! It will make your life a lot easier and give you a neat space where you can keep all your favorite Polish colors organized.


