One sunny afternoon, I decided to try my hand at making DIY napkin rings. It seemed like a fun way to add a personal touch to our family dinners. I gathered some simple materials: ribbons, beads, and some old buttons. It was easy to find everything I needed around the house.
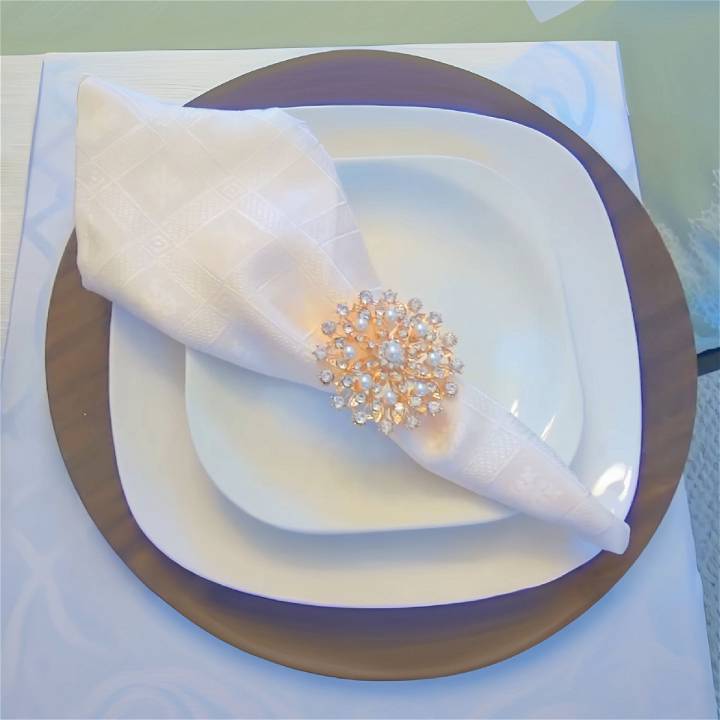
In just a short time, I maked a few beautiful DIY napkin holders. My family was impressed at how such small details made our table look more inviting. This experience taught me that a little creativity can go a long way. I'm excited to share these ideas with you, as they can truly enhance your dining experience.
Making your own napkin rings is a fun and rewarding activity. Give it a try and see how it transforms your table setting!
Materials You'll Need and Why
- Dollar Tree Napkin Rings: I specifically chose the square, flat ones that resemble mirrors for one set, and the round ones for another. They're incredibly affordable and serve as the perfect base for this project.
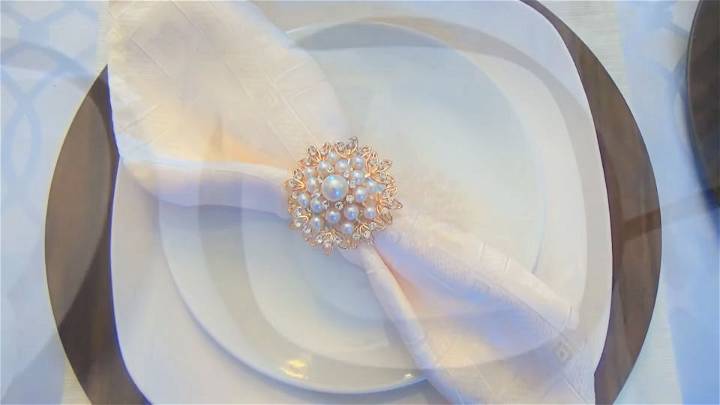
- Totally Dazzled Brooches: These are the key to adding that sparkle and elegance. I selected two designs: one with pearls and another with a more intricate pattern. Their quality is superb, adding richness to the otherwise simple napkin rings.
- Heavy-Duty Glue: The brooches are fairly heavy for their size, so a strong adhesive is necessary. I used the one recommended by Totally Dazzled to ensure the brooches stayed firmly attached to the napkin rings.
- Needle Nose Pliers: These are essential for carefully removing the fasteners from the back of the brooches. Some might require a bit more effort, but it's an important step to ensure a flat surface for gluing.
- Cleaning Cloth: To wipe down the napkin rings before starting. This ensures the surface is free from oils and dirt, which helps the glue adhere better.
Step by Step Instructions
Make beautiful, custom DIY napkin rings with brooches following our step-by-step guide. Perfect for adding a unique touch to any table setting.
Preparing the Napkin Rings and Brooches
- Clean the Napkin Rings: Use a cloth to remove any dust or grease from the napkin rings. This helps the glue to stick better.
- Remove the Brooch Fasteners: Use needle-nose pliers to remove the pins from the back of your brooches gently. Some might be tougher than others, so exercise patience and caution.
Gluing the Brooches to the Napkin Rings
- Apply the Glue Wisely: When I applied the glue, I was careful only to add it where the napkin ring would touch the brooch. This is crucial since any excess glue can seep through the gaps of the brooch and ruin the look. For the brooch with an intricate design, I applied the glue sparingly to avoid it showing through.
- Position Carefully: Ensure each brooch is aligned consistently across all napkin rings. Consistency is key to achieving an elegant and professional look.
Letting Them Dry
- Wait Patiently: Once glued, I allowed the napkin rings to dry thoroughly. This ensured a strong bond that would hold up to use.
Final Touches and Presentation
After letting them dry, I was absolutely thrilled with the results. Each napkin ring looked chic, expensive, and perfect for any occasion. I maked these primarily for a Mother's Day tablescape, but they are versatile enough for weddings, holiday dinners, or any event that could use a bit of sparkle.
Why This DIY Is Worth Your Time
This project stands out for several reasons:
- Cost-Effectiveness: By utilizing Dollar Tree finds and combining them with high-quality brooches, I crafted something that looks luxurious without the high price tag.
- Personalization: You can choose brooches that match your style or theme, adding a personalized touch.
- Ease of Creation: Despite looking complex, these napkin rings are incredibly easy to make, requiring no special skills or tools beyond what I mentioned.
Customization Ideas for DIY Napkin Rings
Making DIY napkin rings is not just about crafting a functional item for your dining table; it's an opportunity to express your creativity and add a personal touch to your table setting. Here are some customization ideas that will help you make your napkin rings uniquely yours:
- Choose Your Theme: Start by deciding on a theme that reflects your personality or the occasion. It could be as simple as a color scheme or as elaborate as a seasonal motif. For example, for a summer dinner party, consider bright colors and floral patterns.
- Personalize with Names: Add a personal touch by painting or engraving names on the napkin rings. This not only personalizes each guest's place setting but also serves as a lovely keepsake for them to take home.
- Play with Textures: Mix and match different textures to make visual interest. Combine materials like rustic burlap with smooth satin, or pair shiny beads with matte-finished wood.
- Incorporate Nature: Bring a piece of nature to your table by using natural elements like twigs, shells, or dried flowers. These materials can be easily glued onto a basic napkin ring to elevate its appearance.
- Add Sparkle: For a touch of glamour, adorn your napkin rings with glitter, sequins, or rhinestones. A little sparkle can go a long way in making an elegant dining experience.
- Use Ribbons and Fabrics: Ribbons and fabrics offer endless possibilities. Tie a simple bow for a classic look, or experiment with various knots and braids for something more intricate.
- Repurpose Old Jewelry: Old earrings, pendants, or brooches can find new life as part of a napkin ring. Attach them to a simple band to make a unique and vintage look.
- Seasonal Decor: Tailor your napkin rings to the season. Use pastel ribbons for spring, incorporate leaves and acorns for autumn, or add pinecones and holly for a festive winter touch.
- Interactive Elements: Make your napkin rings interactive by attaching small chalkboards or tags where guests can write messages or what they're thankful for, especially during gatherings like Thanksgiving.
- Craft for Kids: If you have children, get them involved! They can help decorate with stickers, paint, or by threading colorful beads onto wire rings.
By incorporating these ideas, you'll not only craft a napkin ring but also make a conversation starter and a memorable part of your meal.
Upcycling Tips for DIY Napkin Rings
Upcycling is a fantastic way to reduce waste and make something beautiful and functional. When it comes to DIY napkin rings, there are numerous ways to repurpose items you might already have at home. Here are some tips to get you started:
- Start with What You Have: Look around your home for materials that can be transformed. Old leather belts, unused buttons, and even paper towel tubes can become the base of your napkin rings.
- Fabric Scraps: If you have leftover fabric from other projects, use it to cover plain napkin rings. You can glue the fabric around the ring or use a decoupage technique for a smoother finish.
- Old Jewelry: Broken necklaces or single earrings can be dismantled to provide beads and charms that add sparkle and personality to your napkin rings.
- Cardboard Tubes: The cardboard tubes from toilet paper or paper towels are perfect for making napkin rings. Cut them into the desired width and decorate as you please.
- Nature's Bounty: Use natural elements like twigs, pinecones, or acorns. These can be painted, left natural, or combined with other materials for a rustic look.
- Metallic Accents: Aluminum foil, candy wrappers, or old CDs can be cut and glued onto napkin rings for a shiny, metallic effect.
- Reuse Ribbons: Ribbons from gift wrapping can be reused to make elegant napkin rings. Simply tie a bow around a serviette or glue the ribbon onto a sturdier base.
- Children's Crafts: Involve your kids by using their outgrown or broken toys as embellishments. Small toy figures, puzzle pieces, or legos can make fun and whimsical napkin rings.
- Clothespins: Wooden clothespins can be taken apart and reassembled into circular shapes to serve as napkin rings. They offer a charming, vintage vibe.
- Bottle Caps: Collect bottle caps and use them to make mosaic patterns on your napkin rings. They can be painted or used as-is for an industrial look.
Upcycling aims to reuse and repurpose items. Be resourceful and imaginative by rethinking things you might discard. See how they can be transformed for your DIY napkin ring project.
Maintenance and Care
Taking care of your DIY napkin rings is important to keep them looking their best for every use. Here's how you can maintain and care for them:
- Cleaning Methods: Clean your napkin rings after each use. For most materials, a gentle wipe with a damp cloth will do. If you've used metal or glass elements, a mild soap solution can help remove fingerprints and smudges.
- Storing Properly: Store your napkin rings in a cool, dry place. If possible, wrap them individually in soft cloth or tissue paper to prevent scratches, especially if they have embellishments.
- Handling with Care: Be gentle when using your napkin rings. Avoid dropping or stacking them, which could cause damage.
- Regular Checks: Periodically check your napkin rings for any signs of wear and tear. If you find loose parts or chipped paint, repair them promptly to prevent further damage.
- Avoid Harsh Chemicals: Don't use harsh chemicals or abrasive cleaners on your napkin rings. These can strip away finishes and degrade materials over time.
- Seasonal Rotation: If you have napkin rings for specific seasons or holidays, make sure to rotate them out accordingly. This not only keeps your table setting fresh but also ensures that each set gets an even amount of wear.
- Refresh and Update: Every so often, give your napkin rings a new look. A fresh coat of paint or new decorations can make them feel brand new.
By following these simple tips, you can ensure that your DIY napkin rings remain a beautiful part of your table setting for years to come.
FAQs About DIY Napkin Rings
Discover answers to commonly asked questions about DIY napkin rings, including materials, techniques, and creative ideas for every occasion.
Absolutely! While cloth napkins are traditionally used with napkin rings, paper napkins can also be rolled and threaded through the rings. This can be a great option for more casual events or when you want a simpler cleanup.
The ideal diameter for napkin rings is typically around 1.75" to 2". This size should accommodate most napkins, whether they’re cloth or paper. You can adjust the size based on the thickness of your napkins and your personal preference.
Yes, there are many simple projects that are perfect for beginners. For instance, you can create simple leather napkin rings or use felt and a small wooden dowel to make colorful ones. These projects don't require many materials or tools and can be completed quickly.
Personalizing your napkin rings can be done in several ways. You can add initials to create a monogrammed effect, or use materials like ribbons and beads to design something that reflects your personal style. Experiment with different textures and colors to make your table setting unique.
To make your DIY napkin rings stand out, consider incorporating fresh flowers like carnations or mums to make stunning floral napkin rings. Another idea is to craft wire napkin rings which can be made in gold, copper, or silver to match your table decor. For a chic touch, try making gold geometric napkin rings using cardboard and metallic tape. These unique designs can add a sophisticated flair to any event. Remember, the beauty of DIY is that you can customize the designs to suit your personal style and the occasion!
Conclusion:
In conclusion, making easy diy napkin rings for every occasion is a perfect way to add a personal touch to your table settings. These easy diy napkin holders are not only attractive but also simple to make. With just a few materials and some creativity, you'll have unique and customizable napkin rings for any gathering. Start your project today and impress your guests with your skills.


