Making a DIY necklace holder is not just a fun weekend project, it's a practical way to organize your beautiful necklaces. Whether your collection includes delicate chains or chunky statement pieces, making your own necklace organizer can help keep them untangled and easy to access. This guide will walk you through the steps to craft your very own organizer, ensuring your jewelry is displayed in style and always within reach.
In this tutorial, you'll discover straightforward methods to construct a necklace organizer. From choosing the right materials to step-by-step instructions using wooden dowels or a simple paper towel roll, we've got you covered. Plus, we'll provide customization ideas and troubleshooting tips to ensure success. Get ready to transform your jewelry storage with a touch of personal flair.
Continue reading to unleash your creativity and make a piece that's not just functional but also a reflection of your style.
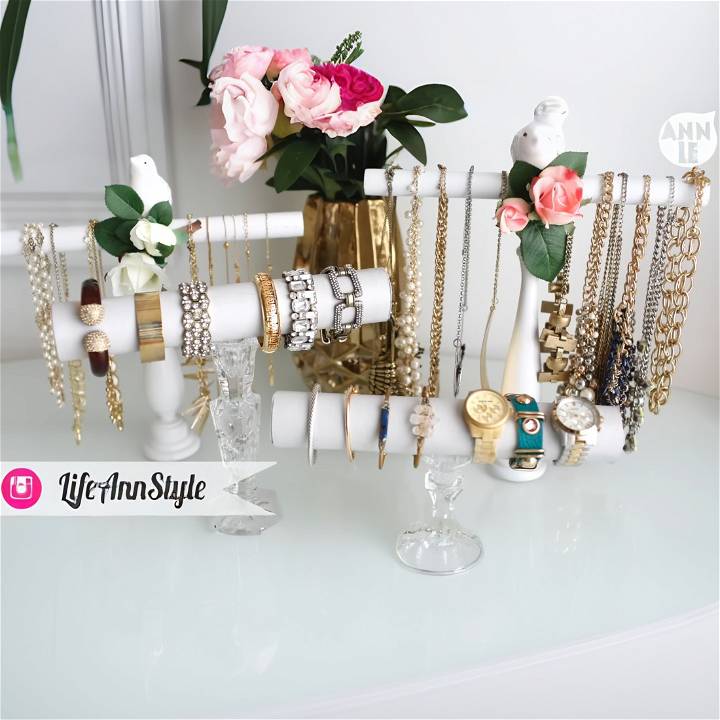
How to Make a Necklace Organizer - Step by Step
Making a stylish necklace and bracelet holder can personalize your room décor with ease. Whether refreshing your room for spring or adding a year-round touch, this DIY guide will help you make a unique jewelry stand to match your style.
Materials Needed
First, let's go over what you'll need to get started:
- For the Base: Candle holders (found at a local thrift store or around the home).
- For the Rack: Wooden dowels (available at craft stores) or a paper towel roll.
- Adhesive: A high-temperature glue gun or E6000 glue.
- For the Wooden Dowel Option: Primer and paint.
- For the Paper Towel Roll Option: Fabric or vinyl.
- Decorations (Optional): Items like artificial flowers or cute figurines for a decorative touch.
Method 1: Using Wooden Dowels
Step 1: Prepare the Dowel
Measure and mark the center of the wooden dowel.
Step 2: Attach the Dowel to the Base
Apply permanent glue to the top of your candle holder. Align the center mark on your dowel with the center of the candle holder and press firmly. Let the glue set for about 30 minutes.
Step 3: Prime and Paint
Once the glue is completely set, apply primer to the dowel and candle holder. After the primer dries, paint them in your desired color.
Step 4: Decorate
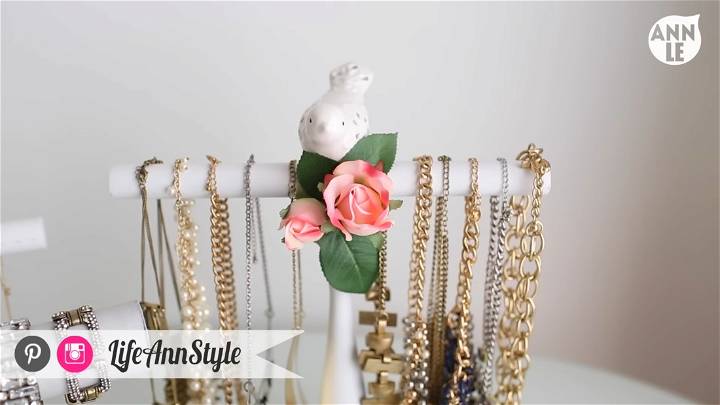
After the paint dries (usually takes a full day), decorate your jewelry holder with spring-themed decorations or any other embellishment of your choice.
Method 2: Using a Paper Towel Roll
Step 1: Cover the Roll
Measure and cut a piece of fabric or vinyl enough to wrap around your paper towel roll. Glue the material around the roll, making sure it's completely covered.
Step 2: Stiffen the Roll
For added durability, roll a magazine into a cylinder and insert it inside the paper towel roll.
Step 3: Make and Attach End Caps
Trace the end of the covered roll onto your fabric or vinyl to make end caps. Cut out the shapes and glue them to each end of the roll.
Step 4: Attach to the Base
Finally, glue the fabric or vinyl-covered roll onto the candle holder base.
Video Tutorial
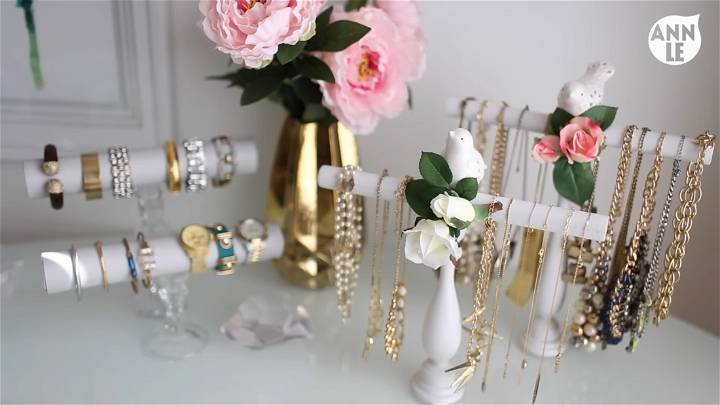
For a step-by-step video tutorial on making these easy DIY necklaces and bracelet holders, watch the YouTube video by Studio Ann Le here.
It pairs well with this written guide, offering a complementary visual representation of the steps outlined above for a clearer understanding of the process.
Make a unique jewelry holder to personalize your space and keep your accessories organized. Choose between wooden dowels or paper towel roll methods for a stylish and functional room decor piece.
Customization Ideas
Making a DIY necklace holder offers a wonderful opportunity to add a personal touch to your space. Here are some ideas to inspire your creativity:
- Theme: Choose a theme that reflects your personality or the decor of the room where the holder will be placed. For example, a nature-inspired theme could feature floral patterns or greenery, while a minimalist design might focus on clean lines and neutral colors.
- Color Scheme: Select colors that complement your room. You can paint the holder in one solid color, use a gradient effect, or make patterns with multiple hues.
- Decorative Elements: Embellish your holder with items like beads, sequins, lace, or fabric for a textured look. You can also use stencils to add shapes or letters.
- Functional Features: Consider adding small shelves or compartments to hold other items like rings, bracelets, or earrings. This turns your necklace holder into a multi-purpose jewelry organizer.
Don't be afraid to experiment with different materials and designs until you find the perfect combination that speaks to you.
Troubleshooting Tips
Even the most well-planned DIY projects can encounter hiccups. Here are some tips to help you overcome common challenges:
- Material Issues: If a material isn't working as expected, don't hesitate to substitute it with something more suitable. For instance, if a type of wood is too hard to work with, try a softer variety.
- Design Flaws: Sometimes, a design might not hold up as well as you'd hoped. If the holder isn't stable, consider reinforcing it with additional supports or adjusting the design to distribute weight more evenly.
- Finishing Touches: If the finish on your holder isn't as smooth or polished as you'd like, sanding it down and applying a different type of paint or varnish can make a big difference.
- Assembly Difficulties: If parts aren't fitting together correctly, double-check measurements and cut edges for accuracy. Sometimes, a small adjustment is all that's needed for a perfect fit.
When faced with a problem, take a step back and approach it from a different angle. Often, a simple solution is right at your fingertips.
FAQs About DIY Necklace Holders
Discover everything you need to know about DIY necklace holders in our comprehensive FAQs guide. Find answers to all your questions here!
What materials do I need to make a DIY necklace holder?
You'll need a base like wood or corkboard, hooks or knobs for hanging necklaces, and any decorative materials you'd like to add, such as paint or fabric.
Can I make a necklace holder without drilling holes?
Yes, you can use adhesive hooks or pegs that stick to the wall or use a corkboard where you can push pins directly into the board.
How can I ensure my necklace holder is sturdy?
Make sure to use appropriate anchors if you're attaching it to the wall and choose a solid base material like wood that can support the weight of your jewelry.
What's the best way to hang necklaces to prevent tangling?
Provide enough space between hooks and hang necklaces by length, with longer ones at the bottom to avoid overlapping.
How do I choose the right size for my necklace holder?
Consider the number of necklaces you have and the space available on your wall. It's better to have extra space than to overcrowd your holder.
Can I make a holder for other types of jewelry too?
Absolutely! You can add smaller hooks for bracelets and earrings or a bar for rings.
How can I personalize my necklace holder?
Personalize it with paint, stencils, or by attaching favorite photos or mementos to the base.
What are some eco-friendly materials I can use?
Look for reclaimed wood, recycled metal, or repurpose items from around your home that you no longer need.
How do I mount my necklace holder on the wall?
Use wall anchors and screws appropriate for your wall type. If you're not allowed to drill holes, consider a freestanding holder or one that hangs over the door.
Conclusion:
In conclusion, mastering the art of making your own DIY necklace holder opens up a world of possibilities for organizing and displaying your favorite jewelry pieces with a personal touch. Whether you choose to work with wooden dowels or opt for the simplicity of a paper towel roll, each step outlined in our guide ensures that your journey toward crafting a bespoke necklace organizer is both fulfilling and fun.
Moreover, our customization ideas and troubleshooting tips are here to enhance your crafting experience, making it easier than ever to bring your vision to life. Remember, every piece you make not only adds a unique charm to your decor but also reflects your creativity and style. So, go ahead, gather your materials, and start on this exciting project today!


