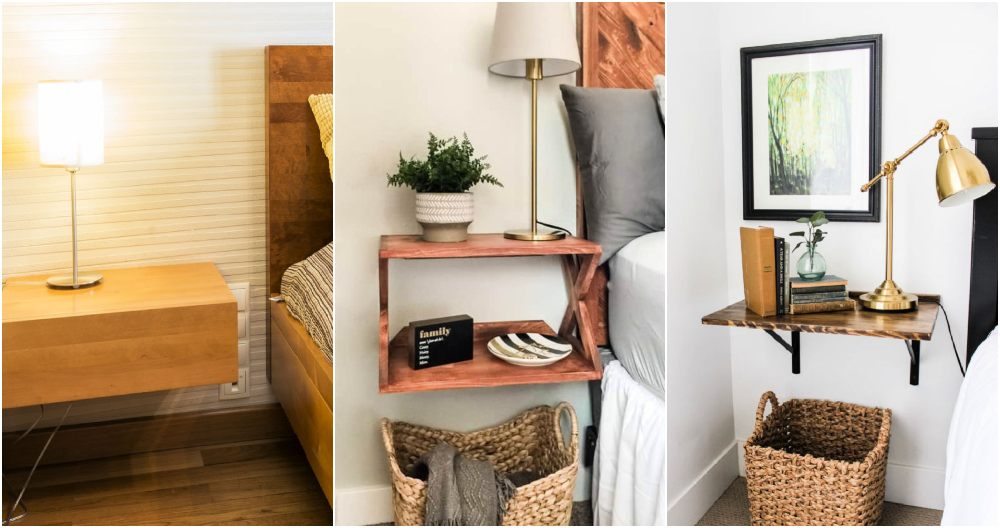
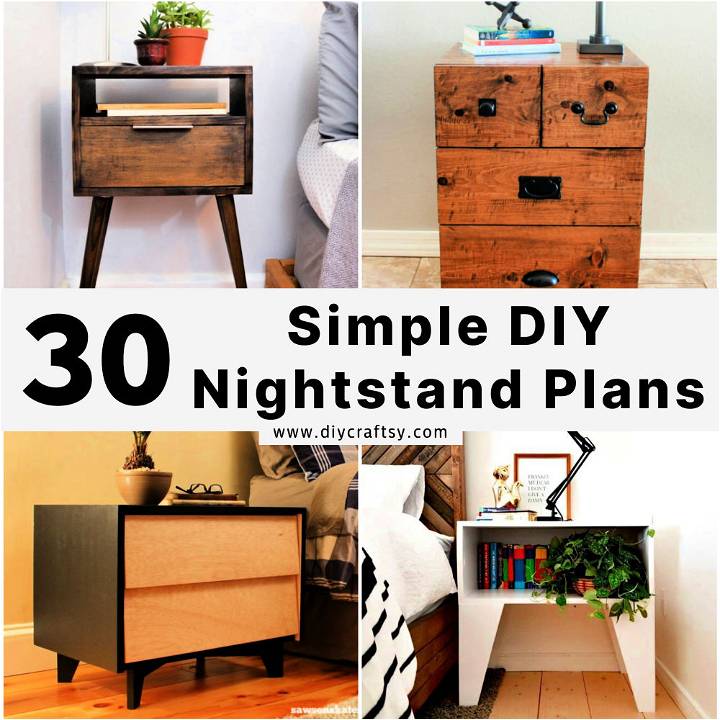
Building a DIY nightstand can add a personal touch to your bedroom, offering both a practical and aesthetic appeal. These 30 simple DIY nightstand plans guide you through crafting a bedside table that reflects your style and meets your needs. With clear, step-by-step instructions, you'll find it straightforward to bring your vision to life, regardless of your crafting skill level. This guide ensures you're well-equipped to build a piece that's both functional and stylish.
Why settle for off-the-shelf when you can build your own bedside table that perfectly aligns with your bedroom's decor? This tutorial on how to build a simple DIY nightstand provides all the necessary information, from selecting the right materials to the finishing touches. As you move onto the next sections, you'll discover helpful tips, essential tools, and inspiring ideas to make your DIY nightstand project a success. Let's get started on making a nightstand that not only stands by your bed but also stands out in your room.
Why Choose DIY Nightstand Projects?
Discover the benefits of DIY nightstand projects! Learn why making your own nightstands can save money, add personal touch, and unleash creativity.
- Cost-Effective: DIY projects often cost significantly less than buying pre-made furniture. You can manage your budget, select materials within your price range, and avoid labor costs.
- Personalization: Crafting your nightstand lets you tailor its size, color, and style to perfectly match your bedroom decor. This level of customization is rarely available in store-bought pieces.
- Skill Development: Building your own nightstand is an excellent opportunity to improve or learn new skills. Whether it's woodworking, painting, or designing, you gain valuable experience.
- Quality Control: When you DIY, you oversee the entire process. This means you can ensure the use of high-quality materials and apply a careful, thorough finish for a durable piece.
- Satisfaction: There’s a unique sense of accomplishment in making something with your own hands. Using a nightstand you’ve built yourself can bring a daily dose of pride and joy.
- Eco-Friendly: By choosing sustainable materials or repurposing old furniture, you make an eco-conscious choice. DIY projects often result in less waste and can breathe new life into discarded items.
- Fun: The process of making a nightstand is enjoyable. It's a chance to express creativity, solve problems, and maybe even involve friends or family for a memorable experience.
DIY nightstand projects offer a blend of practical benefits, personal growth opportunities, and a touch of fun. They're an ideal choice for anyone looking to enhance their bedroom on a budget while expressing their unique style.
How to Build a DIY Nightstand with Drawer
Building a DIY nightstand can elevate the look of your bedroom and provide you with a functional piece of furniture that adds character to your space. Here’s a step-by-step guide to creating a modern rustic nightstand with a drawer, perfect as an end table or a bedside companion.
Materials and Tools Needed
- Lumber (2x2s, 1x6, quarter inch plywood, three-quarter inch thick edge glued panel)
- Kreg Jig for making pocket holes
- Drill and appropriate screws (two and a half inch Kreg screws, one and a quarter inch Kreg screws, one inch wood screws)
- Wood glue
- Circular saw or table saw
- Miter saw
- Level
- Measuring tape
- Wood shims or paint stir sticks
- Stain or paint (optional)
- Polyurethane (optional)
- Drawer knob or pull
- Drawer slides (12-inch or 14-inch)
Steps to Build Your Nightstand
1. Gather Materials
Start by collecting all necessary materials. You can choose between premium wood or more affordable options like common knotty wood.
2. Add Pocket Holes
Set up your Kreg Jig for one and a half inch thick wood and add pocket holes to the 2x2s that will be the sides, back, and front of the nightstand frame. Adjust to three-quarters of an inch for the top panel pocket holes.
3. Assemble the Side Frames
Connect two 2x2 leg boards with a shorter 2x2 board at the end using the drill and screws. Attach a 1x6 under the 2x2, ensuring it's a quarter inch in from the edges for a nice recess. Add another 2x2 under the 1x6 and a final 2x2 three and a half inches up from the bottom for the shelf.
4. Assemble Back of the Nightstand
Connect the side frames at the back with a 2x2 at the top, a 1x6 in the middle, and another 2x2 underneath, similar to the side frame assembly. Ensure the top 2x2 has pocket holes for attaching the top panel.
5. Assemble Front of the Nightstand
Repeat the process for the front of the nightstand, ensuring the 2x2 with pocket holes is at the top, facing inwards.
6. Ensure the Frame is Square
Before proceeding, ensure your nightstand frame is square to avoid issues with drawer alignment.
7. Attach Drawer Slides
Add wood strips inside the nightstand if necessary to mount the drawer slides. Install the drawer slides according to their instructions, ensuring they are level and properly aligned.
8. Build and Install the Drawer
Measure the opening, subtract an inch for the width, and cut the quarter-inch plywood for the drawer bottom. Assemble the drawer box and attach the drawer slides. Install the drawer in the nightstand.
9. Attach the Front Drawer Face
Measure the opening for the drawer face and cut the 1x6 board accordingly. Attach the drawer face with wood glue and nails, ensuring a proper fit.
10. Install the Bottom Shelf and Top
Measure and cut the panel board for the bottom shelf and top of the nightstand. Attach using wood glue and screws.
Finishing Touches
Stain or paint the nightstand as desired, add a protective coat of polyurethane, and finish by attaching a drawer knob or pull.
Video Tutorial
For a detailed visual guide, watch the DIY nightstand with drawer video tutorial below:
It pairs well with this written guide, enhancing your understanding with a visual representation of each step, making the process clearer and more approachable.
Tips for Success
- Measure twice, cut once: Double-check your measurements before cutting to avoid mistakes.
- Take your time: Don't rush the assembly process. Let glue dry fully before moving on to the next step.
- Customize: Feel free to modify your design to fit your needs and style.
Building a DIY nightstand is a rewarding project that can add style and function to your bedroom. With these easy-to-follow steps, you’ll create a beautiful, modern rustic nightstand that you’ll be proud to have made yourself.
DIY Nightstand FAQs
Building your own nightstand can be a fun and rewarding project, we address of the most common questions help you started on your journey.
What do need to build a DIY nightTo build a DIY night, you typically need:
- Wood (pine oak, or plywood are popular choices- Saw (hand saw, saw, or miter saw)
Drill - Sandpaper or an electric sander
- Screwdriver
- Measuring tape
- Wood glue
- Clamps
- Paint or stain (optional)
How do I choose the right design for my nightstand?
When choosing a design for your nightstand, consider:
- The size of your bedroom and the space available beside your bed
- The height of your bed to ensure the nightstand is at a convenient height
- Your storage needs (do you need drawers or shelves?)
- The overall style and decor of your bedroom to ensure it matches
Can I build a nightstand if I have no woodworking experience?
Yes, you can! Start with a simple design and gradually move to more complex projects as you gain confidence and skills. There are many tutorials and plans available specifically for beginners.
What is the standard height for a nightstand?
The standard height for a nightstand is about 24 inches tall. However, the ideal height can vary depending on the height of your bed. Generally, the top of the nightstand should be level with the top of your mattress or slightly higher.
How can I make my DIY nightstand more eco-friendly?
To make your DIY nightstand more eco-friendly, you can:
- Use reclaimed or recycled wood
- Choose non-toxic paints and stains
- Repurpose old furniture into a new nightstand
- Use hand tools instead of power tools to reduce energy consumption
Is it cheaper to build a nightstand than to buy one?
Yes, it can be significantly cheaper to build a nightstand than to buy a pre-made one, especially if you choose affordable materials and do the work yourself. You also avoid labor costs and can customize the nightstand to fit your needs exactly.
How do I protect my DIY nightstand?
To protect your DIY nightstand, you should:
- Apply a coat of sealant or finishing oil after painting or staining
- Use coasters to avoid water rings
- Place felt pads under decorative items to prevent scratches
- Avoid placing it in direct sunlight to prevent fading
Can I add a wireless charging spot to my DIY nightstand?
Yes, adding a wireless charging spot to your DIY nightstand is possible. You'll need to purchase a wireless charging kit and follow the manufacturer's instructions for embedding it into the nightstand. Make sure to plan for this feature early in your design process.
30 Simple DIY Nightstand Plans (How to Build a Bedside Table)
Discover 30 easy DIY nightstand plans for building your own bedside table. Get creative and enhance your bedroom decor with these simple projects.
1. Custom Nightstand Using Minimal Tools
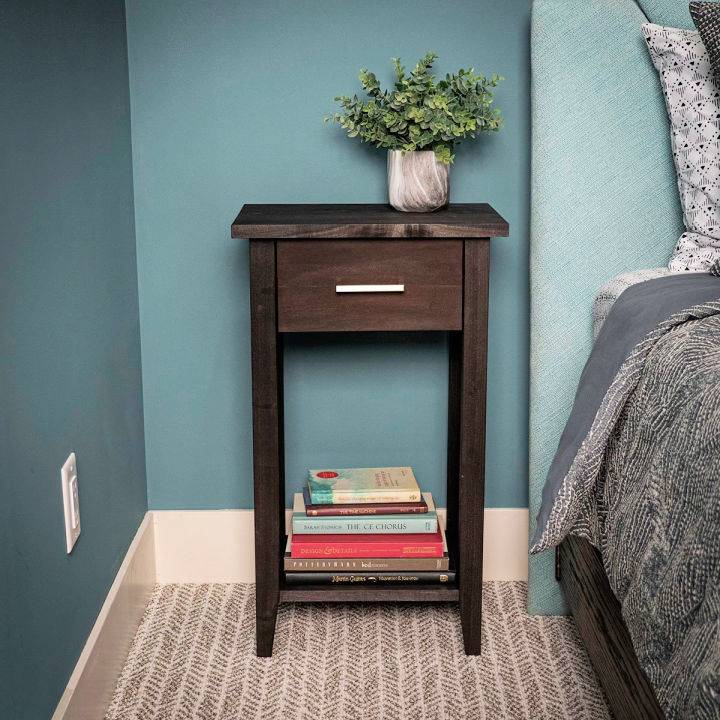
Discover a fulfilling DIY project to elevate your bedroom's charm with our easy-to-follow guide on building a stylish nightstand. Perfect for those with moderate woodworking talents, this project requires minimal tools and can be completed within a day. For a cost-effective update between $50-75, you'll craft a beautiful and functional piece. Dive into each step, from cutting and drilling to finishing, ensuring a polished look that complements your space. Get enthused and prepared by checking out the full guide here.
2. DIY Night Stand With Hidden Wireless Charging
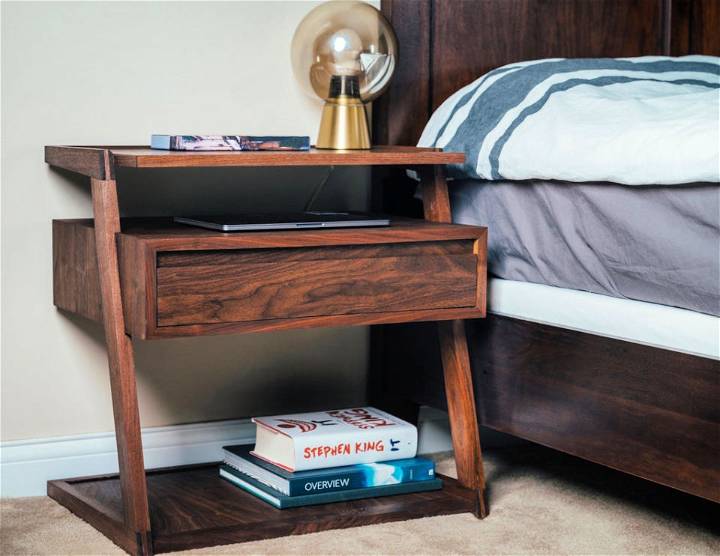
Elevate your bedroom with a sleek, modern nightstand designed to keep your space tidy and your devices charged. This innovative bedside table features a hidden wireless charger and an ingenious cable management system, ensuring that your electronics are always powered up without any messy cords. Its cantilevered legs add a contemporary touch, while the thoughtful design provides ample storage for your essentials. Interested in making your own? Visit Instructables for a detailed guide on how to make this stylish and functional piece.
3. How to Build a Nightstand With Drawers
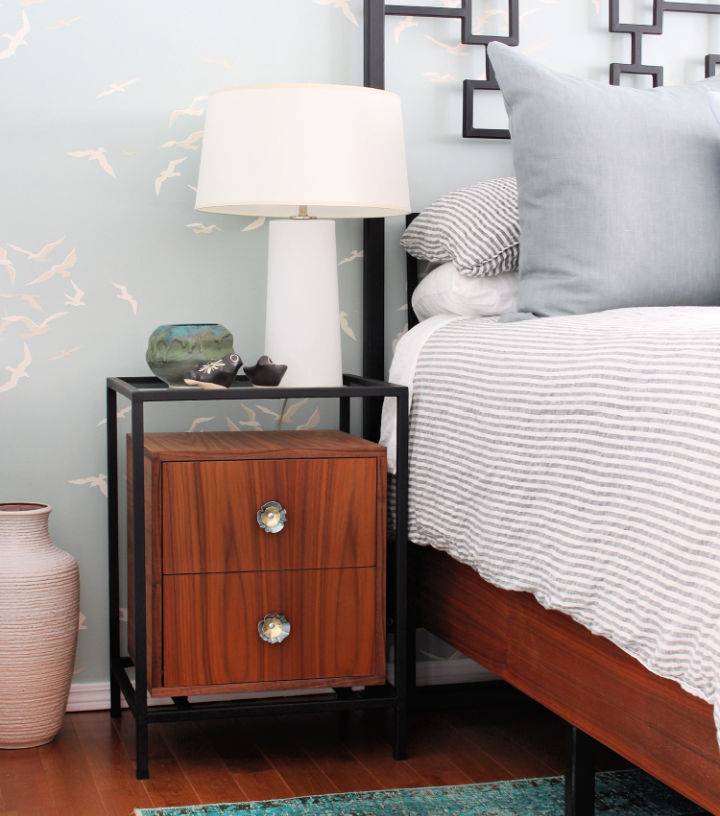
Elevate your bedroom decor by crafting your own nightstand with drawers, an ingenious solution for tidying up while keeping essentials at arms' reach. Dans le Lakehouse offers an engaging and instructive guide, from initial sketches to the final assembly. This tutorial simplifies the process, empowering you to build a functional piece that blends seamlessly with your existing furniture. Ideal for those with a penchant for DIY projects, this guide ensures you achieve professional results with personal flair. Ready to transform your space? Let's dive in.
4. Modern DIY Nightstand Using Wood
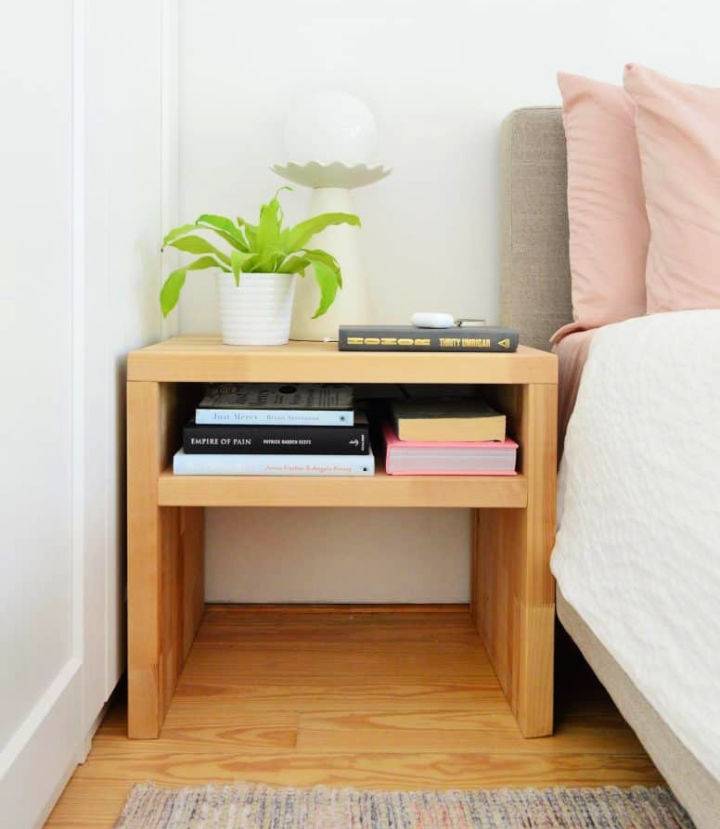
Discover a step-by-step guide on crafting your own DIY nightstands, perfect for any bedroom space, over at Young House Love. With a simple design that utilizes butcher block for a modern and sturdy finish, this project is accessible for all, requiring minimal tools and straightforward cuts.
Ideal for those looking to customize their bedroom furniture to fit unique spaces or to simply add a personal touch to their decor. Plus, you'll find valuable tips on saving costs, selecting materials, and adding functional storage. This engaging tutorial ensures your DIY experience is rewarding, from initial planning to the final oil seal.
5. Make a Planked Wood Nightstand for Bedroom
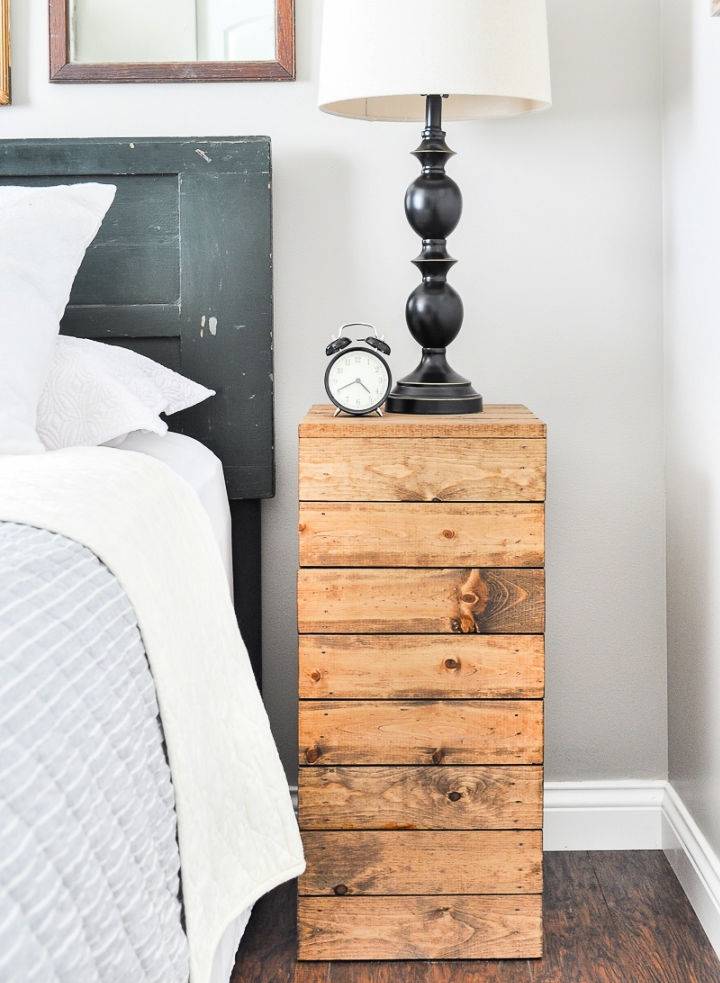
Transform your bedroom with these easy-to-follow DIY planked wood nightstands, a project that combines affordability with customization. Crafting your own nightstands allows you to tailor them perfectly to your space, both in size and style, ensuring they fit seamlessly into your bedroom's decor.
Ideal for spaces that demand furniture of specific dimensions, this guide provides a step-by-step approach. From selecting the right wood to applying the final touches of stain, you'll have everything you need to bring a warm, wooden accent to your room. Dive into this project and give your guest bedroom the upgrade it deserves with custom-made nightstands that are as functional as they are stylish.
6. DIY Crate Nightstand - Step by Step Instructions
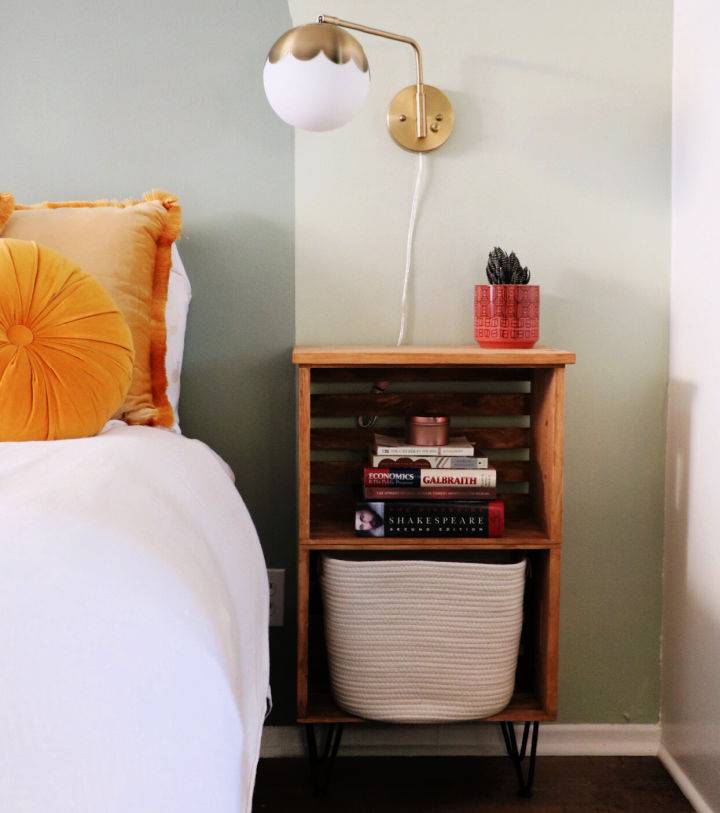
Transform your bedroom with a touch of boho-chic flair! Dive into a DIY project and build a stunning Crate Nightstand that's as stylish as it is functional. With a simple guide from DIY Darling, you'll learn how to repurpose crates into a bespoke nightstand, complete with hairpin legs for a modern twist. Perfect for those who love to add a personalized touch to their space, this project is not only affordable but also incredibly rewarding. Get ready to elevate your nightstand game and bring a fresh look to your bedroom.
7. Mid Century Modern Nightstand Plan
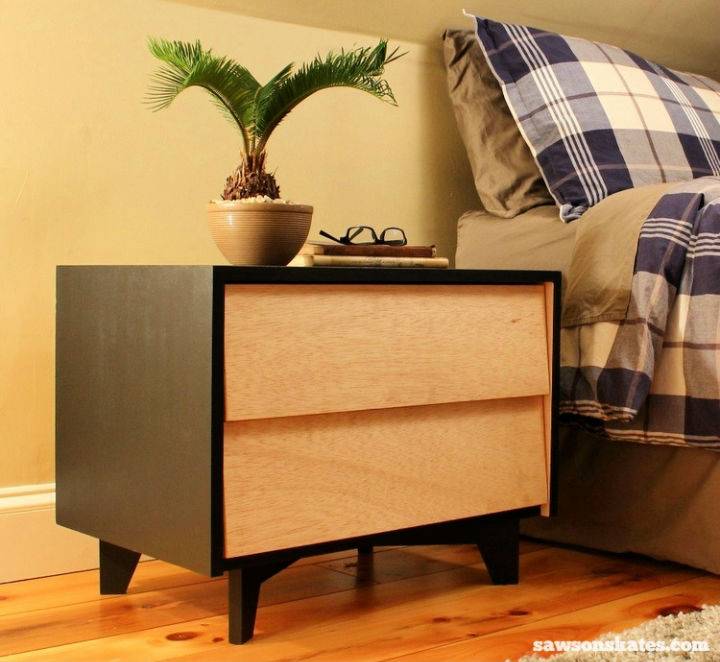
Unleash your inner craftsman with our DIY Mid-Century Modern Nightstand tutorial. Sporting sleek lines and angled drawers, this project dismisses the need for traditional handles, embodying the iconic mid-century modern aesthetic. We've done the legwork, compiling a comprehensive plan complete with a supply list and step-by-step instructions. Freely explore your creativity and bring a touch of retro flair to your space. Ready to start? Click here for the full guide and video walkthrough. Let's build something beautiful together!
8. Easy DIY Nightstand for Beginners
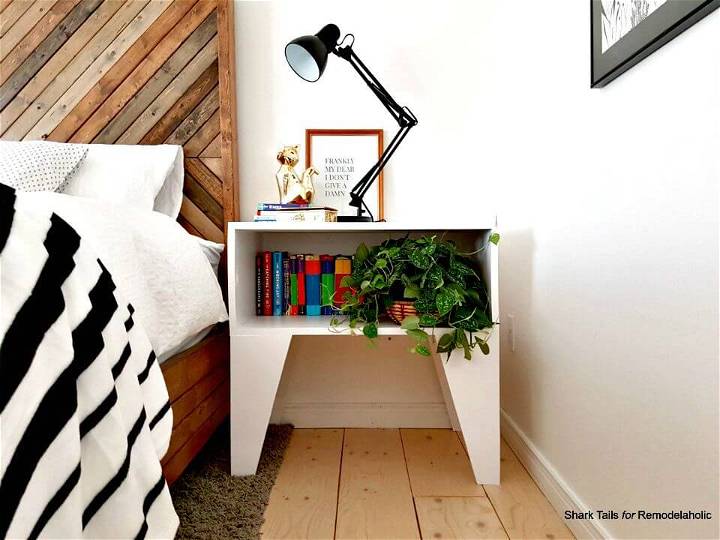
Make the perfect bedroom accessory with our nightstand plans, detailing every step for you. Dive into your next DIY project confidently with our guide on building a simple nightstand perfect for beginner builders. This step-by-step tutorial empowers you to build a stylish, functional piece for your bedroom without breaking the bank or requiring advanced skills. With a focus on using accessible materials and clear instructions, you'll finish with a nightstand that not only serves its purpose but also adds a personal touch to your space. Happy building!
9. Building a PB Teen Nightstand
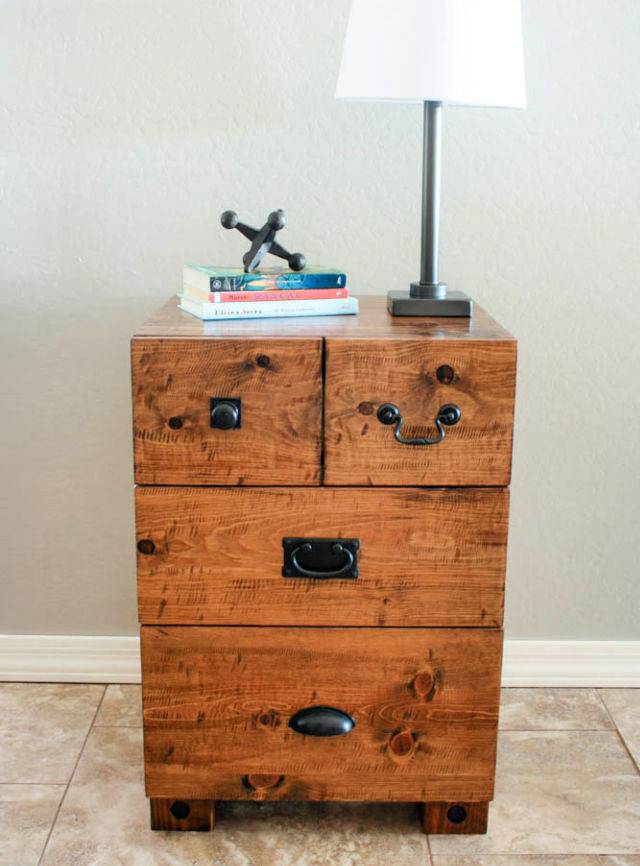
Transform your space with a DIY PB Teen-Inspired Nightstand, a project that not only adds style but also saves you money. Learn how to replicate the Emerson Bedside Table for around $60 with a detailed guide from Addicted 2 DIY. This step-by-step tutorial includes tricks for making authentic-looking saw marks and adapting to woodworking challenges. With free printable plans and a guide on achieving a distressed finish, build a nightstand that's both beautiful and budget-friendly. Perfect for adding a personalized touch to your bedroom.
10. How to Make a Parson Nightstand
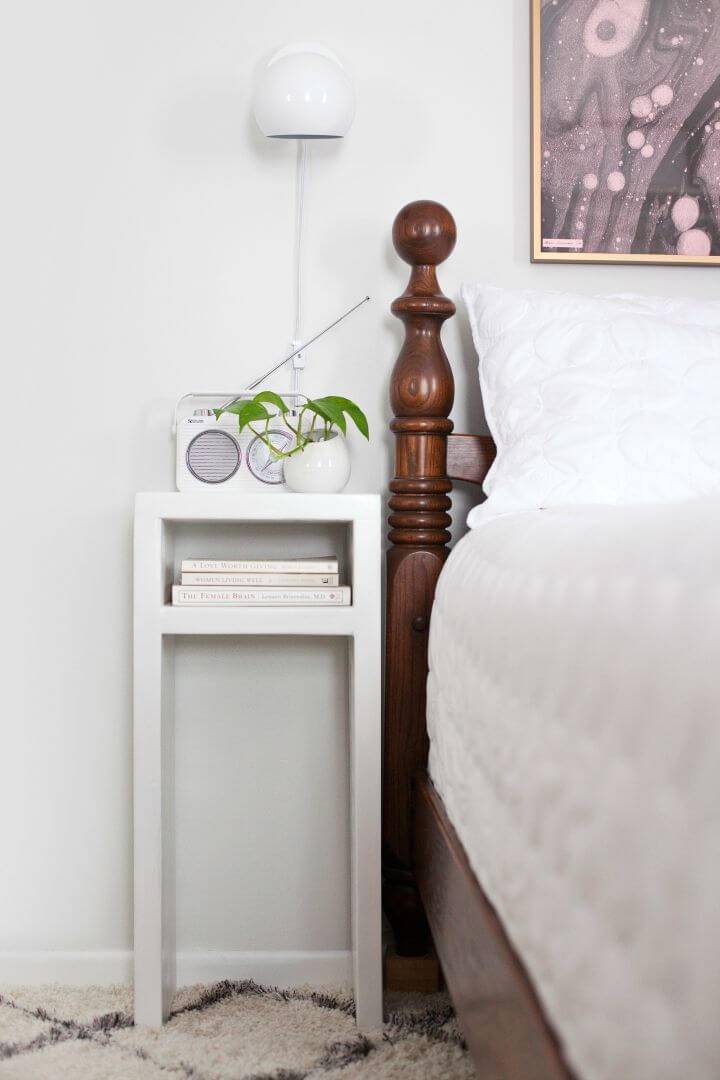
Elevate your bedroom decor with a tasteful DIY Parsons Nightstand, an accessible project even for those new to DIY. Transform your space and add a modern touch next to your traditional or contemporary bed setup. This project, as showcased on A Beautiful Mess, is not only budget-friendly but also allows for personal customization to fit your bedroom's aesthetics and size constraints.
Follow simple steps using basic materials and tools to build a functional and stylish nightstand. Bring harmony to your room with this sleek addition that complements any bed frame, enhancing the coziness and completeness of your bedroom haven.
11. Craftsman Style 3 Drawer Nightstand
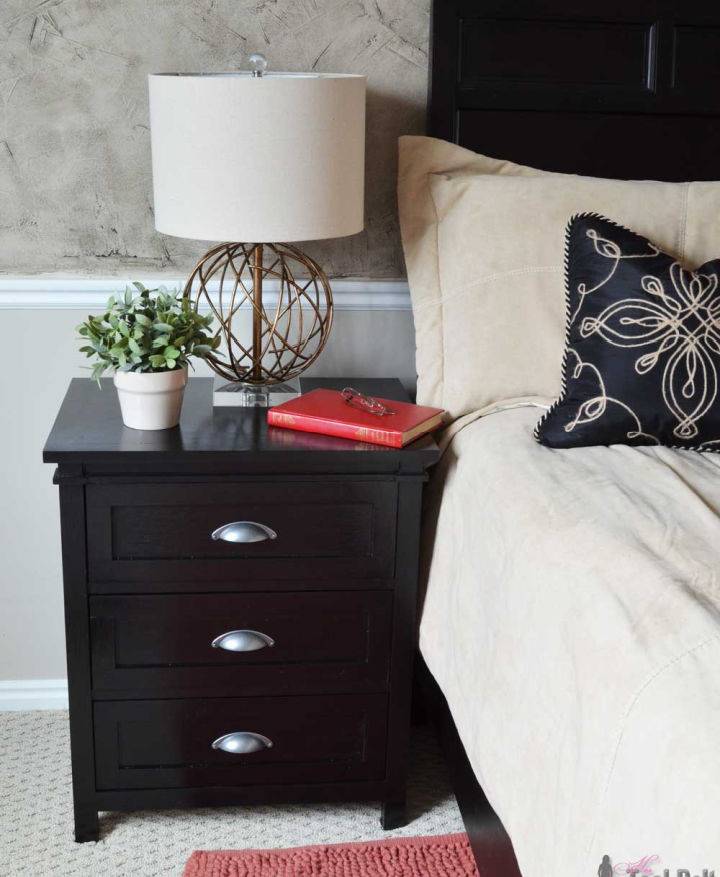
Elevate your bedroom with a DIY Craftsman 3 Drawer Nightstand, offering ample storage for your essentials. Tailored for higher beds at 28", it fits snugly by your side. Admire the optional square trim, a nod to the stylish Layne nightstand. Dive into craftsmanship with Her Tool Belt, where free plans await. Discover tips to perfect your build, from drawer assembly tweaks to achieving a sleek finish. Join a community sharing their project sketches and get inspired. Ready to transform your space? Fetch those tools and let creativity flow!
12. X Leg Accent Table Building Plan
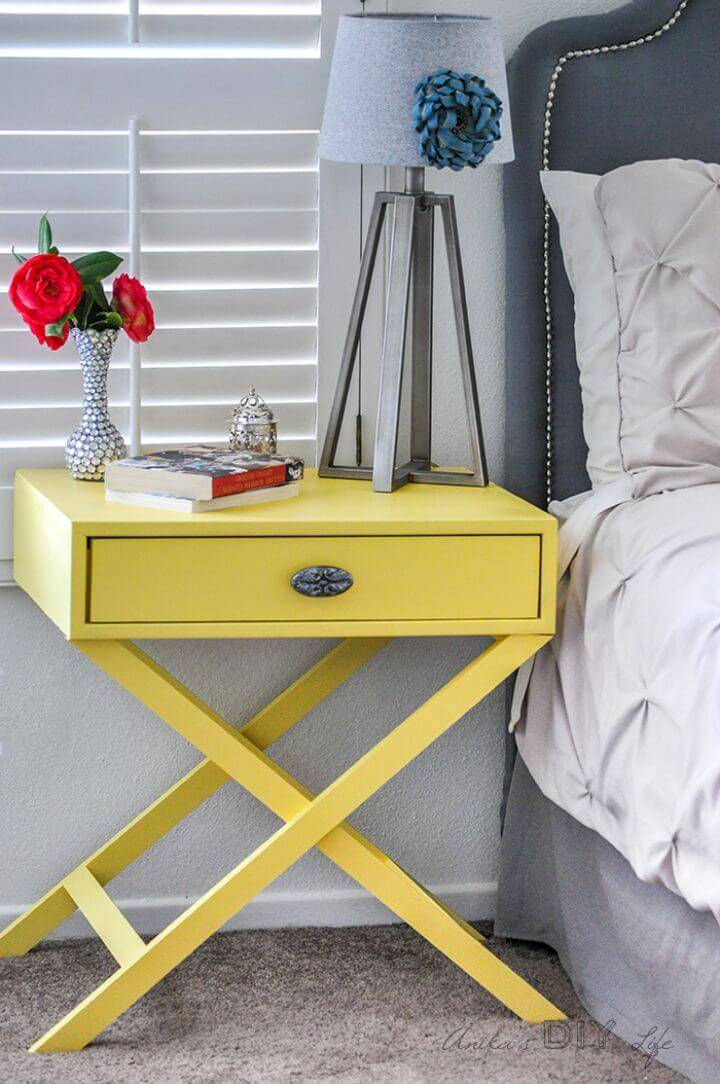
Embarking on a home DIY project can elevate your living space's aesthetic, and what better way to start than with an X-leg accent table? Anika's DIY Life offers a comprehensive guide to making your own chic table, packed with easy-to-follow steps and free plans. Ideal for adding a splash of style to any room, this project is both budget-friendly and rewarding. You don't need to break the bank or be a seasoned builder to craft this beautiful piece of furniture. Ready to transform your master bedroom or living area? Get the plans and start building today!
13. DIY Retro Side Table at Home
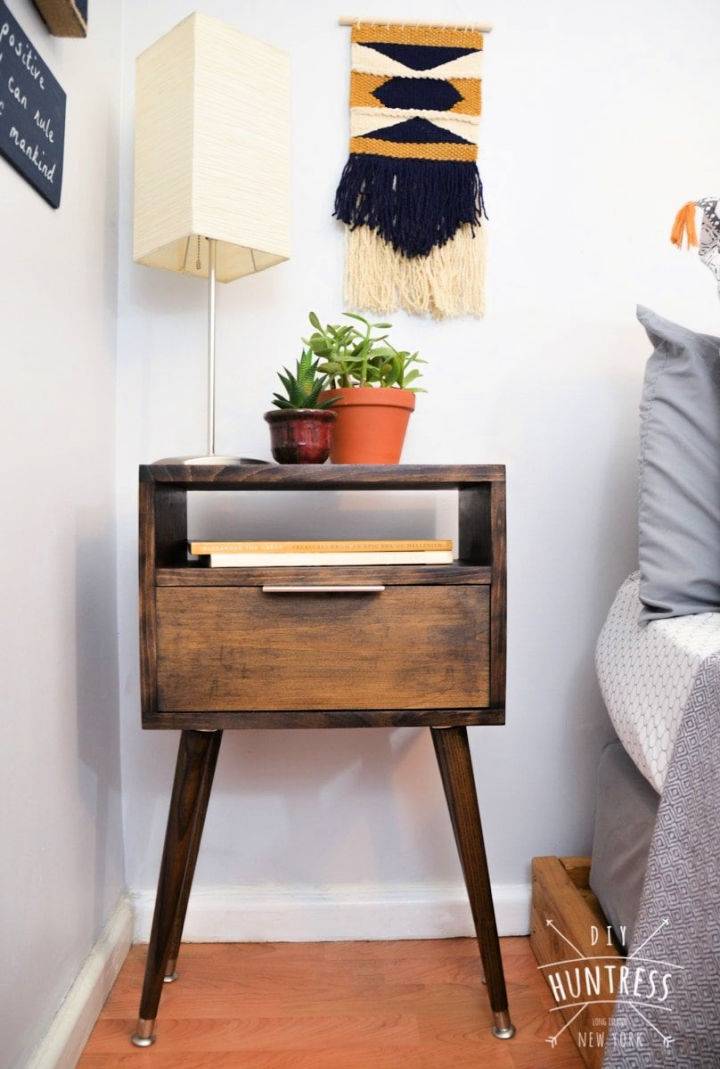
Elevate your living space with a touch of nostalgia! Our DIY Retro Side Table tutorial is perfect for anyone looking to add charm and functionality to their home with simple tools. Designed for easy creation, this project introduces a stunning mid-century modern flair, perfect for housing gadgets or serving as a stylish accent.
With detailed instructions and a list of essential hardware, you'll craft a piece that not only captures the essence of retro design but also showcases your DIY prowess. Perfect for storing those easily lost items like remote controls. Get ready to impress with this charming, beginner-friendly build.
14. Build Your Own Emily Nightstand
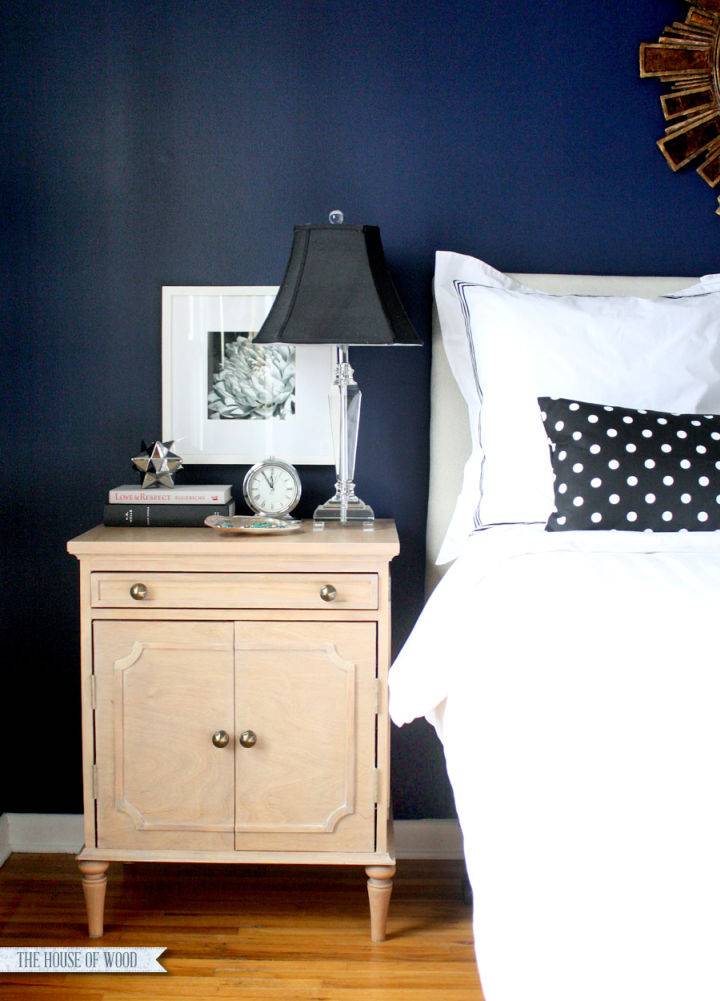
Save money and add a personal touch with these easy DIY nightstand plans. Embarking on a DIY journey to replicate the charming Isabella Nightstands from Ballard Designs? You're in luck. An insightful guide awaits on how to craft these beautiful nightstands yourself.
Complete with a petite drawer and adjustable shelf, the design seamlessly marries functionality with elegance. Intrigued by the detailed craftsmanship? Find all you need, including a comprehensive plan and a list of materials, by clicking here. Perfect for adding a bespoke touch to any bedroom, this project is attainable with patience and creativity!
15. IKEA Ivar Dresser Makeover Hack
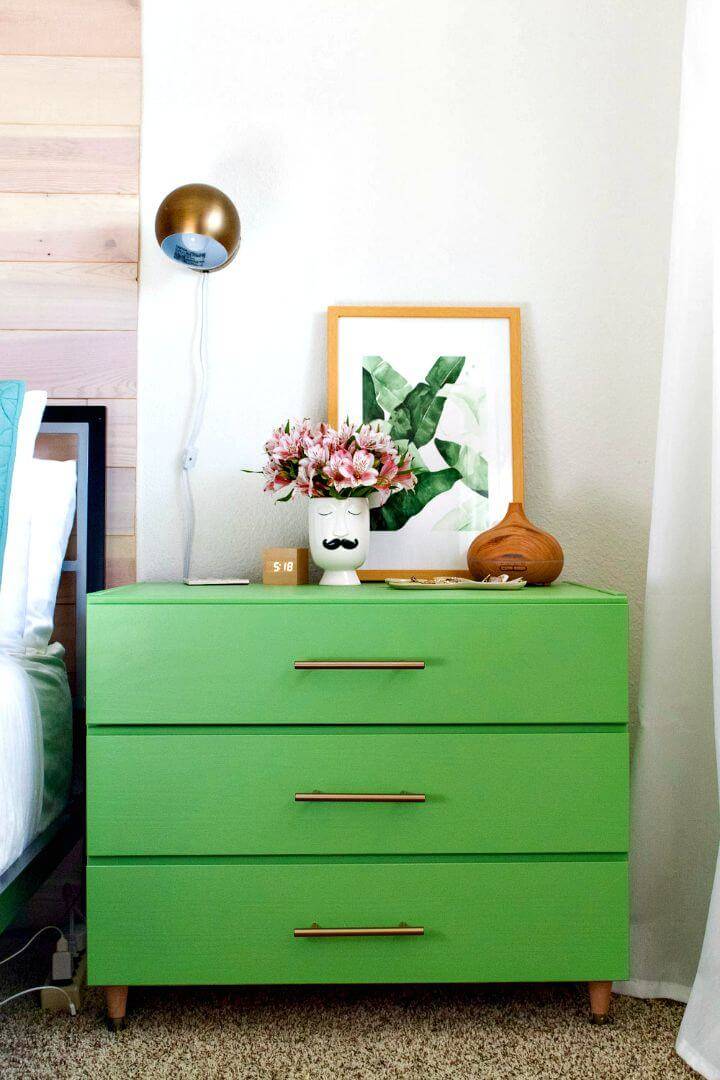
Transform your bedroom with an engaging and straightforward IKEA IVAR dresser makeover guide by Club Crafted. Elevate your space with a pop of color, utilizing Sherwin-Williams paint, and infuse your room with personality and style. This DIY project is perfect for adding functional yet stylish dresser space without breaking the bank. With concise steps, including adding mid-century modern legs and chic brass handles, this tutorial promises to turn ordinary IKEA furniture into a statement piece. Ideal for those ready to tackle a rewarding home upgrade project.
16. Refinished Nightstand With Chalk Paint
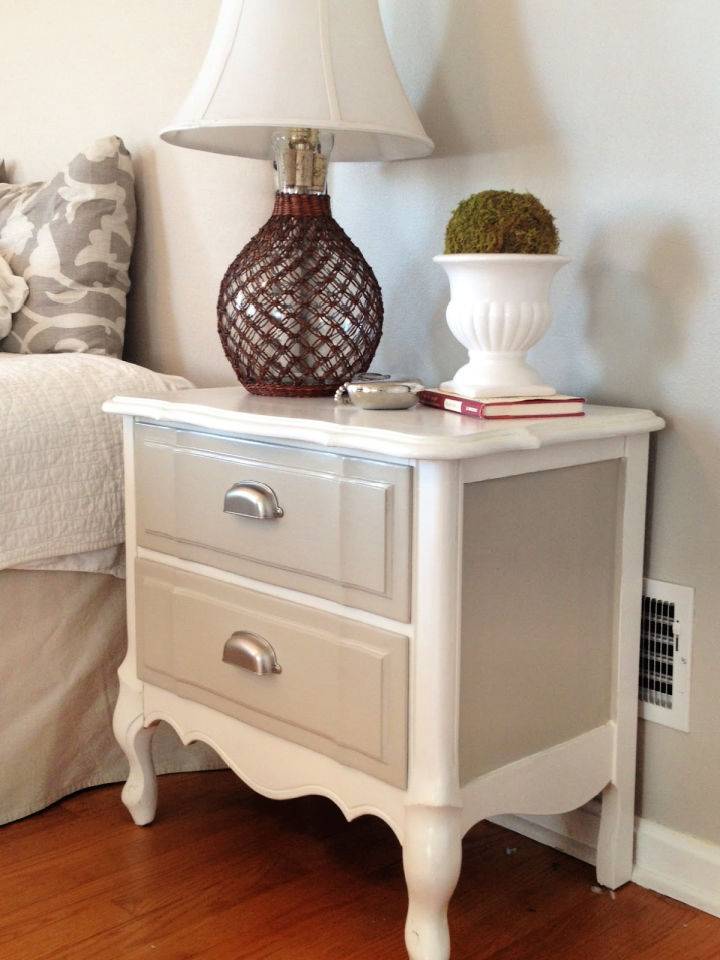
Transform your bedroom with a personal touch. Dive into a DIY adventure by repainting a nightstand using homemade chalk paint, illustrated through an inspiring before and after journey. Learn how to mix and apply the paint for a two-tone finish that'll enhance your decor, anchored on the principle of reusing and improvising.
Discover the importance of sealing your hard work with a polycrylic finish to protect against daily wear and tear. Plus, navigate the tricky waters of finding the perfect hardware to compliment your new piece. Ready to elevate your bedroom aesthetic? Visit Two It Yourself for a step-by-step guide on this creative nightstand makeover.
17. Simple DIY Pottery Barn Nightstand
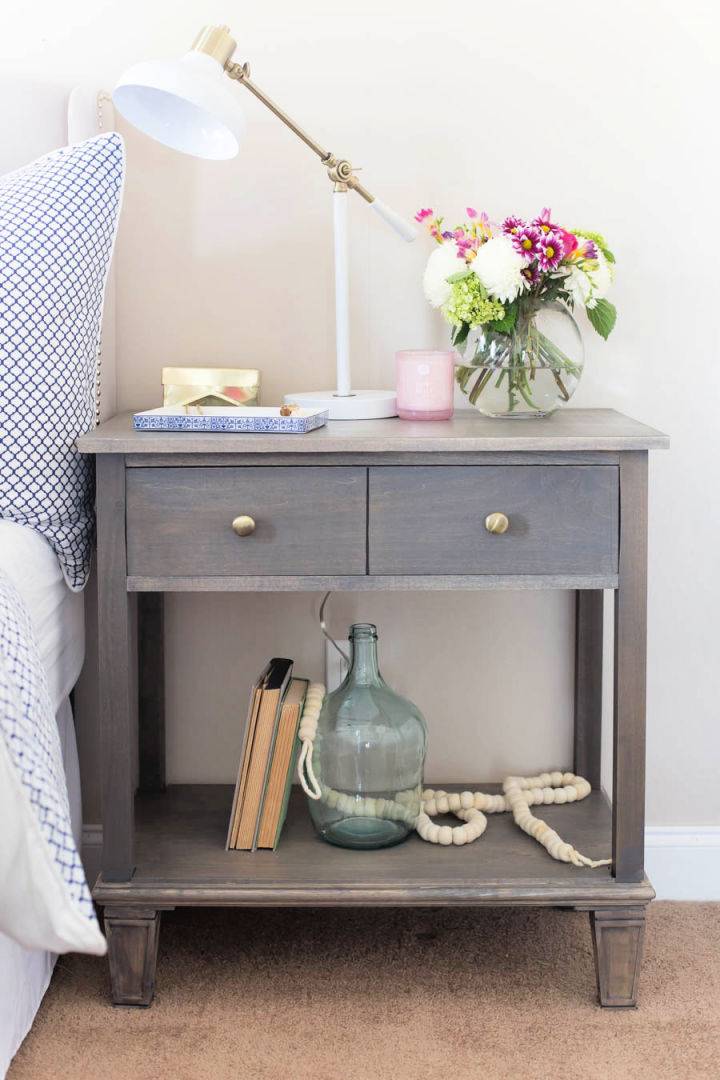
Build your bedside masterpiece with our detailed DIY nightstand plans tailored for any skill level. Unlock the secret to crafting your own exquisite DIY Pottery Barn-Inspired Sausalito bedside table with an easy-to-follow guide. If making a high-end nightstand at a fraction of the cost appeals to you, then this tutorial is your goldmine.
Detailed through a collaborative effort, this project blends affordability with charm, making it an ideal addition to any bedroom makeover. For complete plans, materials, and step-by-step instructions to achieve this gorgeous furniture piece, click here. Start your woodworking journey now and transform your space with a touch of glamour.
18. Free Simpson Nightstand PDF Plan
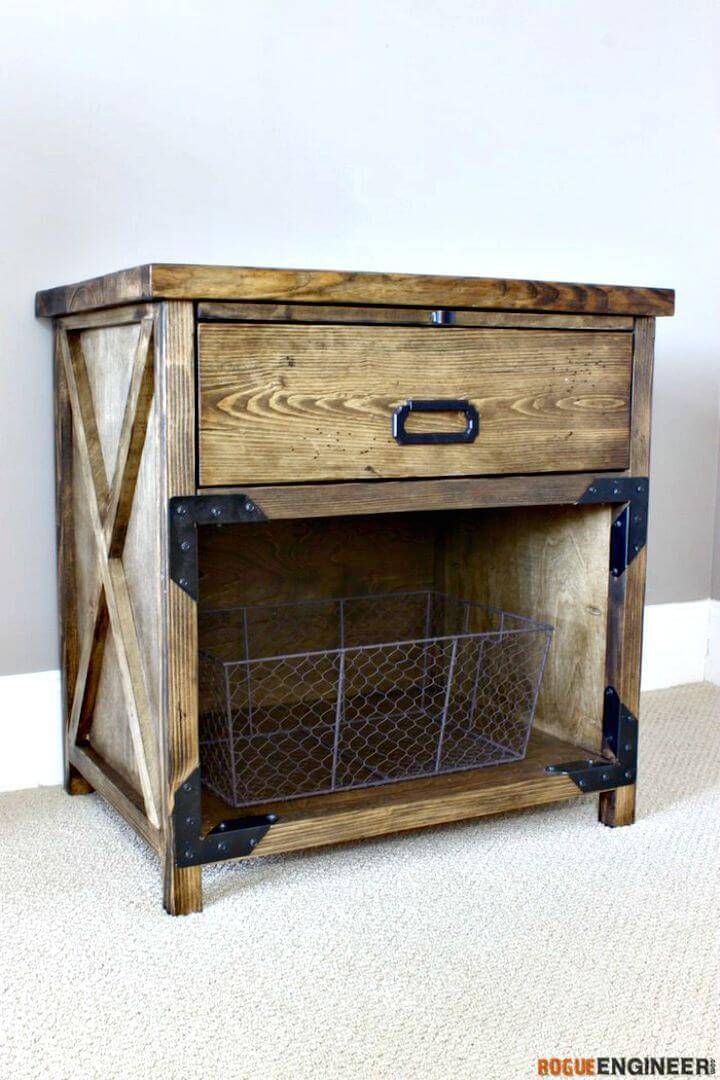
Elevate your bedroom with an inviting DIY project featuring the Simpson DIY Nightstand Plans. Simplify your space with these rustic, approachable nightstand plans that not only offer style but functional design. Perfect for DIY enthusiasts, the project outlines essential materials, cutting dimensions, and necessary steps to bring this charming furniture piece to life.
Accompanied by easy-to-follow instructions, you'll transform plywood and lumber into a practical nightstand, enriched with a warm, ash wood stain finish. Dive into this engaging woodworking adventure and build a nightstand that enhances your décor and showcases your craftsmanship.
19. DIY Sliding Barn Door Nightstand
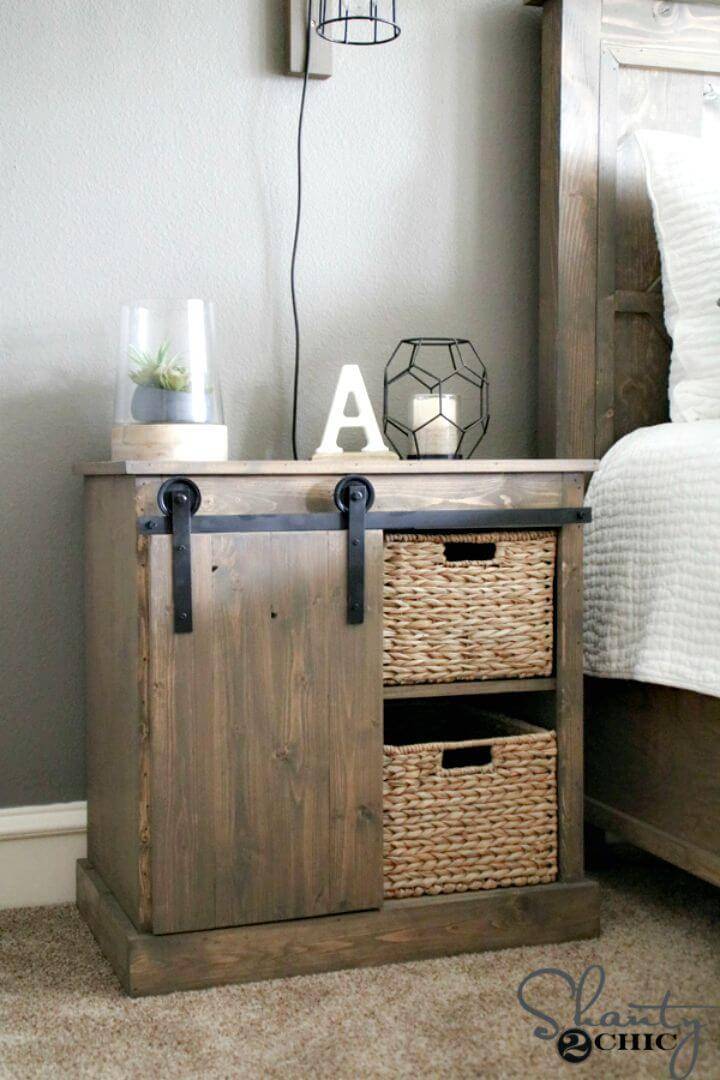
Skilled in woodworking? Our nightstand woodworking plans will guide you to craftsmanship. Revamp your bedroom with a charm and style that speaks to your personality! Dive into a delightful DIY project with our guide on constructing a Sliding Barn Door Nightstand. Perfect for adding a rustic yet modern touch to your space, this piece not only serves as a stylish decorative element but also offers practical storage solutions.
Ideal for keeping your nighttime essentials within reach while hiding away your clutter, this nightstand project is a fantastic weekend endeavor. For a comprehensive step-by-step tutorial, including free printable plans and an engaging how-to video, click on this link to Shanty-2-Chic. Ready to bring a unique touch to your bedroom? Start building today!
20. Make a Floating Storage Nightstand
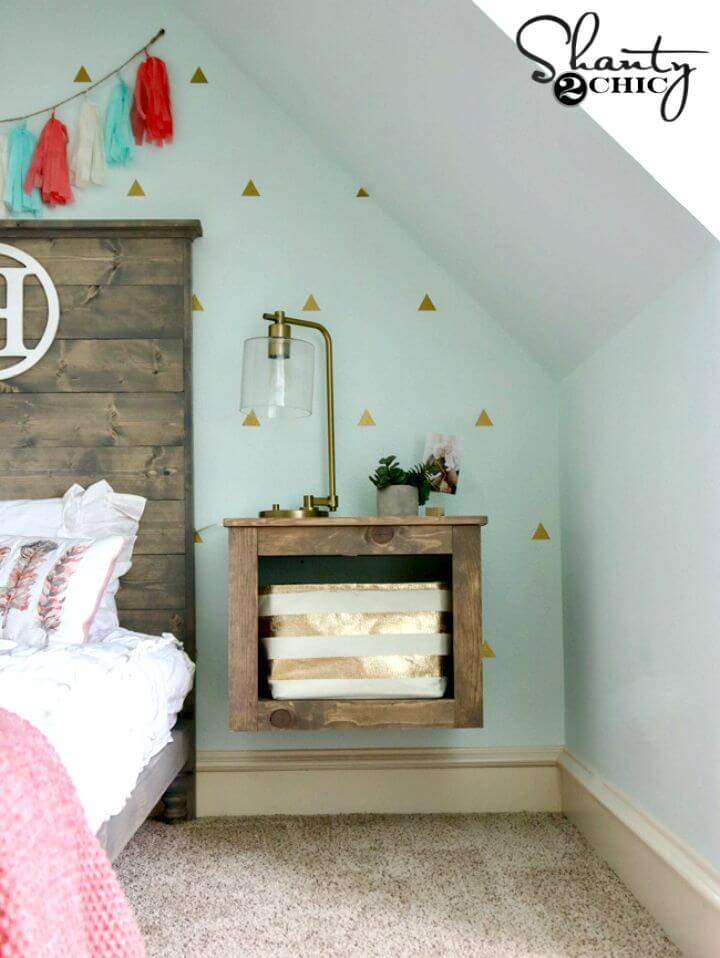
Maximize your bedroom space with an ingenious DIY Floating Storage Nightstand. Perfect for those looking to add a bit of flair and functionality to their resting area. This tutorial walks you through every step, from materials to finishing touches, ensuring a smooth process even for those less experienced in DIY projects. With detailed instructions and the option for customization, build a nightstand that not only saves space but elevates your bedroom's look. Get started and enjoy both the making and the using of this stylish and practical piece.
21. DIY Nightstand With Bun Feet
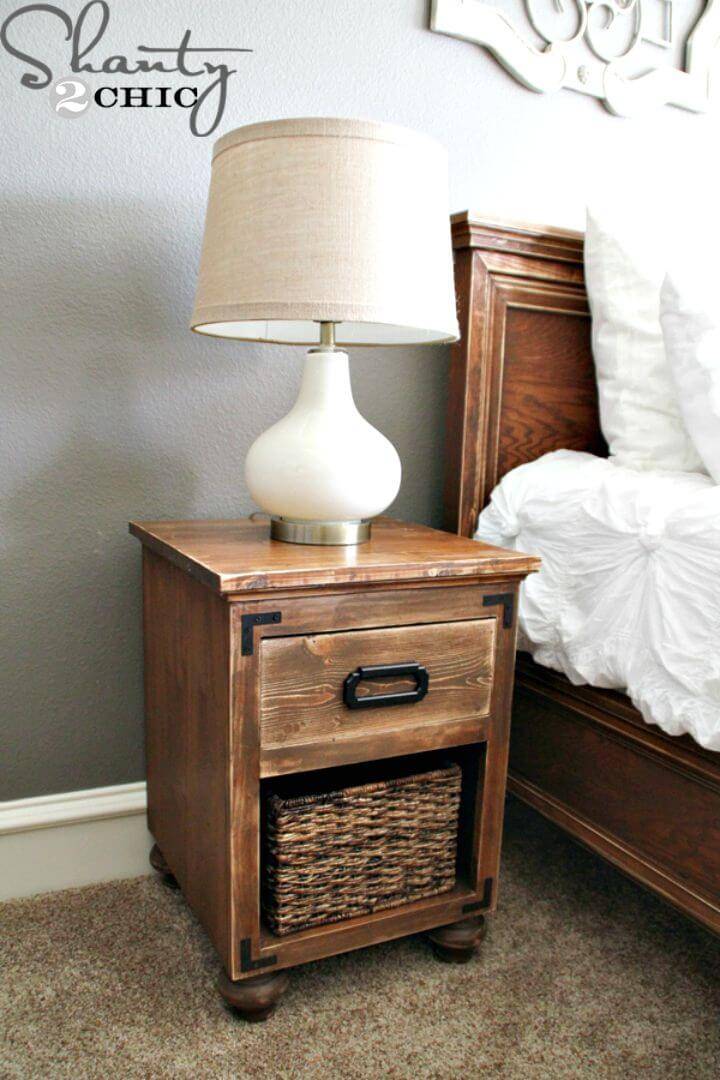
Discover DIY nightstand ideas that turn simple materials into stylish bedroom furniture. Transform your bedroom with a chic DIY Nightstand featuring elegant bun feet—a project that's both budget-friendly and deeply satisfying. Ideal for those who love to infuse their spaces with personalized touches, this easy-to-follow guide ensures you build a piece that perfectly matches your decor.
With its straightforward instructions and the charm of bun feet, this nightstand design elevates any room's aesthetic. For detailed plans and a step-by-step tutorial, visit Shanty-2-Chic. Start crafting your unique furniture piece today and revel in the transformation it brings to your space.
22. Make Your Own X Shape Nightstand
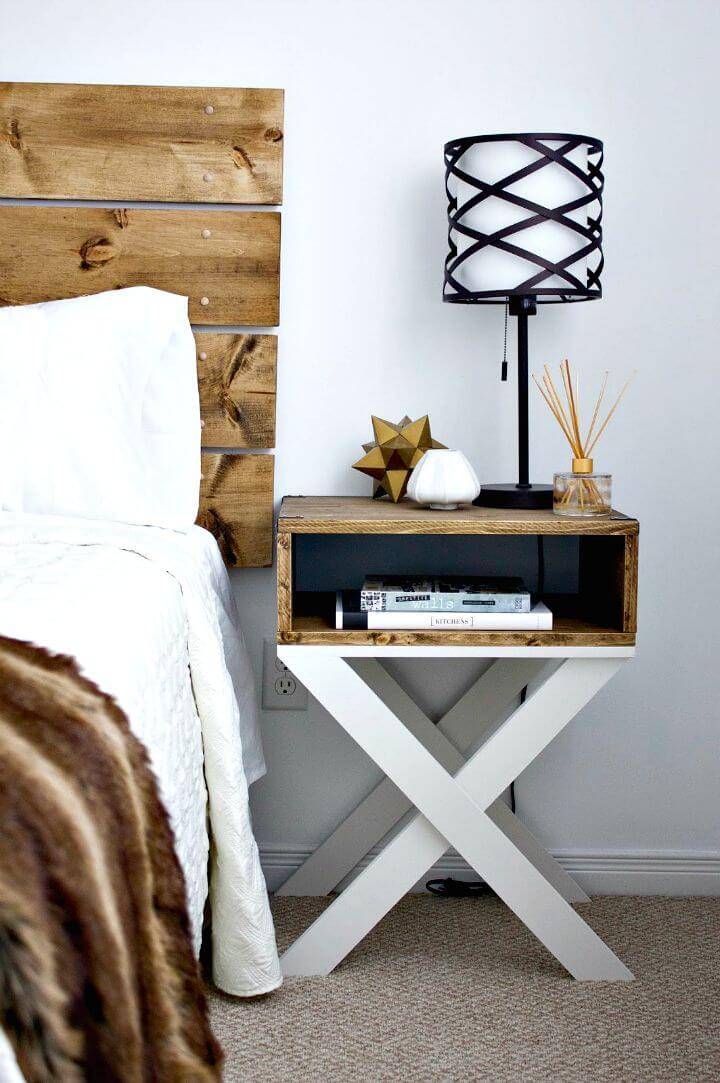
Elevate your guest bedroom with a thrilling DIY project from Brittany Stager's inspirational journey. Learn to craft exquisite X-Stand Nightstands and a captivating Headboard, perfect for adding a rustic yet chic touch to any room. This hands-on guide here breaks down the process into simple, manageable steps - from selecting the right wood and staining it beautifully, to assembling and installing your creations for a stunning finish. Perfect for DIY enthusiasts seeking to transform their space with personalized flair.
23. Yardstick Pallet Wood Night Stand Ideas
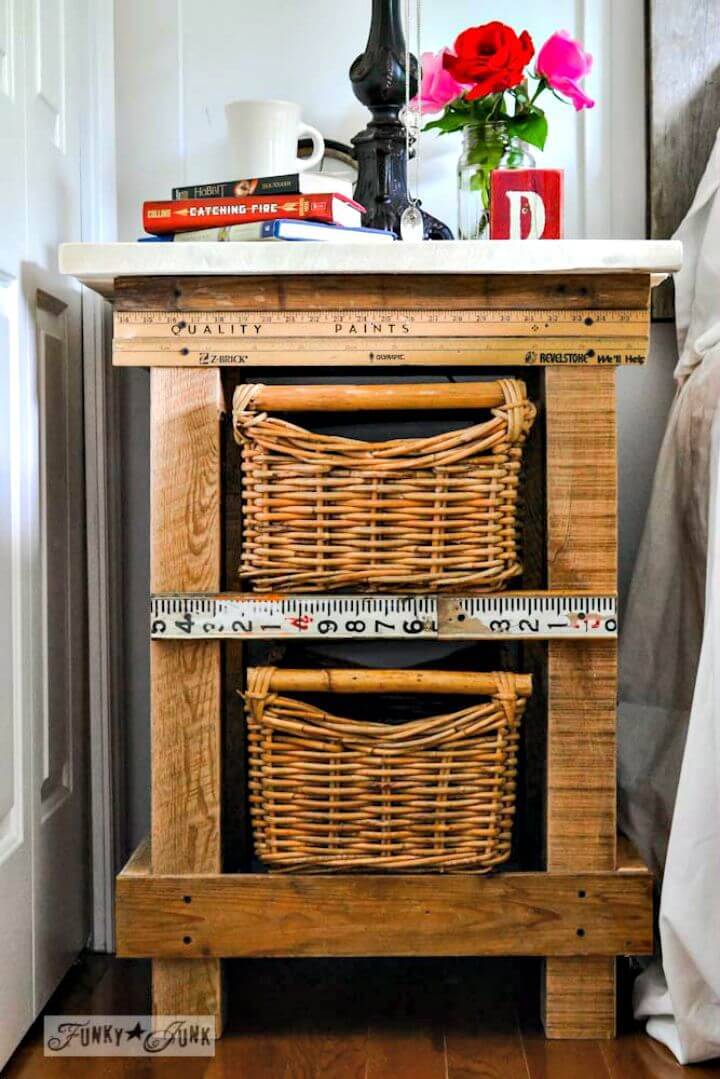
For beginners, these simple nightstand plans make it easy to create a practical piece. Transform your bedroom with a nightstand that boasts rustic charm and practicality, crafted from reclaimed pallet wood and yardsticks. This DIY project is the perfect way to add a touch of uniqueness to your space.
With detailed instructions on how to prepare the wood, construct the frame, and finish with basket drawers for storage, this guide at Funky Junk Interiors makes it easy for anyone to build a functional and stylish nightstand. Whether for your master bedroom or as a versatile piece in your living room, this project is cost-effective, customizable, and ultimately rewarding.
24. How to Build a Nightstand
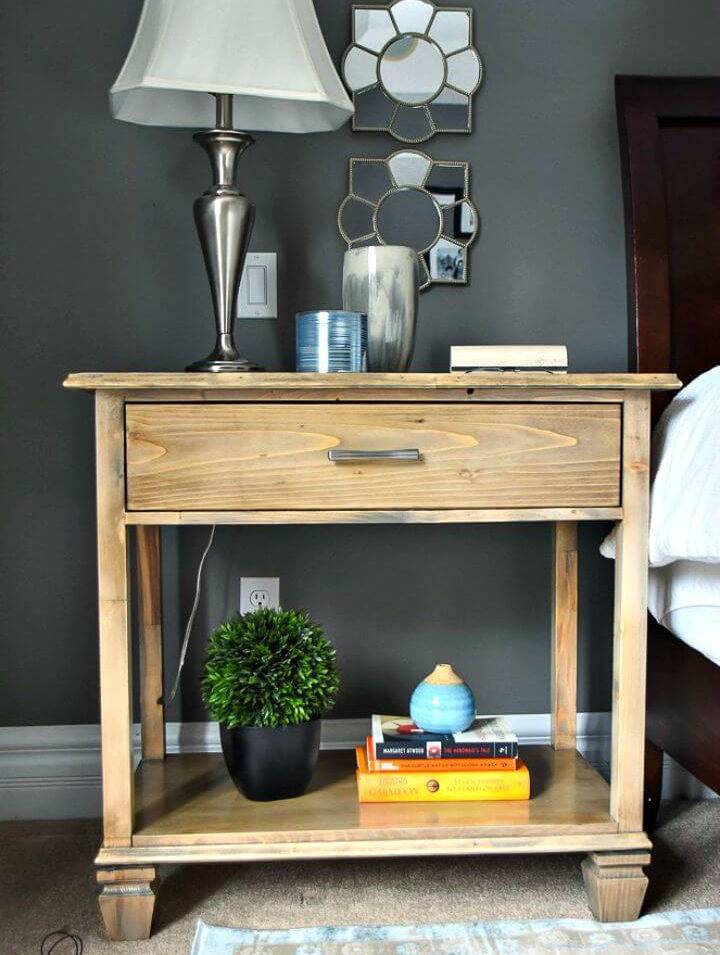
Transform your bedroom with this DIY nightstand inspired by Pottery Barn's Sausalito bedside tables. Utilizing simple plans, you can build a stylish and functional piece, perfect for holding books, decor, or even a basket for pillows.
This project offers customization, from the stain finish to drawer design, allowing a personal touch. Whether adding a single drawer for easy access or a built-in power bar for convenience, this nightstand elevates any bedroom at a fraction of the cost. Ideal for both novice and seasoned builders, dive into crafting your own nightstand today.
25. Floating Nightstand With Details Instructions
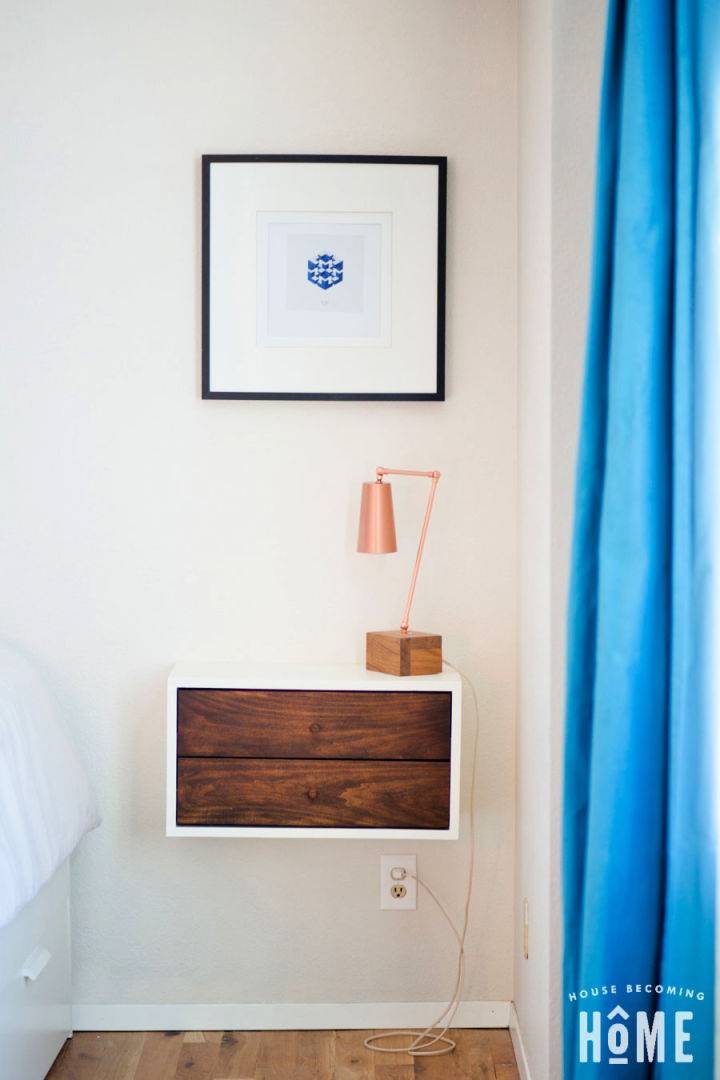
Transform your bedroom space with our easy-to-follow DIY floating nightstand tutorial! Perfect for adding a chic, space-saving solution next to your bed, this project is designed for accessibility and style. Dive into the full tutorial and instructions at Jen Woodhouse. With clear steps on crafting the nightstand shell, assembling drawers, and adding the finishing touches, you'll build a stunning piece that elevates your room's look. Equip yourself with basic tools and get started on this engaging weekend project!
26. DIY Mid-Century Style Nightstand
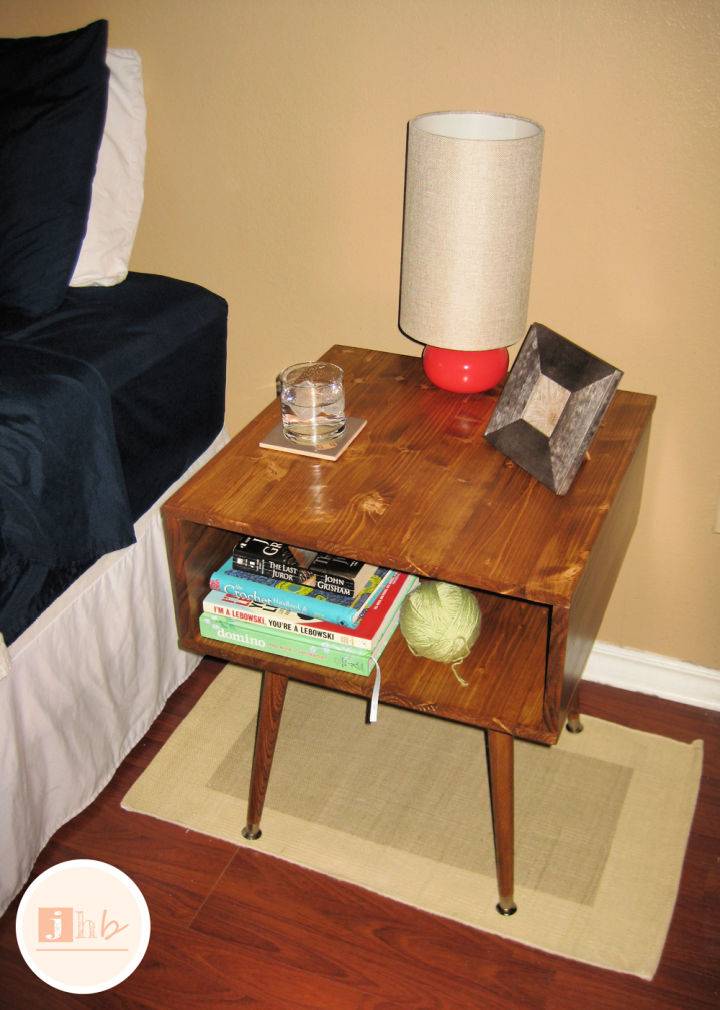
Dive into a creative journey with a DIY Mid-Century Style Nightstand project that transforms ordinary materials into a stylish piece of furniture. Learn step-by-step how to select the right tools, safely handle power equipment, and apply finishes like Danish Oil for that classic mid-century look. From planning to assembly, embrace the challenges and triumphs of DIY crafting. Perfect for anyone eager to upgrade their bedroom with a personal touch.
27. How to Make a Nightstand on Wheels
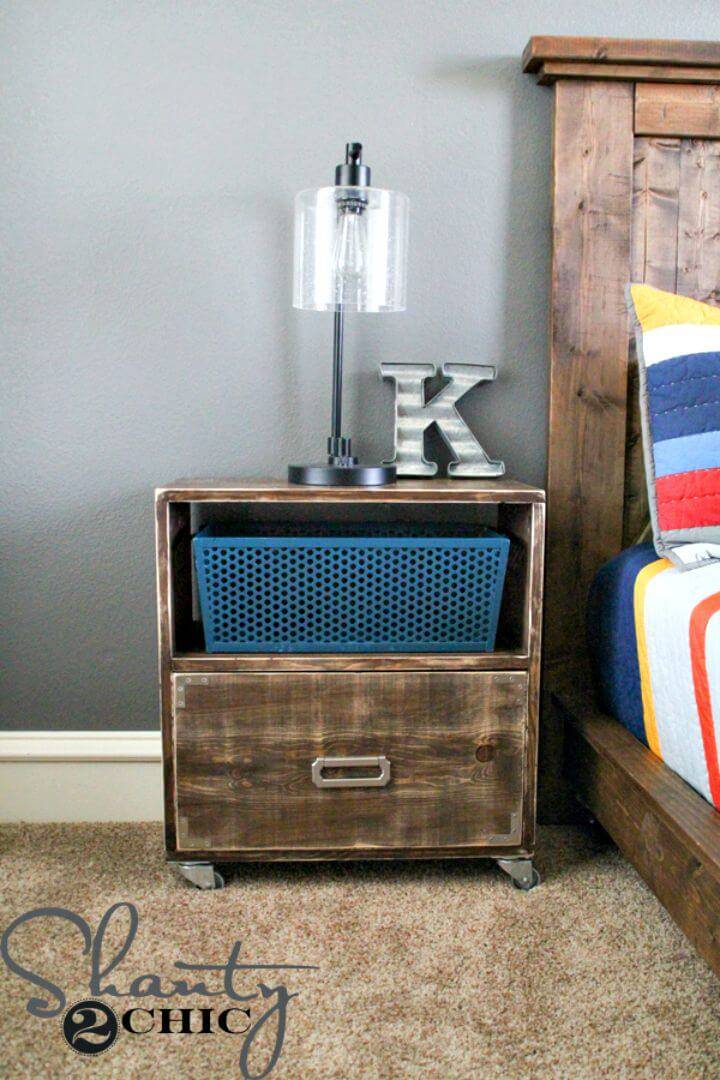
Elevate your bedroom's functionality and style with a DIY Nightstand on Wheels, a project perfect for adding a touch of rustic and industrial charm. Designed with simplicity in mind, you can build this unique piece using just five 1x12 boards, amounting to roughly $90 in lumber.
This nightstand pairs magnificently with platform beds, offering both aesthetic appeal and practical use. Follow a step-by-step guide to construct this nightstand efficiently. For detailed plans and a helpful tutorial, click here. Complete your space with a project that blends seamlessly with any decor while serving as a convenient bedside companion.
28. DIY Nightstand With Hidden Charging Station
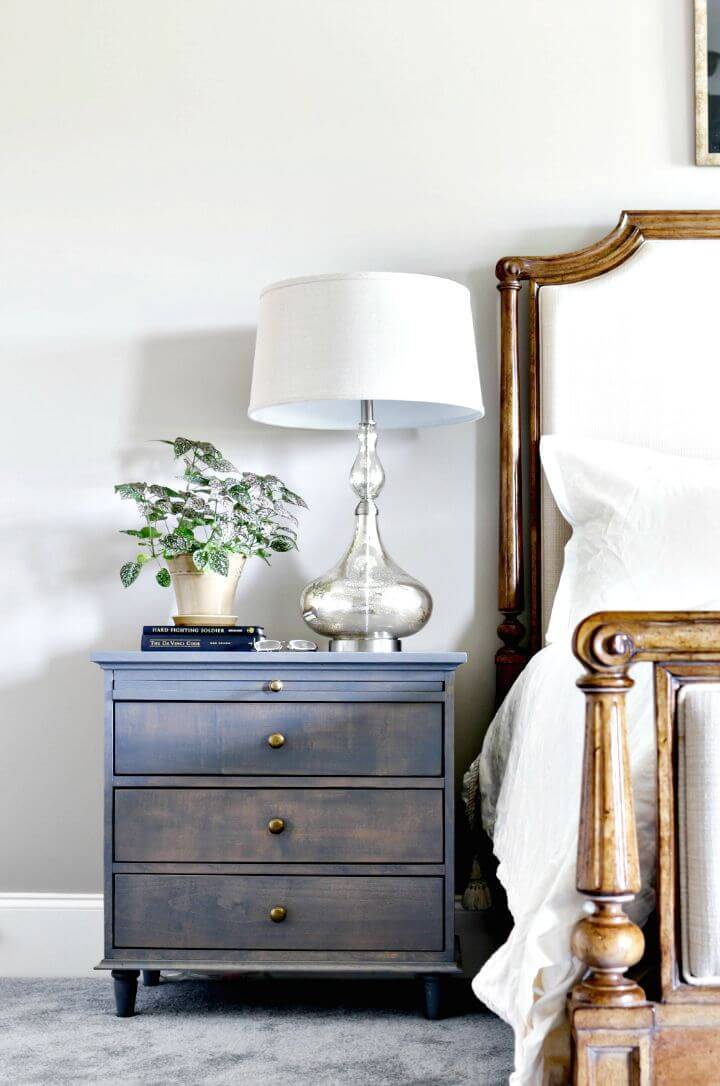
Revolutionize your bedroom with our creative and easy-to-follow DIY nightstand ideas. Elevate your bedroom functionality with a custom-made DIY nightstand featuring a charging station and pullout writing tray. Perfect for tech-savvy individuals or anyone looking to tidy up their sleeping area, this nightstand design not only enhances the aesthetics of your space but also caters to practical needs.
Learn how to integrate a clever charging solution to keep devices powered and organized, all while adding personalized charm to your room. Full instructions and inspirational ideas await at Jen Woodhouse's blog. Dive in and transform your bedside area with this engaging project.
29. Rustic Cargo Nightstand Design
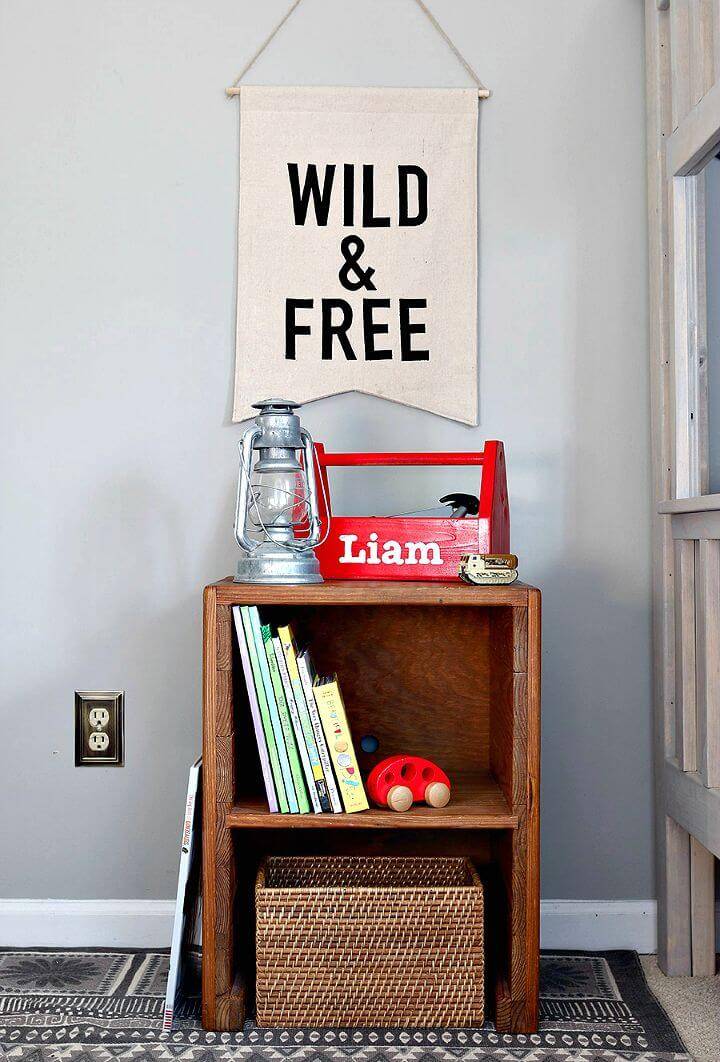
Elevate your bedroom decor with a DIY Rustic Nightstand that blends charm and functionality. Ideal for crafters of all skill levels, this project requires basic tools and materials readily available at your local hardware store. Follow our step-by-step guide for a cost-effective, stylish addition to your nighttime oasis. For detailed plans and a creative venture that promises to refine your space, click here. Happy building!
30. Simple Rustic Square Bedside Table
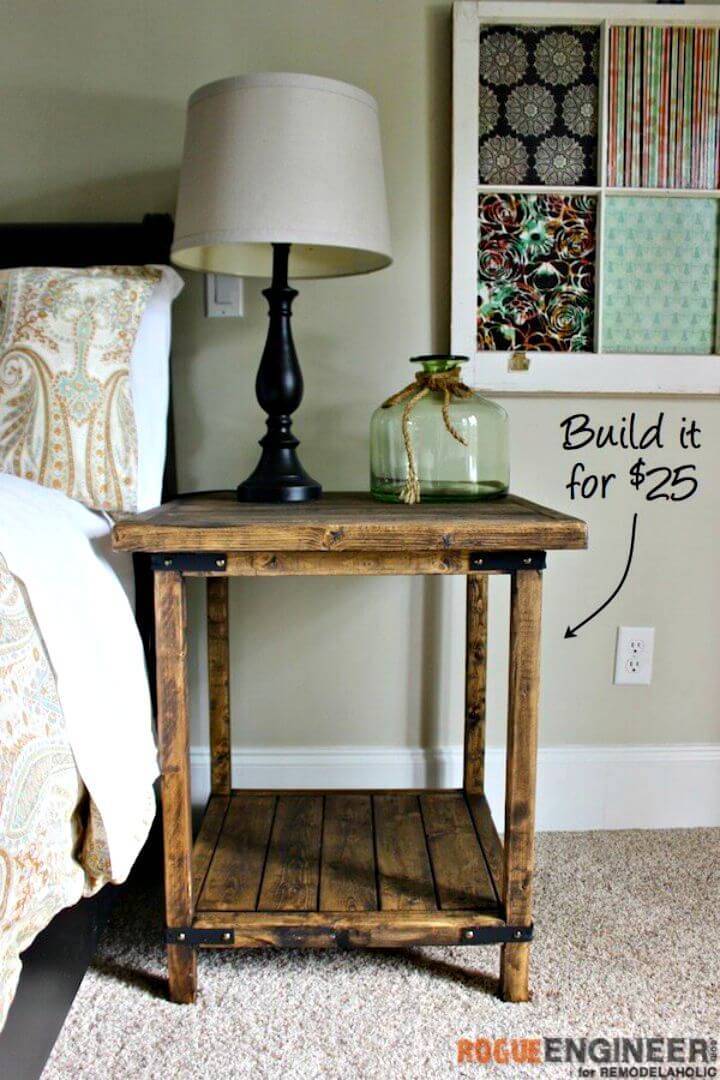
Transform your space with unique and budget-friendly cheap nightstand ideas. Unlock the joy of DIY furniture with our Simple Square Side Table plans. Perfect for DIY newcomers, this project lets you craft a charming rustic bedside table for less than $25.
Dive into the rewarding world of handmade furniture with this straightforward guide, making your start smoother with a piece both practical and stylish. Engage in this hands-on project and transform raw materials into a unique table that adds a touch of coziness to any room.
Conclusion:
In conclusion, our guide on 30 simple DIY nightstand plans has provided you with all the necessary steps and tips to embark on the journey of building your own bedside table. From choosing the right materials to the step-by-step guide on assembly and finishing, we've covered everything to ensure your DIY project is a success. Moreover, we've answered some frequently asked questions to tackle any uncertainties you might face along the way. Building a DIY nightstand not only gives a personal touch to your bedroom but also offers the satisfaction of making something beautiful and functional with your own hands.


