Ever since I started using fountain pens, I've cherished notebooks like rare antiques. The joy of writing in them is unparalleled, but there's always been a nagging concern about protecting the delicate pages. Not long ago, I stumbled upon the idea of making a DIY notebook cover, and it has transformed my relationship with my stationery.
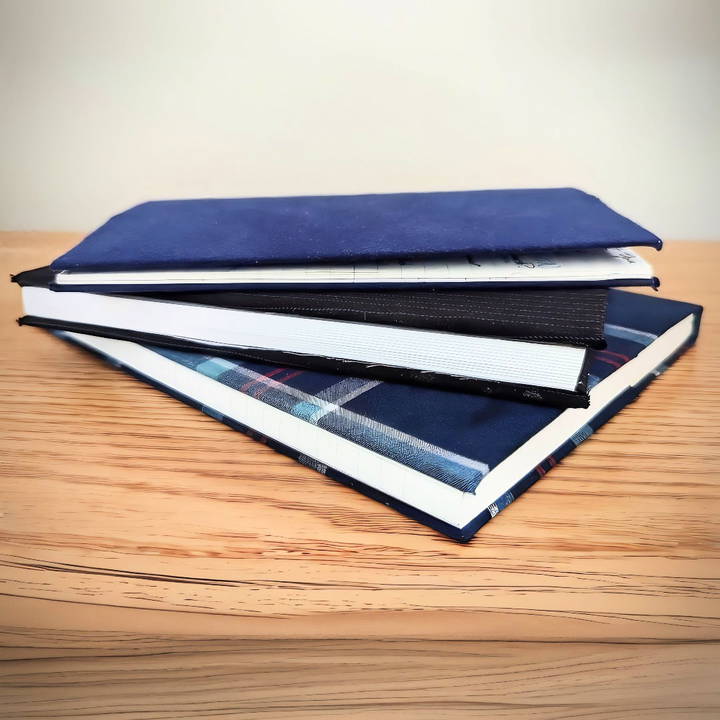
Today, I'm thrilled to guide you through making your slipcover using materials you likely have at home. It won't just protect your notebooks; it'll add a touch of personality to them as well. Let's dive into this creative journey!
Materials Needed and Their Importance
Before we dive into the actual steps, let's go over the materials you'll need and why each is crucial for the slipcover's success:
- Cardboard (preferably from cereal boxes): Cardboard serves as the base, providing structure to the slipcover. Cereal boxes are commonly available, lightweight, and durable enough for this purpose.
- Fabric (an old shirt or pajamas): The fabric is what you'll see on the outside of your slipcover. It adds aesthetic value and offers an extra layer of protection to your notebook.
- Glue (standard white or wood glue): Glue is essential for adhering the fabric to the cardboard, ensuring a snug fit that won't peel off easily.
- Scissors and a Knife: You'll need scissors for cutting the fabric and the cardboard and a knife to make precise cuts on the cardboard for folds.
- Straight Edge (like a ruler): This helps ensure your lines are straight when marking measurements on the cardboard or fabric.
- Pencil: A pencil is for making marks and outlines, a subtle tool to guide your cutting and gluing without leaving permanent marks.
Step by Step Instructions
Learn how to make a DIY notebook cover with step-by-step instructions, from prepping materials to adding personal touches. Perfect for personalized notebooks!
Prepping Your Materials
Learn how to prep your materials, choose and cut cardboard, and select the best fabric with our comprehensive guide. Get started today!
Choosing and Cutting Your Cardboard
My first task was to scavenge for suitable cardboard. Cereal boxes soon became my best friend due to their ideal thickness and ready availability. Lay out your box flat, taking note of any creases. Use these pre-existing creases as folding points to simplify the process.
- Action Step: Use your pencil and straight edge to trace a line where your notebook's spine will be. This will serve as a natural hinge.
Selecting Your Fabric
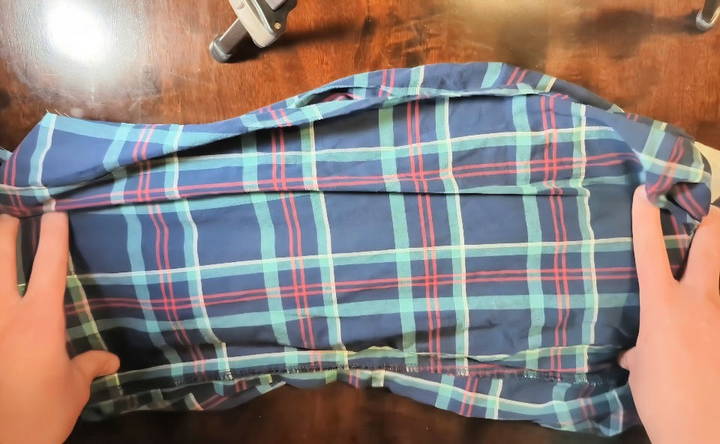
Next, I raided my old clothes for fabric worthy of a new life. An old pair of plaid pajamas caught my eye—just the right blend of quirky and classy. You want a piece of fabric large enough to cover both the outside and inside flaps of your slipcover.
- Action Step: Lay your cardboard on the fabric, adding an extra inch all around to ensure it wraps comfortably.
Building the Structure
Building the structure covers making the framework and gluing the basics for a solid construction foundation. Learn essential steps today!
Making the Framework
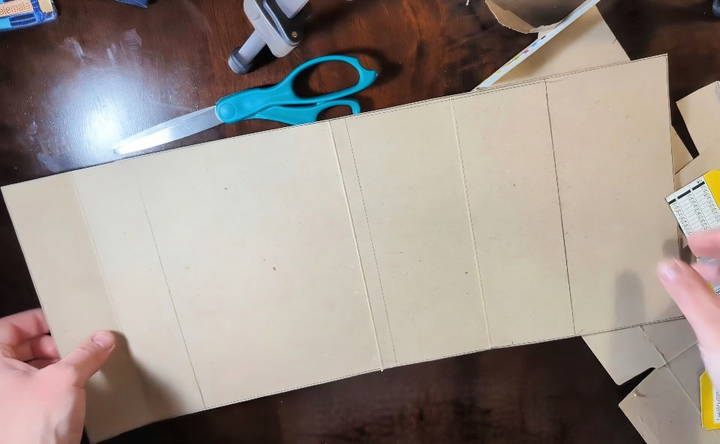
- Trace and Cut: Using your notebook as a guide, trace its outline onto the cardboard, leaving about a millimeter margin to allow easy insertion and removal. Remember to include extensions in this tracing for the cover flaps.
- Folding Edges: Use the knife to gently score the cardboard along the spine and edges—just enough to help with folding but not deep enough to cut through.
Gluing the Basics
Position your cardboard on your fabric. Evenly apply glue on one side of the cardboard, then press this side onto the middle of your fabric piece. Make sure it's stuck well and let it sit for a bit to begin drying.
Adding the Flaps
Learn how to add fabric flaps and complete the final gluing steps for your project. Perfect for DIY enthusiasts and craft lovers.
Cutting the Fabric Flaps
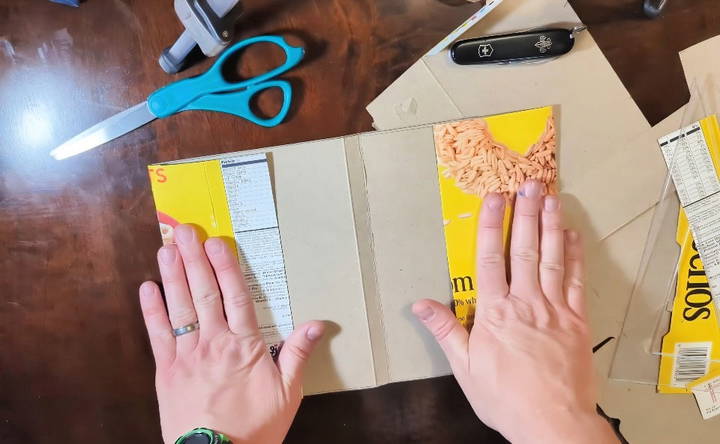
As you prepare to fold the fabric over the cardboard, trim any excess fabric to prevent too much bulk. Trim off the corners at an angle so you don't end up with overlapping layers that are difficult to glue down.
Final Gluing Steps
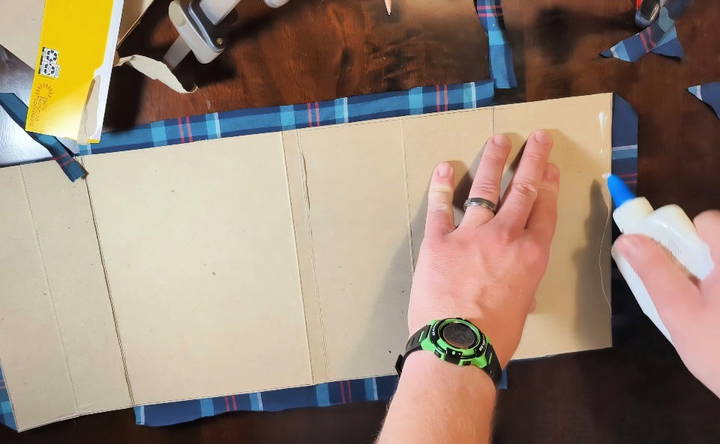
- Side Flaps: Apply glue along one of the longer edges of the cardboard and fold the fabric over tightly. Repeat on the opposite edge.
- Top and Bottom: For the shorter edges, apply glue and fold the fabric similarly, ensuring any rough edges are securely tucked in.
Assembly and Finishing
Ensure a perfect assembly and finishing. Learn to make a snug fit, troubleshoot common issues, and add personal touches for a flawless finish.
Making a Snug Fit
Once the glue has dried, test your slipcover by inserting a notebook. When I did this with my Midori notebook, I discovered the snug fit was perfect. It's important here to trim any fabric causing obstruction.
Troubleshooting Common Issues
- Loose fit: Consider cutting a bit more cardboard or refitting the fabric.
- Excess glue: Wipe away any spills quickly to avoid staining.
Personal Touches
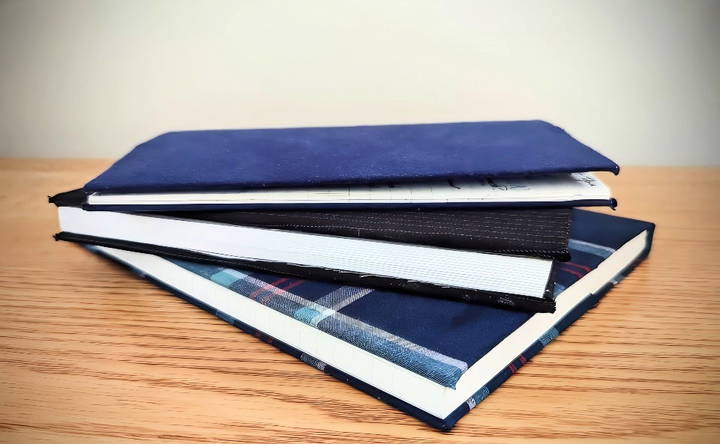
The best thing about DIY projects? Personalization. I appreciated the freedom to choose any fabric pattern I wished, making my notebook truly unique. You could add pockets or use fabric paint to add that extra touch of personality.
Taking It Further
Learn how to experiment with styles and maintain your slipcover with our expert tips in the "taking it further" section. Perfect your home decor today!
Experiment with Styles
After my first success, I ventured into making a hardcover version using stiffer cardboard. Each type of slipcover added unique functionality and personality to my notebooks—my personal library began to feel like an eclectic art collection.
Maintaining Your Slipcover
Make sure your slipcover remains in prime condition. With a fabric protector spray, you can ward off stains and water damage. If your slipcover shows signs of wear, don't hesitate to recycle it and make a new one. The creation process is half the fun!
Customization Tips
Customizing your DIY notebook cover is a fun and creative process. Here are some easy-to-follow tips to help you make your notebook cover unique and personal.
Choose Your Materials
- Fabric: Use old clothes or fabric scraps. They add texture and color.
- Paper: Scrapbook paper, wrapping paper, or even old maps work well.
- Leather: For a professional look, use leather or faux leather.
Add Personal Touches
- Stickers and Decals: Use stickers that reflect your interests. You can find them in craft stores or online.
- Paint and Markers: Draw or paint your designs. Acrylic paint and permanent markers work best.
- Photos and Prints: Print your favorite photos or designs and glue them onto the cover.
Use Embellishments
- Ribbons and Lace: Add a touch of elegance with ribbons or lace. Glue them along the edges or make patterns.
- Buttons and Beads: Sew or glue buttons and beads for a 3D effect.
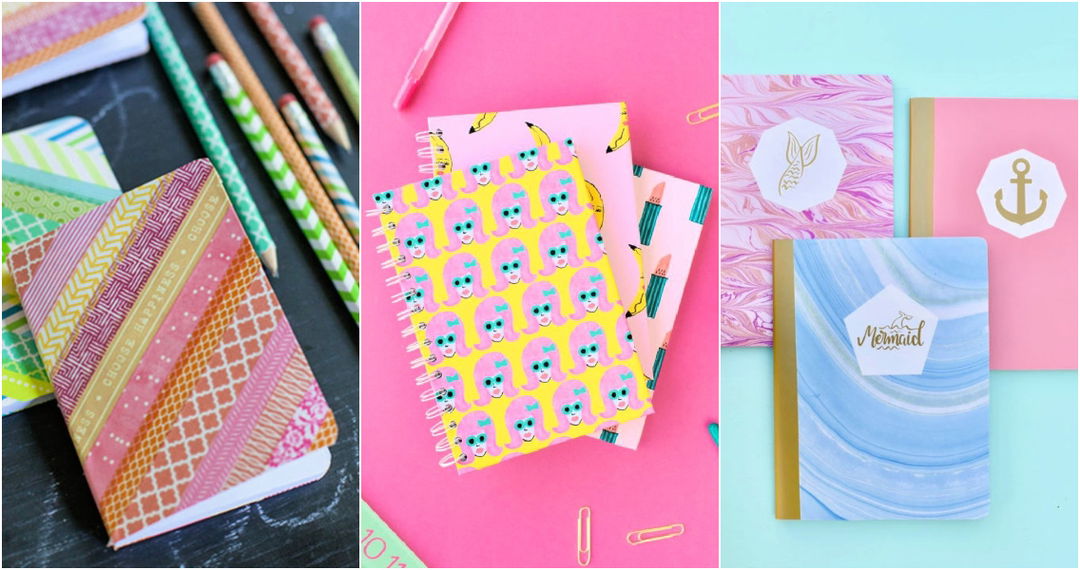
- Washi Tape: This decorative tape comes in many colors and patterns. Use it to make borders or designs.
Incorporate Textures
- Embroidery: If you enjoy sewing, try embroidering a design onto fabric covers.
- Foam and Felt: These materials add a soft, tactile element. Cut them into shapes and glue them on.
- Glitter and Sequins: For a sparkly effect, add glitter or sequins. Use glue to secure them.
Personalize with Names and Initials
- Stencils: Use stencils to add your name or initials. Paint or trace over them for a clean look.
- Handwriting: Write your name in your handwriting for a personal touch. Use a permanent marker or paint pen.
- Monograms: Make a monogram using stickers or cut-out letters.
Experiment with Different Styles
- Minimalist: Keep it simple with clean lines and a few embellishments.
- Vintage: Use aged paper, lace, and muted colors for a vintage look.
- Modern: Bright colors, geometric patterns, and bold designs give a modern feel.
Protect Your Design
- Laminating: Laminate the cover to protect it from wear and tear.
- Clear Contact Paper: Cover your design with clear contact paper for a durable finish.
- Sealants: Use a spray sealant to protect painted or drawn designs.
Mix and Match
- Combine different materials and techniques. For example, use fabric and paper together or add both paint and stickers.
- Experiment with layering. Start with a base material and add layers of embellishments.
By following these tips, you can make a notebook cover that is truly your own. Have fun and let your creativity shine!
Troubleshooting Common Issues
Making DIY notebook covers can be a fun and rewarding project, but sometimes things don't go as planned. Here are some common issues you might encounter and how to solve them.
Materials Not Sticking
- Problem: Glue or adhesive not holding materials together.
- Solution: Use a stronger adhesive like hot glue or fabric glue. Make sure surfaces are clean and dry before applying glue. For paper, try using double-sided tape or a glue stick.
Cover Not Fitting Properly
- Problem: The cover is too tight or too loose.
- Solution: Measure your notebook carefully before cutting materials. Leave a small margin around the edges to ensure a good fit. If the cover is too tight, gently stretch the material. If it's too loose, trim the excess and re-glue.
Wrinkles and Bubbles
- Problem: Wrinkles or air bubbles appear under the cover material.
- Solution: Smooth out the material as you apply it, working from the center outward. Use a ruler or a flat tool to press out bubbles. For stubborn wrinkles, gently lift the material and reapply it.
Edges Peeling
- Problem: Edges of the cover start to peel away.
- Solution: Apply extra adhesive to the edges and press firmly. Use clips or weights to hold the edges in place until the glue dries. For fabric covers, consider sewing the edges for added durability.
Design Smudging or Fading
- Problem: Paint, ink, or other designs smudge or fade over time.
- Solution: Use sealants like clear spray paint or Mod Podge to protect your designs. Allow the design to dry completely before handling. For ink, use permanent markers or pens designed for fabric or paper.
Cover Warping
- Problem: The cover material warps or bends.
- Solution: Use thicker materials that are less likely to warp. Store your notebook flat and avoid exposing it to moisture. If warping occurs, place the notebook under a heavy object to flatten it.
Difficulty Cutting Materials
- Problem: Materials are hard to cut cleanly.
- Solution: Use sharp scissors or a craft knife. For thicker materials, use a cutting mat and a rotary cutter. Mark your cutting lines clearly and cut slowly to ensure accuracy.
Adhesive Showing Through
- Problem: Glue or adhesive is visible through the cover material.
- Solution: Use a thin, even layer of adhesive. For transparent materials, use clear glue. Test the adhesive on a small piece of material first to see how it looks.
Cover Getting Dirty
- Problem: The cover gets dirty or stained easily.
- Solution: Choose materials that are easy to clean, like laminated paper or coated fabric. For fabric covers, consider using a fabric protector spray. Clean the cover regularly with a damp cloth.
By addressing these common issues, you can ensure your DIY notebook cover looks great and lasts a long time.
FAQs About DIY Notebook Covers
Discover answers to common questions about DIY notebook covers. Learn tips, materials, and techniques to make your notebook unique and creative.
First, open your notebook flat and measure its height and width. Add an extra inch to each side for folding over the edges. Mark these measurements on your chosen cover material (paper or fabric) and cut it out. This ensures the cover will fit snugly and securely.
There are countless design ideas for DIY notebook covers, including:
Fabric covers: Use colorful or patterned fabric for a soft, durable cover.
Collage covers: Combine photos, magazine clippings, and stickers for a unique look.
Painted covers: Paint your own designs or patterns directly onto the cover material.
Themed covers: Make covers based on your favorite themes, like nature, travel, or hobbies.
Absolutely! Reusing old materials is a great way to make your DIY notebook cover more eco-friendly. You can use:
Old fabric scraps
Leftover wrapping paper
Magazine clippings
Recycled cardboard for added sturdiness
This not only saves money but also reduces waste
To make a waterproof notebook cover, follow these steps:
Choose a waterproof material like vinyl or laminated fabric.
Measure and cut the material to fit your notebook, adding an extra inch for folding over the edges.
Attach the cover using strong adhesive or double-sided tape.
Seal the edges with clear tape to ensure no water can seep in.
Here are some tips to make your notebook cover stand out:
Layering: Combine different textures and materials for a unique look.
Personalization: Add your name, initials, or favorite quotes.
Themes: Stick to a theme like floral, geometric, or vintage for a cohesive design.
Mixed media: Use a mix of paint, fabric, stickers, and other embellishments to make depth and interest.
Conclusion
Now, I feel ready to see how my notebooks can have their own character. With these easy steps, you can make your own unique DIY notebook cover, too.


