Revamping an old camper can be an exciting and cost-effective way to build a personalized and cozy space. An old camper remodel allows you to inject your unique style into every inch of the vehicle, making it feel like a home away from home. By focusing on an interior camper remodel, you can maximize space and functionality without breaking the bank.
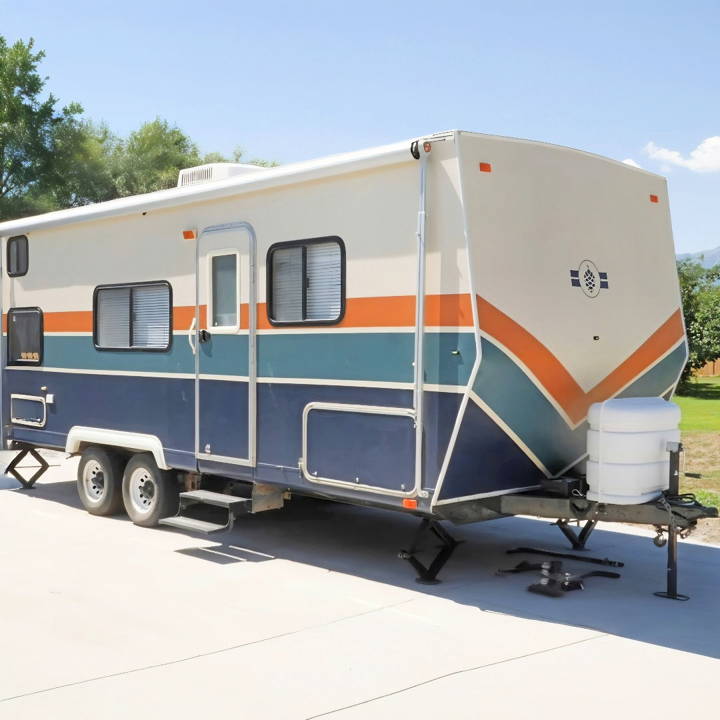
Exploring ideas for an old camper remodel can transform a dated interior into a practical and appealing space. Simple updates like new paint, modern fixtures, and clever storage solutions can make a big difference.
Materials Needed and Why
- Cleaning Supplies: Essential for wiping away years of grime and preparing the surface for renovation.
- Paint: Used for updating the interior and exterior, specifically chosen colors to enhance the retro look.
- Hardware: Replacing old cabinet hardware to modernize and add character.
- Tile Backsplash: To replace the deteriorating plastic behind the oven, ensuring a more durable and aesthetically pleasing kitchen area.
- Leather Material: For wrapping around window frames, replacing the outdated floral wallpaper and for crafting a unique, chic headboard.
- Concrete Backer Board: Applied to areas of deteriorated plywood, particularly behind the oven, to provide a sturdy base for the tile backsplash.
- Angle Aluminum: To repair the seams on the trailer's exterior, ensuring a leak-proof structure.
- RV Lock: An upgraded locking system for added convenience and security.
- Awning: To provide ample shade and enhance the trailer's exterior aesthetics.
Step by Step Instructions
Transform your old camper with our step-by-step instructions on DIY camper remodels. Easy, affordable, and perfect for a fresh new look!
1. Clean Thoroughly
The initial step involved a deep clean of the interior. This wasn't just about aesthetics; it allowed us to assess what needed fixing or replacing, such as the water heater, which required significant attention.
2. Interior Makeover
Removing the outdated wallpaper and painting the cabinets significantly brightened the space. We chose a burberry blue for the bed area cabinets and a stucco tan for the rest, adding dark hardware for contrast. The bathroom door received a unique treatment with a maple glaze paint and tan stripes, embracing the '70s vibe we were aiming for.
3. Functional Upgrades
The oven area needed a functional upgrade due to a melting plastic piece. After addressing the deteriorating plywood with a concrete backer board, we added a tile backsplash that not only solved the issue but also enhanced the kitchen's look.
4. Window and Headboard Wrapping
The floral wallpaper around the windows was an eyesore, so we replaced it with leather material. This material also inspired us to build a leather headboard, adding a bespoke element to the bedroom area.
5. Water Heater Repair
With some elbow grease, cleaning, and a replacement plug ordered from Amazon, we revived the malfunctioning water heater, a testament to the importance of troubleshooting before replacing.
6. Exterior Transformation
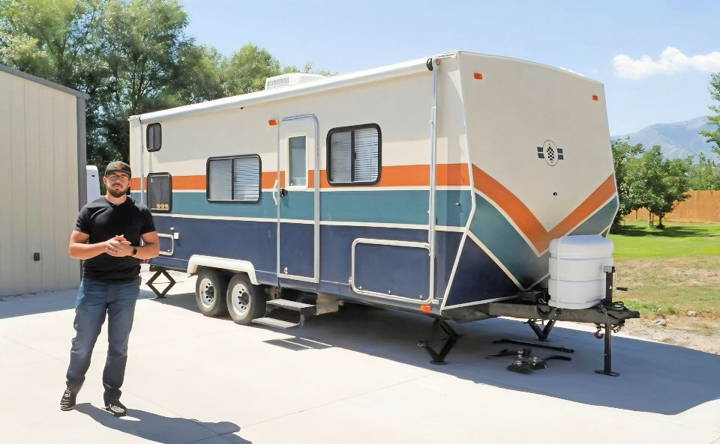
Removing old decals was the first step in the exterior makeover. Then, we repaired damaged seams with angle aluminum for a stronger seal. Painting was the most transformative step, with carefully chosen colors that aligned with the retro theme.
7. Awning Installation
Installing a new awning provided not just shade but also became a statement piece that tied the whole retro look together.
Challenges and Solutions
One major challenge was dealing with the deteriorating plywood behind the oven. The concrete backer board solution provided not only a functional fix but also a better surface for the backsplash, demonstrating that sometimes, problems can become opportunities for improvement.
Technology Integration in Camper Vans
In camper van remodels, modern tech isn't just trendy; it transforms and enhances travel. New advancements add convenience, efficiency, and luxury to life on the road. Here's how to modernize your camper van with the latest tech:
- Smart Connectivity Imagine controlling your van's lighting, temperature, and security systems with just a tap on your smartphone. Smart technology integration means you can manage these aspects remotely, ensuring comfort and safety.
- Eco-Friendly Power Solutions Solar panels and lithium batteries are now more efficient than ever, allowing you to harness the sun's power for your energy needs. This sustainable approach not only reduces your carbon footprint but also ensures off-grid capabilities.
- Modular and Convertible Designs Space is a premium in camper vans. Modular designs offer the flexibility to transform your living area to suit different needs, from a cozy bedroom to a mobile office, all while maximizing space utilization.
- High-Tech Kitchens and Appliances Equipping your camper with high-end kitchen appliances powered by 12v systems means you can enjoy hot meals and the comforts of home cooking, no matter where you park.
- Off-Road Capabilities For the intrepid explorer, upgrading your camper with off-road features opens up new horizons. Tackle challenging terrains and find peace in secluded spots, away from the hustle and bustle.
- Customization at Its Best Your camper van should reflect your personality and lifestyle. With custom tech options, you can tailor your space to include the gadgets and features that matter most to you.
Embracing these tech innovations, your camper van remodel will reflect your style and the promise of modern tech.
Troubleshooting Common Issues
When remodeling an old camper, you're bound to encounter a few hiccups along the way. Here's a guide to troubleshooting some of the most common issues you might face, presented in a clear and straightforward manner.
- Leaks and Water Damage Water is the enemy of any vehicle, especially campers. If you find a leak, address it immediately to prevent mold and structural damage. Seal any cracks with a high-quality sealant and replace damaged seals around windows and doors.
- Electrical System Faults Electrical problems can range from a blown fuse to more complex wiring issues. Always check your fuses first, and if the problem persists, consult a professional. Remember, safety first—don't tackle electrical issues if you're not confident.
- Appliance Malfunctions If an appliance isn't working, ensure it's connected properly and the power source is functioning. For gas appliances, check the gas lines and connections. Sometimes, a simple reset can solve the problem.
- Structural Integrity Over time, the frame and body of a camper can weaken. Inspect the structure regularly for rust or damage, and reinforce any weak spots. Use appropriate materials designed for vehicle repair.
- Heating and Cooling Systems A comfortable temperature is crucial. If your heating or cooling system isn't working, clean all filters and vents first. If the issue isn't resolved, it may be time to upgrade to a more efficient system.
- Plumbing Issues Clogs and leaks in the plumbing system are common. Use a plunger or a plumber's snake to clear blockages, and tighten any loose fittings to stop leaks. Regular maintenance is key to preventing plumbing problems.
Keep these tips in mind, tackle issues as they come, and your camper remodel will go smoothly. When in doubt, consult a professional.
Maintenance and Upkeep
Keeping your camper in top condition is crucial for ensuring many years of joyful adventures. Here's a straightforward guide to maintaining and caring for your remodeled camper:
- Regular Cleaning: Keep both the interior and exterior of your camper clean. Use gentle, appropriate cleaners for different surfaces. Regular cleaning prevents the build-up of dirt and grime that can cause damage over time.
- Check Seals and Seams Inspect the seals around windows, doors, and the roof regularly. Look for cracks or gaps where water could enter and reseal as necessary to prevent leaks.
- Tire Maintenance Check your tires before every trip for proper inflation, and look for signs of wear or damage. Remember, tires also age, so replace them every five to six years regardless of tread life.
- Battery Care: If your camper has been sitting idle, make sure to charge the batteries before you head out. Also, keep the battery terminals clean to ensure a good connection.
- Appliance Checks: Test all appliances periodically to make sure they're in working order. This includes the stove, refrigerator, heating, and cooling systems.
- Plumbing System: Drain and flush the water system, especially if your camper won't be used for a while. This helps prevent freezing and the growth of bacteria.
- Roof and Exterior Inspection: Look over the roof and exterior walls for any damage, especially after a long trip or extreme weather. Address any issues promptly to avoid more extensive repairs later.
By following these simple steps, you'll keep your camper ready for the road and extend its lifespan, ensuring that every trip is as enjoyable as the first.
FAQs About DIY Old Camper Remodel
Explore answers to FAQs about DIY old camper remodels, covering costs, materials, tips, and more to revamp your vintage RV efficiently.
Starting your remodel begins with assessing the condition of the camper. Check for structural damages, water damage, and mechanical issues. Make a clear plan that includes your design preferences, functional needs, and budget. It's also important to consider the weight capacity and distribution to ensure safety on the road.
To keep costs low, focus on cosmetic changes that have a big impact, like painting, using contact paper for countertops, or adding peel-and-stick tiles for the backsplash. Look for second-hand materials on platforms like Craigslist or at local Habitat for Humanity ReStores. DIY projects, such as building a wood plank headboard from pallet wood, can also save money.
Removing half of a dinette booth can open up the living space. Consider multi-functional furniture that can serve as storage. Wall-mounted fixtures and fold-down tables or desks can also help utilize space efficiently. Adding shelves where the microwave used to be can provide extra storage for food and appliances.
Many aspects of a camper remodel can be DIY-friendly, especially if you have some basic tools and a willingness to learn. Tasks like painting, flooring, and decorating can be done on your own. However, for electrical, plumbing, or structural work, it's wise to consult a professional to ensure safety and proper functionality.
To give your camper a modern touch, consider upgrading fixtures like faucets and light fixtures. Technology upgrades, such as installing USB outlets or a digital thermostat, can also modernize your space. Use contemporary color schemes and textures to give the interior a fresh and current look.
Final Thoughts
In conclusion, a DIY old camper remodel on a budget can transform your travel experience. By focusing on an old camper remodel, you can achieve a charming and functional space. A thoughtful interior camper remodel not only enhances aesthetics but also comfort.


