Making a DIY ottoman can transform your living space, adding both a functional and aesthetic touch. These versatile pieces serve as footrests, extra seating, and even as coffee tables, making them an invaluable addition to any room. With 25 unique DIY ottoman ideas, you have a wide array of designs to choose from, ensuring you can find the perfect match for your home decor and personal style. The process of making an ottoman may seem daunting, but with the right guidance, it's an accessible project for anyone.
The journey to making your own ottoman starts with understanding the necessary materials and tools, followed by step-by-step instructions that guide you through the process from start to finish. Whether you aim to add storage, repurpose an existing piece of furniture, or simply want to tailor an ottoman to your taste, these guides have got you covered.
So, get ready to dive into the detailed guide below to unleash your creativity and build a custom ottoman that stands out in your home. Let's explore how to bring these unique DIY ottoman ideas to life!
Why Make a DIY Ottoman?
Making a DIY ottoman is not only a fulfilling project but also offers numerous benefits that can enhance your living space. Here’s why you should consider making one:
- Cost-Effective: Crafting your own ottoman is significantly cheaper than purchasing a store-bought one. You have control over the materials and design, allowing you to tailor your project to fit your budget.
- Customization: DIY projects provide the freedom to customize every aspect of your ottoman. From size and shape to fabric and color, you can make a piece that perfectly matches your decor and meets your specific needs.
- Skill Building: Taking on a DIY ottoman project is an excellent opportunity to learn new skills or hone existing ones. Whether it’s woodworking, sewing, or upholstery, you’ll gain practical experience that can be applied to future projects.
- Sustainability: By choosing to DIY, you have the option to repurpose materials or upcycle furniture. This not only reduces waste but also allows you to make something unique and environmentally friendly.
- Sense of Achievement: There’s a deep sense of satisfaction that comes from making something with your own hands. Completing a DIY ottoman project provides a tangible reward for your effort and creativity, adding personal value to your home.
Making a DIY ottoman can be a rewarding endeavor that saves money, allows for customization, builds skills, promotes sustainability, and provides a sense of accomplishment. With these benefits in mind, why not embark on this creative journey and add a handmade touch to your living space?
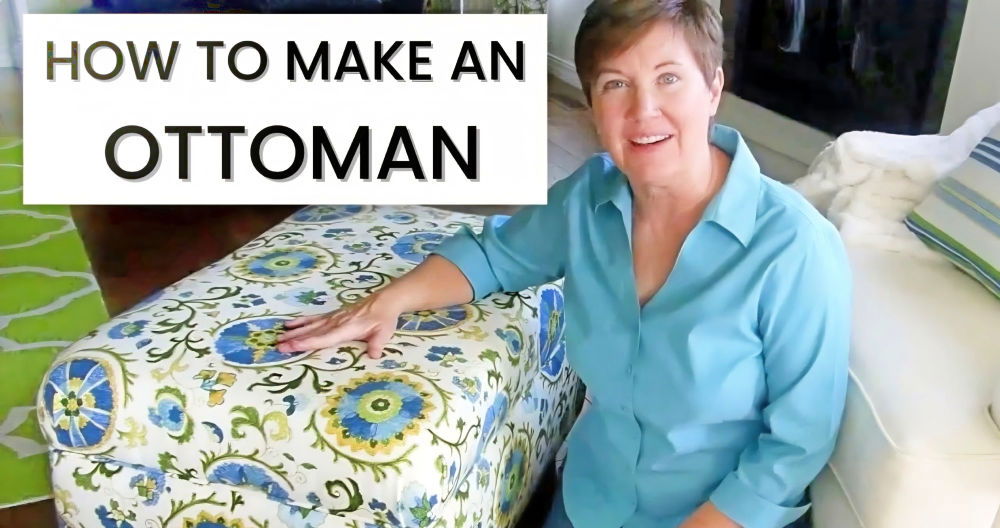
How To Make An Ottoman
Making your own ottoman can add a personal touch to your home décor, offering both functional and aesthetic appeal. Whether you're a DIY beginner or a seasoned craftsperson, follow this step-by-step guide to make a custom ottoman that complements your space. Remember, patience and attention to detail are keys to achieving a professional-looking piece. Let's get started:
Materials and Tools Required
Before you begin, gather the following materials and tools:
- Wood for the frame (sizes vary based on desired dimensions)
- Four wooden legs
- Screws (1.5-inch and 3-inch)
- Drill
- High-density foam
- Plywood for the top
- Batting
- Staple gun with staples
- Fabric of your choice
- Optional: Inner lining (flannel)
- Optional: Cording
- Scissors
Step-by-Step Instructions
- Prepare the Wooden Legs: Paint or stain the four wooden legs of the ottoman. Let them dry completely before attaching them to the frame.
- Construct the Frame: To build the box, drill and screw the wooden panels together at the corners using 1.5-inch screws. Utilize three screws for each corner for enhanced stability.
- Secure the Corner Supports: Place a cut board in each corner inside the box. Attach these supports by driving 3-inch screws through each side, securing the structure.
- Install the Center Support: Insert the center support beam, ensuring it is perfectly centered. Screw this beam into place at both ends to reinforce the frame.
- Attach Foam and Batting: Lay the foam and plywood top on the batting, ensuring the batting is cut sufficiently large to attach it over the top of the board. Staple the batting to the plywood, working your way from the center to the corners. Trim any excess batting.
- Optional - Add Inner Lining: For a smoother finish, you may opt to line your ottoman with flannel before adding the final fabric layer. Cut the lining to size and staple it in place similarly to the batting.
- Apply the Fabric: Place your chosen fabric wrong side up, then position the ottoman top centrally on the fabric. Cut the fabric so there's enough material to staple onto the plywood. Secure the fabric with staples, starting in the center of each side and moving towards the corners. Pleat the corners neatly before stapling for a professional finish.
- Optional - Add Cording: If desired, adding cording along the plywood edge can give your ottoman a polished look. Measure, cut, and staple the cording in place, using a 'V' cut at the corners to maneuver the fabric smoothly.
- Cover the Frame with Batting: Cut batting to wrap around the frame, stapling it along the top and bottom edges. Trim off any excess.
- Add Flannel and Outer Fabric: Cover the batting with a layer of flannel, stapling it in place. Then, cover this layer with your chosen fabric, stapling it along the top and bottom edges of the frame. Trim excess fabric and add trim if desired for a neat finish.
- Assemble the Ottoman: Place the top part of the ottoman (the plywood and foam) plywood side up on a table. Align the box part of the ottoman on top of it, ensuring the center support board touches the plywood. Screw these parts together securely.
- Attach the Legs: Screw the leg plates into each of the four corners. Screw the legs onto each plate.
Video Tutorial
For a more detailed visual guide on making an ottoman, watch the step by step video tutorial on YouTube by Jann Newton.
The visual instructions in this guide will help you understand and follow each step easily, making it easier for you to make a beautiful and functional ottoman.
Choosing the Right Fabric for Your DIY Ottoman
When embarking on a DIY ottoman project, selecting the perfect fabric is crucial not only for the ottoman’s appearance but also for its durability and maintenance. Below, we explore various fabric options, highlighting their advantages and disadvantages, and provide guidance on choosing patterns and colors to complement your interior design.
Cotton
Pros:
- Versatility: Cotton comes in a wide range of colors and patterns, offering flexibility for any design theme.
- Ease of Cleaning: Many cotton fabrics are machine washable, making them practical for households with kids or pets.
- Breathability: Cotton is comfortable to sit on, especially in warm climates.
Cons:
- Wear and Tear: It may not as durable as some other fabrics, showing wear over time, especially in high-use areas.
-Stain Resistance:** Cotton is more prone to absorbing spills and stains.
Leather
Pros:
- Durability: Leather is tough and can handle a lot of wear, making it ideal for a frequently used ottoman.
- Easy to Clean: Spills can be wiped off easily, and leather doesn’t absorb odors.
- Aesthetic Appeal: Leather adds a luxurious feel, fitting well in both traditional and modern decors.
Cons:
- Cost: Leather can be expensive, though faux leather is an affordable alternative.
- Maintenance: It requires regular conditioning to prevent cracking.
Velvet
Pros:
- Texture and Sheen: Velvet adds depth and richness to the room’s decor, making it a popular choice for a statement piece.
- Comfort: It’s soft to the touch, providing extra comfort as an ottoman fabric.
Cons:
- Maintenance: Velvet can be difficult to clean and may require professional services for spills.
- Durability: It can show wear and may not be the best choice for heavy use.
Microfiber
Pros:
- Durability: Microfiber is known for its resistance to stains and wear, suitable for family-friendly living spaces.
- Ease of Cleaning: Most spills can be cleaned with a damp cloth.
- Softness: Offers a comfortable seating surface.
Cons:
- Static: Can attract lint and pet hair.
- Aesthetic: May not have the same luxury appeal as other fabrics.
Choosing Patterns and Colors
- Consider the Room’s Palette: Select a fabric that complements the existing colors in your room. Neutral colors work well in most spaces, but vibrant patterns can add a pop of interest.
- Pattern Size: Large patterns are best in spacious rooms, while small patterns or solid colors suit smaller spaces better.
- Lighting: Remember that colors can look different under various lighting conditions. Check fabric samples in the room where your ottoman will be placed.
By carefully considering the fabric type, pattern, and color, you can ensure your DIY ottoman not only looks great but also meets your practical needs. Remember to balance aesthetic appeal with functionality to enjoy your ottoman for years to come.
Customization Ideas for Your DIY Ottoman
Creating a DIY ottoman offers a fantastic opportunity to add a personalized touch to your home décor. Below, we dive into some customization ideas that can elevate your ottoman from simply functional to a statement piece that reflects your unique style.
Tufting Techniques
Tufting adds depth and elegance to your ottoman, creating a plush, inviting look. Here are a few techniques you can consider:
Diamond Tufting
Diamond tufting is a classic choice known for its geometric, diamond-shaped patterns. This method involves:
- Marking your pattern on the ottoman's surface to ensure even spacing.
- Creating the tufts by threading a long needle through the fabric and foam, securing it at each marked point.
- Pulling the thread tight and securing it, often with a button, to create the distinctive diamond pattern.
Biscuit Tufting
Biscuit tufting creates a more modern, square or rectangular pattern. It’s slightly easier than diamond tufting due to its straightforward alignment.
- Preparation is similar to diamond tufting, but you'll mark your grid with square or rectangular shapes.
- Sewing or attaching buttons at each intersection creates the tufted effect, with the fabric puckering around the buttons or stitches.
Piping and Trim
Adding piping or trim to your ottoman can give it a finished, polished look. This involves:
- Choosing a contrasting or complementary fabric for your piping or trim to stand out or blend in, depending on your preference.
- Measuring and cutting your fabric strips to the required length, then sewing them around a cord for piping.
- Attaching the piping or trim to the edges of your ottoman cover, either by sewing or using fabric glue for a no-sew option.
Button Accents
Fabric-covered buttons can enhance the look of your ottoman, especially when combined with tufting. Here’s how to add them:
- Select fabric for your buttons, which can match or contrast with your ottoman cover.
- Use a button-making kit to create your fabric-covered buttons. These kits are readily available in craft stores and make the process straightforward.
- Decide on placement for your buttons. They can be part of a tufting pattern or simply added as decorative accents.
- Attach the buttons using a strong thread or special button-tufting needle, securing them tightly to the surface of your ottoman.
By exploring these customization techniques, you can create a truly unique ottoman that not only adds comfort but also a touch of personal flair to your space.
Storage Solutions for Your DIY Ottoman
Hidden Storage
Maximizing Space: A DIY ottoman isn't just a footrest; it's a potential goldmine for hidden storage. Perfect for living rooms or bedrooms, an ottoman with hidden compartments can store blankets, magazines, remote controls, and much more, keeping your space tidy and clutter-free.
Design Tips: When designing your ottoman, consider the items you plan to store. This will guide the size and number of compartments. For instance, a single large compartment is ideal for blankets, while multiple smaller sections can organize magazines and remotes efficiently.
- Hollow Base: A popular method involves creating a hollow base beneath the cushion. This space can be accessed by lifting the cushion, which can be attached with Velcro for easy removal.
- Side Drawers: Another ingenious solution is to incorporate drawers into the ottoman's sides. These can be cleverly disguised to maintain the ottoman's aesthetic appeal.
Construction: Use lightweight materials for the inner compartments to ensure they're easy to open and won't strain the ottoman's structure. Plywood or MDF are excellent choices for their combination of strength and lightness.
Lift-Top Ottomans
Functional Design: A lift-top ottoman adds a layer of convenience, allowing easy access to storage with the help of a hinged top. This design is especially useful for larger items that need quick and easy retrieval.
Installation Tips:
- Choosing Hinges: Opt for safety hinges that are specifically designed for lift-top applications. These ensure a smooth, controlled opening and prevent the top from slamming shut.
- Secure Attachment: Ensure the hinges are securely attached to both the lid and the body of the ottoman. Use screws that are long enough to anchor the hinges but not so long that they pierce through the other side.
Safety First: Always consider the safety of those using the ottoman, particularly children. Safety hinges will prevent fingers from getting caught, but it's also important to balance the lid's weight to avoid it being too heavy to lift or it slamming down unexpectedly.
Make a DIY ottoman with hidden storage or a lift-top for both style and functionality. Make sure to prioritize safety in your design for a secure final product.
Styling Your DIY Ottoman
Transforming a DIY ottoman into a statement piece for your living space not only adds a touch of personality but also enhances the overall aesthetics of the room. Below, find simple yet effective styling tips to elevate your ottoman.
Color Coordination
The key to a harmonious interior is color coordination. When selecting a color for your DIY ottoman, consider the hues of your existing furniture and room decor. Aim for a complementary color scheme that adds depth and interest without overwhelming the space. For instance, if your room features neutral tones, a pop of color like teal or mustard can add vibrancy. Conversely, an ottoman in soft pastel or earth tones can balance out a brightly colored room.
Layering with Rugs
Positioning your ottoman on a rug not only defines a cozy seating area but also adds layers of texture and color to your space. Choose a rug that complements both the ottoman and the overall room decor. A contrasting rug can highlight the ottoman as a focal point, while a harmonious color scheme creates a cohesive look. Consider the rug's texture as well; a plush rug can add warmth and comfort, enhancing the inviting feel of your seating area.
Accessorizing
Adding accessories to your ottoman can elevate its style and functionality. A decorative tray serves as a chic surface for organizing items or serving drinks, turning your ottoman into a versatile piece. Stack a few coffee table books or place a small vase with fresh flowers on the tray for an elegant touch. These simple additions not only enhance the aesthetic appeal of your ottoman but also reflect your personal style and interests.
When styling your DIY ottoman, aim for balance. Try out various accessories, textures, and colors to make it stand out in your home.
Repurposing Old Furniture into Unique Ottomans
Transforming old furniture into stylish and functional ottomans is not just an eco-friendly choice but also a great way to add a personal touch to your living space. Here's how you can breathe new life into old coffee tables, wooden crates, or vintage suitcases, and reupholster existing ottomans for a fresh look.
Upcycling Old Furniture into Ottomans
1. Transforming Old Coffee Tables
- Before-and-After: Start with an old coffee table. The transformation process will give it a new purpose and appearance.
- Step-by-Step:
- Choose a coffee table that is the right height for an ottoman.
- Sand down any rough edges to prepare the surface.
- Apply a fresh coat of paint or stain if desired.
- Create a cushion top by cutting foam to size and covering it with your choice of fabric.
- Attach the cushion to the table top using a staple gun for a secure fit.
2. Wooden Crates Turned into Storage Ottomans
- Before-and-After: Wooden crates offer a rustic charm that, when converted, results in a unique ottoman with storage.
- Step-by-Step:
- Connect two or more crates together, depending on the desired size.
- Sand and paint or stain the crates.
- Attach casters to the bottom for mobility.
- Create a cushioned top as described in the coffee table section.
3. Vintage Suitcases for a Quirky Ottoman
- Before-and-After: A vintage suitcase can become a quirky and conversation-starting ottoman.
- Step-by-Step:
- Choose a sturdy suitcase.
- Attach wooden legs to the bottom for support.
- Optionally, add a cushion on the top for extra comfort.
Reupholstering Existing Ottomans
Giving Your Ottoman a Fresh Look
- Tools and Materials: Fabric of choice, staple gun, scissors, screwdriver, and replacement foam (optional).
- Step-by-Step:
- Remove the existing fabric carefully. Use this as a template for cutting your new fabric.
- If the foam is worn out, replace it with new foam cut to size.
- Lay the new fabric over the ottoman top, pulling it taut and stapling it underneath to secure.
- Trim any excess fabric and reattach the top to the ottoman base if necessary.
Tips for Success
- Fabric Choice: Choose a durable fabric that can withstand wear and tear, especially if the ottoman will be used frequently.
- Personal Touch: Add buttons, piping, or tufting for a more customized and sophisticated look.
- Functionality: Consider adding wheels for mobility or creating a hollow interior for storage.
Transforming or updating an ottoman can be a rewarding DIY project. Not only do you get to infuse your personal style into piece of furniture, but you also contribute to a more sustainable lifestyle by repurposing and upcycling.
DIY Ottoman FAQs
Making a DIY ottoman is an exciting project that can add a personal touch to your home. Here are answers to some of the most frequently asked questions to help you through your crafting journey.
How do I choose the right fabric for my ottoman?
Consider these factors:
- Durability: Choose a fabric that can withstand wear and tear, especially if the ottoman will be used frequently.
- Style: Select a fabric that matches your decor. Consider patterns, colors, and textures that complement your space.
- Maintenance: Think about how easy the fabric is to clean. Removable covers can be a practical choice for easy washing.
Can I turn an existing piece of furniture into an ottoman?
Yes, repurposing old furniture such as coffee tables or chairs into ottomans is a great way to upcycle and add a unique piece to your home. Ensure the structure is sturdy and adapt the steps for attaching foam, batting, and fabric to suit the piece you're transforming.
How do I add storage to my DIY ottoman?
To make a storage ottoman, construct or modify the frame to include a hollow interior. The top of the ottoman should be attached with hinges instead of being permanently fixed, allowing it to lift and reveal the storage space inside.
What tools do I need for a DIY ottoman project?
You will need a few basic tools, such as:
- Drill
- Screwdriver
- Staple gun
- Scissors
- Measuring tape
- Saw (if cutting wood is required)
How can I ensure my DIY ottoman is sturdy?
To ensure sturdiness:
- Use quality wood for the frame.
- Secure all joints with screws, ensuring tight fits.
- Add corner braces inside the frame for extra support.
- Ensure the legs are properly attached and capable of supporting weight.
How do I upholster the ottoman for a smooth finish?
For a smooth finish:
- Stretch the batting tightly over the foam and staple securely.
- Do the same with your fabric, starting from the center of each side and working towards the corners.
- For corners, fold and tuck the fabric neatly before stapling to avoid bulkiness.
- Optionally, add a layer of inner lining between the batting and fabric for a smoother appearance.
Can I make a DIY ottoman without woodworking skills?
Yes, there are no-sew and minimal woodworking options, such as using an old tire, bucket, or basket as the base. These projects typically involve covering the base with foam and fabric, requiring minimal tools and no cutting or drilling of wood.
Making a DIY ottoman can be a fun and rewarding project. With the right materials, tools, and a bit of creativity, you can craft a beautiful and functional piece that adds a personal touch to your home.
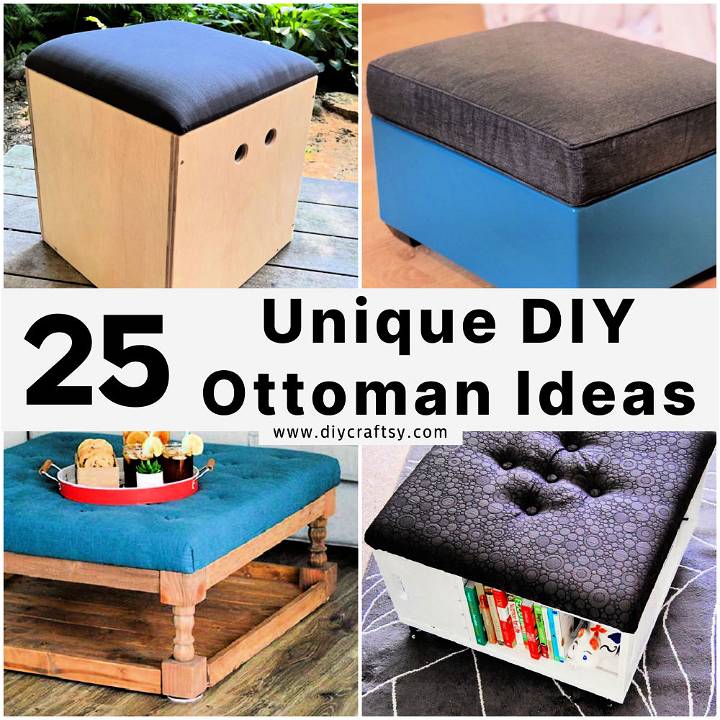
25 Unique DIY Ottoman Ideas (How to Make an Ottoman)
Discover 25 unique DIY ottoman ideas for making stylish and functional seating. Learn how to make an ottoman with these creative tutorials.
1. How to Make an Ottoman
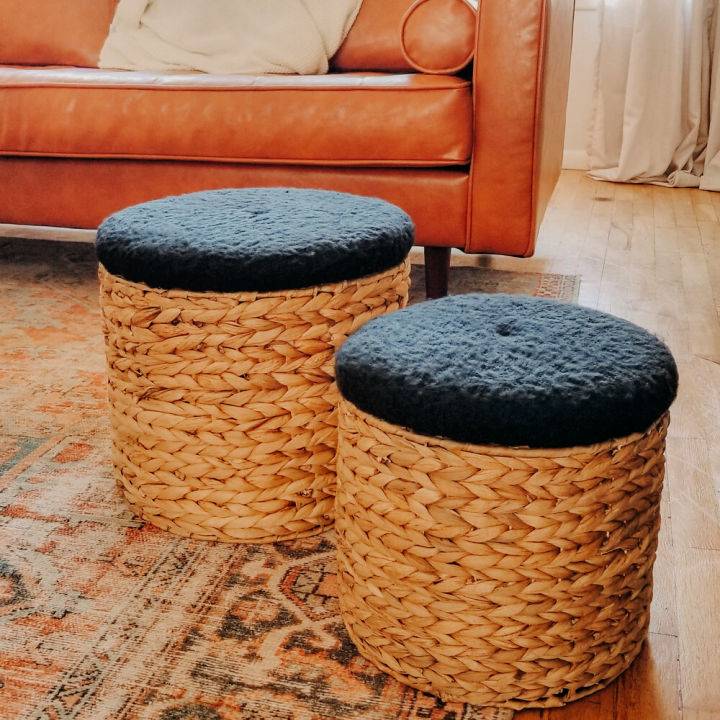
Discover how to make a stylish and affordable DIY ottoman with Brooke Summers' straightforward guide. If splurging on expensive store-bought ottomans doesn't appeal to your budget, this project offers an ingenious solution using simple materials like baskets, foam, fabric, and a few tools.
Brooke takes you through each step, from selecting the right basket to assembling the cushioned top, ensuring your homemade piece not only looks great but is also sturdy. Her engaging instructions make it easy to follow along, and you'll feel accomplished with a personalized ottoman that adds charm and comfort to your space. Perfect for crafters who enjoy adding a handmade touch to their home decor.
2. Round Leather Upholstered Ottoman
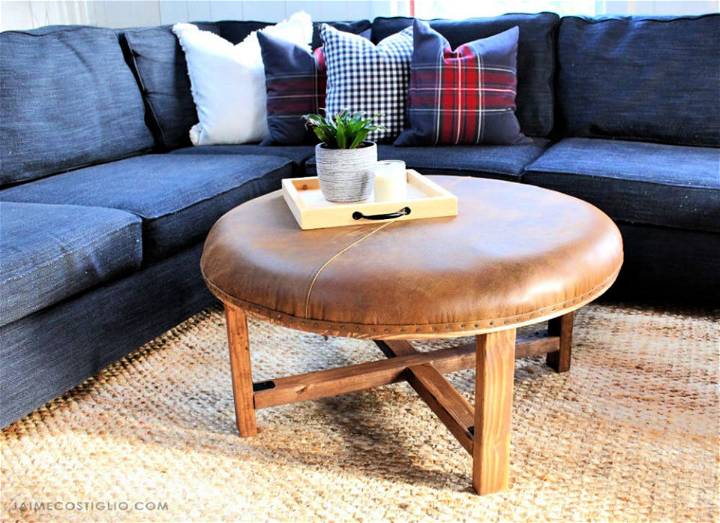
Jaime Costiglio's DIY guide offers an engaging step-by-step tutorial on making a round leather upholstered ottoman, a versatile addition to any living space. By utilizing quality materials such as Simpson Strong-Tie connectors and luxurious Montana buckskin leather, this project combines durability with aesthetic appeal.
Perfect for storing books, holding remotes, or resting your feet, this ottoman can be customized with unique details like carpet tacks and hand-stitched seams. The guide is structured to assist in building a sturdy base, with the option to include an upholstered top cushion. If you're eager to craft functional furniture with a professional touch, Jaime Costiglio provides the blueprint and valuable tips for a successful DIY endeavor.
3. Modern DIY Farmhouse Tufted Ottoman
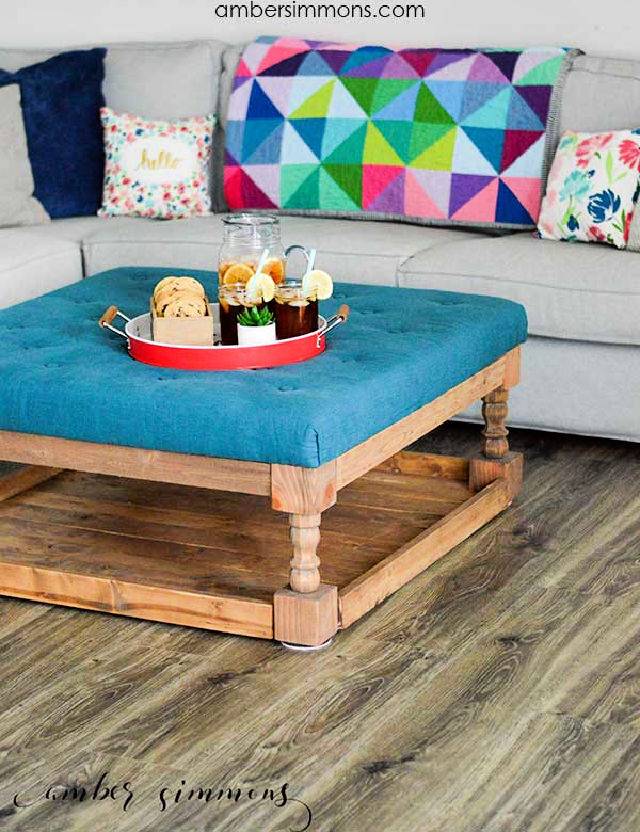
Transform your living space with a touch of Fixer Upper charm by making a modern farmhouse tufted ottoman, guided by the detailed tutorial from Amber Simmons. Ideal for adding functional elegance to any room, this DIY project allows you to build a custom ottoman at a fraction of the cost of store-bought alternatives.
With clear instructions, you'll cut and assemble wood, make a plush tufted top, and finish with a stain of your choice. This step-by-step guide is perfect for those who love hands-on crafting and are eager to enhance their home with a personalized piece of furniture that's both sturdy and stylish. Get ready to put your DIY skills to use and enjoy the satisfaction of a beautifully handcrafted ottoman.
4. Quick and Easy Ottoman
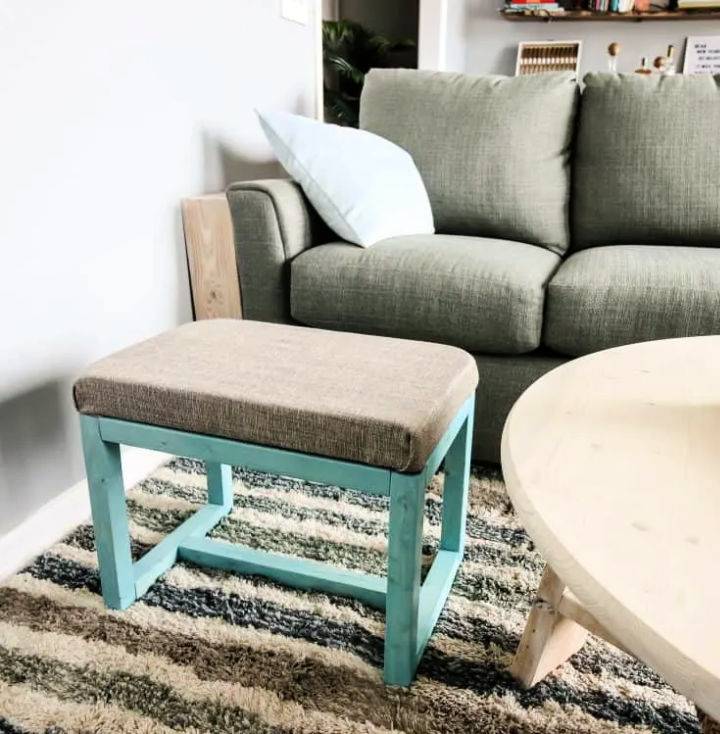
Embarking on a DIY project to craft a cozy and sturdy ottoman can be an engaging weekend activity. At Charleston Crafted, you'll find detailed plans for constructing an ottoman that not only serves as a comfortable footrest but also doubles as a convenient seating option. With a straightforward guide from Kreg's BuildSomething.com, the process becomes simple with step-by-step instructions, including precise cuts, measurements, and pocket hole placements.
The project utilizes minimal materials—a single 8-foot 2x4, scrap plywood, foam, and fabric—making it a cost-effective addition to your living space. Ideal for complementing your existing furniture or as a standalone piece, this DIY ottoman promises durability and style. Dive into the project with confidence, knowing that you're crafting a piece that combines functionality with homemade charm.
5. Build a Wooden Storage Ottoman
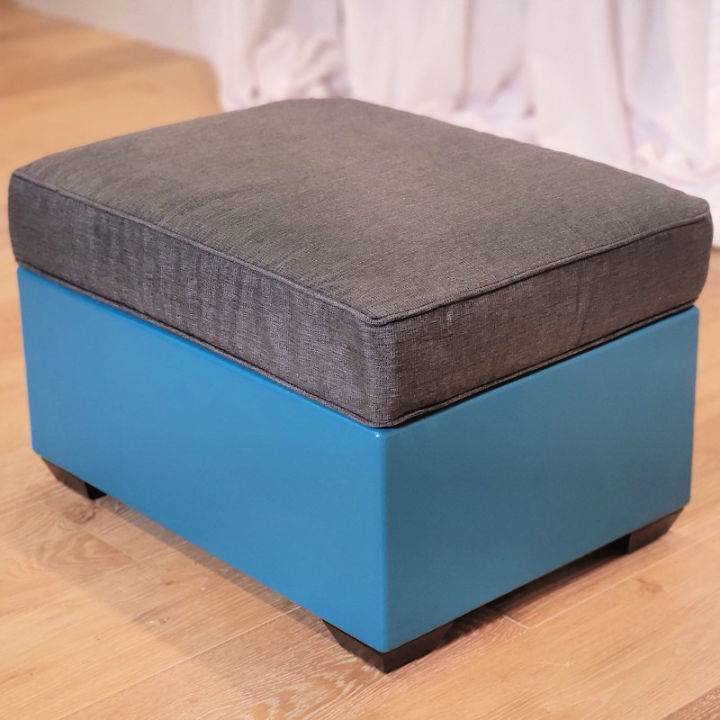
Make a chic and functional piece for your home with this DIY storage ottoman guide from Family Handyman. Follow along step-by-step to construct a versatile footstool that not only offers a comfortable place to rest your feet but also serves as a clever storage solution.
The process is designed for intermediate DIYers and can be completed in half a day, costing between $50-100. With easy woodworking joints, minimal tools, and no upholstery skills needed, this project is perfect for adding a personalized touch to your space while keeping it clutter-free. Get ready to enhance your living area with a custom-made storage ottoman that blends style with practicality.
6. Make Your Own Ottoman
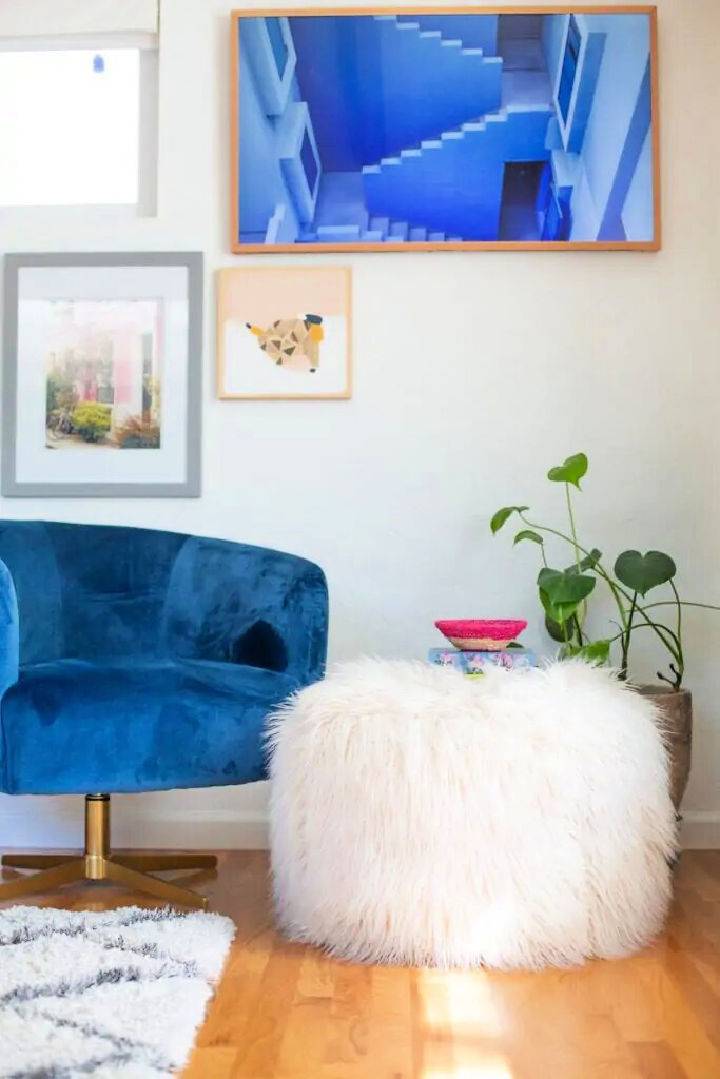
Looking to add a touch of handmade charm to your home decor? Lovely Indeed offers an engaging guide on crafting your own DIY ottoman that even those new to sewing can undertake with confidence. This easy-to-follow tutorial provides step-by-step instructions on making a stylish and practical floor pouf, perfect for elevating any room's aesthetic.
Learn how to repurpose a blanket or select fabric for this project, cut precise squares, and sew them into a cozy ottoman. It's an instructive, helpful resource that simplifies the process, ensuring a successful crafting experience. With detailed directions, recommended materials, and clever styling tips, you'll enjoy making a piece that's as functional as it is beautiful.
7. Easy DIY Storage Ottoman
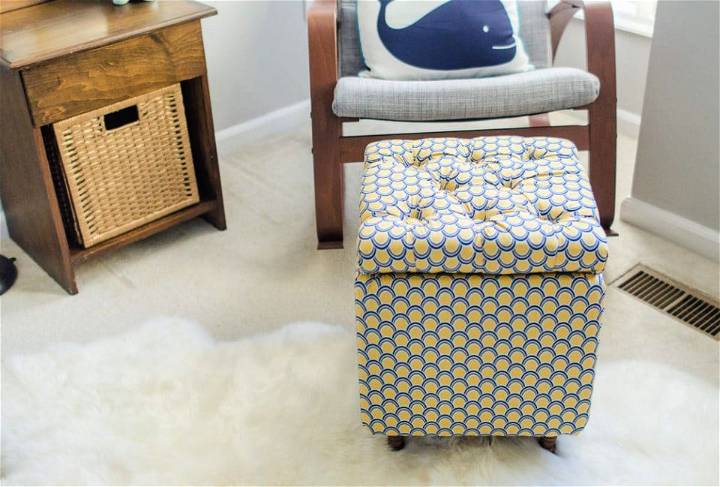
Transform your living space with a personalized touch by making a DIY Storage Ottoman, detailed in this comprehensive two-part tutorial. In Part 2, Ribbons & Bluebirds provides step-by-step guidance on how to upholster your ottoman, ensuring you can craft a stylish and functional piece that's unique to your home.
With a focus on clear, instructive advice, the tutorial breaks down the upholstery process into manageable steps, from padding with foam to adding the finishing touches with fabric-covered buttons. Whether enhancing your decor or maximizing storage, this engaging guide empowers you to bring a custom creation to life, perfect for any room. Capitol Romance
8. DIY Leather Upholstered Ottoman
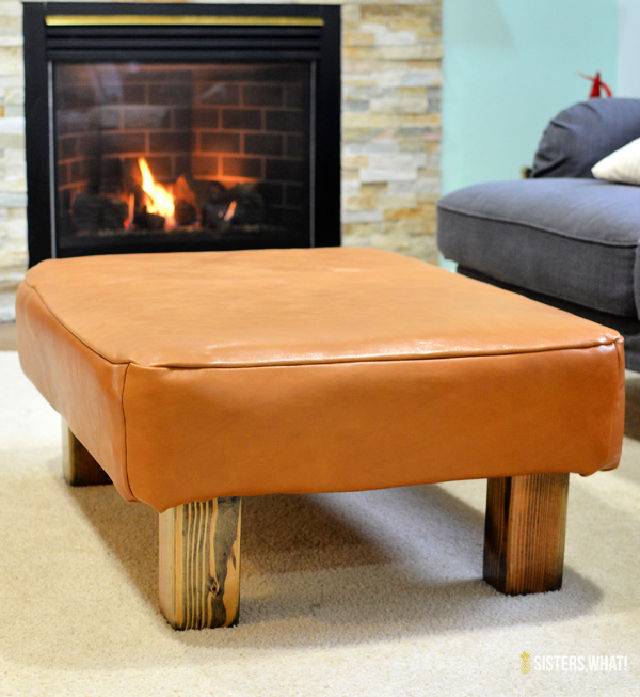
Transform your old ottoman or coffee table into a stylish and durable piece of furniture with a DIY leather upholstered ottoman cover. Sisters, What! offers a step-by-step guide to reupholstering an ottoman, proving that with the right materials and careful measurements, you can make a custom, kid-friendly furnishing.
This tutorial emphasizes the importance of choosing quality upholstery leather and illustrates the process from sanding and staining the legs to sewing and fitting the leather. Perfect for anyone who enjoys hands-on projects, this guide will help you breathe new life into a well-loved item while also enhancing the look and longevity of your decor.
9. Making Upholstered Ottoman Footstool
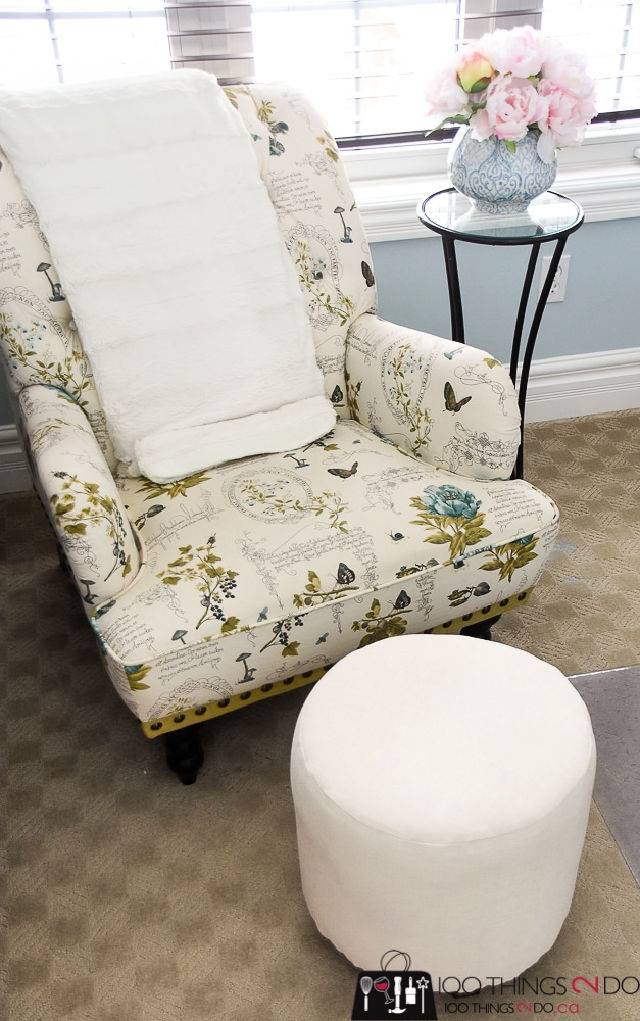
If you're keen to add a custom touch to your home decor without breaking the bank, a DIY upholstered ottoman footstool is a fantastic project to consider. Shelly from 100Things2Do.ca guides you through the process of making a stylish and functional piece for just $25, a far cry from the triple-digit price tags often seen in stores.
By using a concrete form, plywood, foam, and upholstery fabric, you can craft an ottoman that not only elevates your living space but also provides extra seating and a cozy spot for your feet. The House of Wood offers an in-depth tutorial that makes assembling this chic addition to your home both simple and rewarding. With clear instructions and helpful tips, you'll be able to tackle this project with confidence and enjoy the fruits of your labor in no time.
10. Ottoman Bench From a Repurposed Coffee Table
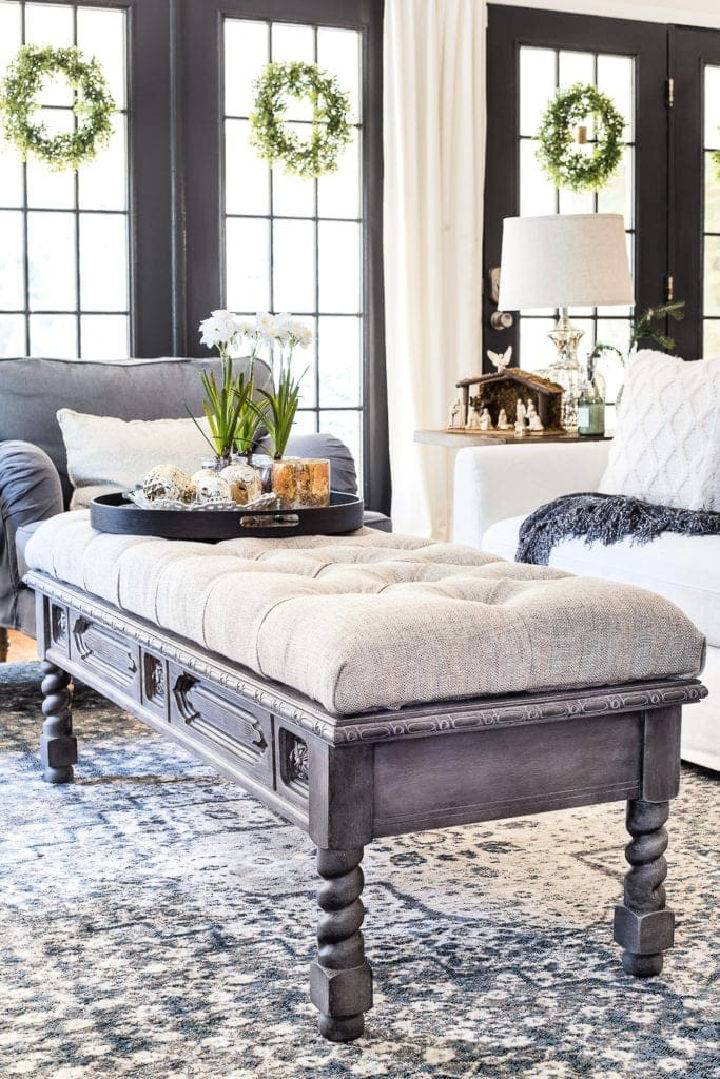
Repurposing an old coffee table into an elegant ottoman bench is a creative and cost-effective way to add a touch of sophistication to your living space. In this detailed guide by Bless'er House, Lauren provides step-by-step instructions for transforming a thrifted coffee table into a designer-inspired piece, complete with tips for achieving a faux weathered wood finish and mastering the art of tuft upholstery.
With a clear and engaging tone, the tutorial covers everything from material selection to the final touches, ensuring a rewarding DIY experience. This transformation not only breathes new life into discarded furniture but also offers a personalized addition to your home décor. Whether enhancing your living room or providing extra seating, your handcrafted ottoman bench will be a unique testament to your crafting skills.
11. Make an Upholstered Footstool
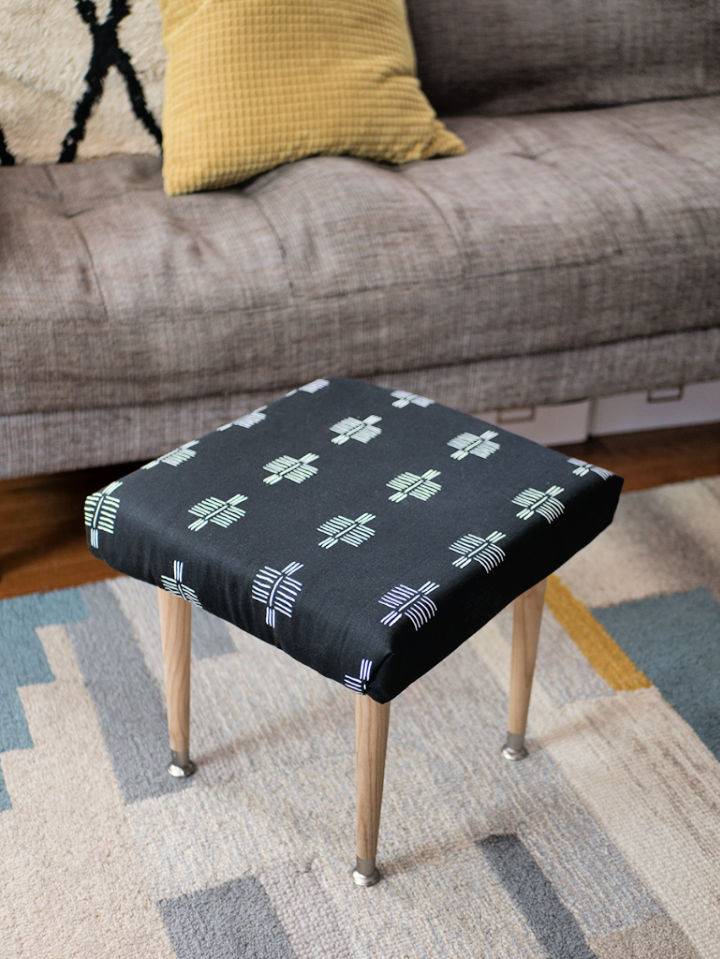
Making a customized upholstered footstool can add a cozy and stylish touch to your living space. The Homesteady offers an easy-to-follow guide on crafting a soft-cornered footstool, ideal for homes anticipating the bustle of a mobile child. This DIY project requires a wooden base, plush high-density foam, fabric of your choice, and a few tools like a drill and staple gun.
By attaching table legs and carefully wrapping and securing the fabric, you can make a multi-purpose piece that's perfect for resting your feet or serving as an impromptu seat. It's a practical, hands-on way to enhance your room's functionality while injecting a bit of personal flair.
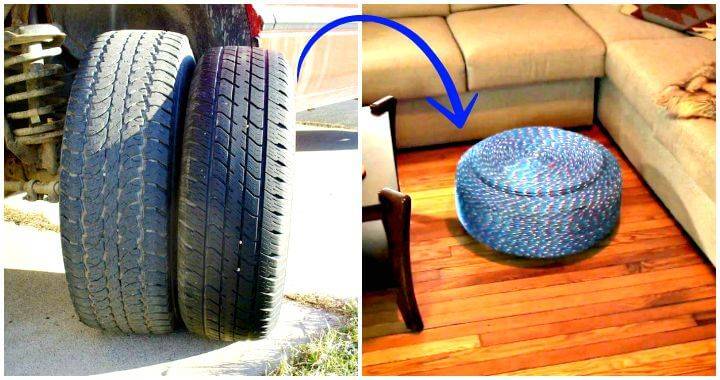
12. Easy to Make Tire Ottoman
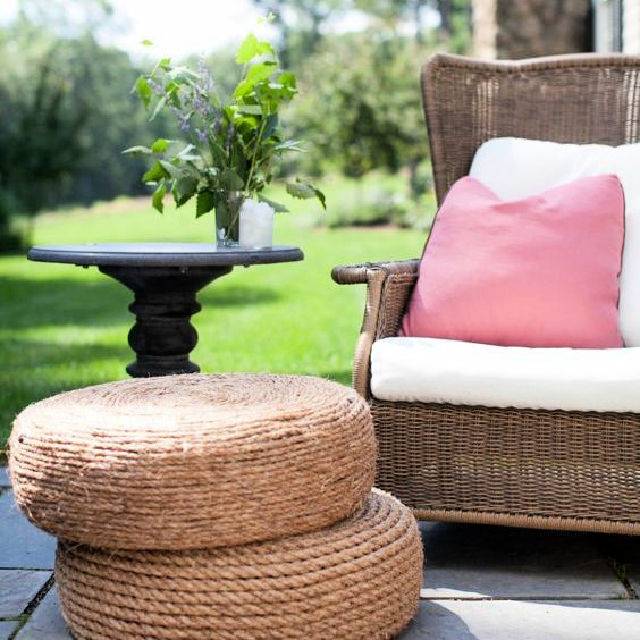
Transform your old tires into chic, eco-friendly ottomans with a touch of creativity and some DIY flair. House Beautiful shares an inspiring guide to upcycling discarded rubber tires into stylish rope ottomans that can add a unique element to your outdoor space.
With a few simple materials like rope, plywood, and furniture legs, you can craft a durable and attractive piece of furniture that's perfect for warm-weather lounging. Follow their step-by-step instructions to cut, screw, glue, and seal your way to a homemade masterpiece. Engage in this sustainable crafting trend to revamp your home décor while also making an environmentally conscious choice.
13. How to Make a Bucket Ottoman
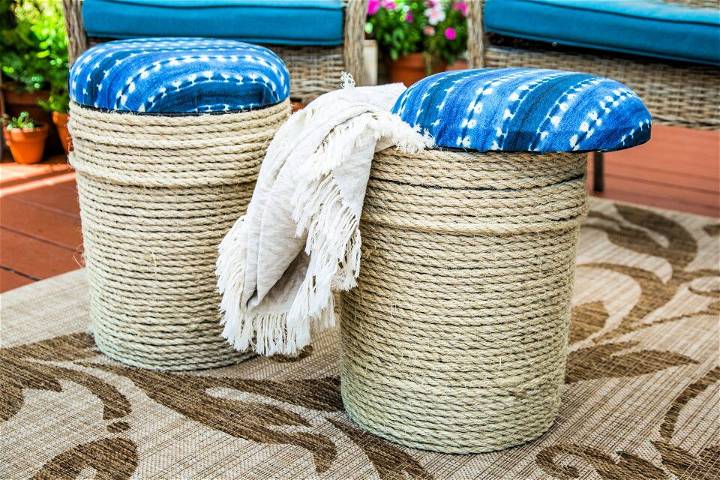
Transform a simple plastic bucket into a chic and functional ottoman for your home with Orly Shani's DIY guide on the Hallmark Channel. The process involves cutting foam to fit the bucket lid, securing it with hot glue and a staple gun, then wrapping it in a durable fabric like mudcloth.
Detailed steps include tracing the lid onto foam, cutting a plywood round, stretching and stapling the fabric, and trimming excess material. This DIY project is perfect for adding a touch of style and versatility to your indoor or outdoor living space. Follow the easy-to-understand instructions to make a stylish ottoman that's both practical and a great conversation starter.
14. Upholstered Storage Ottoman Step-by-Step
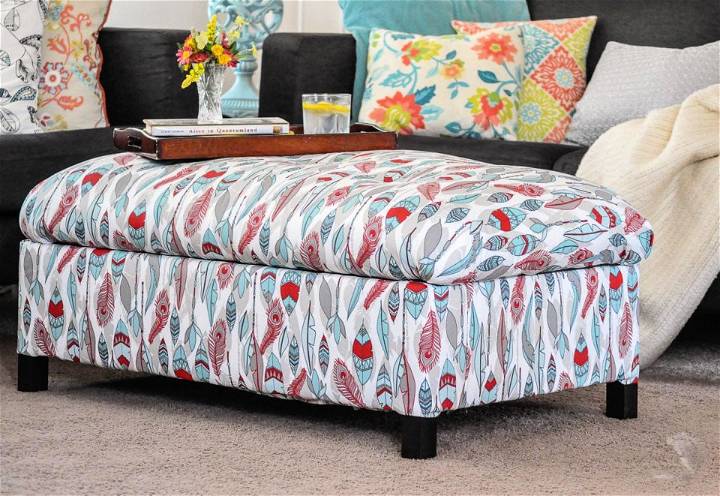
Are you ready to add a personalized touch to your living room with a DIY upholstered storage ottoman? Anika's DIY Life offers a full tutorial that guides you through building and upholstering a functional ottoman, complete with storage space. Ideal for tucking away blankets or games, this piece can also serve as a cozy footstool or a unique coffee table with the addition of a tray.
The instructions are clear and the process is straightforward, making it accessible even if you're not a seasoned DIY enthusiast. With the right tools and some creativity, you can craft a stunning ottoman that not only enhances your decor but also provides practical storage solutions. The tutorial covers everything from constructing the frame to the finishing touches of tufting, ensuring you have all the information needed to make a piece you'll be proud to display.
15. Making an Ottoman
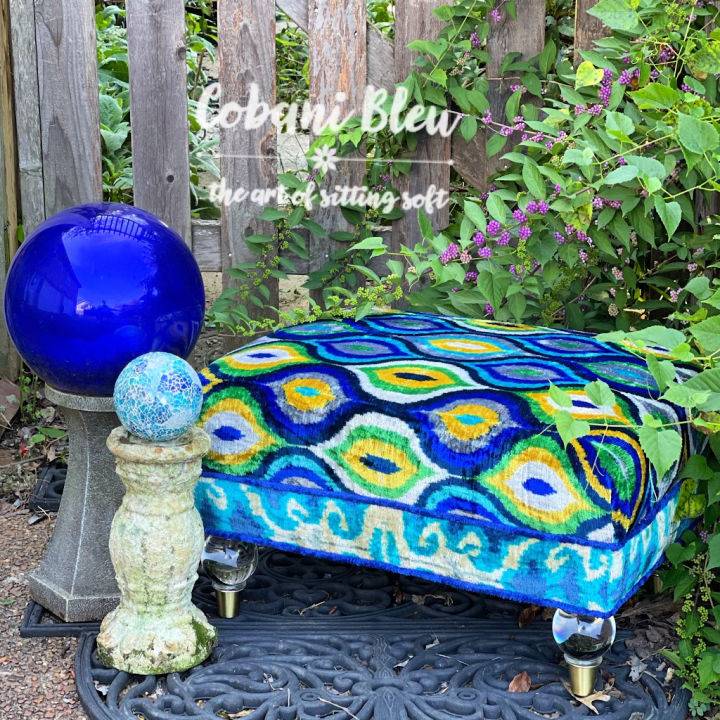
Discover the joy of crafting your very own ottoman with Cobani Bleu's exciting online course, DIY Ottoman: One Weekend To WOW! This course is ideal for anyone keen to learn upholstery, offering a comprehensive guide to making a personalized ottoman. Dive into the art of upholstery with lessons on designing, building, and embellishing your piece, with a variety of projects like benches, cocktail ottomans, and vanity stools. Step-by-step instructions make the process clear and achievable, and by the end of the weekend, you'll marvel at your creation.
16. How to Sew Storage Ottoman
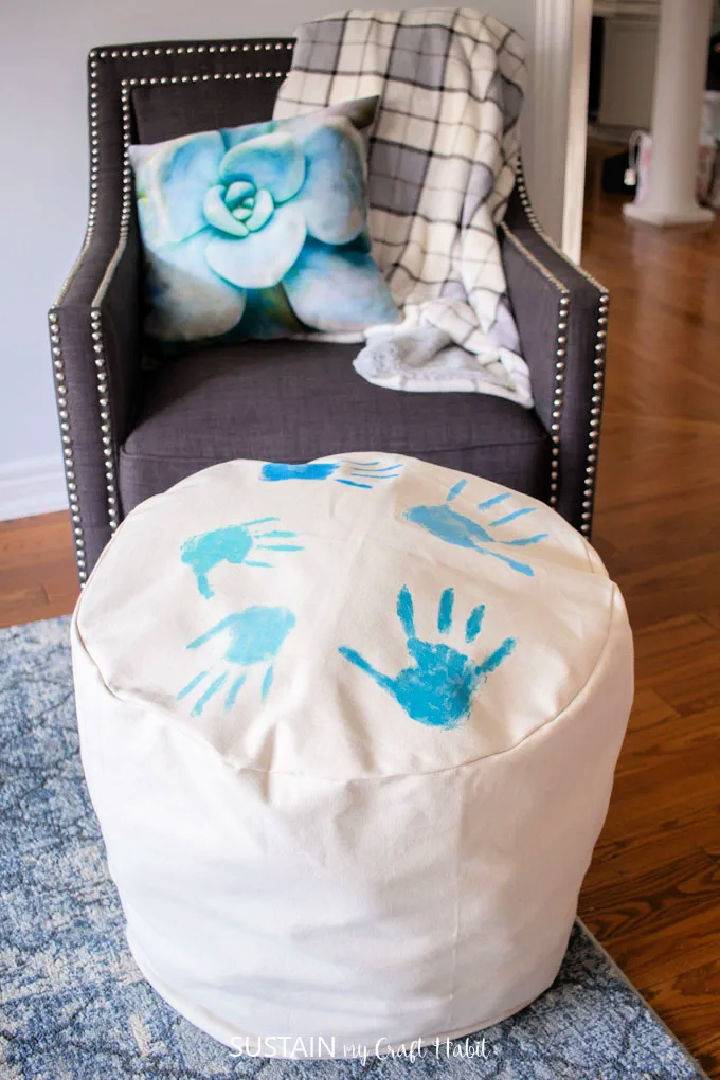
Transform your living space with a practical and stylish DIY storage ottoman, as guided by Jane and Sonja on Sustain My Craft Habit. This project not only offers a quick way to declutter your family room by hiding toys, blankets, and other items, but it also doubles as a cozy pillow for relaxation.
Crafted from durable canvas material, this sewing project is a creative and affordable solution to storage woes. The optional addition of hand-stamped designs adds a personalized touch, making this ottoman a charming and useful addition to any home. Follow the clear, step-by-step instructions to make your own functional piece that's sure to keep your space organized and inviting.
17. DIY Coffee Table Turned Ottoman
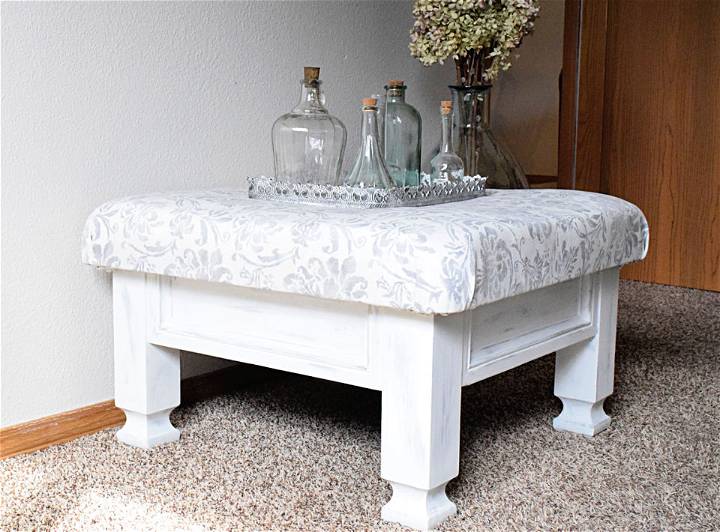
Transform an old coffee table into a stylish and functional ottoman with this engaging DIY project from Timeless Creations. Breathe new life into a piece that's lost its charm by adding a fresh coat of chalk paint and a custom-cut cushion wrapped in your choice of fabric. The tutorial is designed to be helpful and instructive, guiding you through each step with clarity.
From preparing the table and applying a chic paint distressing technique to the art of upholstery with simple stapling, you'll be equipped to craft a beautiful piece that enhances your living space. This project is perfect for those who love to repurpose furniture and enjoy a hands-on approach to home decor. With detailed instructions and practical tips, you're set to make a unique ottoman that's sure to become a conversation starter in any room.
18. Build a Large Upholstered Ottoman
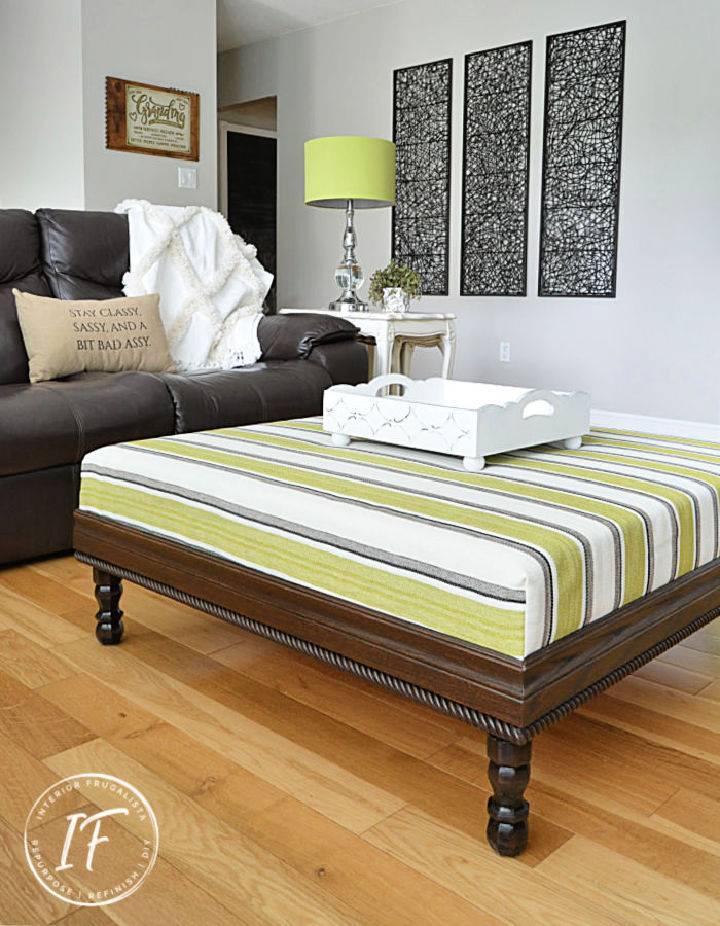
Ready to craft your own large upholstered ottoman? Marie-Interior Frugalista provides a comprehensive, step-by-step guide on making a stylish and functional piece of furniture tailored to your living space. With detailed instructions on everything from choosing materials to final upholstery touches, this tutorial is designed to empower DIY enthusiasts to build an ottoman with professional-looking results.
The guide is thoughtful and thorough, making sure you're equipped with the know-how to bring this comfortable and versatile addition into your home. Simple and clear language ensures that the process is as enjoyable as the outcome. Dive in and transform your living room with a custom ottoman that's both a statement piece and a testament to your handiwork.
19. Making a Dorm Room Storage Ottoman
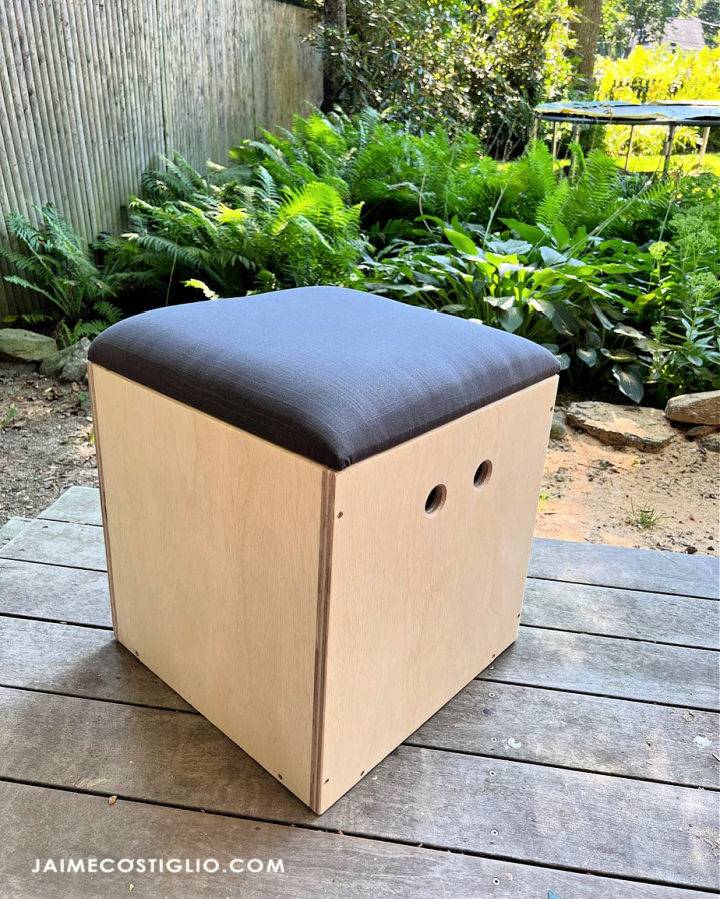
Transform your dorm room into a multifunctional oasis with Jaime Costiglio's DIY Dorm Room Storage Ottoman. Ideal for compact spaces, this storage ottoman not only serves as a cozy extra seat or a convenient step stool into lofted beds but also offers ample hidden storage to keep your area tidy. With a straightforward tutorial, Jaime guides you through the construction process, complete with tips on making a professional-looking cushioned top using tools like a table saw, drill, and staple gun.
Incorporating elements such as finger holds for portability and plastic feet for floor protection, this storage ottoman is not just practical but also sports a polished look. Perfect for dorms, playrooms, and small living spaces, Jaime Costiglio's design is a clever solution for anyone seeking to maximize their living area with style and ease. Visit Jaime Costiglio's website for the printable PDF plans and detailed instructions to get started on this smart storage solution.
20. How to Make a Tufted Fabric Ottoman
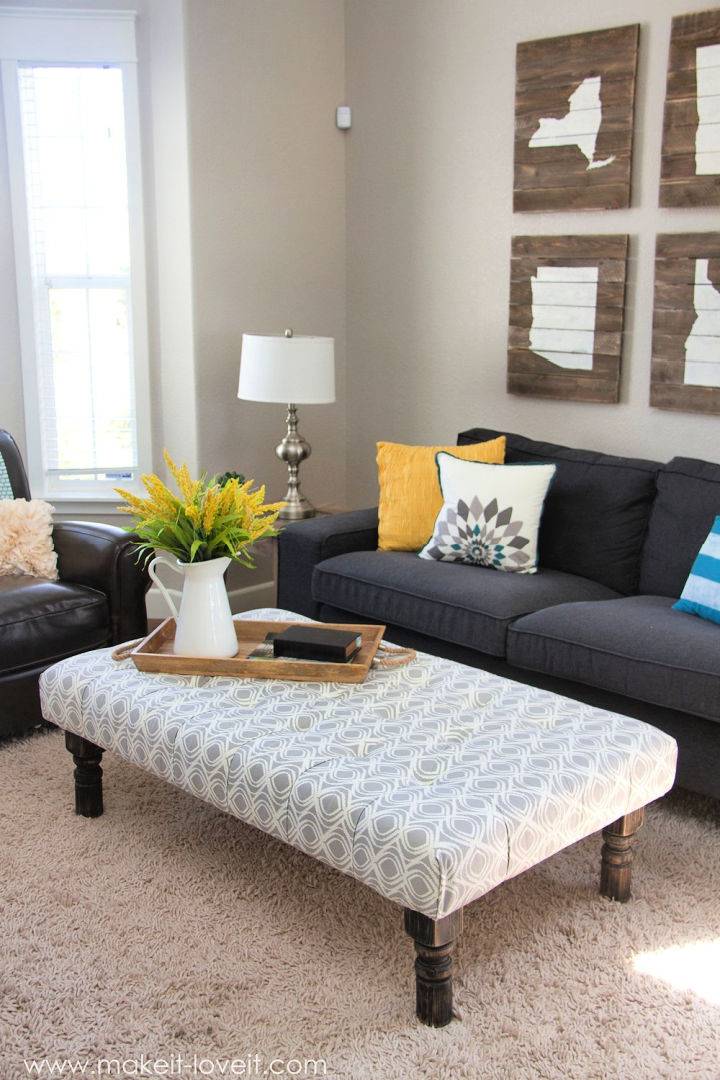
Transform your old tables into a stylish and functional tufted fabric ottoman with Ashley Johnston's guide on Make It & Love It. This comprehensive tutorial will walk you through the process step-by-step, from choosing the right materials to the final touches of attaching the legs.
Whether repurposing an unused kitchen table or rejuvenating a coffee table you no longer love, this DIY project is perfect for adding a touch of elegance to your living space. With easy-to-follow instructions and helpful tips, you'll make a cozy ottoman that not only serves as a comfortable footrest but also elevates the look of your room. Get creative with fabric choices and enjoy crafting a unique piece that complements your home décor.
21. Making a Storage Ottoman
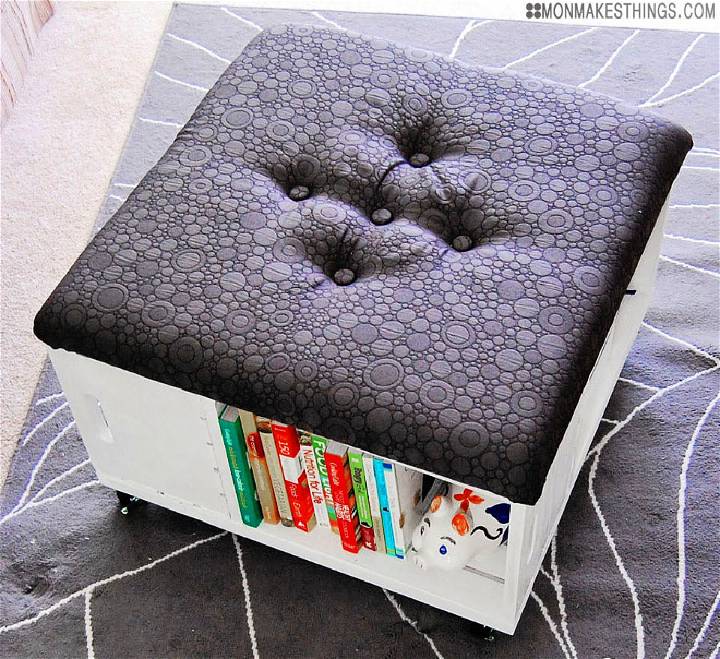
If crafting is your passion and you're keen to make a piece of furniture that is both functional and stylish, constructing a storage ottoman might be the perfect project for you. With some basic tools, you can transform simple wooden crates into an attractive, upholstered centerpiece that not only enhances your living space but also offers additional storage.
This DIY guide provides you with a step-by-step process to build a sturdy base, add mobility with casters, and complete the look with a soft, tufted top. The result is a versatile ottoman that invites you to put up your feet while keeping your belongings neatly tucked away. Engage in this rewarding endeavor and craft an ottoman that is sure to garner compliments from all who see it. Mon Makes Things
22. DIY Upholstered Ottoman From Scratch
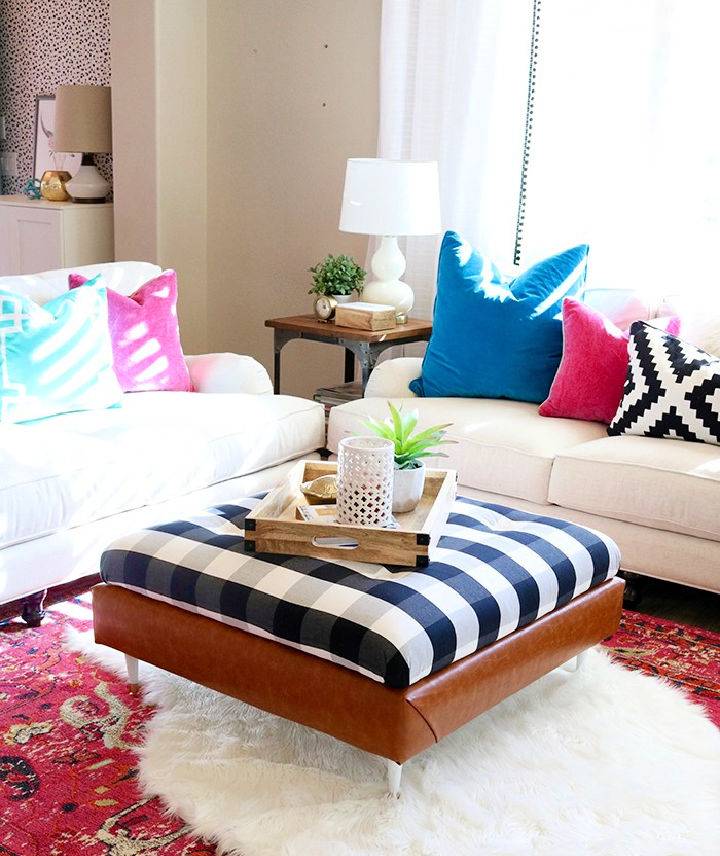
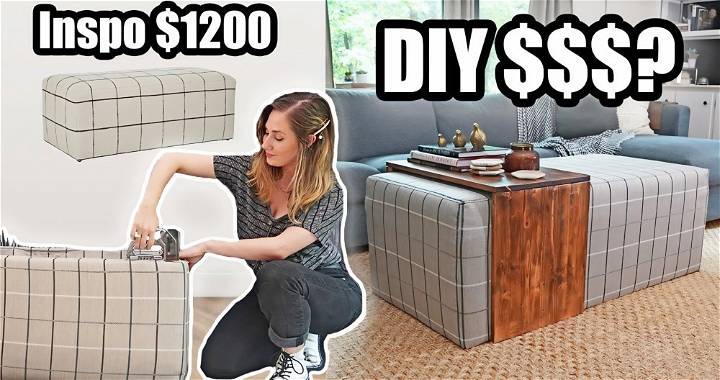
Transform your living space with a personalized touch by crafting a stunning Buffalo Check DIY Ottoman. Rebecca Propes Design & DIY offers an inspiring and straightforward guide to revamp a simple IKEA ottoman into a chic and stylish piece of furniture.
With detailed instructions on how to select and attach the perfect feet, how to prepare the base and cushion, and even tips on achieving the classic tufted look, you'll have all the support you need to make this eye-catching addition to your home.
Engage in a creative project that not only enhances your decor but also provides a sense of accomplishment once you see your handiwork come to life. Get ready to elevate your interior design with a unique ottoman that showcases a blend of fabric, texture, and pattern.
23. Homemade Bucket Storage Ottoman
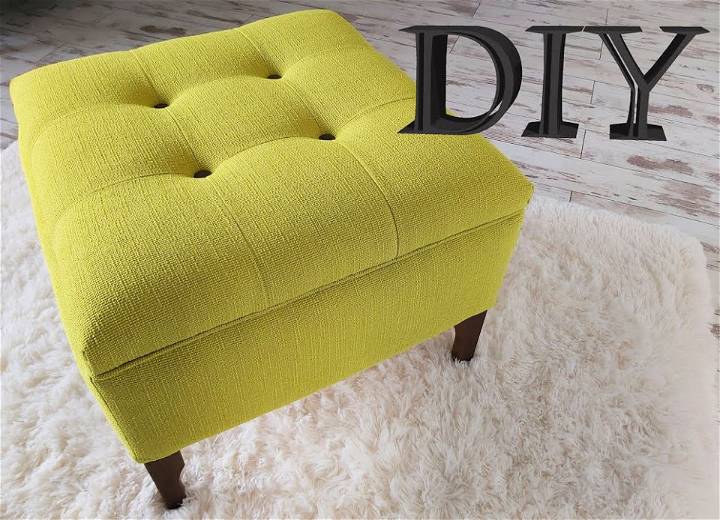
For DIY enthusiasts eager to make a custom piece for their living space, crafting a tufted ottoman footstool can be a rewarding project. YouTube offers a comprehensive tutorial on transforming simple materials into an elegant and functional piece of furniture. The process involves measuring and cutting the base, adding padding for comfort, and finally, the meticulous art of tufting, which gives the ottoman its classic, buttoned look.
With guidance, even those new to upholstery can achieve professional-looking results. To start your DIY ottoman journey, you only need some basic tools, supplies, and the desire to make. Dive into the video and enjoy making a beautiful and personalized addition to your home decor.
24. DIY Upholstered Ottoman From Scratch
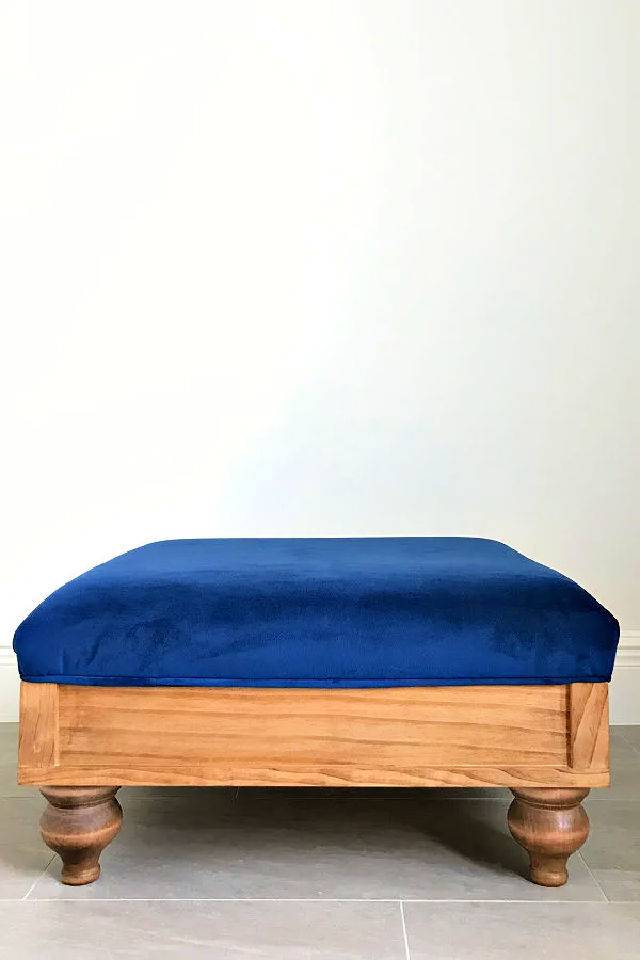
Ready to make a custom DIY upholstered ottoman that adds both function and charm to your home? Abbotts At Home offers a comprehensive guide that will walk you through the process of building a stylish ottoman from scratch. This project is perfect for anyone who enjoys hands-on crafting and wants to add a personal touch to their living space.
The instructive tutorial is designed to be easy to understand and follow, ensuring a fulfilling and engaging crafting experience. From selecting the perfect fabric to the final touches of upholstery, every step is clearly laid out, helping you achieve a beautifully finished piece over a weekend. Get your tools ready and let Abbotts At Home guide you through this enjoyable woodworking venture.
25. Ottoman With Storage Tutorial
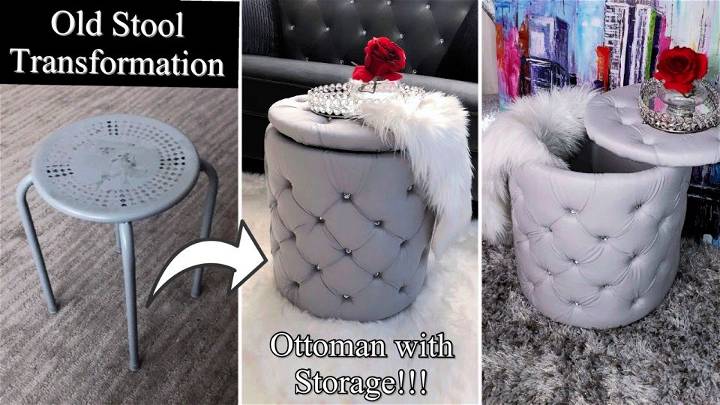
Discover how to transform an old iron stool into a stylish and functional ottoman with storage, courtesy of a detailed YouTube tutorial by Yoduvh Essentials. This DIY project is a cost-effective and creative way to enhance your home's aesthetic while repurposing existing furniture. The step-by-step guide takes you through the process of wrapping the stool with a sturdy board, adding cushioning, and finishing it with elegant fabric and crystal buttons.
The result is a unique piece of furniture that not only provides additional seating but also offers a hidden storage solution. Perfect for craft lovers and those looking to add a personal touch to their living space, this DIY ottoman project can be completed with ease and promises to elevate the look of any room in your home. Visit YouTube to watch the full transformation and gain inspiration for your next home decorating endeavor.
Conclusion:
In conclusion, our journey through 25 unique DIY ottoman ideas has shown us the versatility and creativity possible in how to make an ottoman. From selecting the right fabric to adding a personal touch with storage or unique upholstery, building a DIY ottoman can transform any room.
With our comprehensive guide, including materials, step-by-step instructions, and answers to common FAQs, crafting your own ottoman has never been more attainable. We hope this guide inspires you to make a piece that not only adds comfort but also reflects your unique style and meets your needs.


