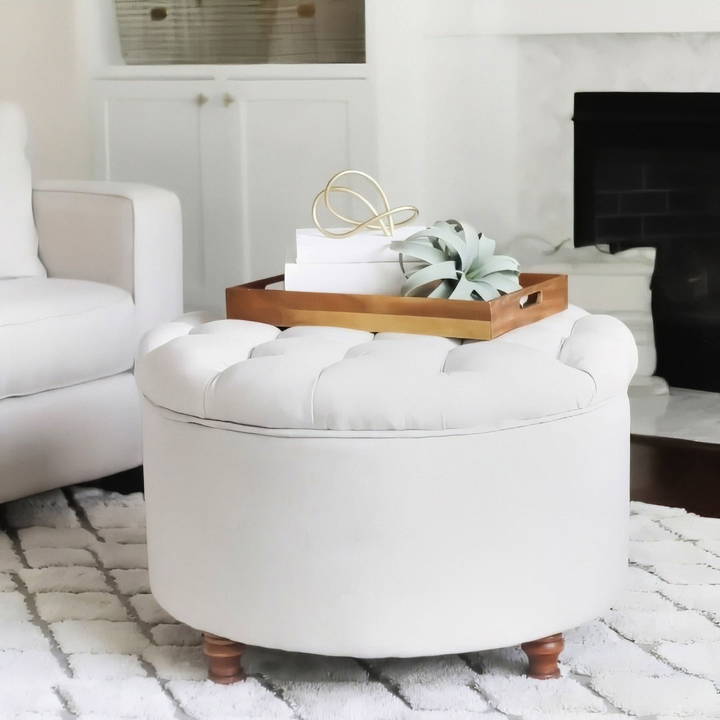
I'm always on the hunt for the next exciting DIY project, especially if it enhances my home and makes everyday life just a little bit easier. When I first came across the concept of a round storage ottoman, I was immediately intrigued. It combined practical storage with stylish seating, a solution my home definitely needed. But here's the catch—I'm not much of an upholsterer.
In fact, the mere thought of a sewing machine is enough to make me break out in a sweat. So, I set out on a mission to build a DIY ottoman with storage, and I'm thrilled to share my step-by-step adventure with you!
Gathering Materials
Discover the essential materials and their purpose for any project. Get a complete list of materials to gather and streamline your process efficiently.
Necessary Materials and Their Purpose
Before diving headfirst into construction, I learned that proper preparation was key. Here's a list of the materials I gathered and why each is essential:
- Half-Inch Plywood - This sturdy material serves as the foundation of the ottoman.
- 2x3 Boards - These form the vertical structure between the base and top ring of the frame.
- Flex Wall Panel - Offering a balance of rigidity and flexibility, this material wraps around the vertical boards.
- Foam Sheets - Layers of cushioning for the ottoman's comfort.
- Batting - For that soft, plush feel beneath the fabric.
- Fabric of Choice - This is where you get to personalize your ottoman. Make sure it's durable yet complements your decor.
- Buttons with DIY Kit - For those gorgeous tufted details.
- Staple Gun and Staples - Your best friend in this no-sew project.
- Hot Glue Gun - To secure things in place where staples won't reach.
- Spray Adhesive - Helps layers stay put during assembly.
- Tin Snips or Heavy-Duty Scissors - Essential for cutting the wall panel.
- Jigsaw and Drill - Allows for precise cutting and drilling of plywood pieces.
- Cooking Spray (Alternative to Lubricant) - Prevents foam binding during the drilling process.
- Serated Knife (or Electric Knife) - Handy for cutting foam sheets accurately.
With everything in hand, I felt prepared and ready to embark on my crafting journey.
Step by Step Instructions
Learn how to make a stylish DIY storage ottoman with our easy step-by-step guide, which includes crafting, tufting, and fabric application.
Step 1: Crafting the Circular Pieces
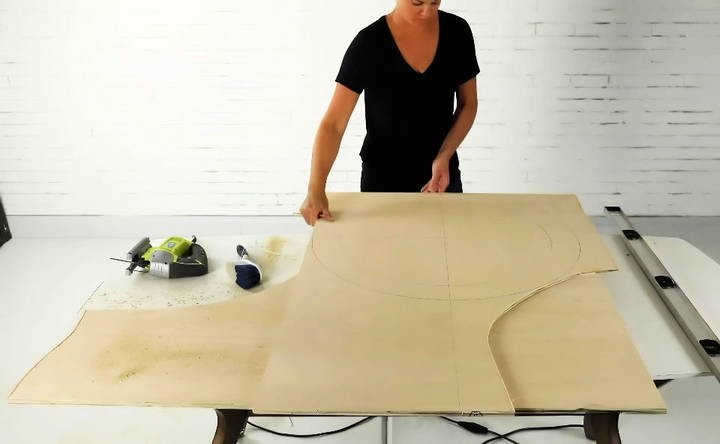
My first task was cutting three circles from the half-inch plywood. To do so, I marked out circles on the plywood using a simple homemade compass (a scrap board with holes spaced 15 inches apart). I nailed it through one hole and used a pencil in the other to draw perfect circles. This method was surprisingly effective and ensured consistency in each circle's size.
Step 2: Cutting with Precision
I used a jigsaw to cut out the circles and further marked an inner ring on one circle for the storage lid. I found that drilling a hole in the center of each circle helped in aligning them perfectly. Then, I stacked and cut them simultaneously to ensure uniformity across all pieces. To finish, I trimmed the inner circle and ring appropriately.
Step 3: Joining the Structure
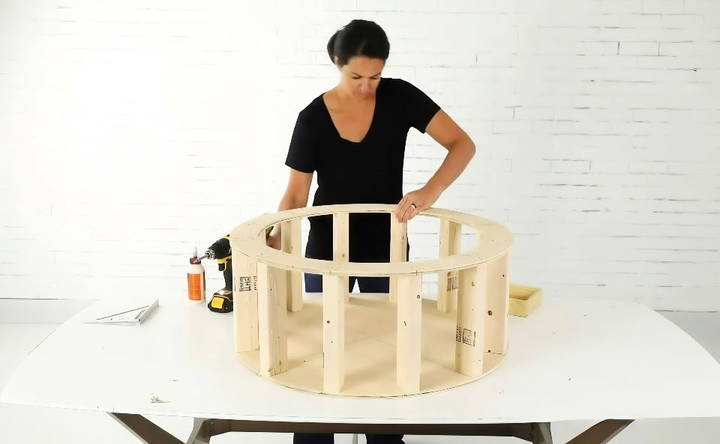
Next, I measured and marked equal sections around the circle to guide the placement of the 12 vertical boards. Cutting the 2x3 boards into size and securing them between the base and top ring framed the ottoman. Gluing and screwing these into the top and base rings was satisfying as it began to take shape.
Crafting the Panel Exterior
Learn how to wrap the frame in step 4 of crafting the panel exterior. Follow our guide for a flawless finish and expert tips!
Step 4: Wrapping the Frame
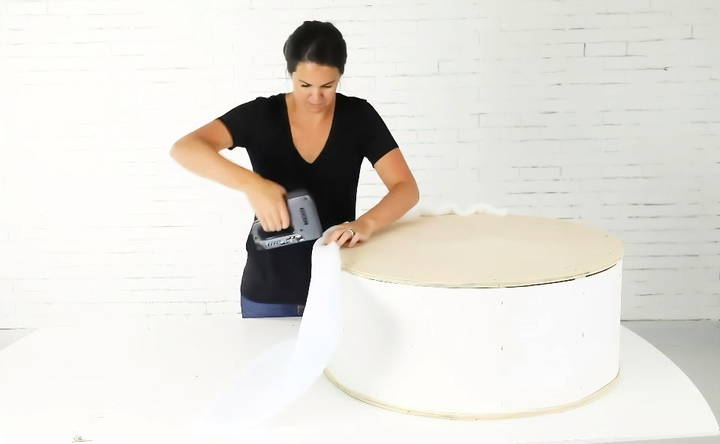
Finding the right wrap material was a journey. In the end, a flexible wall panel worked perfectly. I marked and cut strips for both the inside and outside of the structure. Tin snips made it easy to cut out precise panels, and using hot glue and a staple gun, I attached the first strip starting at a vertical board. The panel was then wrapped smoothly around the structure.
Adding Comfort and Style
Add comfort and style with our easy tufting guide. Prepare for tufting and assemble the top step-by-step for a chic, cozy finish.
Step 5: Preparing for Tufting
I wanted the ottoman top to be lush and inviting, so I layered one-inch foam sheets, traced the lid, and cut them using a serrated knife. The journey to cutting these was easier than expected after I sprayed a bit of cooking oil on the foam, acting as a temporary lubricant for the saw blade.
After placing the foam on the lid and marking out a tufting pattern, I drilled corresponding button holes through the foam and plywood.
Step 6: Assembling the Tufted Top
Aligning the foam with the adhesive spray kept it in place. Adding the batting over the foam and pressing it into the button holes gave it that classic tufted appearance. Once flipped, I anchored the batting securely using my trusty staple gun.
Upholstery and Finishing Touches
Discover the essential steps in upholstery: fabric application, completing the lid, and finishing touches to perfect your project.
Step 7: Fabric Application
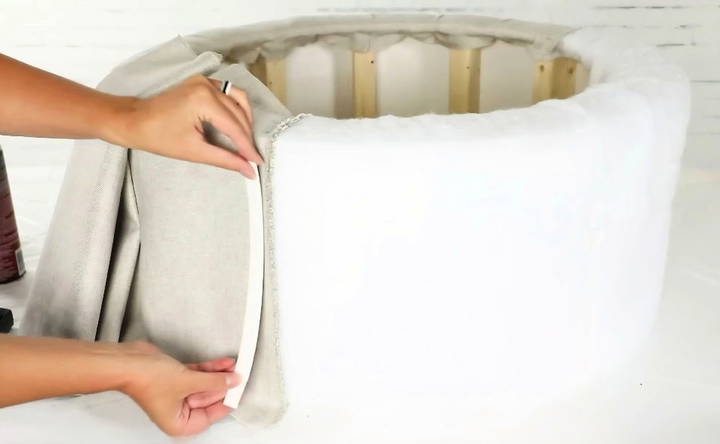
I carefully measured and cut fabric to size, ensuring it would extend over the base and top rings. Adhesive spray was a lifesaver in securing the fabric in stages. I then adeptly folded and pleated excess fabric around the structure, stapling it securely to maintain a tidy finish.
Step 8: Completing the Lid
The lid's fabric was just as crucial. With lines center-marked on the underside, I combined DIY button kits with threads to enhance the tufting effect. Threading and pulling each button down through foam and plywood, then securing it tightly in place, made a satisfying diamond pattern.
To hide any imperfections and add a decorative edge, I buildd a fabric-covered cord and adhered it around the lid's rim. A simple wall panel cutout helped finish the inside of the lid flawlessly.
Step 9: Finishing Touches
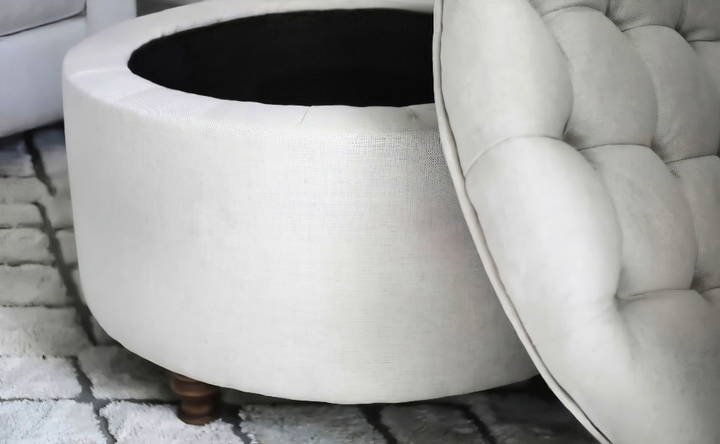
Flipping and adding foot plates with drilled holes ensured the ottoman stood at the perfect height. A last layer of protective black fabric beneath refined its appearance. Now it stood firm, elegant, and ready for use!
Customization Ideas
Customizing your DIY storage ottoman can make it uniquely yours and perfectly suited to your home decor. Here are some easy and creative ideas to get you started:
Fabric Choices
Choosing the right fabric is crucial for both aesthetics and durability. Here are some options:
- Cotton: Affordable and available in many patterns and colors. It's easy to clean but may wear out faster.
- Linen: Offers a sophisticated look and is durable. However, it can be more expensive.
- Velvet: Adds a touch of luxury and is soft to the touch. It can be harder to clean.
- Leather or Faux Leather: Durable and easy to clean. It gives a sleek, modern look.
Color Schemes
Selecting the right color can make your ottoman a focal point or blend seamlessly with your decor:
- Neutral Tones: Colors like beige, gray, and white are versatile and can match any decor.
- Bold Colors: Bright colors like red, blue, or green can make your ottoman stand out.
- Patterns: Stripes, florals, or geometric patterns can add visual interest.
Additional Features
Enhance the functionality of your storage ottoman with these features:
- Wheels: Adding wheels makes it easy to move your ottoman around. Choose lockable wheels for stability.
- Handles: Install handles on the sides for easy lifting and moving.
- Extra Compartments: Make sections inside the ottoman for better organization. You can use dividers or small boxes.
Decorative Elements
Add some flair to your ottoman with these decorative touches:
- Buttons and Tufting: Make a classic look with button-tufted upholstery.
- Trims and Piping: Use contrasting trims or piping to outline the edges.
- Embroidery or Appliqué: Personalize your ottoman with embroidered designs or appliqué.
Eco-Friendly Options
Consider using sustainable materials to make your project more eco-friendly:
- Recycled Fabrics: Look for fabrics made from recycled materials.
- Natural Fibers: Choose fabrics like hemp or organic cotton.
- Upcycled Materials: Use old clothes, curtains, or other fabric items you already have.
By incorporating these customization ideas, you can make a storage ottoman that not only meets your needs but also reflects your personal style.
Common Mistakes and How to Avoid Them
When making a DIY storage ottoman, it's easy to make mistakes that can affect the final product. Here are some common pitfalls and tips on how to avoid them:
Incorrect Measurements
- Mistake: Not measuring accurately can lead to parts that don't fit together properly.
- Solution: Double-check all measurements before cutting any materials. Use a tape measure and mark clearly with a pencil.
Choosing the Wrong Materials
- Mistake: Using materials that are not durable or suitable for the project.
- Solution: Select high-quality materials that are appropriate for furniture. For example, use sturdy wood for the frame and durable fabric for the upholstery.
Poor Assembly
- Mistake: Assembling the ottoman incorrectly can make it unstable or uneven.
- Solution: Follow the instructions carefully. Use the right tools and ensure all parts are securely fastened. If you're unsure, look for video tutorials for visual guidance.
Ignoring Safety Precautions
- Mistake: Not taking safety measures can lead to accidents or injuries.
- Solution: Always wear safety gear like gloves and goggles. Work in a well-ventilated area and keep your workspace clean and organized.
Skipping the Sanding Process
- Mistake: Not sanding the wood can result in a rough finish and splinters.
- Solution: Sand all wooden parts thoroughly before assembly. Use fine-grit sandpaper for a smooth finish.
Using the Wrong Adhesive
- Mistake: Using an adhesive that is not strong enough can cause parts to come apart.
- Solution: Choose a high-strength wood glue or fabric adhesive, depending on the materials you're working with. Follow the manufacturer's instructions for the best results.
Overlooking Fabric Tension
- Mistake: Not stretching the fabric tightly enough can lead to wrinkles and a loose fit.
- Solution: Pull the fabric taut as you staple it to the frame. Work from the center outwards to ensure an even stretch.
Neglecting to Test Stability
- Mistake: Not testing the ottoman's stability can result in a wobbly or unsafe piece of furniture.
- Solution: Once assembled, test the ottoman by applying pressure to different areas. Make adjustments as needed to ensure it is stable and secure.
Forgetting to Pre-Drill Holes
- Mistake: Not pre-drilling holes can cause the wood to split.
- Solution: Always pre-drill holes before inserting screws. This helps prevent splitting and ensures a stronger hold.
Rushing the Project
- Mistake: Trying to complete the project too quickly can lead to mistakes and a lower-quality finish.
- Solution: Take your time and work methodically. Allow glue and paint to dry fully between steps.
By being aware of these common mistakes and taking steps to avoid them, you can make a beautiful and functional DIY storage ottoman that you'll be proud of.
FAQs About DIY Storage Ottomans
Discover the essential FAQs about DIY storage ottomans: materials, construction tips, and benefits to maximize your living space efficiently.
When deciding on the size of your storage ottoman, consider the following:
Available space: Measure the area where you plan to place the ottoman.
Intended use: Think about whether it will be used for seating, as a footrest, or as a coffee table.
Storage needs: Determine how much storage space you need.
Proportion to furniture: Ensure the ottoman fits well with your existing furniture.
Choosing the right fabric is crucial for both aesthetics and durability. Here are some tips:
Durability: Opt for stain-resistant fabrics if you have kids or pets.
Texture: Suede offers a luxurious feel, while leather is easy to clean.
Pattern and color: Geometric designs make a bold statement, while solid colors offer versatility. Choose a shade that complements your existing decor.
Customization options are endless. Here are a few ideas:
Fabric choice: Select a fabric that matches your decor.
Feet style: Choose different styles of feet, such as bun feet or casters, to change the look.
Storage compartments: Add dividers inside the ottoman for better organization.
Decorative elements: Use buttons, tufting, or nailhead trim to add a unique touch.
Maintaining and cleaning your storage ottoman ensures it stays in good condition for years. Here are some tips:
Regular vacuuming: Use a vacuum with an upholstery attachment to remove dust and debris.
Spot cleaning: For fabric ottomans, use a mild detergent and water to clean spills. For leather, use a leather cleaner.
Avoid direct sunlight: Keep the ottoman out of direct sunlight to prevent fading.
Check hardware: Periodically check and tighten any screws or bolts to ensure stability.
Yes, you can repurpose an old ottoman into a storage ottoman with some modifications:
Remove the top: Carefully remove the top of the ottoman.
Add a storage compartment: Build a box frame inside the ottoman using plywood.
Reattach the top: Use a continuous hinge to reattach the top, allowing it to open and close.
Upholster as needed: If the fabric is worn, consider reupholstering the ottoman to give it a fresh look.
The Grand Reveal
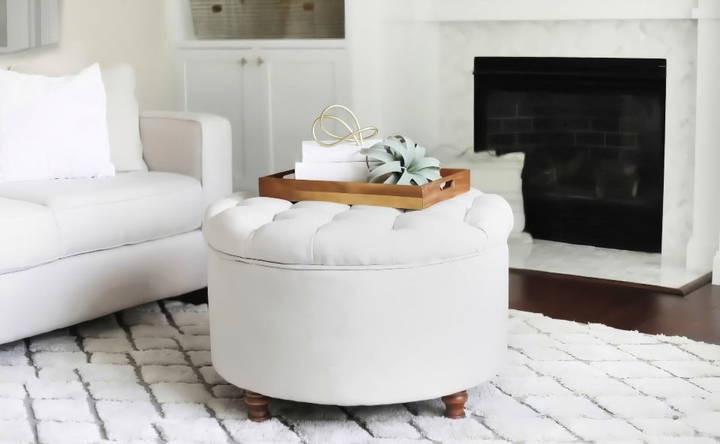
As I placed this beautifully crafted ottoman in my living space, I couldn't help but admire how it blended seamlessly with my decor. Besides the apparent aesthetic appeal, it offered storage space I greatly appreciated. This project may have seemed daunting at first glance, but breaking it down into manageable steps made it achievable, even for a novice like me.
Through each phase of construction, I learned and enhanced my skills, applying creativity and practical solutions. As you tackle your no-sew round-tufted storage ottoman, remember that patience and a clear vision make all the difference. Here's to making beautiful, functional furniture that speaks to your personal style!


