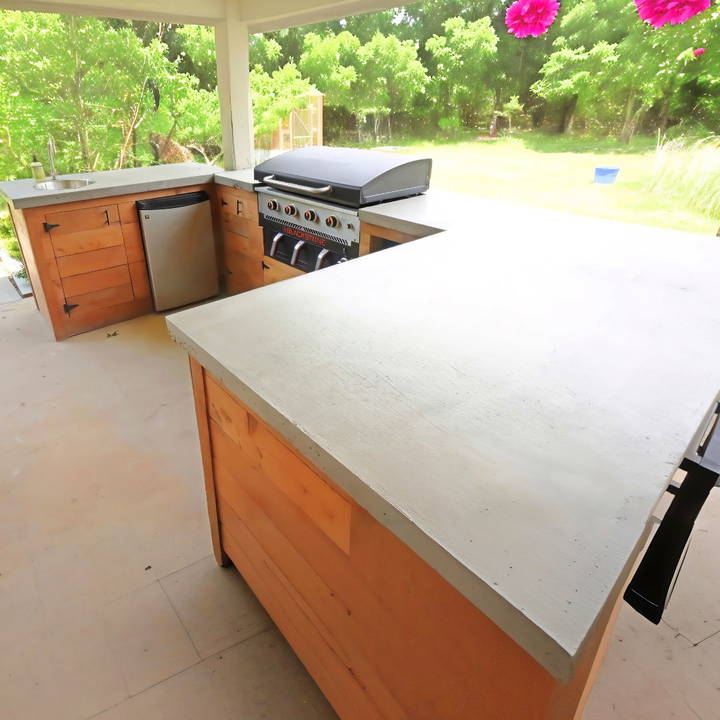
Building DIY outdoor countertops on a budget is simpler than you imagine. Last summer, I spent a few weekends making my backyard more stylish yet practical. I enjoyed working with my hands and saw this project as a chance to give my patio a new look without spending much. The results were amazing, and I felt proud knowing I made it myself.
You can also transform your outdoor space with a bit of creativity and effort. Start with basic materials, and you'll be surprised at what you can accomplish. In this guide, I'm sharing useful tips and easy steps that helped me, and they will surely help you, too.
Dive in and discover how to make inexpensive DIY outdoor countertops that are both functional and attractive.
Materials and Their Purpose
- Pine Plywood: For the base of the countertops, providing a sturdy foundation.
- Metal Blocks and Legs: For the grill installment, offering support and stability.
- Melamine: Used for edge forms, ensuring the countertops have smooth, clean lines.
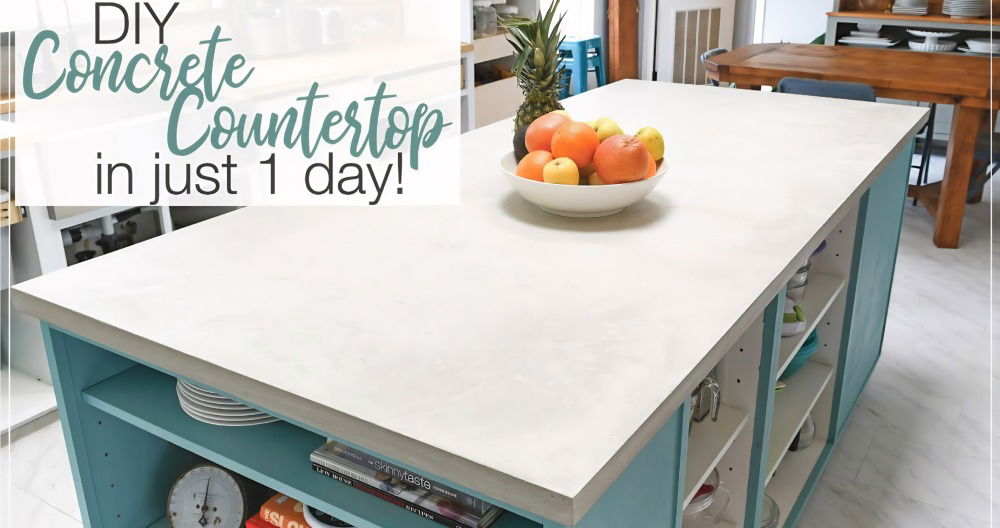
- Concrete Mix: I chose Quikrete's crack-resistant mix to avoid past mistakes.
- Rebar and Wire Ties: These strengthen the concrete, preventing future warping.
- Polyurethane and Paste Wax: To seal and release the forms easily from the concrete.
- Silicone Caulk: For making smooth, round edges around the countertops.
Each material was chosen with precision, aiming to build something that was not only visually appealing but also durable against outdoor conditions.
Step by Step Instructions
Learn how to make DIY outdoor countertops with our step-by-step guide. From prep to finishing touches, make stunning outdoor counters yourself!
Step 1: Removing the Old and Preparing for the New
I started by dismantling the old countertops which, while a tad disheartening, was necessary. Ensuring not to repeat history, I swapped out the previous grill for a 36-inch wide Blackstone flat top, which required me to open up the structure and reinforce it meticulously. I used metal blocks for the grill to rest on, providing the necessary height and stability.
Step 2: Laying the Foundation
After reinforcing the structure, I cut pine plywood to size for the base of my countertops. It was essential to have a * ¾ inch overhang around the edges for the final look. Cutting the wood was straightforward with a circular saw, following measurements diligently. I then placed and secured the plywood base, making sure every piece was aligned correctly.
Step 3: Building the Forms
The next step involved building edge forms out of melamine. This process was critical for achieving smooth and professional edges on the countertops. I attached these forms to the bottom of the plywood, ensuring they were the exact height I wanted my countertops to be. It's worth noting here; the detail in sealing these forms can make or break the final look.
Step 4: Sealing and Pouring the Concrete
After constructing the forms, I sealed the plywood base with water-based polyurethane and coated the melamine forms with paste wax. This step made sure the concrete wouldn't stick to the wood or the forms, making demolding easier. Then came the exciting part – mixing and pouring the concrete. I aimed for a consistency that was wet enough to flow but dry enough to retain strength. It was a bit of trial and error, but I found the right balance eventually.
Step 5: Finishing Touches
Once poured, I focused on removing any air bubbles and ensuring the surface was level. After allowing it to cure, I de-molded the forms to reveal the fruits of my labor. To my relief, the countertops looked fantastic, albeit with a few more bubbles than I'd hoped. However, those imperfections added character. I then sealed the concrete with a low-luster outdoor sealer to protect it from the elements.
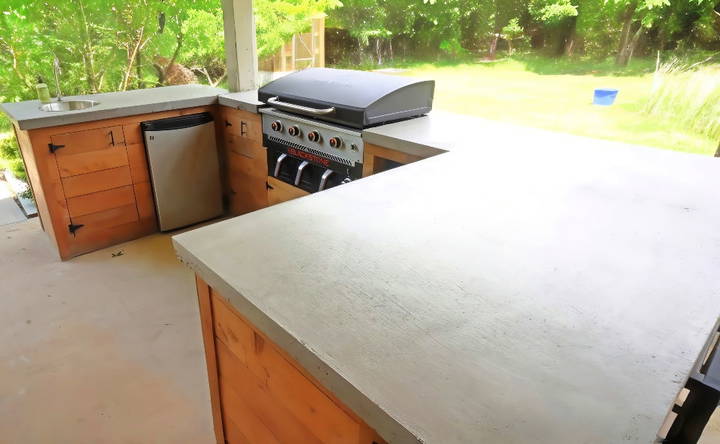
The project was a learning journey, from selecting materials to mastering concrete. The outdoor kitchen now boasts durable, stylish countertops and an upgraded grill, enhancing both functionality and aesthetics.
Design Ideas and Inspiration
When it comes to making a beautiful and functional outdoor countertop, the design is just as important as the materials you choose. Here are some fresh and inspiring ideas to help you design an outdoor countertop space that not only meets your cooking needs but also enhances your outdoor living experience.
Embrace Nature with Biophilic Elements
Incorporating natural elements into your outdoor countertop design can build a harmonious and inviting space. Consider using natural stone countertops for their durability and timeless appeal. Adding wooden accents and integrating plants can bring a sense of tranquility and connection to nature.
Modular Designs for Flexibility
Modular outdoor kitchens are a growing trend, offering the flexibility to adapt the layout to your space and lifestyle needs. With modular designs, you can easily reorganize or update components to keep up with seasonal trends or customize as you see fit.
Multi-Purpose Spaces
Today's outdoor kitchens are more than just places to cook; they're spaces to entertain, relax, and connect with nature. Think about including seating areas, a cooking zone, or even a fire pit where guests can gather at night to enjoy delicious meals on the spot.
Technology Integration
Smart grills, wireless temperature controls, and automated lighting systems are enhancing the outdoor cooking experience. These technological advancements allow for a seamless and efficient cooking experience and can be controlled remotely for added convenience.
Eco-Friendly Choices
With a growing awareness of environmental factors, consider using eco-friendly materials like reclaimed wood or metal, and avoid harmful chemicals in paints and sealants. Energy-efficient appliances and solar-powered lighting can also contribute to a sustainable outdoor kitchen design.
Personal Touches
Customization is key in 2024. Tailor your outdoor kitchen to reflect your personal style with custom-built pizza ovens, tailored cabinetry, and unique outdoor fireplaces. Design a space that complements the existing landscape and architecture of your home.
Use these design ideas for a functional, stylish, and sustainable outdoor countertop.
Troubleshooting Common Issues with DIY Outdoor Countertops
Building an outdoor countertop can be a rewarding DIY project, but sometimes you might encounter issues along the way. Here's a helpful guide to troubleshoot common problems, ensuring your outdoor countertops remain in top condition.
Cracks and Chips
Cracks can occur due to temperature changes or settling. To fix them:
- Clean the area thoroughly.
- Fill the cracks with a matching color epoxy or resin.
- Sand the area after the filler has cured for a smooth finish.
For chips:
- Use a repair kit designed for the specific countertop material.
- Apply the adhesive and filler as directed.
- Allow it to dry before sanding down any excess.
Stains and Discoloration
Outdoor countertops can get stained, especially from organic materials or harsh chemicals. To remove stains:
- Identify the type of stain and choose an appropriate cleaner.
- Apply a non-abrasive cleaner and let it sit for a few minutes.
- Gently scrub the stain and rinse with water.
For discoloration:
- Use a stone color enhancer for natural stone countertops.
- Regular sealing can prevent future discoloration.
Uneven Surfaces
If your countertop is uneven:
- Check if the foundation has shifted and adjust as necessary.
- For minor unevenness, use a leveling compound.
- For tiles, reposition any that are uneven and re-grout the area.
Loose Tiles or Stone
Loose tiles or stones can be a hazard. To secure them:
- Remove the loose piece and clean the area.
- Reapply adhesive and set the tile or stone back in place.
- Allow it to dry completely before using the countertop again.
Sealant Issues
Problems with sealant can lead to water damage. To address this:
- Strip any old or damaged sealant with a sealant remover.
- Clean the area thoroughly.
- Reapply a high-quality sealant and allow it to cure as directed.
Regular maintenance prevents issues. Inspect countertops often and fix problems quickly to make them last.
Maintenance and Care Tips for Outdoor Countertops
Outdoor countertops add functionality and style to your outdoor living space. To ensure they remain in top condition, regular maintenance is essential. Here are some straightforward tips to help you take care of your outdoor countertops:
Regular Cleaning
- Daily cleaning is simple: use a soft cloth or sponge with mild dish soap and warm water.
- For granite, avoid harsh or acidic cleaners, like vinegar or citrus-based products.
- Rinse thoroughly with water after cleaning to prevent soap residue.
Stain Prevention and Removal
- Prevent stains by wiping spills immediately, especially from oily substances or acidic foods.
- For stubborn stains, a mixture of baking soda and water can be applied. Let it sit for a few minutes before gently scrubbing.
Sealing Countertops
- Sealing is crucial for materials like granite, which can be porous.
- Perform a simple water test to check if resealing is needed: spill some water on the surface, and if it beads up, the seal is good; if it soaks in, it's time to reseal.
Protecting the Surface
- Always use a cutting board to avoid scratches and preserve the finish.
- Hot pans should not be placed directly on the countertop; use trivets or hot pads instead.
Winter Care
- If you live in a region with freezing temperatures, cover your countertops or store them indoors if possible to prevent cracking from freeze-thaw cycles.
Regular Inspection
- Inspect your countertops regularly for any signs of wear or damage.
- Address small issues promptly to prevent them from becoming bigger problems.
Follow these care tips to keep your outdoor countertops looking great and safe for years, ensuring a hygienic food prep and entertainment surface.
FAQs About DIY Outdoor Countertops
Explore essential FAQs about DIY outdoor countertops. Discover tips, materials, and techniques for making stunning outdoor kitchen surfaces.
Start by removing any existing countertops and cleaning the area. If you’re working with structures like grills or sinks, measure carefully to ensure a good fit. Use 1/2 inch plywood for the base, cut to size with a slight overhang, and consider the placement of any inserts.
You can choose between the pre-cast method, where you build the countertop separately and then place it, or the pour-in-place method, where you pour concrete directly onto your base structure. Pour-in-place is often easier for DIY projects.
Build a mold using melamine board cut to the desired thickness of your countertop. Seal the plywood base with polyurethane and wax the melamine to prevent sticking. Form edges with silicone caulk for a smooth finish. Reinforce with rebar before mixing and pouring the concrete.
After the concrete has cured, remove the mold and sand the surface starting with a coarse grit and moving to finer grits for a smooth finish. Seal the countertop with a food-safe sealer to protect against stains and weather. Regular cleaning and resealing will maintain the countertop’s appearance and durability.
To ensure your outdoor countertops can withstand the elements, it's crucial to select materials that are naturally weather-resistant, such as concrete, granite, or glazed tiles. Apply a waterproof sealer to protect against moisture and stains. For wooden bases or frames, use exterior-grade lumber and finish with a weatherproof stain or paint. Regular maintenance, including cleaning and resealing as needed, will also help extend the life of your countertops.
Final Thoughts
If you follow these steps, you'll make stunning DIY outdoor countertops that will impress everyone. Get started and enjoy the satisfaction of making outdoor countertops with your own hands. It's easy and rewarding!


