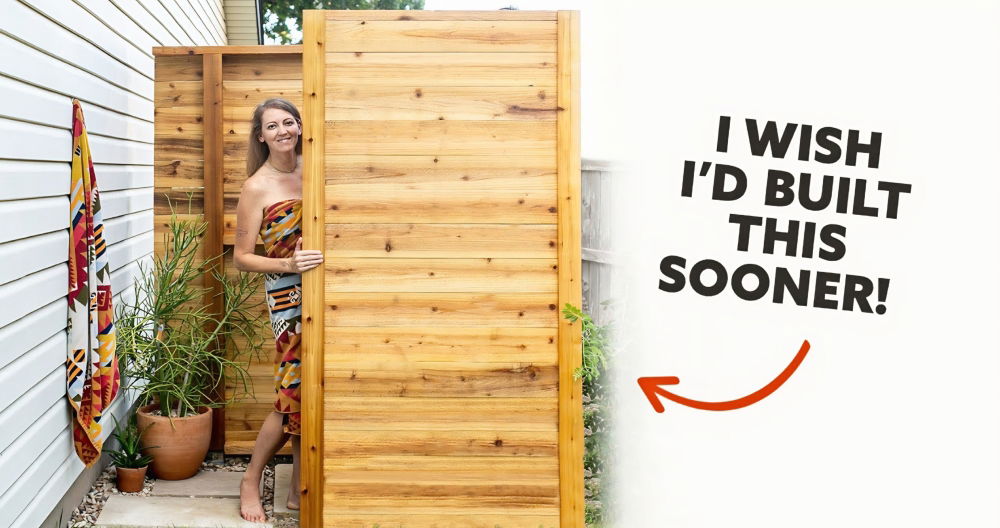
Summer was around the corner, and my deck was as open as a book. For someone who treasures a bit of privacy and an opportunity to unwind in peace, this was far from ideal. That's when i decided it was time to take matters into my own hands and build a DIY outdoor privacy screen. And let me tell you, it has been a game-changer. Here's how i did it, in simple, easy steps so you can build this DIY deck privacy wall, too.
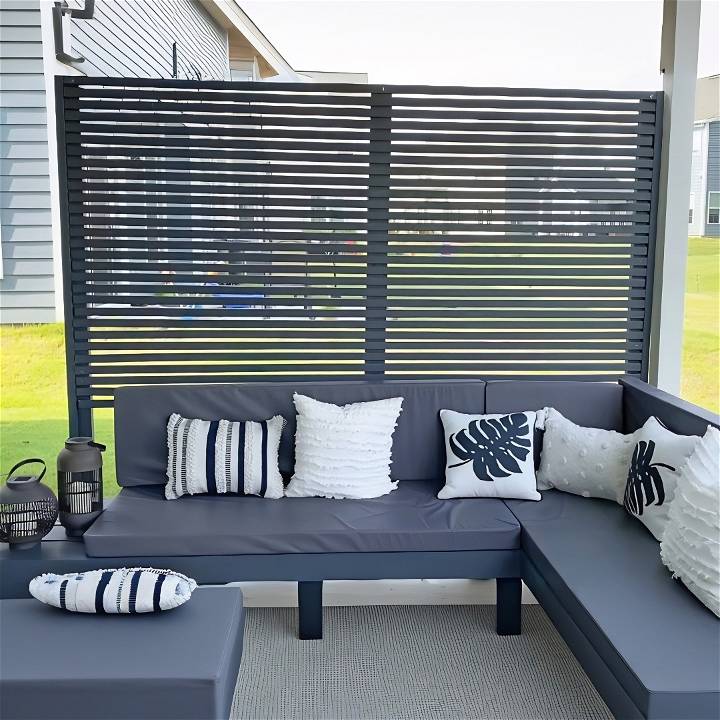
Materials and Why They're Needed
- Pressure Treated Wood (1x2s and 2x4s): For the structure. The pressure treatment ensures it can withstand outdoor conditions.
- Orbital Sander and 180 Grit Sandpaper: To smooth out the wood surfaces. Because splinters and rough edges are nobody's friend.
- Screws and Drill: To assemble the structure securely. Pilot holes are essential to avoid splitting the wood.
- Paint and Roller: To give it a finished look and extra protection against the elements.
- Nails (2-inch): To attach the slats to the posts.
- Wheels (with a locking system): For mobility, making it easy to move the wall if needed.
- Wire Hooks: For additional stability, especially important if you're adding wheels.
Step by Step Instructions
Build your own outdoor oasis with a DIY privacy wall! Simple step-by-step instructions for building the perfect backyard retreat.
Step 1: Planning and Prepping the Wood
First things first, I got my hands on the best straight pieces of wood I could find. It's crucial for the structure to be stable and for the final look to be neat. I cut my 2x4s into three legs that were two feet wide and three posts that were six feet high, taking the height of the wheels into consideration.
Step 2: Sanding Down the Wood
Although not my favorite part, sanding was necessary. I lightly sanded the wood using an orbital sander and 180 grit paper. Remember, it doesn't need to be perfect, just smooth enough to handle and paint.
Step 3: Building the Base Frame
I attached the legs to a 2x4, making sure to mark the centers before screwing them together. Drilling pilot holes first makes this process much smoother and reduces the risk of the wood splitting.
Step 4: Attaching the Posts
After drilling pocket holes in one side of the posts, I attached them to the base frame. While I went for a straightforward joint, investing time in a stronger joint might be a better choice if you have the skills and patience.
Step 5: Preparing and Painting the Slats
Sanding all the slats in batches made the job quicker. I then used a paint roller to apply a coat of paint, doing this in batches as well helped manage the workload and drying time.
Step 6: Assembling the Wall
This was where the project started to come together. I nailed two slats vertically at the edges of the posts for a finished look and measured the distance between them to cut the rest of the slats to the correct size. Using a 0.5-inch spacer helped maintain even gaps between the slats, making the process much smoother.
Step 7: Adding Mobility and Stability
To add wheels, I chose ones with a locking system for ease of movement and security. However, this made the wall a bit unstable. To counteract this, I secured the wall to our pergola with wire hooks for extra support on windy days. It's an easy fix that can be undone if I need to move the wall.
The Final Look
With persistence and patience, I transformed my open deck into a private oasis. It's incredible how much of a difference this privacy wall has made. Not only does it provide seclusion, but it's also a stylish addition to our outdoor space.
Strategically Positioning Your Outdoor Privacy Screen
When it comes to making an effective outdoor privacy screen, proper placement is key. By strategically positioning your privacy screens, you can maximize their functionality and enhance your outdoor living experience. Here are some practical tips to guide you:
1. Assess Your Space
Before installing your privacy screen, take a close look at your outdoor area. Consider the following factors:
- Sunlight Exposure: Observe how the sun moves across your space throughout the day. Identify areas that receive direct sunlight and those that remain shaded. Your privacy screen placement should account for both sun and shade.
- Wind Direction: Note prevailing wind patterns. Screens can act as windbreaks, so position them to shield seating areas or outdoor dining spaces from strong gusts.
- Views from Neighbors: Walk around your property to understand what your neighbors can see from their vantage points. Place screens strategically to block unwanted views while maintaining a harmonious neighborhood atmosphere.
2. Zones of Privacy
Divide your outdoor space into different zones based on functionality. Each zone may require a different level of privacy:
- Lounging Area: If you have a cozy seating area or lounge, position your screen to build a sense of seclusion. Consider placing it on the side where you want the most privacy.
- Dining Space: For outdoor dining, place the screen near the dining table. This ensures privacy during meals and minimizes distractions.
- Pool or Spa Area: If you have a pool or spa, position the screen to shield it from neighboring properties. Privacy is essential when you're relaxing by the water.
3. Height and Orientation
- Height: The height of your privacy screen matters. Taller screens provide better coverage, especially if you're dealing with multi-story neighboring buildings. Consider screens that extend above eye level for optimal privacy.
- Orientation: Screens can be oriented vertically or horizontally. Vertical screens are excellent for narrow spaces or to build a visual barrier. Horizontal screens work well for wider areas and can also serve as decorative features.
4. Natural Elements
- Greenery: Incorporate plants into your privacy screen design. Climbing vines, tall grasses, or potted shrubs can soften the appearance of screens while adding a touch of nature. Choose plants that thrive in your climate.
- Living Walls: Consider making a living wall by attaching planters filled with greenery to your screen. Living walls not only provide privacy but also improve air quality.
5. Mobility and Flexibility
- Portable Screens: If you're renting or prefer flexibility, opt for portable screens. These can be moved around as needed, allowing you to adjust privacy levels based on the occasion.
- Folding Screens: Folding screens are versatile and can be expanded or collapsed as desired. Use them to build temporary partitions or to shield specific areas during gatherings.
The goal is to strike a balance between privacy and aesthetics. Your outdoor privacy screen should enhance your outdoor lifestyle while respecting the surrounding environment.
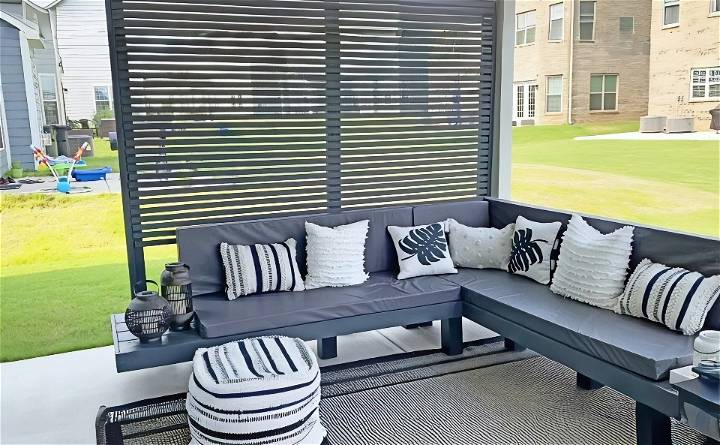
Creative Plant-Based Screens: Bringing Nature to Your Privacy
When it comes to outdoor privacy screens, why settle for plain and mundane when you can infuse them with the beauty of nature? Creative plant-based screens not only provide privacy but also enhance your outdoor space with greenery, fragrance, and visual appeal. Let's explore some delightful ideas:
1. Climbing Vines and Trellises
- Climbing Plants: Choose vigorous climbers like clematis, ivy, or honeysuckle. These plants naturally cling to trellises or wire mesh screens. As they grow, they build a lush, living curtain that shields your space.
- Trellises and Arbors: Install wooden or metal trellises near seating areas or along fences. Train climbing plants to weave through the lattice, forming a charming privacy screen. Consider adding an arbor for an elegant entrance to your garden.
2. Bamboo and Reed Fencing
- Bamboo: Bamboo screens are both eco-friendly and stylish. They provide a tropical vibe and can be easily customized to fit any space. Use bamboo panels or rolled bamboo fencing for a quick and effective privacy solution.
- Reed Fencing: Similar to bamboo, reed fencing offers a natural look. It's lightweight, easy to install, and provides a rustic backdrop. Use it to enclose a patio or build a secluded corner.
3. Living Walls and Vertical Gardens
- Living Wall Panels: These modular panels feature pockets where you can plant various herbs, succulents, or flowering plants. Hang them on a sunny wall to build a living work of art that doubles as a privacy screen.
- Vertical Planters: Attach planters directly to your existing fence or wall. Fill them with colorful annuals, trailing vines, or fragrant herbs. The result? A vibrant and functional privacy barrier.
4. Potted Trees and Shrubs
- Container Trees: Large pots filled with small trees or shrubs can build an instant privacy screen. Consider dwarf evergreens, Japanese maples, or citrus trees. Place them strategically along your patio or balcony.
- Boxwood Hedges: Boxwood shrubs are classic choices for making hedges. Plant them in containers or directly in the ground. Regular pruning keeps them dense and neat.
5. Hanging Gardens and Macrame Planters
- Hanging Baskets: Suspend baskets filled with trailing plants like petunias, lobelia, or string of pearls. Hang them from pergolas, eaves, or tree branches to add privacy and color.
- Macrame Plant Hangers: Get crafty with macrame! Build your own plant hangers and showcase cascading greenery. Hang them at different heights for a whimsical effect.
6. Espaliered Fruit Trees
- Espalier Technique: Train fruit trees (such as apple, pear, or fig) to grow flat against a wall or fence using the espalier method. Not only do they provide privacy, but they also yield delicious fruit.
- Artistic Patterns: Arrange the branches in artistic patterns—fans, diamonds, or horizontal lines—for added visual interest.
Whether you opt for fragrant blooms, lush foliage, or edible delights, creative plant-based screens bring a touch of nature to your outdoor sanctuary.
FAQs About DIY Outdoor Privacy Screen
Learn all about DIY outdoor privacy screens in this comprehensive FAQ guide. Discover tips, ideas, and solutions for making your own backyard oasis.
1. What are the best plants for privacy screen ideas?
When choosing plants for your outdoor privacy screen, consider those that thrive in your climate and provide both coverage and aesthetics. Here are some excellent options:
- Climbing Vines: Plants like clematis, ivy, and honeysuckle can climb trellises or wire mesh screens, making a living curtain of greenery.
- Bamboo: Bamboo screens offer a tropical vibe and are eco-friendly. They grow quickly and can be customized to fit any space.
- Boxwood Shrubs: Classic choices for making hedges, boxwood shrubs are dense and easy to maintain.
2. How do I maintain my privacy screen?
Regular maintenance ensures your privacy screen remains effective and attractive:
- Trimming and Pruning: Keep plants well-trimmed to maintain their shape and prevent overgrowth.
- Inspect for Damage: Check for any signs of wear, rot, or insect damage. Repair or replace damaged parts promptly.
- Stain or Paint: If your screen is made of wood, apply stain or paint to protect it from weathering.
3. Can I use privacy screen ideas for small spaces?
Absolutely! Privacy screens work well in small spaces too. Opt for compact designs like hanging planters, folding screens, or vertical gardens. These provide privacy without overwhelming the area.
4. Are there temporary privacy screen ideas?
Yes, temporary screens are great for renters or those who want flexibility. Consider options like portable screens, folding panels, or fabric curtains. You can move them around as needed.
5. How do privacy screens benefit my home?
Privacy screens offer several advantages:
- Seclusion: Enjoy private moments without feeling exposed to neighbors or passersby.
- Aesthetic Enhancement: Screens add beauty and texture to your outdoor space.
- Noise Reduction: Some screens can dampen sound, making a quieter environment.
6. Can I build a privacy screen on a budget?
Definitely! Many DIY privacy screen projects use affordable materials like wood slats, lattice panels, or picket fencing boards. Get creative with recycled materials or repurpose existing items to keep costs low.
Final Thoughts
Building this outdoor privacy wall was a fulfilling project that enhanced our home and made our summers more enjoyable. Whether you're a seasoned DIYer or a novice, I hope this guide inspires you to tackle your own privacy wall project. With the right materials, a bit of time, and some effort, you can build a beautiful and practical outdoor feature that elevates your living space.


