Building our DIY outdoor sectional was such a fun and rewarding project. With just a few basic tools and some budget-friendly materials, we transformed our patio space into a cozy retreat. We measured, cut, and assembled the wood frames, making sure everything fit perfectly. It was a bit challenging at times, but seeing it come together step by step was absolutely worth it.
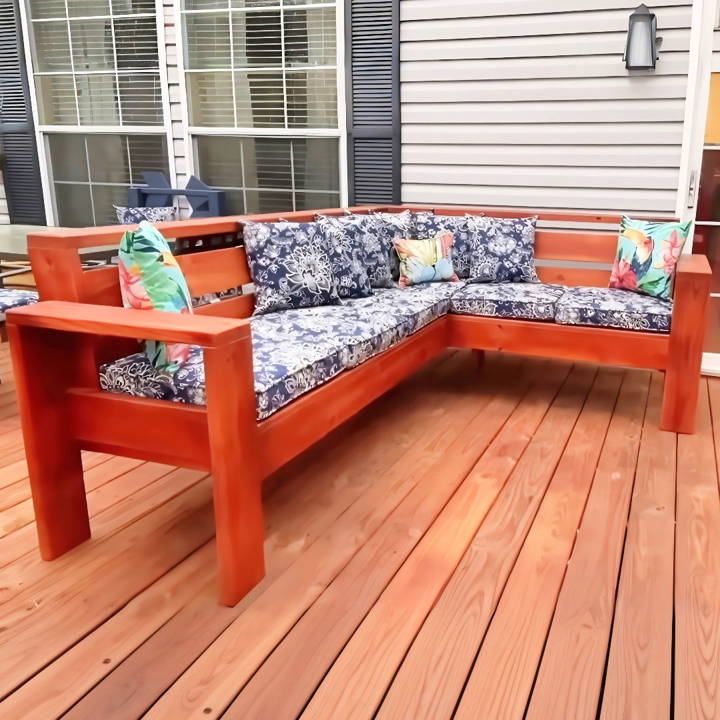
One of my favorite parts was picking out the cushions and fabric. We wanted something comfortable and weather-resistant. I loved adding a personal touch with throw pillows and a small side table. This project not only gave us great seating but also made our patio feel brand new.
I'm helping with this guide on making your own DIY patio sectional—these tips will help you get started!
Materials Needed and Their Importance
Before you start, it's essential to gather all necessary materials:
- Common 2x6 Pine Boards: These form the foundation of your sectional. Pine is affordable and easy for DIY projects.
- 1x6 Boards: Used for decking, these boards are lighter and less expensive than heavier alternatives.
- Pocket Hole Jig: This is for securely joining the boards together.
- Wood Glue and Exterior Screws: Necessary for assembling the pieces to ensure durability and stability.
- Sander and Sandpaper: To smooth out all surfaces for a polished look.
- Router with Chamfer Bit (Optional): For rounding off the edges to prevent splinters and give a professional finish.
Step by Step Instructions
Build the perfect DIY outdoor sectional with our easy, step-by-step guide. Make your ideal outdoor seating space today!
Building the Frame
- Cutting the Boards: The first step is to cut your 2x6 pine boards according to the dimensions of your sectional. I needed two pieces at 77 inches for the long sides, eight pieces at 21.75 inches for support, and two at 39 inches for the short sides.
- Drilling Pocket Holes: Set your pocket hole jig for 1.5-inch thick wood (the size of a 2x6). This will allow you to join the boards securely. A tip here is to adjust the drill depth slightly less than the thickness to prevent the screws from breaking through the surface.
- Assembling the Frames: Apply wood glue on ends of the support pieces, and then use pocket screws to join them. Ensure the long side frames and short side frames are assembled separately.
Adding the Decking
- Cutting and Laying the 1x6 Boards: Measure and cut the 1x6 boards to match the length of your frames and lay them across the top, leaving small gaps between each board for water drainage. Attach these with screws directly into the frame.
Constructing and Attaching the Legs
- Building the Legs: Cut four pieces for the uprights of the legs and attach them to the frame, making sure to position the front face flush. Use clamps to hold them in place while you screw them in.
- Attaching the Frame to the Legs: Once the legs are attached to one side of the frame, repeat the process with the second set of legs on the other side. Ensure all legs are of equal length for stability.
Final Touches: Sanding, Routing, and Finishing
- Sanding: Smooth all surfaces with a sander, starting with 80-grit sandpaper and then moving to 120-grit for a finer finish.
- Routing Edges (Optional): If you have a router, use a chamfer bit to smooth out sharp edges particularly on the armrests and the bottom of the legs to prevent splintering and wear.
- Staining or Sealing: Finally, protect your outdoor sectional with a weather-resistant stain or sealer. I chose a quality outdoor stain that matched my outdoor d* écor, applied with a sprayer for an even coat.
Lessons Learned
- Double-Check Measurements: Ensure all your measurements are correct before cutting to avoid waste.
- Clamping is Key: Always clamp your workpieces during assembly to prevent them from moving.
- Test As You Go: Regularly check that everything fits together correctly, especially before final assembly.
Design Customization Ideas
Making a DIY outdoor sectional gives you the freedom to tailor it to your personal taste and the specific needs of your outdoor space. Here are some ideas to inspire your design:
- Choose a Theme: Start by deciding on a theme that reflects your style. Whether it's modern minimalism, rustic charm, or tropical vibes, let your theme guide your choices in materials and colors.
- Selecting Materials: Opt for durable materials suited for outdoor use. Hardwoods like teak or cedar, metals such as aluminum or wrought iron, and all-weather wicker are popular choices. Consider the climate you live in and select materials that will withstand the elements.
- Color Palette: Pick a color scheme that complements your home's exterior. Neutral colors like beige, gray, and white offer versatility, while bold hues can add a vibrant touch. Use outdoor cushions and throw pillows to introduce patterns and pops of color.
- Functional Features: Think about adding built-in side tables, storage compartments, or even a hidden cooler section to make your sectional more functional. These features can be both practical and stylish.
- Comfort is Key: Prioritize comfort with plush, weather-resistant cushions. Look for high-quality fabrics that are UV-protected and mildew-resistant to ensure they last longer.
- Accessorize: Finalize your design with accessories. Outdoor rugs, string lights, and planters can enhance the ambiance of your space. Consider a matching coffee table or a fire pit for a cozy gathering spot.
- Personal Touches: Add elements that make the space uniquely yours. This could be anything from a hand-painted mural on a wooden sectional to custom-made cushion covers with your favorite patterns.
DIY projects have no strict rules. Mix ideas to craft a unique outdoor sectional. Keep it simple, ensure quality, and enjoy the process!
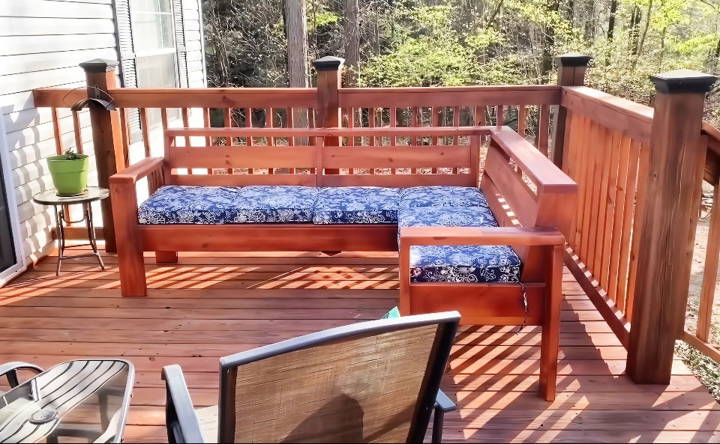
Troubleshooting Common Issues
When embarking on a DIY outdoor sectional project, you might encounter a few hiccups along the way. Here's how to troubleshoot some common issues:
- Wood Warping or Cracking: This can happen due to moisture or temperature changes. To prevent this, choose quality, kiln-dried wood and apply a sealant. If warping occurs, use clamps and wood glue to straighten and secure the boards.
- Screw and Bolt Challenges: If screws aren't going in smoothly, ensure you're using the correct size and type for your materials. Pre-drilling holes can prevent the wood from splitting. Stripped screws can be removed with a screw extractor kit.
- Unstable Furniture: Check that all joints are tight and reinforced if necessary. Adjust leg lengths to ensure evenness or add additional supports to any wobbly sections.
- Paint or Stain Issues: For an even finish, sand the wood thoroughly before applying paint or stain. Use multiple thin coats rather than one thick coat, allowing ample drying time between each.
- Cushion Slippage: To keep cushions from sliding off, attach Velcro strips or use non-slip mats underneath them.
- Rust on Metal Parts: Prevent rust by choosing stainless steel or coated hardware. If rust appears, use a wire brush to remove it, then apply a rust-inhibiting primer and paint.
By anticipating these issues and knowing how to handle them, you'll be better prepared to make a beautiful and durable outdoor sectional.
FAQs About DIY Outdoor Sectional
Discover answers to common questions about DIY outdoor sectional setups. Get tips, materials, and expert advice for making your perfect outdoor seating.
The cost can vary widely depending on the materials you choose and whether you have some of the tools and supplies already. Generally, you can expect to spend anywhere from $100 to $500. Using reclaimed materials like pallets can help reduce costs.
Yes, there are plans available for all skill levels. Some designs are very straightforward and require only basic tools and materials. However, if you choose a more complex design, you might need a bit more experience or the help of a friend who is handy.
The time it takes can range from a few hours to a couple of days, depending on the complexity of the design and your level of experience. Simple designs can be completed in a weekend, while more elaborate ones might take longer.
Yes, treating the wood with a sealer or using naturally weather-resistant wood like cedar is important to protect your sectional from the elements. This will help ensure that your outdoor sectional lasts for many seasons.
To maintain your outdoor sectional, clean it regularly with mild soap and water, and cover it when not in use to protect it from the elements. For wood sectionals, reapply sealer or paint as needed to prevent weather damage. If your sectional includes cushions, store them inside during extreme weather.
Conclusion
Completing my own DIY outdoor sectional gave me a sense of accomplishment. Give it a try—these steps will help you build your dream patio space!


