Living in Texas, the summers can be unforgivingly hot. For the longest time, the idea of having a refreshing outdoor shower in our backyard lingered in my mind. After much contemplation and planning, I finally decided to make it happen. What started as a simple project to beat the heat turned into an exciting DIY journey, enhancing our outdoor living space and adding a touch of luxury to our humble abode. Here's a step-by-step guide on how I built our DIY outdoor shower, nestled conveniently next to our stock tank pool.
Choosing the Location and Initial Preparations
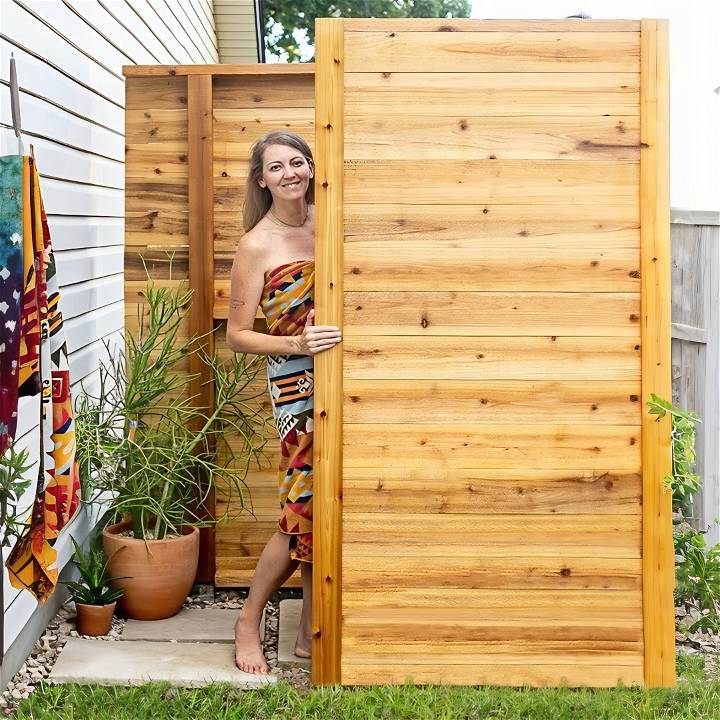
The perfect spot for our DIY outdoor shower was an easy pick – right by our stock tank pool. This not only made it super convenient for a quick rinse before diving into the pool but also provided an opportunity to block an unattractive view on that side of the house with something functional.
Materials Needed and Their Purpose:
- Wooden Posts & Sleeves: To build a sturdy structure while protecting it from moisture-induced rot.
- Pea Gravel: For effective drainage at the base of the posts.
- Concrete Mix: To securely anchor the posts in place.
- Natural Stone Pavers and Rocks: For the shower flooring, offering durability and a pleasant aesthetic.
- Cedar Wood: Selected for the walls for its natural beauty and resistance to rot and pests.
- Plumbing Supplies: For the essential functionality of the shower, ensuring a refreshing flow of water.
Step by Step Instructions
Learn how to build a DIY outdoor shower step by step: from setting the foundation to plumbing installation and waterproofing - all in one guide!
Step 1: Setting the Foundation
The very first step involved digging holes for the four posts that would support our shower walls. Each hole was dug about 12 inches wide and 24 inches deep. A layer of pea gravel at the bottom of each provided excellent drainage. I then prepared the posts with protective sleeves, which are essential for combating wood rot due to constant moisture exposure.
Step 2: Installing the Posts
After preparing the posts, I set each post in their respective holes, marking two inches above the ground for accurate sleeve placement. This step was crucial for ensuring the longevity of our structure. I opted for a fast-setting concrete mix to anchor the posts, a choice driven by both efficiency and the promise of strong support.
Step 3: Crafting the Shower Floor
The shower floor deserved special attention. I excavated a modest layer of topsoil to build a gentle slope away from our house, ensuring proper drainage. The choice of natural stone pavers and rocks was both aesthetic and practical, providing a solid, yet naturally beautiful flooring that complemented the outdoor vibe.
Step 4: Building the Shower Walls
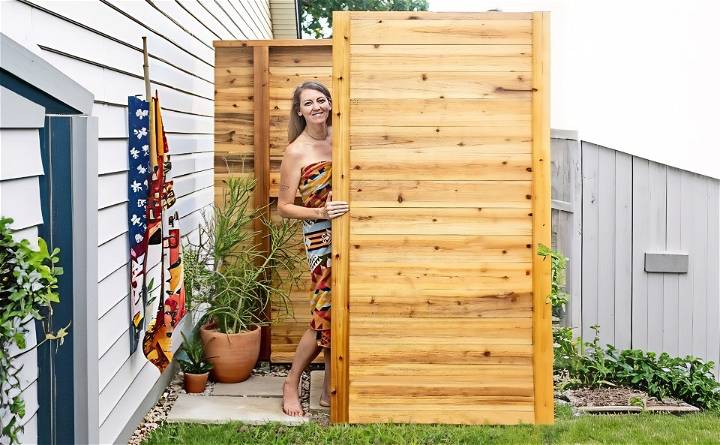
I chose cedar for the shower walls due to its beauty and innate resistance to decay. The walls were constructed from horizontal cedar slats, which not only offered privacy but also added a modern, minimalist aesthetic to the shower.
Installation of the cedar slats required precision. I started at the bottom, ensuring the first board was perfectly level, as it would set the tone for the rest of the installation. The use of exterior-rated screws and a bit of patience resulted in walls that were not just functional but also strikingly attractive.
Step 5: Finishing Touches and Waterproofing
To preserve the cedar's gorgeous hue and protect it from the elements, I applied a finish that sealed the wood from moisture while enhancing its natural grain. The transformation was remarkable – the wood's rich colors came to life, promising to stand the test of time.
Step 6: Plumbing Installation
The final step involved the plumbing work, arguably the backbone of the outdoor shower. I opted for a simple setup, with cold water being more than sufficient for our hot Texas summers. The installation of galvanized steel pipes added an industrial flair to the shower, blending seamlessly with the natural and wooden elements.
The Result – An Outdoor Oasis
The completion of our DIY outdoor shower was a moment of pure satisfaction. From the refreshing sprays of water to the serene ambiance buildd by the surrounding cedar and stone, every element came together flawlessly, exceeding our expectations. It's more than just a shower; it's an experience – an escape into nature within the confines of our backyard.
Creative Design Ideas for Your DIY Outdoor Shower
When it comes to designing your outdoor shower, the possibilities are as refreshing as the water that flows through it. Whether you're building from scratch or revamping an existing setup, consider these creative ideas to elevate your outdoor shower experience:
Nature-Inspired Oasis
Build an outdoor shower that seamlessly blends with its natural surroundings. Imagine showering under a canopy of lush leaves, surrounded by fragrant flowers and the soothing sound of rustling leaves.
Tips:
- Shower Enclosures: Use bamboo, wooden lattice, or living walls (covered in climbing plants) to enclose your shower area. These materials provide privacy while maintaining an organic feel.
- Pebble Flooring: Lay down a pebble floor for an earthy texture. The uneven surface feels great underfoot and allows water to drain easily.
- Rainfall Showerhead: Opt for a large, rainfall-style showerhead that mimics the sensation of standing under a gentle waterfall.
Beach Vibes
Transport yourself to a coastal paradise with a beach-themed outdoor shower. Think sandy floors, driftwood accents, and a relaxed, carefree atmosphere.
Tips:
- Sandy Base: Build a sandy base for your shower area. Soft sand feels delightful and evokes memories of beach vacations.
- Driftwood Hooks: Hang your towels and swimsuits on driftwood hooks. These weathered pieces add rustic charm.
- Nautical Details: Incorporate rope handles, marine-inspired tiles, or even a porthole window for that seaside flair.
Minimalist Zen
If you prefer simplicity and tranquility, a minimalist outdoor shower can be your oasis of calm. Clean lines, neutral colors, and uncluttered design define this style.
Tips:
- Sleek Fixtures: Choose modern fixtures with clean lines. Stainless steel or matte black finishes work well.
- Open Space: Keep the shower area open and spacious. Avoid excessive ornamentation.
- Japanese Influence: Take inspiration from Japanese onsen (hot spring) baths. Incorporate natural wood, stone, and bamboo elements.
Vintage Charm
Capture the nostalgia of yesteryears with a vintage-inspired outdoor shower. Think retro tiles, antique hardware, and a touch of whimsy.
Tips:
- Patterned Tiles: Install vintage-patterned tiles on the shower walls. Classic subway tiles or Moroccan-inspired designs work beautifully.
- Exposed Plumbing: Instead of hiding pipes, embrace them! Exposed copper or brass plumbing adds character.
- Antique Fixtures: Hunt for antique showerheads, faucets, and knobs at flea markets or salvage yards.
Tropical Paradise
Turn your outdoor shower into a tropical escape. Picture vibrant colors, lush greenery, and a sense of adventure.
Tips:
- Tiki-Inspired: Design a tiki-themed shower with bamboo poles, thatched roofing, and tiki torches.
- Palm Trees: If you're in a warm climate, plant palm trees around your shower area. Their swaying fronds build a vacation vibe.
- Outdoor Mosaic: Consider a mosaic-tiled shower floor with tropical motifs like hibiscus flowers or sea turtles.
Your DIY outdoor shower should reflect your personal style and enhance your connection with nature. Whether you're rinsing off after a swim or simply enjoying the great outdoors, let your creativity flow like the water from your showerhead!
FAQs About DIY Outdoor Shower
Discover everything you need to know about DIY outdoor showers in this comprehensive FAQ guide. Learn how to build and maintain your own outdoor oasis.
1. Can I Use Solar Heating for My Outdoor Shower?
Yes! Solar-heated showers are eco-friendly and cost-effective. Here's how:
- Solar Bag Showers: Hang a black bag filled with water in the sun. The heat warms the water inside.
- DIY Solar Collector: Build a simple solar collector using black PVC pipes. Water circulates through the pipes, getting heated by the sun.
2. What's the Best Material for an Outdoor Shower Floor?
Choose a material that's durable, slip-resistant, and easy to clean:
- Teak Wood: Teak is naturally resistant to water and insects.
- Stone Tiles: Stone provides a natural look and excellent drainage.
- Composite Decking: Composite materials mimic wood but require less maintenance.
3. How Can I Ensure Privacy in My Outdoor Shower?
Privacy is crucial. Consider these options:
- Natural Barriers: Use plants, bamboo, or lattice to build a green screen.
- Shower Curtains: Install weather-resistant curtains around your shower area.
- Folding Screens: Portable screens can be set up and moved as needed.
4. Is It Possible to Add Hot Water to My Outdoor Shower?
Absolutely! Here's how:
- Connect to Home Plumbing: Extend hot water lines from your house to the outdoor shower.
- Tankless Water Heater: Install a small tankless water heater near the shower for instant hot water.
5. What Maintenance Does an Outdoor Shower Require?
Regular maintenance ensures your outdoor shower stays in top shape:
- Cleaning: Remove dirt, mold, and algae from surfaces.
- Sealing Wood: If you have a wooden shower, apply a sealant to protect against moisture.
- Winterizing: In colder climates, drain water and cover the shower during winter.
Remember, an outdoor shower adds convenience and a touch of luxury to your outdoor space. Customize it to fit your style, and enjoy the refreshing experience!
Final Thoughts
This project, while challenging, was incredibly rewarding. It served as a reminder of the beauty of DIY – the joy of making something with your hands, the satisfaction of personal achievement, and the endless possibilities of making your home a better place. If you've been considering an outdoor shower, I hope this guide inspires you to take the plunge. It's more than a luxurious addition to your outdoor space; it's a lifestyle upgrade that you won't regret.


