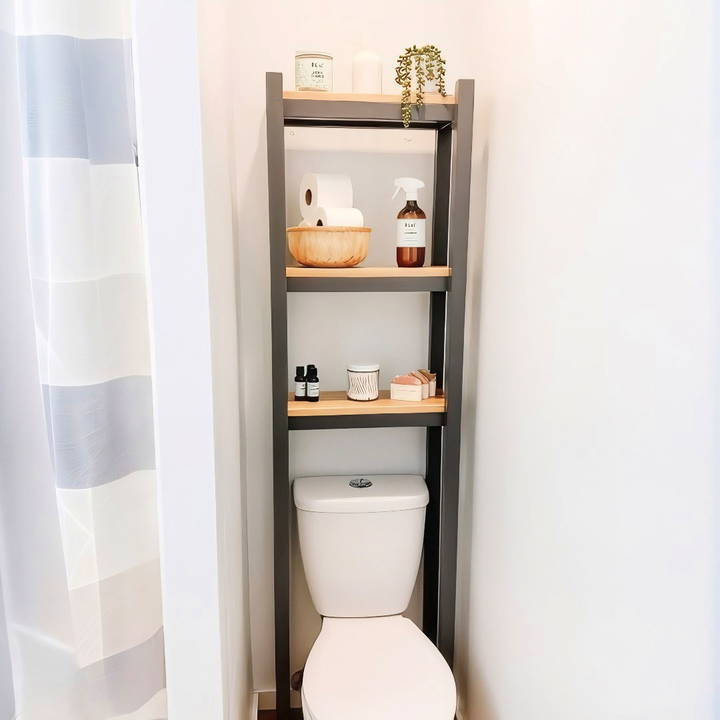
Building a DIY over-the-toilet storage shelf is a great way to maximize space, especially in smaller bathrooms. This project offers a practical solution for keeping your bathroom organized while adding a custom aesthetic touch. You will learn how to build an over-the-toilet storage shelf based on the steps outlined by Sew Bright Creations. This project can be customized to fit your style and bathroom space, offering both functionality and elegance.
Why Build Over-the-Toilet Storage?
Bathrooms are often tight on space, and the area above the toilet is frequently underutilized. With a DIY storage shelf, you can make the most of this space without needing to install wall-mounted cabinetry. Whether you're storing towels, toiletries, or décor, a shelf like this gives you extra storage while enhancing the look of your bathroom.
Materials Needed for the Project
To get started, you'll need some basic materials and tools. Most of these can be found at your local hardware store, or you may already have them in your workshop.
- 2x2 Boards (For the frame): You'll need enough wood to build the frame, including the vertical posts and the horizontal sections that will support the shelves.
- Four 2x2 boards cut to 6 feet each for the frame.
- Six 2x2 boards cut to 19 inches each for the shelf supports.
- Six 2x2 boards cut to 4 inches each for added structure.
- 1x6 Cedar Boards (For the shelves): These will serve as the surfaces for your shelves. Cedar is a good choice due to its natural resistance to moisture, which is ideal for bathrooms.
- Pocket Screws and Wood Glue: Used to join the frame pieces together securely.
- Wood Filler: For filling screw holes to give the project a smooth, finished appearance.
- Sandpaper (150-grit): To sand down rough edges and prepare the wood for finishing.
- Polyurethane: To seal and protect the wood.
- Paint: A durable paint such as Benjamin Moore's Iron color is recommended for the frame.
- Brad Nailer: To secure the shelves to the frame.
- Craig Jig: For drilling pocket holes in the smaller boards to make assembly easier.
- Clamps: To hold the boards in place while securing them with screws.
- Countersink Bit: For pre-drilling holes to attach the long 2x2s to the rectangular frame.
- Measuring Tape: For accurate measurements throughout the project.
Step by Step Instructions
Learn how to build DIY over-the-toilet storage with this step-by-step guide, from preparing wood pieces to customizing your perfect shelf.
1. Prepare the Wood Pieces
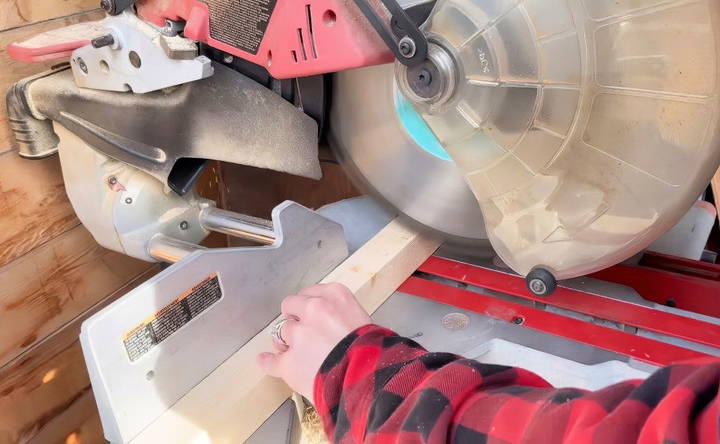
Start by cutting your wood pieces to the correct dimensions. The frame is built using 2x2s, and you'll need:
- Four 6-foot-long 2x2 boards for the vertical posts.
- Six 19-inch-long 2x2 boards for the shelf support.
- Six 4-inch-long 2x2 boards for added reinforcement and structure. Sand all your wood pieces with 150-grit sandpaper to smooth out any rough edges and ensure the boards are ready for assembly and finishing.
2. Assemble the Rectangular Frames
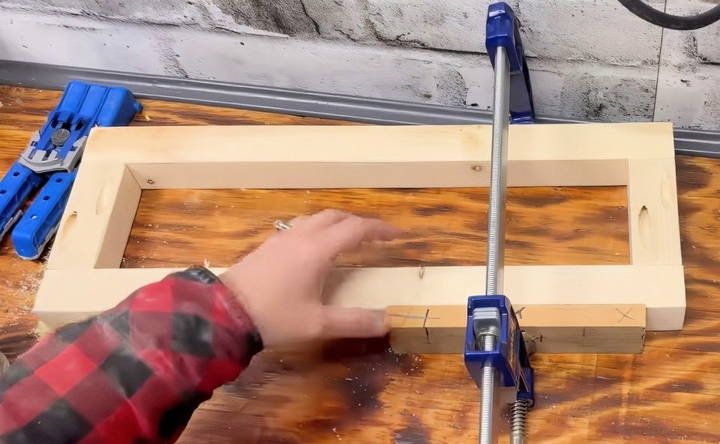
Begin by constructing three rectangular frames. Use your Craig Jig to drill pocket holes into the ends of the smallest boards (the 4-inch-long pieces). This will make it easier to secure these pieces to the 19-inch boards.
- Apply wood glue to the ends of the 4-inch boards and then screw them into the 19-inch boards using pocket screws.
- Clamp the boards together to keep everything aligned and square.
- Repeat this process three times to build three identical rectangular frames.
3. Attach the Frames to the Vertical Posts
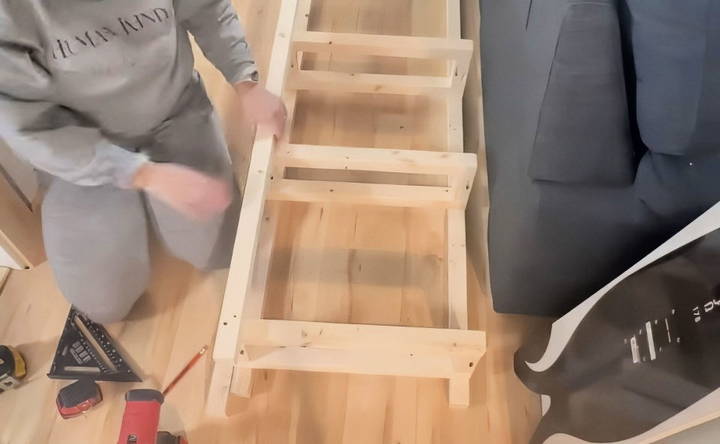
Once the rectangular frames are built, it's time to attach them to the 6-foot-long vertical posts.
- Measure 2 inches down from the top of each post and mark the spot. This is where the top shelf will be attached.
- Use a countersink bit to pre-drill holes into the long 2x2s and then attach the top rectangular frame using two screws for each post. For the middle shelf:
- Measure 16 inches down from the top shelf and attach the second rectangular frame. The bottom shelf:
- Measure 38 ½ inches up from the bottom and attach the third rectangular frame. This layout builds a sturdy and visually appealing arrangement with three evenly spaced shelves.
4. Add Extra Support to the Base
To make sure your shelf is stable and can support the weight of your items, add two more 2x2 pieces near the bottom of the frame for extra support. These should be attached just above the bottom shelf.
- Cut two more 2x2 boards to fit horizontally across the width of the frame, and secure them with screws for added stability.
5. Fill and Sand the Screw Holes
Once the frame is fully assembled, it's time to prepare it for finishing. Use wood filler to fill the screw holes on the front side of the frame.
- After the wood filler dries, sand it smooth so that the surface is even and ready for paint.
- Repeat this step with two coats of wood filler, sanding in between coats to ensure a flawless finish.
6. Paint the Frame
Now that your frame is assembled and sanded, it's time to paint. For this project, Benjamin Moore's Iron paint was used, but you can choose any color that complements your bathroom décor.
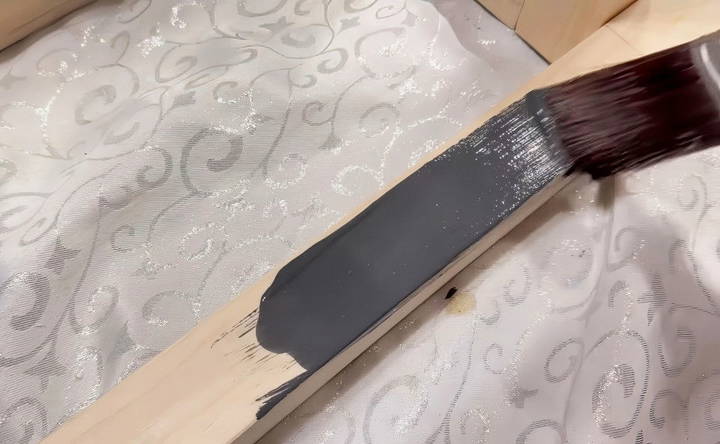
- Apply two coats of paint, sanding lightly between coats for a smooth and professional finish.
7. Prepare and Seal the Cedar Shelves
While the paint dries, you can prepare the cedar shelves. Start by cutting your 1x6 cedar boards to the correct length to fit across each shelf.
- Sand the cedar boards to remove any rough spots and ensure they are smooth.
- Apply two coats of polyurethane to seal and protect the wood from moisture and wear. Just like with the frame, sand lightly between coats for the best results.
8. Attach the Cedar Shelves
Once the polyurethane has dried on the cedar shelves, use a brad nailer to secure them to the rectangular frames. The cedar adds a beautiful natural touch to the piece while providing a sturdy surface for storage.
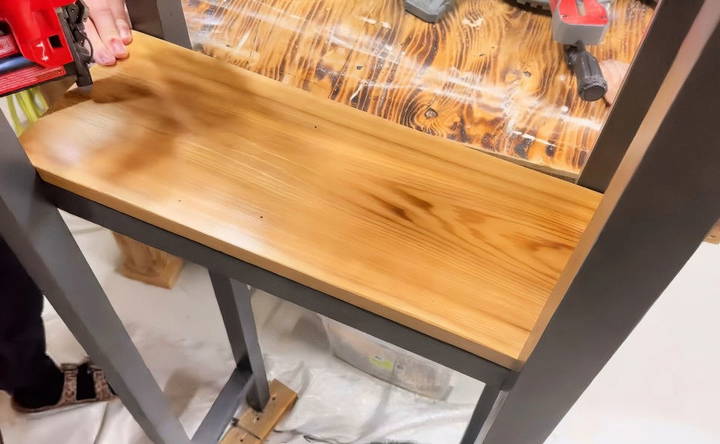
- Nail the boards to the top of each rectangular frame, ensuring they are secure and level.
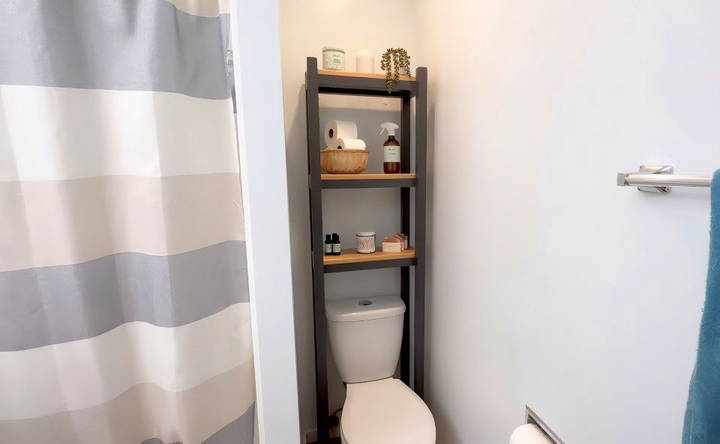
9. Install and Enjoy Your New Storage Shelf
The final step is to place your new storage shelf over your toilet. Slide it into place, and make any necessary adjustments to ensure it fits snugly and evenly.
Once it's in position, you can start using it for storage. Whether you use it for toiletries, towels, or decorative items, this custom shelf adds both function and style to your bathroom.
Tips for Customizing Your Over-the-Toilet Shelf
This project can be easily customized to fit your bathroom's size and style. Here are a few ideas for personalizing your shelf:
- Adjust the Shelf Height: Depending on what you plan to store on the shelves, you may want to adjust the height between them. For example, if you're storing taller items like baskets or plants, increase the space between the shelves.
- Use Different Wood Types: If cedar isn't your preference, you can opt for other types of wood, such as pine, oak, or even reclaimed wood for a rustic look.
- Decorate the Shelves: Add decorative elements like small plants, jars, or artwork to make the shelf feel more integrated with your bathroom's aesthetic.
Conclusion
Building your own over-the-toilet storage shelf is a rewarding DIY project that offers practical storage while adding style to your bathroom. With just a few materials and some basic woodworking skills, you can build a piece that's both functional and beautiful. By following the steps above, you'll have a sturdy and attractive storage solution that's tailored to your space. Happy building!
FAQs About DIY Over-the-Toilet Storage Shelf
Discover answers to common FAQs about DIY over-the-toilet storage shelves, enhancing bathroom space and organization effortlessly.
Always double-check the wood dimensions you're working with. Some lumber can vary slightly in size, so adjusting your measurements accordingly can ensure a better fit.
Yes! This shelf can be customized for various purposes. For example, it can be adapted to rotate and move if you're not using it in the bathroom. Consider adding wheels or a swivel base for mobility.
Ensure the rectangular frames are square during assembly. Use clamps to hold the wood together tightly while screwing. If needed, recheck the level after assembly and make minor adjustments.
For extra stability, make sure to secure the bottom with two additional 2x2 boards. You can also attach it to the wall for added support, especially if you plan to store heavy items.
Use a durable paint that can withstand humidity, like Benjamin Moore's Iron, as mentioned in the project. This will protect the wood and give your shelf a polished look.


