Making a DIY pacifier clip is a fun and creative way to craft a personalized accessory for babies, and it also serves a practical purpose. Pacifier clips keep pacifiers, teething toys, or small toys attached to your baby's clothing, ensuring they don't fall to the ground and get dirty. Follow this comprehensive tutorial to craft your own pacifier clip, including guidance on materials selection, putting it together, and maintaining safety.
What You'll Need
To make a DIY pacifier clip, gather the following materials:
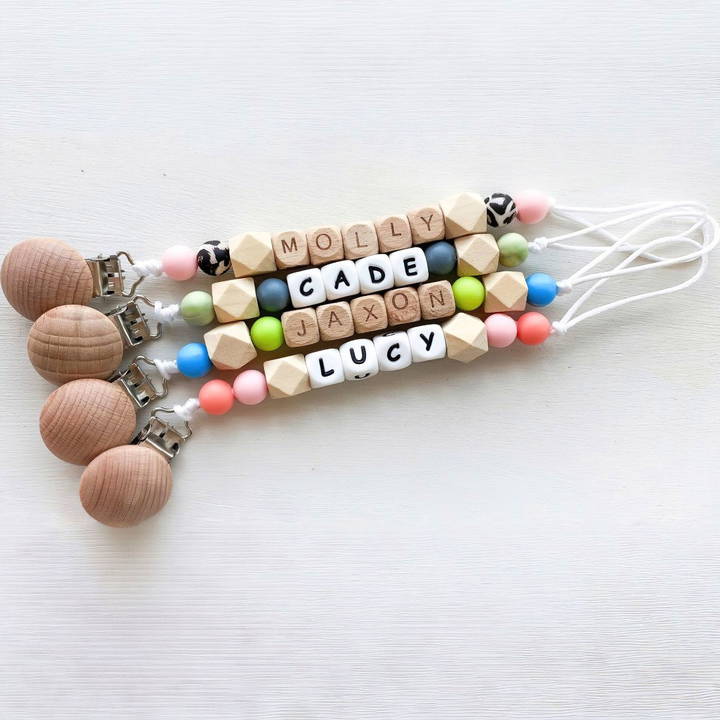
- Wooden or Silicone Beads: These beads are soft, safe, and suitable for babies to chew on, as they are typically BPA-free, latex-free, and lead-free.
- Alphabet Beads: Personalize the clip with your baby's name using silicone or wooden letter beads.
- Pacifier Clips: These can be found in a variety of designs and can clip onto a shirt, bib, or blanket to hold the pacifier in place.
- Strong String or Cord: Choose a sturdy cord, like nylon or polyester, to ensure durability.
- Scissors: Essential for trimming the string to the right length.
- Needle (optional): For threading thicker string through beads with smaller holes.
- Thimble (optional): To help push the needle through tight bead holes.
Step by Step Instructions
Learn how to make your own DIY pacifier clip with step-by-step instructions. Customize and personalize with beads for safe, stylish gifts.
Step 1: Prepare Your Materials
Before you begin, make sure you have all your materials in one place. This makes the assembly process much smoother. Lay out your beads in the order you'd like them to appear on the clip. You can build various patterns with the beads, incorporating different colors, shapes, and textures.
- String Length: Cut a piece of string approximately 24 inches (2 feet) long. This length gives enough room to thread the beads and tie secure knots while leaving extra room to build the loop at the end.
- Bead Layout: Arrange your beads in a pattern. You may choose to alternate silicone and wooden beads or place name beads in the middle for a personalized touch.
Step 2: Attach the Pacifier Clip
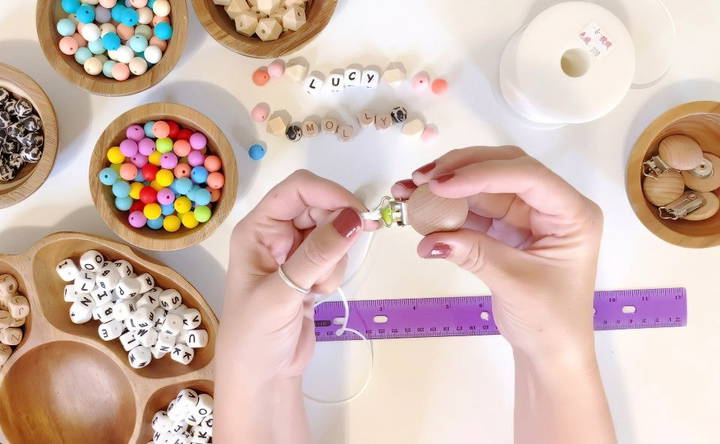
- Looping: Fold a small part of the string, about 2-3 inches, over the top of the pacifier clip.
- Luggage Tag Knot: Insert the looped string through the hole in the clip, then pull the remaining string ends through the loop. This should build a secure slipknot that attaches the string firmly to the clip.
- Secure the Knot: To ensure the clip is safely attached, tie a knot as close to the clip as possible. Pull it tightly to keep it secure.
Step 3: Begin Beading
Now comes the creative part—adding beads to the pacifier clip. This step allows you to design a unique and personalized pattern for your baby's clip.
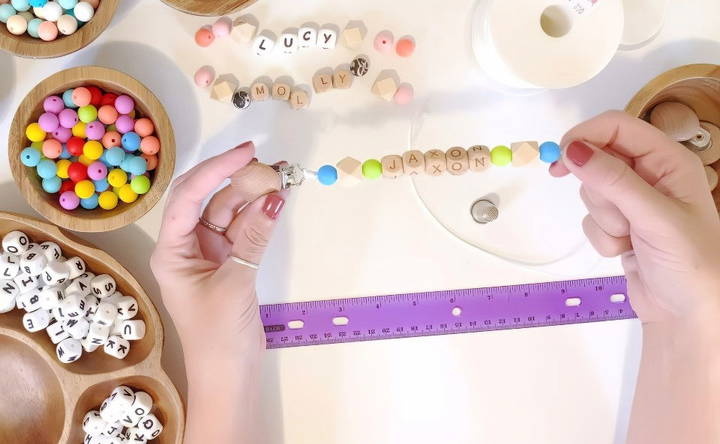
- Start with the First Bead: Slide the first bead onto the string. If the string's end is frayed, trim it slightly to make threading easier. If you're using thicker cord, use a needle to help thread it through the beads.
- Conceal the Tail: Tuck the short tail from the slipknot inside the first bead. This builds a cleaner look and ensures the tail doesn't dangle or fray.
- Continue Adding Beads: Slide each bead onto the string, following the pattern you set up earlier. For extra security, periodically pull the beads tightly to make sure they're snug on the string.
Step 4: Build a Loop at the End
The loop at the end of the string will hold the pacifier or teething toy.
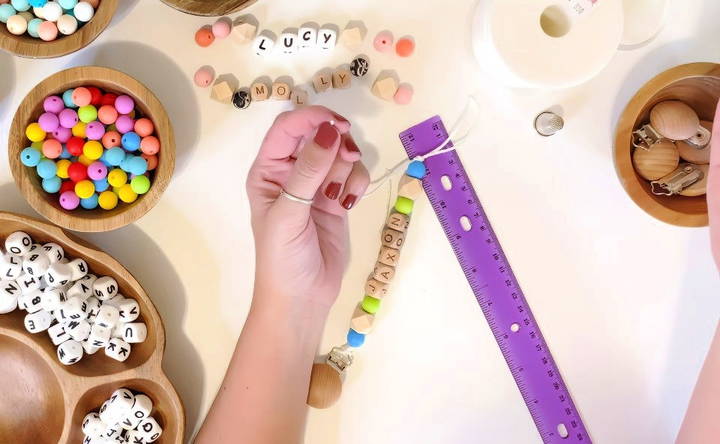
- Measure the Loop Size: Leave about 2 inches of string from the last bead to the end, ensuring it's large enough to fit all beads through when looping around a pacifier or toy.
- Tie a Secure Knot: Wrap the string around your finger, pull it through to build a knot, and slide it as close to the last bead as possible. Pull it tightly to secure.
- Thread the Extra String Back: For extra security, thread the remaining string back through a few beads. This will conceal the end of the string and provide a more polished look.
Step 5: Test and Attach the Pacifier or Toy
To attach the pacifier:
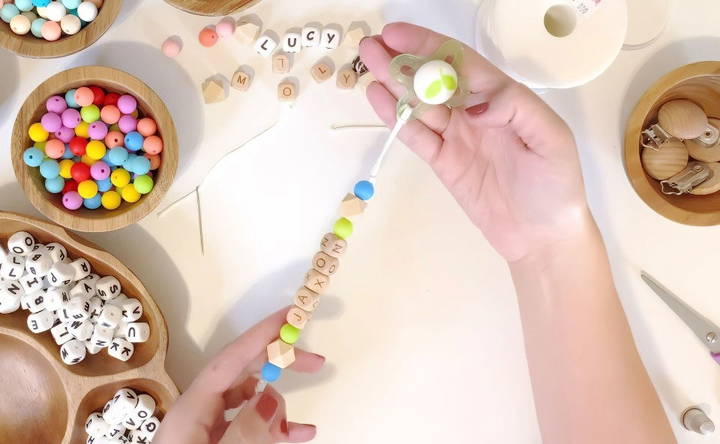
- Loop Through the Pacifier: Insert the looped end of the clip through the pacifier ring or any attachment point.
- Secure by Looping the Beads Through: Pass the entire beaded section through the loop and pull to tighten. This step keeps the pacifier attached to the clip securely.
Variations and Personalization Options
The beauty of DIY pacifier clips is the customization! Here are a few ideas to make your pacifier clips unique:
- Personalized Name Clips: Add alphabet beads to spell out your baby's name.
- Color and Theme: Match the clip colors to your baby's room, favorite toys, or a specific theme (e.g., pastel colors for a soft look or bright colors for a playful feel).
- Material Variety: Use different textures, like wood, silicone, or textured beads, to add sensory interest for your baby.
- Bead Shapes: Experiment with unique shapes like hearts, stars, or geometric designs. Many stores offer fun, baby-safe silicone shapes that you can incorporate.
Safety Tips
When making a pacifier clip for a baby, safety is essential. Here are some important guidelines:
- Secure Knots: Ensure all knots are tight and secure. Avoid using glue, as babies may chew on the beads.
- Appropriate Length: Avoid making the string too long to prevent potential hazards.
- Choking Hazard: Always supervise babies using the pacifier clip. These are not toys, and beads can pose a choking hazard if they break loose.
- Material Safety: Use BPA-free, latex-free, lead-free, and phthalate-free materials. Babies often chew on pacifier clips, so choose non-toxic, baby-safe supplies.
- Inspect Regularly: Check the pacifier clip frequently for wear and tear, especially the knots and beads. If you notice any loose components, repair or discard the clip immediately.
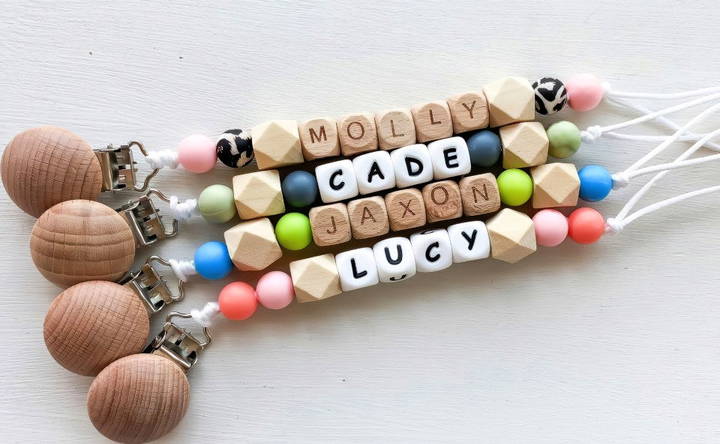
DIY Pacifier Clips: Tips and Tricks
Making pacifier clips can sometimes be tricky, especially when working with thicker cords or smaller bead holes. Here are some tips to make the process smoother:
- Use a Needle for Thick String: A needle with a large eye can help thread thick cords through smaller beads.
- Use a Thimble for Hard-to-Thread Beads: When beads are tight, a thimble can assist in pushing the needle through without hurting your hands.
- Experiment with Cord Types: Try using waxed cotton or leather cords if nylon feels too bulky or challenging.
- Trim Frayed Ends: If your string starts to fray, cut a clean edge to make beading easier.
- Mix Bead Types: Use a combination of silicone and wood beads for texture, or try different colors for visual interest.
Gift Ideas and Presentation
A DIY pacifier clip makes a thoughtful, personalized gift, especially for baby showers. Here's how to make it even more special:
- Gift Wrapping: Place the finished pacifier clip in a small gift box or cloth pouch.
- Customized Set: Build a matching set with a pacifier clip and teething ring, using similar beads and colors.
- Add a Personal Note: Include a small, handwritten note with care instructions and a special message for the recipient.
- Baby Theme Packaging: Wrap it in baby-themed wrapping paper or add a bow in colors matching the pacifier clip.
Final Thoughts
DIY pacifier clips are a simple, creative way to make a personalized gift that is both cute and functional. By following the steps above, you can build a secure, stylish accessory that keeps pacifiers and toys close at hand and off the floor. Whether making it for your own baby or as a gift, this project is sure to be a hit. Remember, the key is to keep safety a priority while having fun with customization. With a few supplies and a bit of creativity, you can make beautiful, functional pacifier clips that add a personal touch to any baby's essentials.
FAQs About DIY Pacifier Clip
Discover answers to all your FAQs about DIY pacifier clips, including tips, materials, and safety guidelines for making your own.
Making a pacifier clip can take about 15-30 minutes, depending on your experience and the complexity of the design.
Yes, most pacifier clips made with silicone and wooden beads can be gently wiped with a damp cloth. Avoid submerging them in water, as wooden beads can absorb moisture and become damaged.
While glue can add extra security, it’s generally best to avoid it. Babies often chew on pacifier clips, and many glues contain chemicals that aren’t safe for infants.
Ensure all materials used are baby-safe, non-toxic, and free from harmful chemicals, as babies often chew on pacifier clips.
The loop should be about 2.5 inches long to fit securely around the pacifier or toy, without being too tight or too loose. Adjust as needed based on the size of your beads and pacifier attachment.
Satin cording, often called “Rattail,” is recommended. It’s sturdy, non-elastic, and slides through the beads smoothly. Thicker cords around 1.5mm are ideal for durability and aesthetics.
If the cord is too thick or frays, use a needle with a larger eye. A thimble or needle-nose pliers can help push the needle through tighter beads. Trim frayed ends before threading.
While 1mm cord may work, it might not feel as secure. Thicker cords around 1.5mm are generally more durable and give a sturdier appearance for pacifier clips.
Yes, you can use silicone or wood beads. Silicone beads are chew-safe and baby-friendly, while wood beads are also non-toxic. Avoid plastic beads unless the clip is intended only for decorative purposes, like for a doll.
Make sure all knots are tight and check for wear over time. Avoid overly long strings and supervise use, as beads can pose a choking hazard. If in doubt, add knots between each bead for added security.
If you plan to sell DIY pacifier clips, ensure they meet safety standards and consider third-party lab testing for compliance. In the U.S., handmade baby products need to meet CPSC safety standards.


