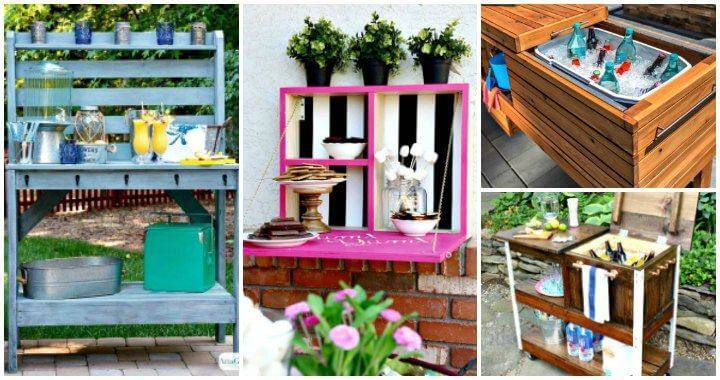
Building a DIY pallet bar is a fun and creative project. I remember when I first decided to build a backyard pallet bar. I had some old pallets lying around, and I thought it would be a great idea to repurpose them. With some simple tools and a bit of effort, I transformed those pallets into a beautiful and functional bar for my backyard.
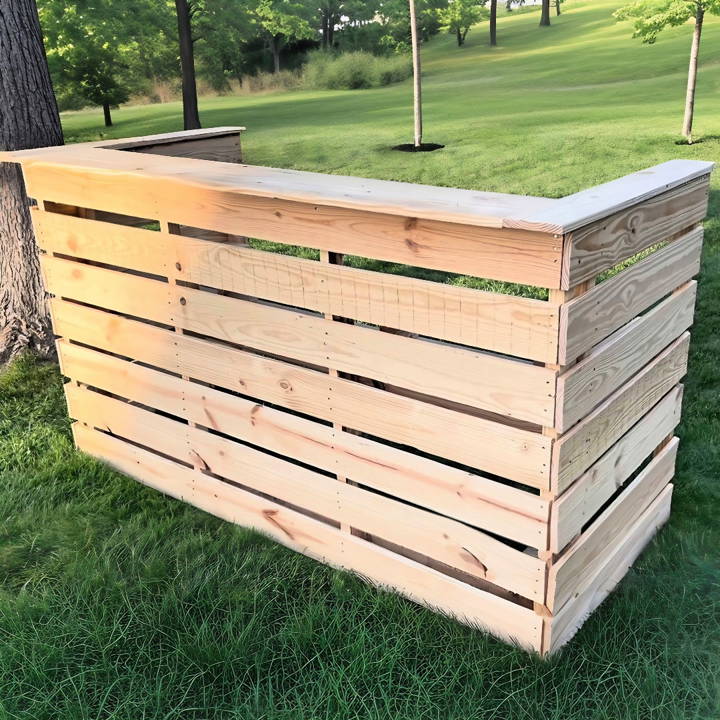
Completing that project brought a lot of joy and satisfaction. It was nice to see something I built from scratch becoming a centerpiece in my outdoor space. Friends and family loved it, too. If you're considering building your own pallet bar, I can assure you it's worth the effort.
Learning how to build a pallet bar instructions are easy to follow and will guide you through the process.
Gathering Materials and Tools
Discover essential materials and tools for any project. Learn why each material is needed to ensure optimal results. Gather everything you need today!
Why Each Material is Needed
- Pallets: The backbone of your bar. Look for HT (heat-treated) stamped pallets, which are free from parasites and insects. I sourced mine for free from a local store's oversized shipment.
- Two by Fours: These provide structural support for the bar top and shelves.
- Reciprocating Saw and Circular Saw: Essential for cutting pallets and wood to the correct dimensions. The circular saw became my best friend, providing power and precision.
- Four-Pound Hammer and Drill: For securing stakes into the ground and assembling the bar.
- Screws and Brad Nails: To hold everything firmly together. Multi-purpose screws work best for a quick bite and counter sinking.
Step by Step Instructions
Learn how to build a DIY pallet bar with our easy step-by-step instructions. Perfect project for your outdoor space or home bar setup!
Cutting the Pallets
- Preparation: I measured and marked my pallets to ensure the final bar height would be 46 inches. Using the circular saw, I cut off one section at 45 and a quarter inch.
Building the Frame
- Stabilization: To ensure the bar would be sturdy, I hammered stakes into the ground where the bar would stand. This step is crucial for both temporary and permanent installs.
- Assembling Sides: Measuring and cutting the sides to match the front pallet's dimensions was a bit tricky due to natural pallet imperfections, but giving myself a little extra room made the process forgiving.
Installing the Top and Shelves
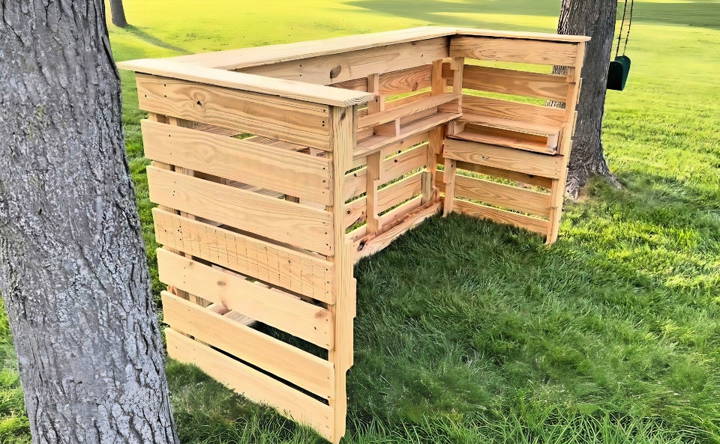
- Bar Top: I opted for a 12-inch depth for the top, giving ample room for drinks and decor. Using brad nails, I secured the planks onto the supports I installed earlier.
- Shelves: For the interior shelves, I repurposed additional pallet wood, keeping the aesthetic consistent and utilizing every piece of material efficiently.
Finishing Touches
- Sanding: Once assembled, I sanded down the rough edges to prevent splinters and give a more finished appearance.
- Staining: I applied a coat of wood stain to protect the wood and enhance its rustic look.
Lessons Learned
- Plan for Imperfections: Pallet wood isn't uniform, so measuring with room for error helped immensely.
- Invest in the Right Tools: The circular saw and reciprocating saw were invaluable for making precise cuts and disassembling pallets.
- Safety First: Always wear gloves and eye protection, especially when cutting wood and breaking down pallets.
Design Customization Ideas
When it comes to making a DIY pallet bar, the beauty lies in its potential for customization. Here are some ideas to inspire a unique design that reflects your personal style:
- Choose a Theme: Start by deciding on a theme that resonates with you. Whether it's rustic, modern, or tropical, let your theme guide your color choices and decorative accents.
- Selecting Colors: Colors can set the mood. For a rustic look, consider natural wood stains. For something more vibrant, use outdoor paint in bold colors. Always apply a sealant to protect against the elements.
- Adding Patterns: Stencils or free-hand painting can add a personal touch. Geometric patterns, stripes, or even a mural can turn your bar into a conversation piece.
- Functional Features: Think about what features will make your bar more practical. Hooks for bar tools, built-in ice buckets, or shelves for glasses and bottles can add functionality and style.
- Lighting: Good lighting can enhance the ambiance. String lights, solar-powered lamps, or LED strips under the counter can build a warm glow for evening gatherings.
- Top It Off: The bar top is the centerpiece. Consider embedding tiles, bottle caps, or even a clear resin with items that tell a story for a unique finish.
- Eco-Friendly Touches: Use recycled materials for decor. Old wine bottles can become candle holders, and reclaimed wood can serve as shelving.
- Comfort Matters: If space allows, add bar stools or chairs that match your theme. Cushions in outdoor fabric can add comfort and a pop of color.
Craft a welcoming space that showcases your personality. Enjoy the process and experiment with materials. Make your DIY pallet bar a memorable spot!
Sustainability and Upcycling
Embracing sustainability and upcycling in your DIY pallet bar project is not just a trend; it's a responsible choice that benefits the environment and adds character to your creation. Here's how you can make your pallet bar eco-friendly:
- Source Responsibly: Look for pallets that have been discarded or are no longer in use. Many businesses give them away for free. Ensure they are safe to use by checking for the HT (Heat-treated) stamp, which means they haven't been chemically treated.
- Preserve Natural Resources: By reusing pallets, you're reducing the demand for new wood, which helps to conserve forests and wildlife habitats.
- Non-Toxic Finishes: Choose natural, non-toxic stains and paints for your bar. These are better for the environment and safer for you and your guests.
- Energy-Efficient Tools: Use hand tools when possible to minimize electricity use. If power tools are necessary, opt for those that are energy-efficient.
- Repurpose with Purpose: Get creative with materials. Old jars can become light fixtures, and scrap metal can be transformed into decorative accents.
- Biodegradable Decor: Decorate with natural elements like plants or stones. They look great and won't harm the planet when it's time to change the decor.
- Teach and Inspire: Share your project and the importance of upcycling on social media or a blog. You might inspire others to start their own sustainable projects.
By focusing on sustainability and upcycling, you're not just building a bar; you're highlighting the need to protect our planet with a unique story for every visitor.
Safety Precautions
When building your DIY pallet bar, safety is paramount. Here's a guide to ensure you build your project without any mishaps:
- Wear Protective Gear: Always wear safety glasses, gloves, and sturdy shoes. If you're sawing or sanding, consider a dust mask.
- Tool Safety: Familiarize yourself with each tool before use. Keep tools in good condition and unplug them when not in use.
- Workspace Setup: Ensure your workspace is well-lit and free of clutter. Keep children and pets away from the area.
- Handling Pallets: Check for nails, staples, or splinters. Use a pry bar or hammer to safely remove any protruding metal.
- Lifting Techniques: Lift with your legs, not your back. If a pallet is too heavy, ask for help or use a dolly.
- Fire Safety: Keep a fire extinguisher nearby, especially if you're working with electrical tools or applying finishes.
- First Aid: Have a first aid kit on hand for any minor injuries that may occur.
- Stay Informed: Read up on the latest safety guidelines for working with wood and tools.
By keeping these safety precautions in mind, you'll ensure that your DIY experience is both enjoyable and safe.
FAQs About DIY Pallet Bar
Get answers to common questions about DIY pallet bars, including materials, tools, and step-by-step building tips for crafting your own unique bar.
Customizing your pallet bar can be done in various ways. You can stain or paint the wood to match your decor, add wheels for mobility, or even alternate materials like sand or tiles for a distinctive look. Some people choose to burn patterns into the wood for a rustic effect or add decorative elements like a bell or bottle rack.
Building a pallet bar can range from simple to complex, depending on the design. There are many plans available that cater to different skill levels. If you’re new to woodworking, starting with a basic design is advisable. As you become more comfortable with the tools and techniques, you can attempt more intricate projects.
Yes, even if you have limited space, there are pallet bar designs that can accommodate your needs. Wall-mounted fold-out bars are a great solution, as they can be folded away when not in use. This type of bar is not only space-saving but can also be a fun project that doesn’t require a lot of time or money to complete.
To maintain your pallet bar, apply a finish to protect the wood from the elements, especially if it’s an outdoor bar. Regular cleaning is important to prevent spills from staining the wood. If you’ve chosen a tiled top, it will be easier to clean and more resistant to bacteria and mildew growth. Inspect your bar periodically for any loose screws or damage and repair as needed to ensure longevity and safety.
Safety is paramount when building and using a DIY pallet bar. First, ensure that the pallets you select are HT stamped, which means they are heat-treated and safe for indoor use. When constructing your bar, use screws for assembly to provide better stability than nails. It's also important to sand down all surfaces to prevent splinters and apply a finish to protect the wood. If your bar is outdoors, secure it to the ground or another structure to prevent tipping. Regularly check for any loose parts and repair them promptly to maintain the bar's safety and integrity.
Conclusion
I encourage you to start building your DIY pallet bar today. It's a rewarding project that enhances your backyard. With these guidelines, making your own bar will be a breeze.


