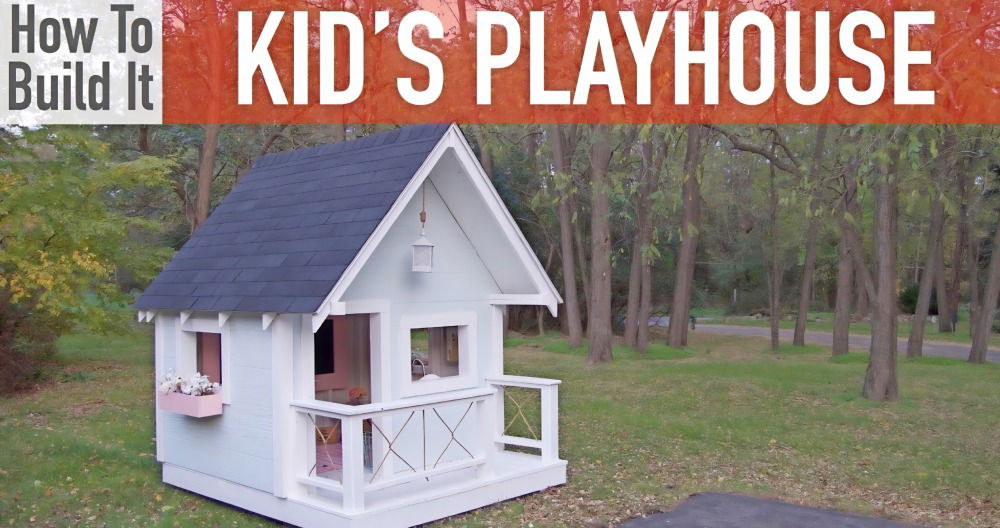
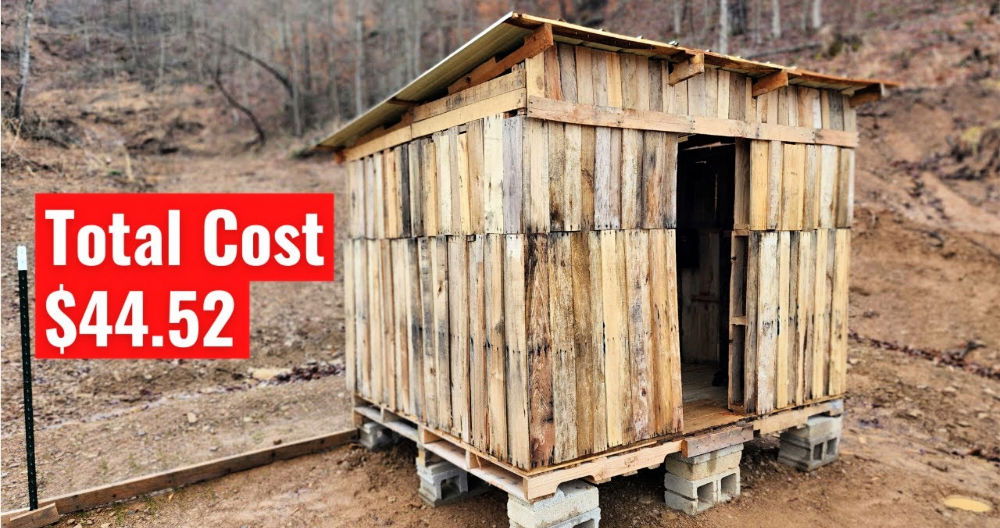
Building a DIY pallet playhouse is an exciting project that provides a cost-effective way to make a playful haven for children. This guide covers every aspect of constructing a sturdy and functional playhouse using reclaimed pallets, some basic tools, and minimal building skills. Let's dive in!
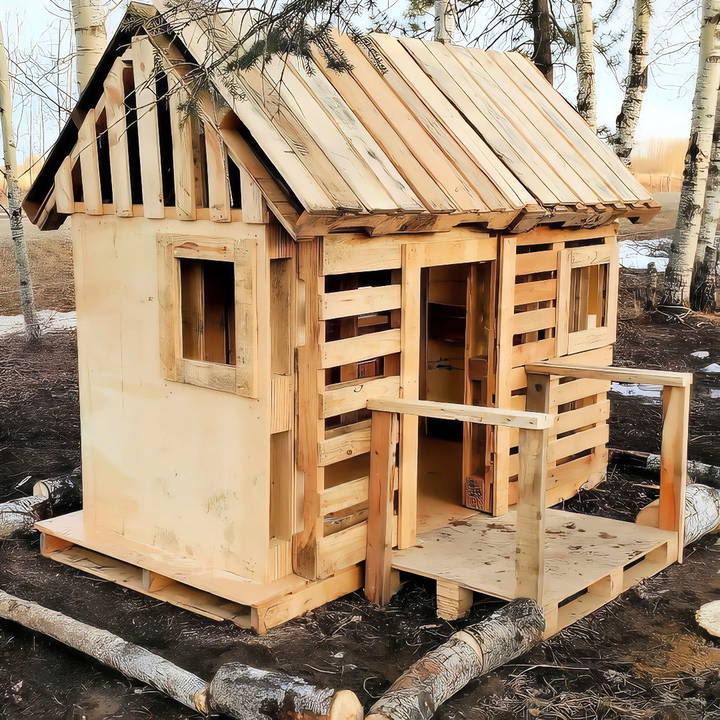
Why Choose Pallets for a Playhouse?
Pallets are popular for DIY projects because they're often free or inexpensive, environmentally friendly, and sturdy enough to build a small structure. With some creativity, you can transform these simple wood platforms into a whimsical playhouse that kids will love.
Materials and Tools Needed
Here's a rundown of the essential materials and tools you'll need to get started:
Materials:
- Pallets: You'll need several pallets for the walls, floor, and roof.
- 2x4s and Scrap Wood: Essential for bracing, framing, and adding stability.
- Screws: Use various sizes, such as 1.5", 2.5", and 3" construction screws.
- Plywood (optional): Can provide additional flooring support.
- Weatherproof Wood Screws: Ideal for areas exposed to weather to prevent rusting.
Tools:
- Power Drill: For securing screws.
- Circular Saw: For cutting the pallets and wood as needed.
- Screwdriver and Hammer: For adjustments and assembly.
- Measuring Tape and Carpenter's Square: For accurate measurements and alignment.
Step by Step Instructions
Build your own pallet playhouse with step-by-step instructions! From choosing a location to the final touches, enjoy endless fun and creativity.
Step 1: Preparing Your Pallets
Before building, examine each pallet to ensure they are in good condition. Look for ones that are free from cracks and signs of rot, as you want a sturdy and safe structure. Pallets should also be sanded to avoid any splinters that might injure kids.
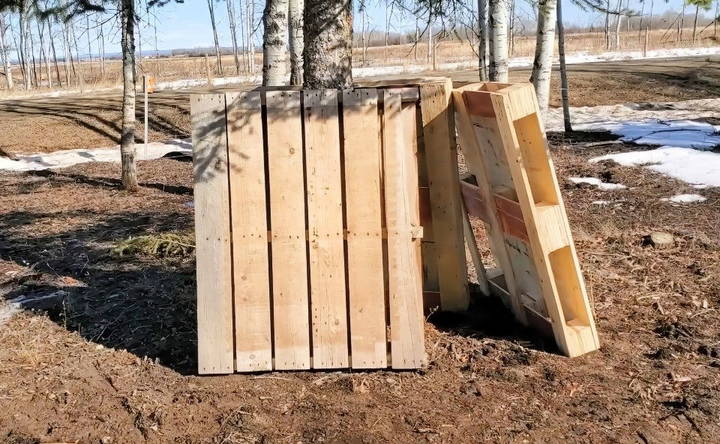
Step 2: Choosing a Location
Select a spot where the playhouse will have a solid, level foundation. Placing it under trees or near a shaded area can give kids a comfortable place to play, especially during warmer months.
Step 3: Building the Base and Floor
Discover how to build a solid base and floor foundation with expert tips and techniques. Ensure stability and strength for your construction project.
Laying the Foundation
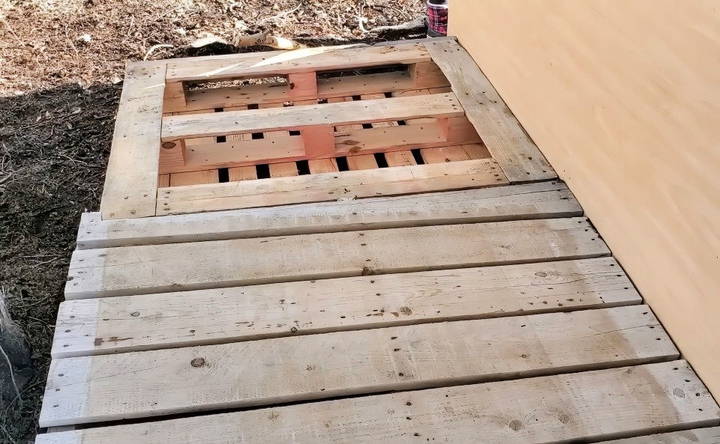
- Position Your Pallets: Begin by arranging the pallets for the floor. A larger, double-wide pallet works well as the main foundation, ensuring stability.
- Secure the Foundation: Lay the pallet base and secure it with screws. If you have plywood, add it on top to prevent kids' feet from getting caught between slats.
- Level the Floor: Use scrap wood or dig out the ground to ensure the foundation is even. An uneven foundation can make the playhouse wobbly and unsafe.
Step 4: Constructing the Walls
Learn about constructing walls with our guide on building the back and adding side walls. Perfect for your next project!
Building the Back Wall
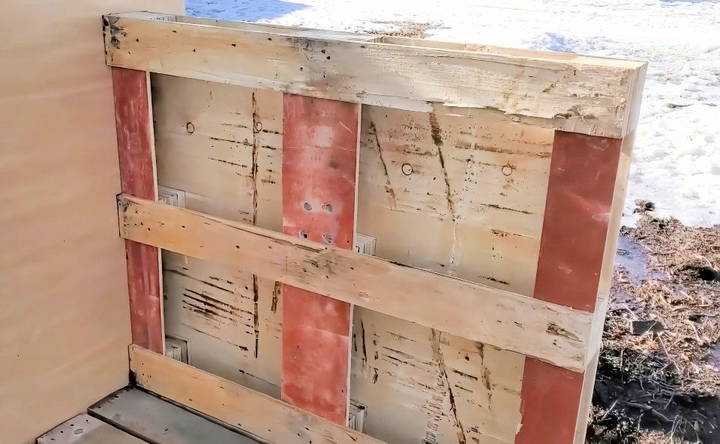
- Attach the Back Pallets: Start by attaching the back wall pallet to the floor. Use 2x4s as braces at each corner for added stability.
- Secure with Screws: Drill screws through the 2x4s and pallets, ensuring they are firmly attached. This provides a solid back wall to anchor the rest of the structure.
Adding the Side Walls
- Position the Side Walls: Place pallets on either side of the back wall, aligning them to build a roomy interior.
- Brace the Corners: Attach 2x4s at each corner where the back and side walls meet, reinforcing the structure.
- Screw Everything in Place: Attach screws from the side wall pallets to the braced back wall, ensuring everything is aligned and secure.
Step 5: Framing the Front Wall and Door
Learn how to frame the front wall and build a door with our step-by-step guide, perfect for DIY enthusiasts and home renovators.
Installing the Front Wall
- Attach the Front Pallets: Use another pallet for the front wall. Secure it to the side walls and add a 2x4 across the top for additional support.
- Plan the Door: Decide on the door's placement and cut one of the front pallets to build a door opening. Aim for a width of about 20 inches, which should be comfortable for kids to enter and exit.
Building the Door
- Cut the Door: Using a circular saw, cut a pallet in half to fit the door's dimensions. Smooth out any rough edges with sandpaper.
- Attach the Door: Secure the door using hinges or simply let it swing freely. A swinging door gives kids an interactive part of the playhouse to enjoy.
Step 6: Adding Stability with Cross Beams
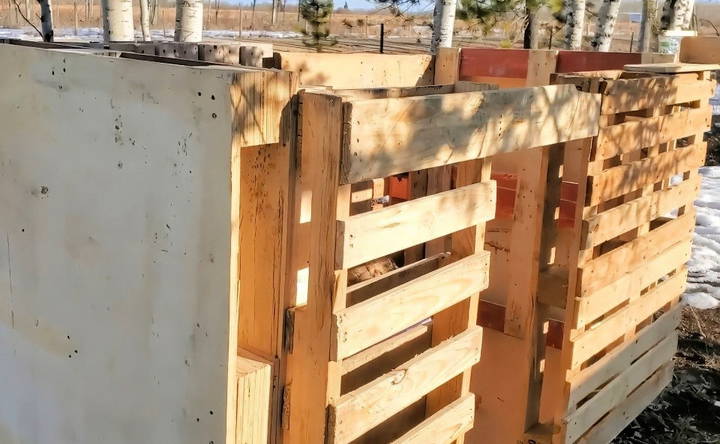
To ensure a sturdy structure, add cross beams along the top of the side and back walls.
- Install 2x4 Cross Beams: Place 2x4s across the front and back walls. This step will reinforce the frame, prevent it from shifting, and provide support for the roof.
- Screw the Beams in Place: Use several screws along each 2x4 to ensure they're securely attached to the pallets.
Step 7: Building the Roof
Learn about building the roof by choosing the right style and securing it for lasting durability and protection.
Choosing the Roof Style
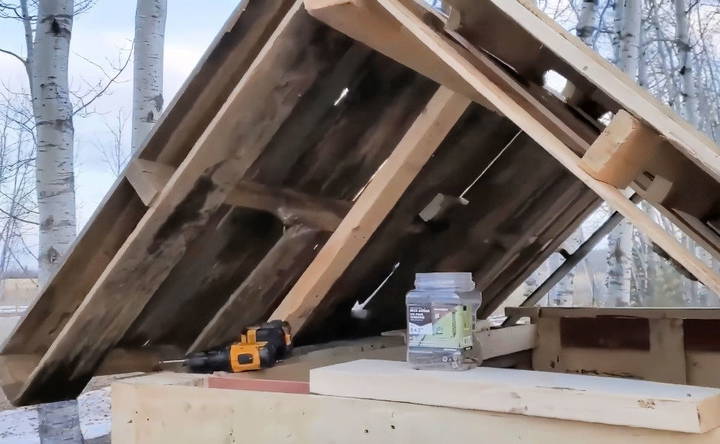
For this playhouse, a simple peaked roof made of pallets works perfectly.
- Cut and Measure: Lay the pallets in a way that gives a slight overhang on each side, helping to keep rainwater away from the walls.
- Install Roof Pallets: Position the pallets lengthwise, aligned like shingles to guide water down the roof.
Securing the Roof
- Attach 2x4 Supports: Run 2x4s along the roof pallets to support the overhang. These supports stabilize the structure and prevent roof pallets from sliding.
- Add Weatherproofing: If you want the playhouse to last through the seasons, consider adding a waterproof tarp or weatherproofing spray to the roof.
Step 8: Adding Windows and Other Features
Enhance your space with expert tips on framing windows and adding shelves for efficient storage. Discover how to add windows and other features effortlessly.
Framing Windows
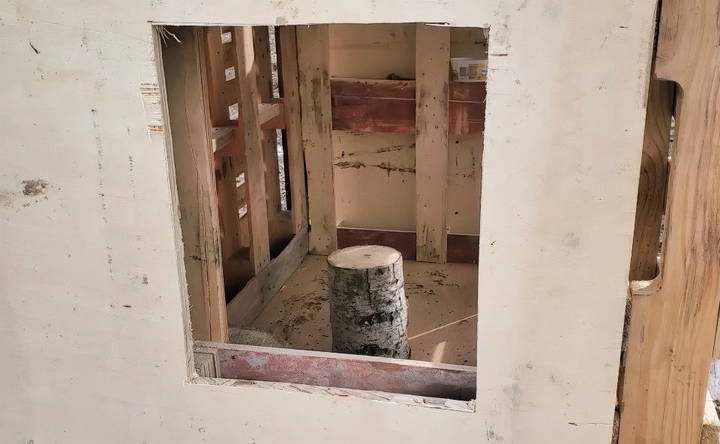
- Cut Out Windows: Using a skill saw, cut a window opening on one side of the playhouse. This lets in light and adds a cozy vibe.
- Frame the Windows: Use 2x4s around the window opening to frame it, giving the playhouse a finished look and added durability.
Adding Shelves and Storage
Kids love having shelves for toys and small items. Here's how to add shelving inside:
- Install 2x4s as Shelves: Cut 2x4s to fit between wall braces and screw them in place.
- Add Cubbies: The lower sections of the pallets can serve as small cubbies for toys, providing handy storage and extra play space.
Step 9: Customizing with Final Touches
Enhance your home with our guide on customizing with final touches: add a porch, railings, and build stunning outdoor decor.
Adding a Porch and Railings
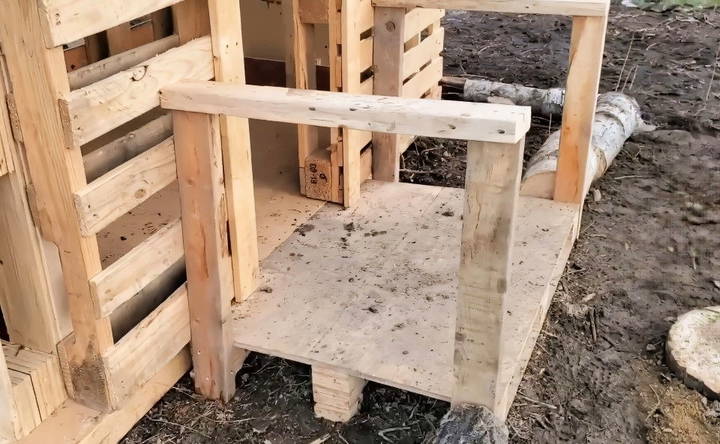
A small front porch adds charm and functionality to the playhouse. Use a mini pallet as a front porch and attach it to the front wall with screws. For safety, add a simple railing:
- Install Railings: Cut 2x4s to the porch's length, securing them from the inside and at the bottom for stability.
Building Outdoor Decor
- Plant Flowers Around the Playhouse: Planting a few flowers or using potted plants around the playhouse can make it feel more like a cozy cabin.
- Add Small Stools or a Table: Use logs or scrap wood to build stools and tables for a rustic touch that encourages kids to stay and play.
Step 10: Securing and Testing
After assembling all parts, thoroughly inspect the playhouse to ensure it's safe for children.
- Check All Screws and Joints: Make sure every screw is tightened and no sharp edges or splinters are sticking out.
- Test for Stability: Gently shake the playhouse to confirm it's solidly built. If you notice any wobbling, add additional supports or cross beams.
- Inspect for Weatherproofing: If the playhouse will be outside year-round, apply a weatherproof sealant to protect the wood from moisture.
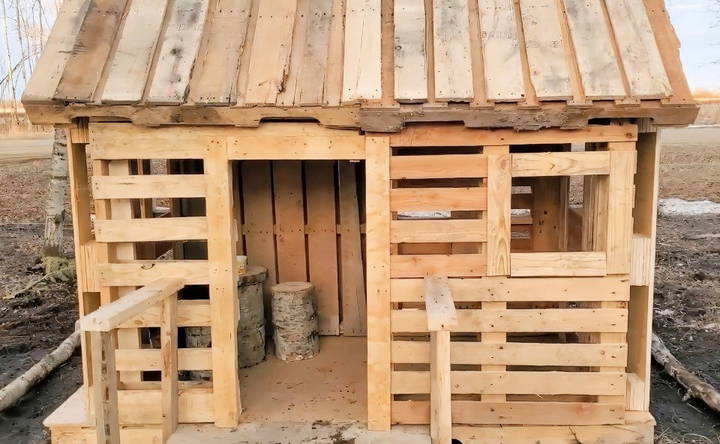
Enjoying the Finished Playhouse
Your DIY pallet playhouse is now ready for use! This charming little structure will provide countless hours of fun for kids, sparking their imaginations and giving them a dedicated space for creative play.
Tips for Maintaining the Pallet Playhouse
Here are some quick maintenance tips to keep your playhouse in top condition:
- Regularly Inspect for Loose Screws: Every few months, check for loose screws and tighten them.
- Sand Down Splinters: Inspect the structure for any splintering wood and sand down rough edges.
- Apply a Sealant Annually: If the playhouse is exposed to the elements, apply a fresh coat of sealant each year.
Final Thoughts
Building a DIY pallet playhouse is a project that's easy to customize to your kids' preferences and fits into a variety of outdoor spaces. This structure is also sustainable, as it repurposes old pallets and scrap wood that would otherwise go to waste. Not only will your kids get a fantastic play area, but you'll also enjoy the satisfaction of a job well done.
FAQs for Building a DIY Pallet Playhouse
Learn how to build a DIY pallet playhouse with this comprehensive FAQ guide. Get tips, tools, and answers to common questions.
Adding weatherproofing is essential for outdoor playhouses. Use a weatherproof sealant on all exposed wood surfaces, focusing on the roof and sides. For extra protection, consider using a tarp over the roof or attaching shingles if you have access to roofing material.
Yes! You can create small shelves by screwing pieces of wood horizontally between the pallet slats. Scrap 2x4s work well as mini shelves, providing storage for small items like toys or collectibles.
Using a sawzall to cut the nails between boards is a great trick to dismantle pallets quickly. This method minimizes damage to the wood, making it easier to reuse in your build.
To add a window, measure the area you want, then use a circular saw to cut through the pallet. Sand down the edges and frame the window with 2x4s for added support. This not only improves the structure but also enhances the look of the playhouse.
For a stable roof, use cross beams like 2x4s along the top and secure the roof pallets to them with 3” screws. Position the screws where the roof meets the side and back walls for a secure hold.
While unconventional, minor plumbing (like hoses for a play sink) or outdoor-safe electrical setups for lights or charging toys are possible. These can be DIY additions if properly weatherproofed and done safely, especially if kids will be using them.
Lay down landscape cloth under and around the playhouse to prevent weed growth. Cover with mulch or gravel to add a finished look and keep weeds at bay.
Using small pallets or scrap wood, you can build a porch or outdoor seating area. Cut pallets to size, secure them as desired, and add railings for safety. Adding flower beds or logs around the porch can further enhance the space.


