Building a DIY pea gravel patio might seem daunting, especially if you're not a professional landscaper. However, by sharing my personal journey of building a patio in our backyard, I hope to guide you through the process with easy-to-follow steps. Let's embark on this rewarding project that will transform your outdoor space into a delightful area where you can entertain or unwind.
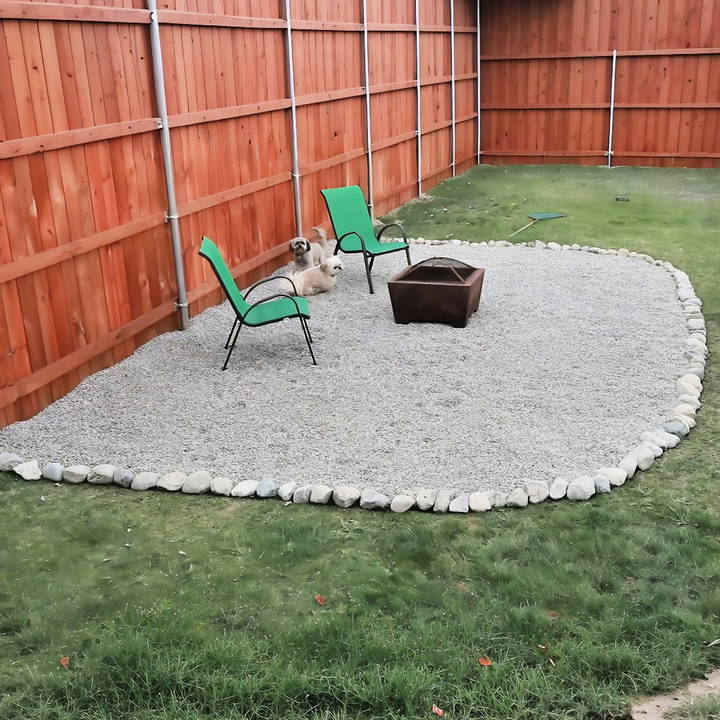
Step by Step Instructions
Learn how to build a DIY pea gravel patio step by step with our detailed guide. Discover tools, materials, and maintenance tips for a perfect outdoor space!
Planning the Pea Gravel Patio
Discover why you should choose pea gravel for your patio, the initial steps to set a clear vision, and the essential tools you'll need for planning.
Why Choose Pea Gravel?
Before diving into the project, it's essential to understand why pea gravel is a fantastic choice for your patio. Pea gravel is affordable, easy to maintain, and offers excellent drainage, making it an ideal material for outdoor spaces. Its natural texture and color also provide a visually appealing and comfortable surface.
Initial Steps: Setting a Clear Vision
- Measure Your Space: Begin by deciding the patio size. For my project, we measured from the fence out to 12 feet wide and 20 feet long. Having a clear plan helps in determining how much material you will need.
- Gather Your Materials: Based on the size, acquire the necessary materials. For our patio:
- Pea Gravel: We used four cubic yards for full coverage.
- Field Stones: These were used for the perimeter of the patio.
- Landscape Fabric: Preventing weed growth is key.
- Landscape Pins: To secure the fabric in place.
Tools You'll Need
Running a DIY project requires some tools which ease the work burden:
- Weed Whip: For trimming down tall grass.
- Tape Measure: Ensures precise measurements.
- Stakes and Strings: Helpful for marking the patio's boundary.
- Shovel and Rake: For spreading gravel evenly.
Preparing the Ground
Learn how to prepare the ground by clearing and leveling the site, marking the perimeter, and laying landscape fabric for a perfect garden foundation.
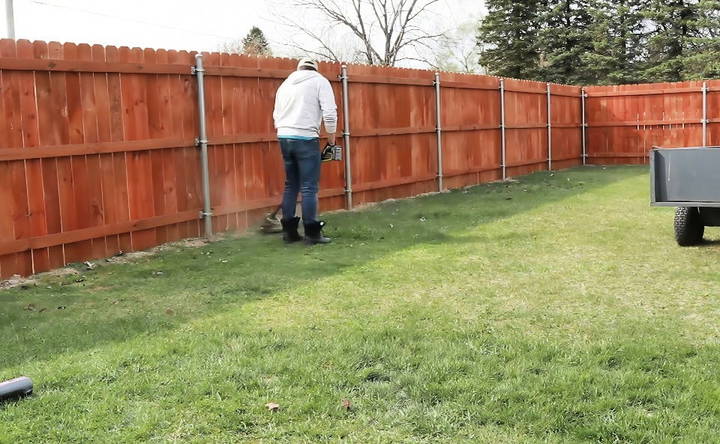
Clearing and Leveling the Site
- Trim the Vegetation: Use the weed whip to cut all the grass where the patio will be set. This will provide a clean base for your project.
- Level the Ground: Most backyards are pretty level, but it's always good to double-check and ensure evenness. If there are bumps, use a shovel to smooth them out.
Mark the Perimeter
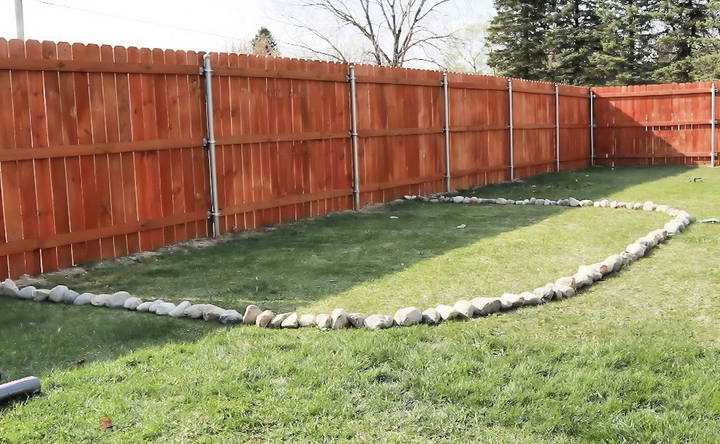
- Use Field Stones or Paint: We opted to lay down field stones to mark the perimeter. While this may seem manual, it worked well. A simpler way is using spray paint to outline the border.
Laying Landscape Fabric
- Place the Fabric: Lay the landscape fabric across the entire area. This is crucial to prevent any unwanted weeds from sprouting through your beautiful new patio.
- Secure the Fabric: Use landscape pins to secure all edges, ensuring it doesn't move when you spread the gravel.
Laying the Pea Gravel
Learn how to lay pea gravel by calculating gravel requirements, pouring, and spreading it effectively for a perfect finish.
Calculating Gravel Requirements
The depth of gravel determines the material amount needed. Aim for at least two inches deep covering your entire patio. For our project, four cubic yards sufficed.
Pour and Spread
- Strategic Pouring: Begin by dumping the pea gravel over the fabric. Focus on one section at a time.
- Evenly Distribute: Use a rake to evenly spread the gravel until you reach the desired depth.
Final Touches
Learn how to achieve flawless results with our guide on 'final touches,' including building the perimeter and adding personal touches.
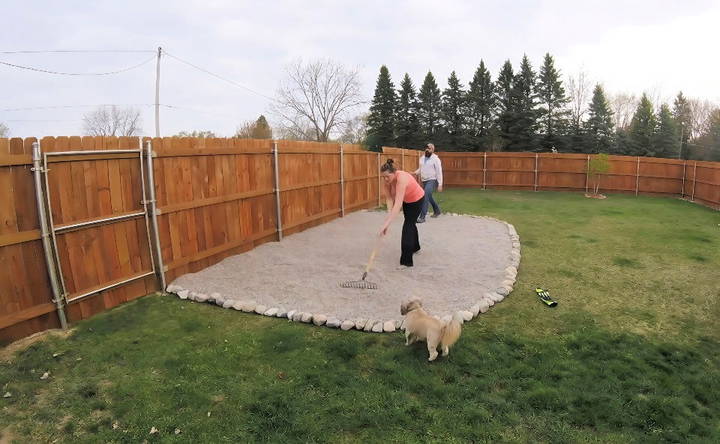
Creating the Perimeter
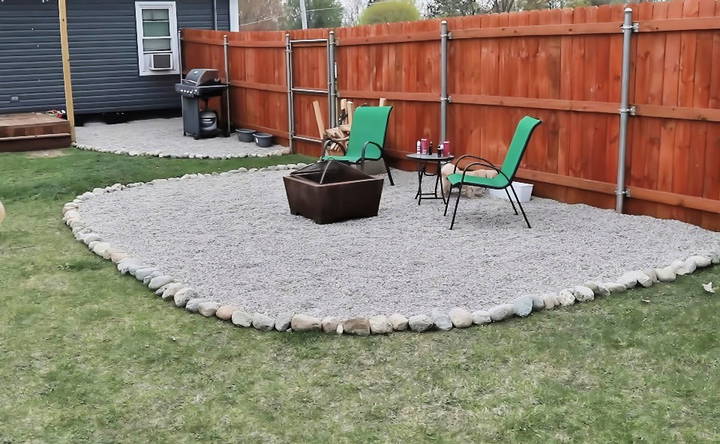
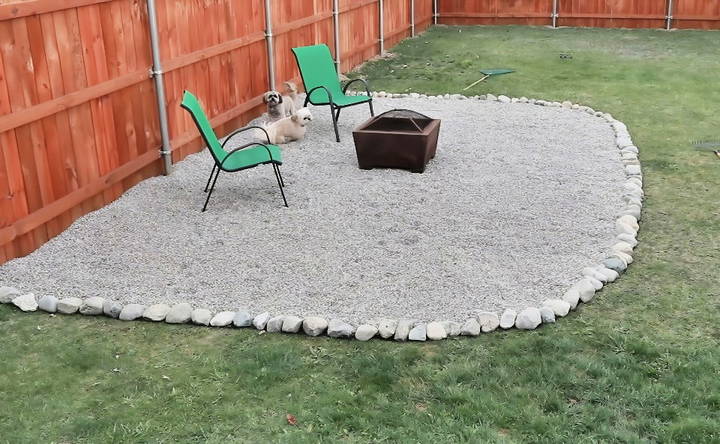
- Border with Field Stones: Outline the patio with field stones. This adds structure and clearly defines your patio's edges.
Adding Personal Touches
- Furniture Placement: Choose comfortable and weather-resistant furniture to make the space inviting.
- Light Features: Incorporate some solar garden lights or string lights for ambiance during evenings.
Expanding or Altering Your Design
After finishing the basic patio, consider adding larger landscape projects like a grill area. We extended a similar gravel layout from the patio to our grill station, making for a seamless transition.
Maintenance Tips
Keep your patio pristine with these maintenance tips. Discover easy ways to clean, protect, and enhance your outdoor space effortlessly.
Keeping Your Patio Pristine
Maintaining a pea gravel patio is straightforward:
- Raking Regularly: Ensure the surface remains even by occasionally raking the stones.
- Refill Over Time: Gravel can move around due to foot traffic; adding new stones from time to time helps maintain its appearance and depth.
- Regular Cleaning: Using a leaf blower helps keep debris off your patio, preserving its pristine look.
Common Mistakes to Avoid
When building a pea gravel patio, it's easy to make mistakes that can affect the final result. Here are some common pitfalls and how to avoid them:
Skipping the Planning Stage
- Mistake: Not planning the layout and design can lead to a patio that doesn't fit your space or needs.
- Solution: Take time to sketch out your design, measure the area, and consider factors like drainage and sunlight.
Ignoring the Base Layer
- Mistake: Laying pea gravel directly on soil can cause it to shift and sink over time.
- Solution: Always start with a solid base layer of crushed stone or gravel. This provides stability and helps with drainage.
Using the Wrong Type of Gravel
- Mistake: Not all gravel is suitable for patios. Using the wrong type can lead to an uneven surface.
- Solution: Choose pea gravel specifically designed for patios. It should be smooth, round, and uniform in size.
Neglecting Edging
- Mistake: Without proper edging, pea gravel can spread and make a messy look.
- Solution: Install sturdy edging materials like metal, plastic, or wood to keep the gravel contained.
Overlooking Weed Control
- Mistake: Weeds can quickly take over if you don't take preventive measures.
- Solution: Lay down a weed barrier fabric before adding the gravel. This helps prevent weeds from growing through the gravel.
Not Compacting the Gravel
- Mistake: Loose gravel can be uncomfortable to walk on and may shift over time.
- Solution: After spreading the gravel, use a tamper or roller to compact it. This makes a firm, stable surface.
Underestimating the Amount of Gravel Needed
- Mistake: Running out of gravel can disrupt your project and lead to an uneven surface.
- Solution: Calculate the amount of gravel needed based on the area and desired depth. It's better to have a little extra than not enough.
Ignoring Maintenance
- Mistake: Failing to maintain your patio can result in weed growth and gravel displacement.
- Solution: Regularly rake the gravel to keep it even and remove any debris. Check for weeds and pull them out as soon as they appear.
By avoiding these common mistakes, you can ensure your pea gravel patio is both beautiful and functional. Taking the time to plan, prepare, and maintain your patio will pay off in the long run.
Safety Considerations
Building a pea gravel patio can be a rewarding DIY project, but it's important to prioritize safety. Here are some key safety considerations to keep in mind:
1. Wear Protective Gear
- Gloves: Protect your hands from sharp objects and rough materials.
- Safety Glasses: Shield your eyes from dust and debris.
- Sturdy Footwear: Wear boots or shoes with good grip to prevent slips and protect your feet.
2. Check for Underground Utilities
- Before Digging: Always check for underground utilities like gas, water, and electrical lines. Contact your local utility companies to mark these areas.
- Digging Safely: Use hand tools near marked areas to avoid damaging utilities.
3. Use Tools Properly
- Read Instructions: Familiarize yourself with the proper use of tools and equipment.
- Maintain Tools: Ensure tools are in good working condition to prevent accidents.
4. Lift Correctly
- Avoid Strain: Use proper lifting techniques to avoid back injuries. Bend your knees and keep your back straight when lifting heavy materials.
- Get Help: Don't hesitate to ask for help when lifting or moving heavy objects.
5. Ensure Stable Ground
- Level Surface: Make sure the ground is level and stable before starting your project. Uneven ground can cause accidents.
- Secure Edging: Properly install edging to prevent gravel from spreading and building tripping hazards.
6. Handle Materials Safely
- Gravel Handling: Be cautious when handling bags of gravel. They can be heavy and awkward to carry.
- Avoid Dust: Wet the gravel slightly to minimize dust, which can be harmful if inhaled.
7. Stay Hydrated and Take Breaks
- Hydration: Drink plenty of water, especially if working in hot weather.
- Rest: Take regular breaks to avoid fatigue, which can lead to mistakes and accidents.
8. Be Mindful of Weather Conditions
- Avoid Extreme Weather: Don't work in extreme heat, cold, or during storms. These conditions can increase the risk of accidents.
- Check Forecast: Plan your project around favorable weather conditions.
9. Secure the Area
- Keep Children and Pets Away: Ensure the work area is safe and secure to prevent accidents involving children or pets.
- Clear Pathways: Keep pathways clear of tools and materials to avoid tripping hazards.
10. Emergency Preparedness
- First Aid Kit: Have a first aid kit on hand for minor injuries.
- Emergency Contacts: Know the emergency contact numbers and the location of the nearest medical facility.
By following these safety considerations, you can ensure a smooth and accident-free experience while building your pea gravel patio.
FAQs About DIY Pea Gravel Patio
Discover key FAQs about DIY pea gravel patios and get expert tips on design, installation, and maintenance for a beautiful and durable outdoor space.
Maintaining your patio is simple:
Rake regularly: Rake the surface to keep it level and remove any debris.
Pull weeds: Remove any weeds that may sprout through the landscape fabric.
Top up gravel: Add more pea gravel as needed to maintain the desired depth.
Clean spills promptly: Clean up any spills or stains to prevent them from setting in.
Pea gravel patios offer several benefits:
Affordable: Pea gravel is a budget-friendly option compared to other patio materials.
Easy installation: You can create a DIY pea gravel patio without specialized skills or tools.
Good drainage: Pea gravel allows water to drain easily, preventing puddles and erosion.
Versatile: Pea gravel complements various landscaping styles and can be used for patios, walkways, and other outdoor areas.
Low maintenance: With minimal upkeep, your pea gravel patio will remain beautiful for years to come.
Yes, you can use pea gravel on a gentle slope, but it requires additional preparation. You'll need to terrace the area or build retaining walls to create level sections. This prevents the pea gravel from shifting and washing away during heavy rain.
Installing landscape fabric beneath the pea gravel is crucial for weed prevention. Make sure to overlap the edges of the fabric to make a continuous barrier. Additionally, regularly inspect the patio for any weeds that may have sprouted through the fabric and remove them promptly.
Yes, you can place furniture on a pea gravel patio, but keep in mind that it may not be as stable as on a solid surface. Consider using wider-legged furniture or placing pavers or flat stones beneath furniture legs for added support.
Conclusion
Making a DIY pea gravel patio isn't as complicated as it may seem. With some planning, preparation, and commitment to following this step-by-step guide, you can transform your backyard into a functional, beautiful outdoor space. Not only is this an economical option, but it also enhances your home's aesthetic appeal. Whether for family gatherings or personal relaxation, this DIY project yields lasting satisfaction.


