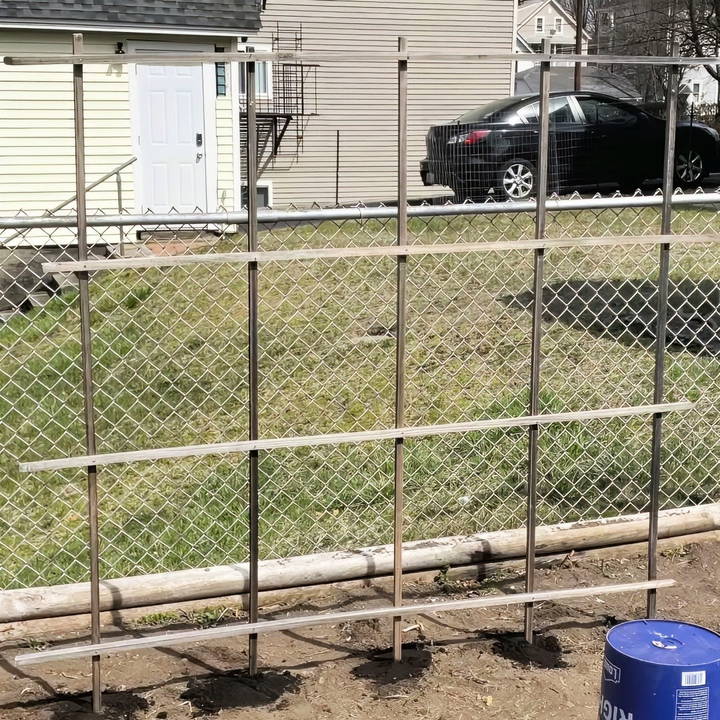
Growing peas in your garden can be a rewarding experience. These climbing plants are both beautiful and functional, producing delicate pea flowers and delicious pods. However, because peas are vining plants, they need support to grow properly. One effective solution is to build a simple pea trellis. This detailed guide will show you how to make your own DIY pea trellis using a practical, low-cost method that you can complete quickly. This guide also covers materials, assembly instructions, tips for stability, and advice on placement to ensure your pea thrives.
Why Build a Pea Trellis?
Pea plants are natural climbers, meaning they will grow vertically if given proper support. A trellis not only provides this support but also helps maximize garden space. By encouraging upward growth, you reduce the need for ground space, allowing more plants to thrive in the same area. Vertical gardening also has other benefits: it improves air circulation, reducing the risk of disease, and makes harvesting easier since the pods are more accessible.
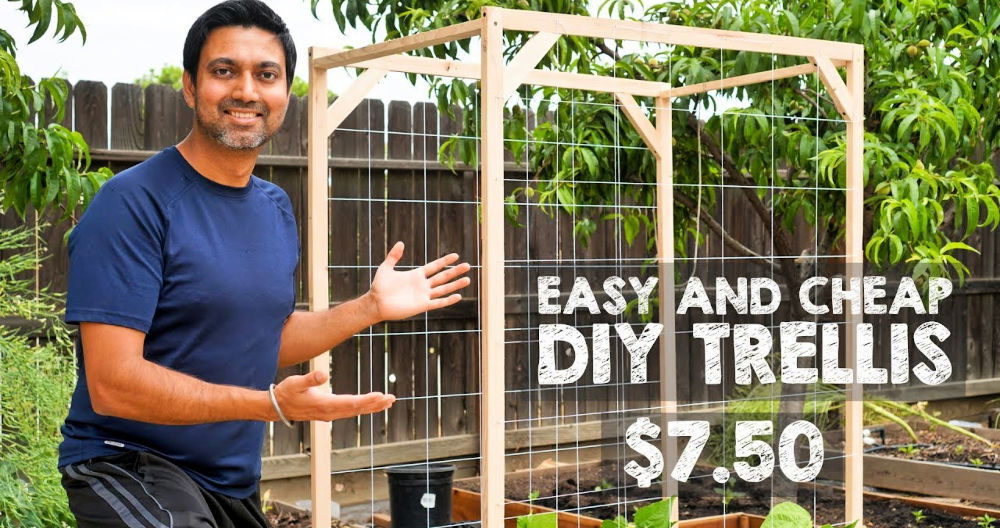
A DIY pea trellis is a great project because it is affordable, quick to make, and customizable based on your garden space and needs. For less than $10 and in about 30 minutes, you can build a sturdy and reliable trellis that will support your pea plants throughout the growing season.
Materials You Will Need
Before you start building your trellis, gather the following materials:
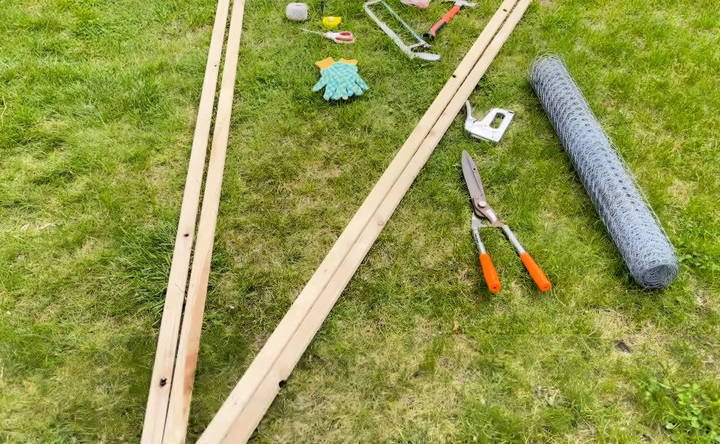
- Wood slats: 1-inch by 1-inch by 8-foot wooden slats (you will cut these down to 6-foot lengths).
- Nails: Small but sturdy nails to secure the structure.
- Hammer: For driving the nails into the wood.
- Hacksaw: To cut the slats to size.
- Twine or string: To provide extra support for the pea vines.
- Measuring tape: To ensure accurate measurements when cutting and assembling.
- Scissors: For cutting twine.
- Gloves: To protect your hands while working.
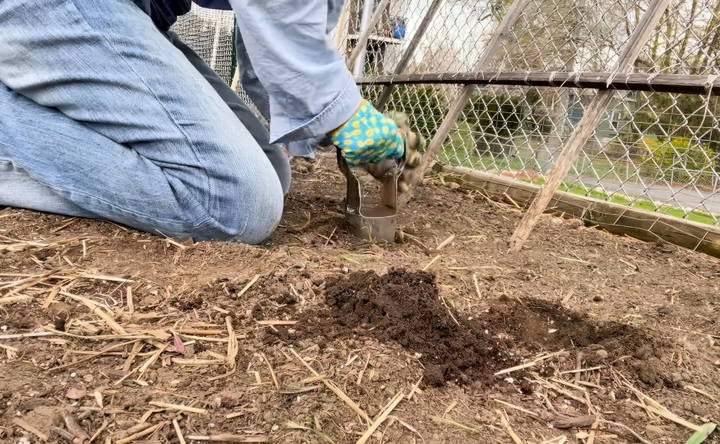
- Bulb transplanter or small shovel: For digging holes to secure the trellis in the ground.
Step by Step Instructions
Make a sturdy DIY pea trellis with our step-by-step guide. Learn to cut, assemble, and secure your trellis for optimal pea growth.
1. Cutting the Wood Slats
Start by cutting your 8-foot wooden slats down to 6-foot lengths using a hacksaw. You will want the trellis to be tall enough to support the growing peas, but not so tall that it becomes unstable. Additionally, make one end of each slat pointed. This will help you sink the trellis into the ground more easily later on.
2. Laying Out the Frame
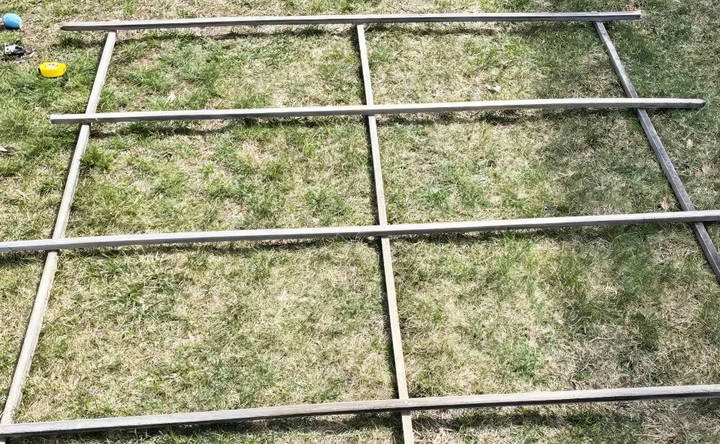
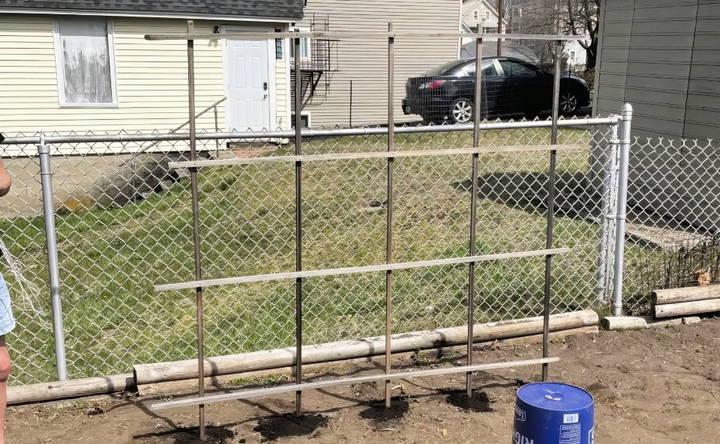
Lay out three of your 6-foot slats vertically on the ground, spaced about 3 feet apart. These will serve as the main supports of your trellis.
3. Attaching Horizontal Slats
Next, take one of your remaining slats and place it horizontally across the top of the three vertical slats. Nail it in place to secure the structure. Continue attaching horizontal slats every 2 feet down the length of the trellis until you have used all the wood.
By the end of this step, you should have a sturdy frame measuring about 6 feet high and 3 feet wide, with horizontal slats spaced evenly along the structure.
4. Securing the Trellis in the Ground
Once the frame is complete, it's time to secure it in the ground. Start by marking the spots where the pointed ends of the slats will go. Using a bulb transplanter or small shovel, dig small holes at these points. The holes don't need to be too deep, just deep enough to allow the trellis to stand up and be stable.
After placing the trellis in the holes, use a hammer to tap it firmly into place. Ensure that the trellis is standing straight and secure.
5. Stabilizing the Trellis
For added stability, fill each hole with small rocks before covering them with soil. Pack the soil firmly to ensure the trellis won't shift once the pea vines start growing and applying pressure to the structure. The rocks help keep the trellis stable and prevent it from wobbling or tipping over.
6. Adding Twine for Extra Support
Although the wooden slats provide the main support for the pea vines, adding twine or string between the slats gives the plants more to cling to as they grow. Start by tying the twine around one of the vertical slats at the bottom of the trellis. Then, weave it horizontally across the trellis, securing it to each vertical slat as you go. You can build several layers of twine, spaced a few inches apart, to provide plenty of support for the vines.
7. Anchoring to a Fence (Optional)
If you have a fence near your garden, you can secure your trellis to it for additional support. Use zip ties or garden wire to fasten the trellis to the fence, ensuring that it won't topple over as the peas grow and become heavier.
Tips for a Successful Pea Trellis
- Use quality wood: Since the trellis will be exposed to the elements, choose durable wood that won't rot or weaken quickly. Cedar or pressure-treated wood are good options for garden structures.
- Keep it lightweight: While sturdiness is important, don't make the trellis too heavy, as this can make it harder to install and less stable over time.
- Regular maintenance: At the end of each growing season, inspect your trellis for damage. Replace any broken slats or worn twine to ensure the structure is ready for the next planting season.
- Pea variety: Different varieties of peas have different growth habits. For taller, vining types like sugar snap or snow peas, a 6-foot trellis will work perfectly. For shorter varieties, you can adjust the height of the trellis accordingly.
- Spacing: When planting your peas, ensure they are spaced about 2-3 inches apart at the base of the trellis. This allows the plants to grow without overcrowding and ensures each vine has enough support.
The Benefits of a DIY Pea Trellis
Making your own pea trellis offers several benefits:
- Cost-effective: A DIY trellis can be made for less than $10, a fraction of the cost of store-bought versions.
- Customization: You can adjust the size and shape of your trellis to fit your garden's specific needs.
- Satisfaction: Building something with your own hands is always rewarding, and watching your peas grow up the structure you made is a great feeling.
- Eco-friendly: Using natural materials like wood and twine means your trellis is biodegradable, making it a more sustainable option than plastic or metal alternatives.
Conclusion
A DIY pea trellis is an easy and inexpensive project that can greatly enhance your gardening experience. With just a few materials and a little bit of time, you can build a sturdy support system that will help your pea plants grow tall and healthy. Whether you're an experienced gardener or just starting out, building your own trellis is a great way to support vertical gardening and improve your garden's overall productivity.
By following the steps outlined in this guide, you can build a trellis that will last for multiple growing seasons, ensuring you enjoy bountiful harvests year after year.
FAQs About DIY Pea Trellis
Discover answers to common questions about DIY pea trellis, including tips and materials for building your own garden support.
For added stability, fill the holes around the trellis legs with small rocks before covering them with soil. This helps keep the structure firmly in place, preventing it from wobbling or tipping over as your pea plants grow.
Yes! If you’ve already purchased a trellis, you can still apply these tips by adding twine for extra support and stabilizing the base with rocks, just as you would with a DIY trellis.
Use natural jute or cotton twine. These materials are sturdy yet gentle on your plants, providing the right balance of support without damaging the vines.
If you don’t have a bulb transplanter, a small shovel or hand trowel works fine for digging holes to secure the trellis. Just make sure the holes are deep enough to keep the structure stable.
Yes! You can customize the height by cutting the wood slats shorter if you’re growing smaller pea varieties or if your garden space requires a more compact structure.
If your trellis leans after installation, check the ground stability. You can add more rocks around the base or secure the trellis to a nearby fence for added support.
At the end of the growing season, inspect your trellis for any damaged or weakened slats. Replace any broken parts and reapply fresh twine to ensure it's ready for the next planting season.


