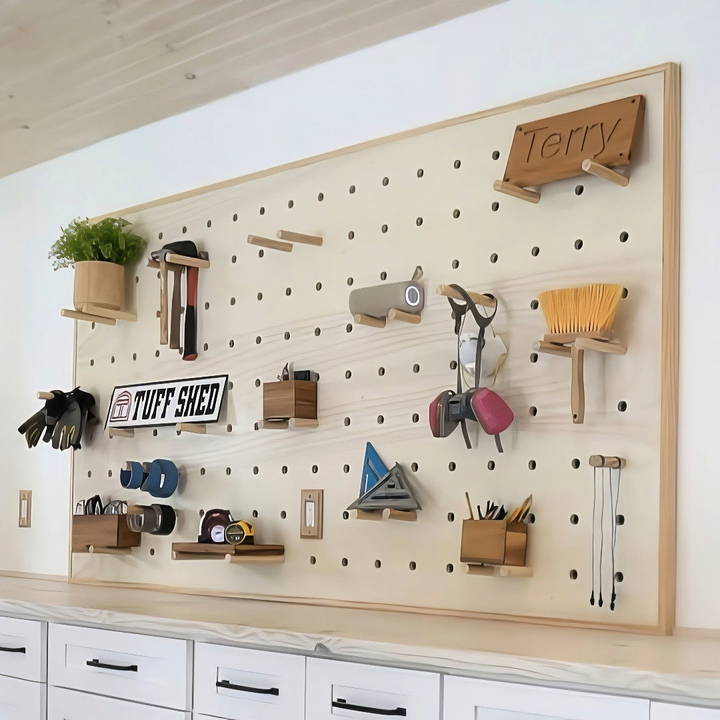
Building a custom DIY pegboard is a fantastic way to add organization and style to your workshop or crafting space. From selecting materials to installing your pegboard, this guide provides each step to complete the project. A pegboard can hold tools, crafting supplies, or anything else you need at hand, making it a versatile addition to your space. Follow this detailed tutorial to build a large custom pegboard that suits your specific needs.
Materials and Tools You'll Need
Before starting your pegboard project, gather all the materials and tools to ensure a smooth building process. Here's what you'll need:
Materials:
- 4' x 8' Sanded Plywood: Provides the surface for the pegboard. Sanded plywood is smooth, making it easy to paint or finish.
- 1” Wooden Dowels: These will serve as the pegs for hanging items. They should be cut to your desired lengths.
- 1” x 2” Pine Boards: Used to trim the pegboard and mount it on the wall.
- Outlet Box Extender: Allows an outlet to be recessed into the wall, extending it to sit flush with the pegboard.
- Wood Glue: Helps secure the trim pieces to the pegboard.
- Polyurethane (Water-Based, Satin Finish): Protects the wood and gives it a finished look.
Tools:
- 1” Forstner Bit: Essential for drilling clean, precise holes for the dowels.
- Drill Guide: Keeps the drill straight while making holes.
- Circular Saw: For cutting plywood and pine boards to size.
- Orbital Hand Sander: Ensures a smooth finish on the pegboard.
- Miter Saw: Makes angled cuts for trimming the edges.
- Jigsaw: Useful for cutting out spaces, such as around outlets.
- Clamps: Secure the board while drilling and sanding.
- Brad Nailer: Attaches the trim to the pegboard.
Step by Step Instructions
Learn how to make your own pegboard with these easy step-by-step instructions. Perfect for organizing tools and optimizing your workspace.
Step 1: Prepare the Plywood
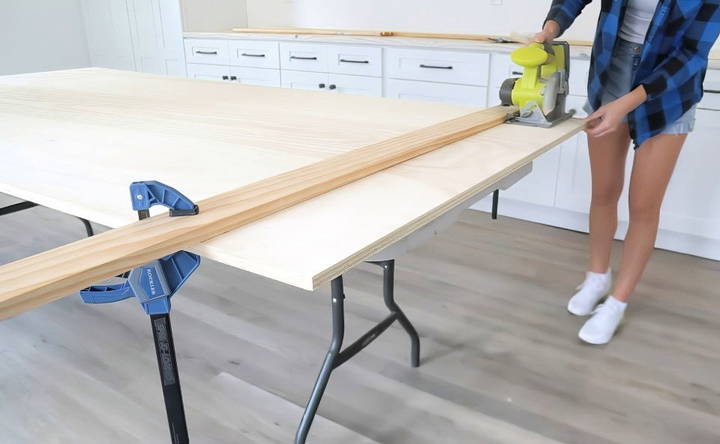
Start by cutting your plywood to the desired size. If you're using a 4' x 8' sheet, you may need to trim it slightly to fit your space. Once cut, sand the entire board using an orbital sander, gradually working up to 220 grit sandpaper for a smooth finish.
Step 2: Measure and Mark the Grid for Holes
To ensure the dowels are evenly spaced, use a drywall square and pencil to draw a grid on the plywood. Leave a 4-inch border around the edges of the board, then space the grid lines evenly at 5-inch intervals. This layout will help maintain uniformity when drilling holes.
Step 3: Drill the Holes
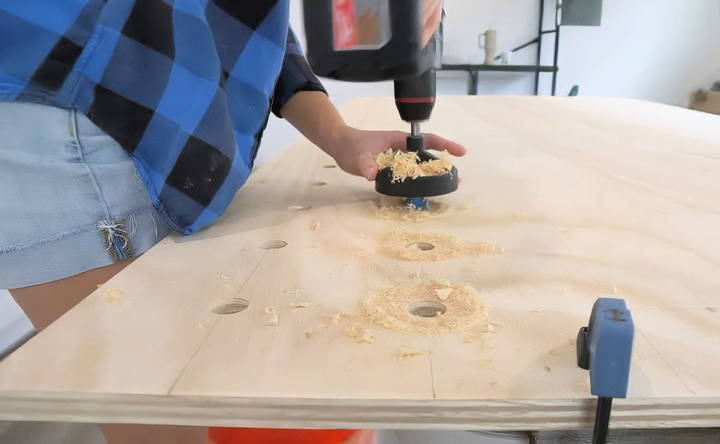
With the grid marked, it's time to drill the holes for the pegs. Attach a 1” Forstner bit to your drill and use a drill guide to keep the bit straight. This step is crucial to ensure that the pegs will sit firmly and align correctly. Drill each hole, making sure to clamp the board securely to the table to prevent movement. This is the most time-consuming part of the project, as you may need to drill over 160 holes.
Step 4: Sand the Pegboard
After drilling the holes, flip the board over to remove any splintered wood on the backside. Sand the front again with 220 grit sandpaper, and don't forget to smooth out the edges of each hole. Rolling a piece of sandpaper into a tube shape can help you reach inside the drilled holes.
Step 5: Apply a Finish
A finish can protect the wood and give your pegboard a polished look. For this project, a whitewash finish was used, consisting of one part paint to one part water. Apply the mixture using a brush, then quickly wipe off the excess with a clean rag. This technique gives the pegboard a subtle, rustic look that still allows the wood grain to show through.
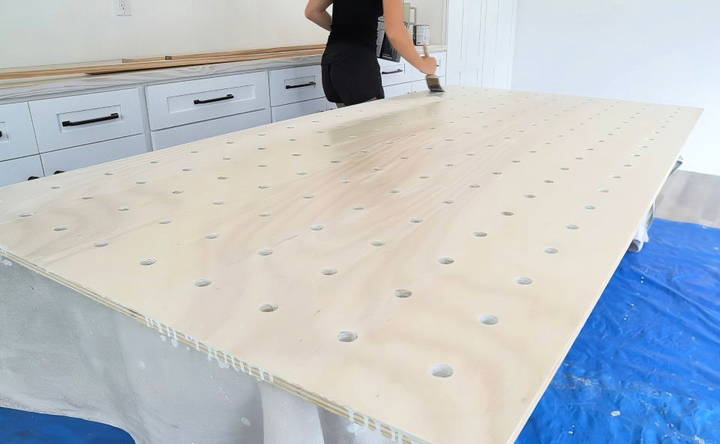
After whitewashing, apply three coats of water-based satin polyurethane to protect the surface. Sand lightly between each coat to maintain a smooth finish. Be sure to clean out the holes of any drips or buildup to ensure the pegs will fit snugly.
Step 6: Prepare the Wall for Mounting
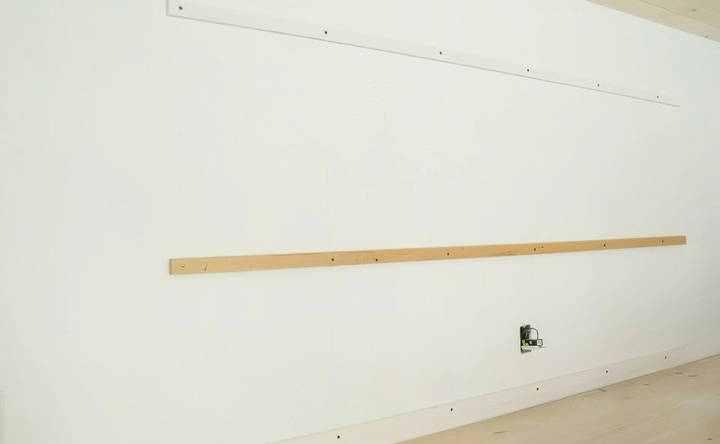
Before mounting the pegboard, locate the wall studs. Mark the positions on the wall where you plan to attach 1” x 2” pine strips. These strips will provide a secure backing for the pegboard, allowing space between the wall and the pegboard for easy insertion of pegs.
Secure the pine strips to the wall using long 3-inch screws, making sure that the strips do not block any of the peg holes.
Step 7: Cut Out Space for Outlets
If the pegboard will cover any electrical outlets, turn off the power and remove the outlet cover. Use the measurements to mark out the outlet location on the pegboard, then use a jigsaw to cut out the space. Afterward, install an outlet extender to ensure the outlet is accessible once the pegboard is mounted.
Step 8: Attach the Pegboard to the Wall
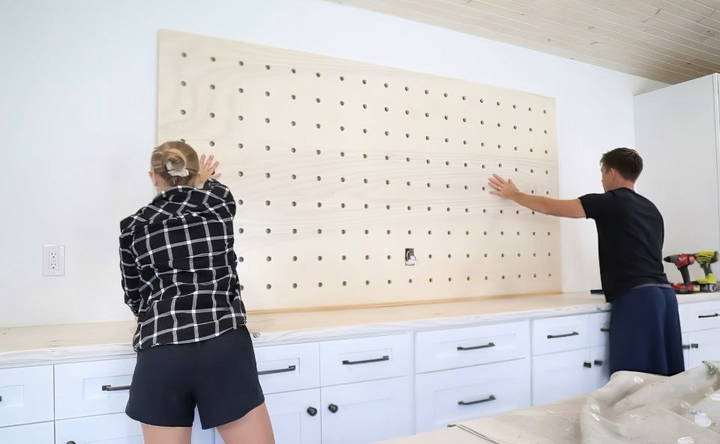
With the wall strips in place, it's time to install the pegboard. Pre-drill holes through the pegboard where it will attach to the wall strips. This prevents the wood from splitting during installation. With the help of a friend, lift the pegboard into place, align it carefully, and secure it using small trim head screws.
Step 9: Trim the Pegboard
To give your pegboard a finished look, trim the edges using 1” x 2” pine boards. Miter the corners at a 45-degree angle for a clean, professional appearance. Attach the trim with wood glue and secure it with a brad nailer. Overhang the trim slightly to account for the thickness of the backing strips.
Step 10: Install the Outlet Extender and Cover
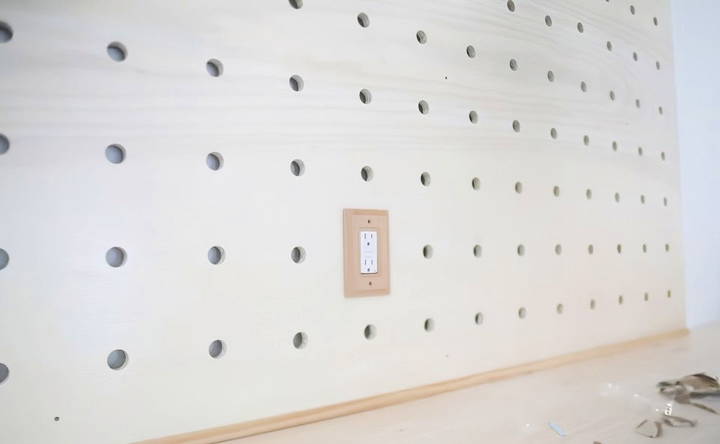
With the pegboard mounted, reinstall the outlet using the outlet extender to ensure it sits flush with the pegboard. Attach the outlet cover for a clean finish. Wooden outlet covers can add a cohesive look, blending with the overall design of your pegboard.
Step 11: Cut and Install the Pegs
Using 1” wooden dowels, cut the pegs to your desired lengths. Standard lengths like 4 inches, 6 inches, and 8 inches are versatile for holding a range of items. After cutting, hand-sand the ends of each dowel to remove any rough edges.
Fit the pegs into the drilled holes on your pegboard. If they are too tight, use fine sandpaper to adjust their size slightly until they fit snugly but can be removed when needed.
Step 12: Organize Your Tools and Supplies
Once the pegboard is in place and the pegs are fitted, you can start organizing your tools and supplies. Place frequently used items at lower levels for easy access. You can arrange the pegs to build shelves, hang tools, or display crafting supplies. The beauty of a custom pegboard is its adaptability—you can rearrange and customize it as your needs change.
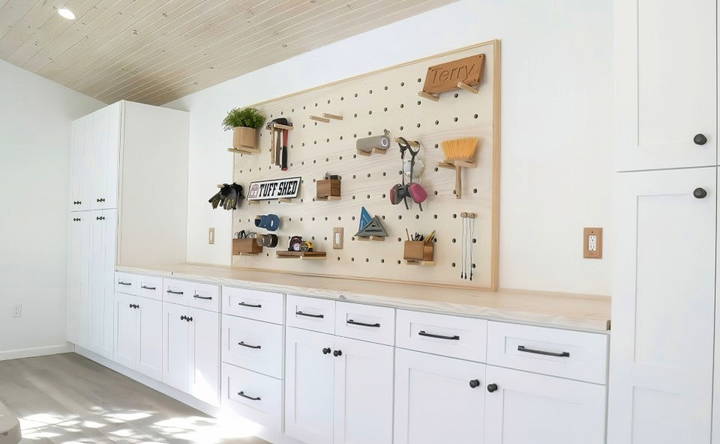
Tips for a Successful DIY Pegboard
- Use a Drill Guide: Keeping the drill straight while making holes is crucial for even peg alignment.
- Sand Thoroughly: A smooth finish ensures that the pegs fit easily and the overall look is polished.
- Plan the Layout: Take time to consider what items you want to store on the pegboard before drilling holes, ensuring the spacing works for your needs.
- Work Safely: Always wear safety glasses when drilling and cutting wood, and ensure the power is off when working near electrical outlets.
Final Thoughts
Building a custom pegboard is an excellent way to enhance the organization and aesthetic of any workspace. It's a project that requires some time and effort, especially when drilling and sanding the holes, but the results are well worth it. With the right tools, a bit of planning, and some patience, you can build a pegboard that is not only functional but also adds a personal touch to your space. Happy building, and enjoy the satisfaction of a clutter-free, stylish workshop!
FAQs About DIY Pegboard
Discover essential FAQs about DIY pegboards, from setup tips and materials to creative uses and organization ideas for any space.
Measure and mark a grid on your plywood, leaving a 4-inch border around the edges. Space the holes 5 inches apart to maintain consistency. Use a drywall square for precise measurements, ensuring each hole is aligned before drilling.
If the pegs are too tight, use fine-grit sandpaper to slightly reduce their diameter. You can also smooth out the insides of the drilled holes using rolled-up sandpaper.
When applying polyurethane, do three thin coats, sanding lightly between each one with 220-grit sandpaper. Be especially careful around the holes—use a small brush to prevent drips that could obstruct peg insertion.
Yes, turn off the power and remove the outlet cover before positioning the pegboard. Use a jigsaw to cut a hole for the outlet, then use an outlet box extender to ensure it is flush with the pegboard surface.
While it's possible to patch the hole with wood filler, it may be easier to leave it, especially if it doesn’t affect functionality. You can place larger items over the area to hide minor mistakes.
For larger cables or plugs, cut a small section from the pegboard to pass the cable through. Reinsert the cut piece afterward or use cable clips to secure wires neatly along the back of the pegboard.
No, a whitewash finish is optional. You can stain, paint, or leave the wood natural, depending on the look you want. Just ensure you protect it with a clear polyurethane coat for durability.
A drill guide ensures straight, even holes, but if you don't have one, you can build a simple guide using a scrap piece of wood with pre-drilled 1-inch holes to keep the drill bit steady.
Use 1” x 2” pine strips secured to the wall studs. Pre-drill holes through the pegboard where the strips are located, then attach the pegboard using trim head screws to prevent splitting.
Yes, a paint sprayer can speed up the process, providing even coverage. Just be sure to dilute the paint properly and adjust the sprayer settings to avoid oversaturation.


