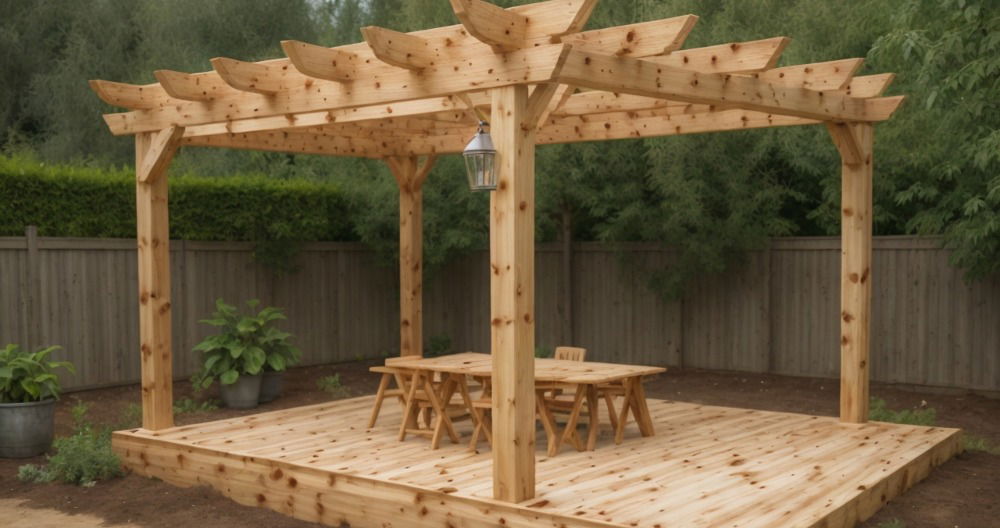
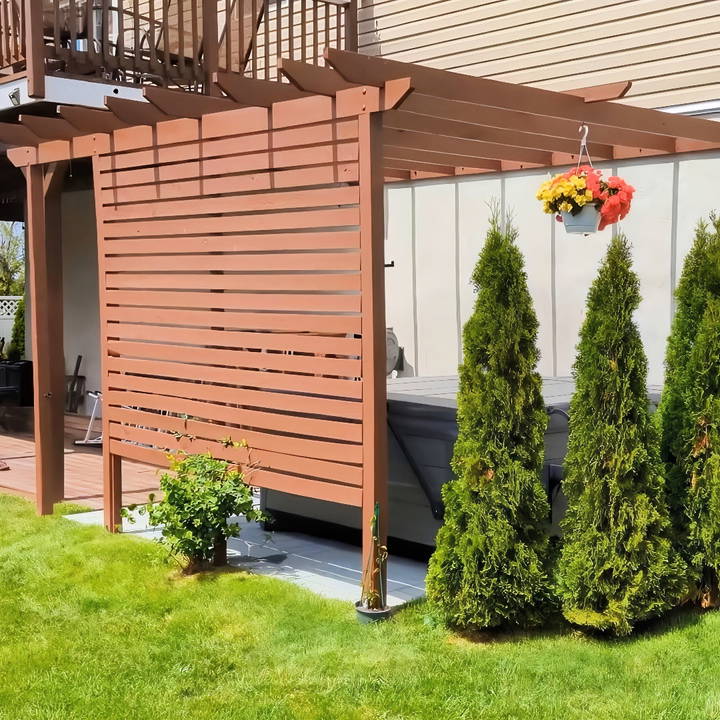
A pergola can transform your backyard, adding shade, privacy, and style to your outdoor space. Attaching a pergola to your house is a great way to extend your living area into the outdoors, and it can be a satisfying DIY project for those with basic woodworking skills. In this comprehensive guide, we'll walk you through the entire process of building a DIY pergola attached to your house, from gathering supplies to finalizing the build.
Materials and Tools You'll Need
Materials:
Before diving into the project, make sure you have all the necessary materials on hand. Here's a list of supplies used for the pergola project in this guide:
- 2 2x6 beams (16 ft long) – These serve as the front and back horizontal beams.
- 3 4x4 posts (12 ft long) – These will go 3 feet into the ground, making the pergola about 9 feet tall.
- 18 1x4 slats (10 ft long) – These are used for privacy slats.
- 6 hex bolts, washers, and nuts – These are used to attach the front beam to the posts.
- 8 2x6 boards (12 ft long) – These go across the top of the pergola as cross beams.
- 8 Simpson Strong-Tie joists – These hold the cross beams in place.
- 1 2x4 (16 ft long) – This goes over the top of the cross beams for additional stability.
- 1 12-ft 2x4 – This is placed between the two posts to prevent slats from warping.
- Half-inch by 4-inch sleeve anchors – These are used to attach the back beam to concrete.
- 3 80-lb bags of concrete – For setting the posts in place.
- 2 2x1 pieces of wood (10 ft long) – These will be nailed into the inside of the posts to secure the privacy slats.
- A variety of screws and nails – For attaching joists and slats.
- 1 gallon of paint – To protect and finish the wood.
Tools:
Make sure you have the following tools ready to go:
- Miter saw
- Circular saw
- Hand saw
- Jigsaw
- Paint roller
- Rubber mallet
- Brad nailer (18-inch)
- Hammer drill
- Drill
- Post hole digger
- Shovel
- Wheelbarrow (for mixing concrete)
- Clamps
- Tape measure
Step by Step Instructions
Learn how to build a DIY pergola attached to your house with step-by-step instructions. Transform your outdoor space with this easy, detailed guide.
Step 1: Planning and Design
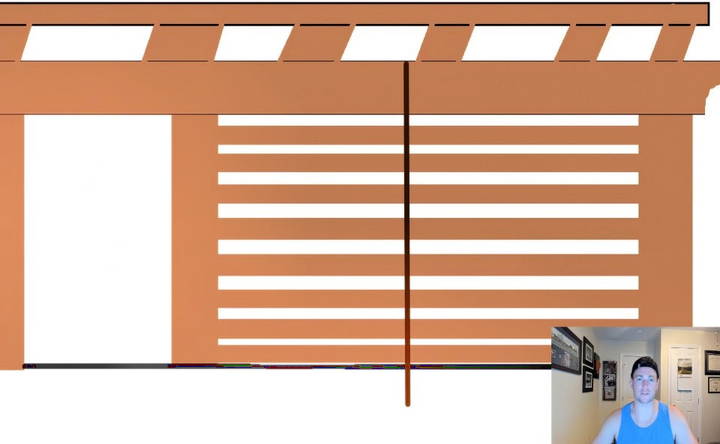
Start by planning how you want your pergola to look. The initial design will determine the size, shape, and materials needed. In this project, the goal was to build a 10x12 pergola to cover a patio and offer privacy for a hot tub.
Consider factors such as:
- Size: Measure your patio or the area where you want to build the pergola. In this example, the pergola covers a 10x12 patio.
- Privacy: The pergola includes privacy slats, and additional plants like arborvitae and a pull-down shade were used for natural and adjustable privacy.
- Post size: While you could opt for thicker 6x6 posts, 4x4 posts were chosen for this project as they are sturdy enough for the load.
Step 2: Gather Materials
Once you have your design, build a detailed list of materials. For this build, the list included wood for beams, posts, slats, and reinforcing pieces, as well as concrete, bolts, and paint. Head to your local hardware store or lumber yard to purchase everything, and load it up in your truck for transport home.
Step 3: Prepping the Posts and Beams
Before assembling, cut your beams and posts to size, and make notches where necessary to ensure the wood pieces fit together securely.
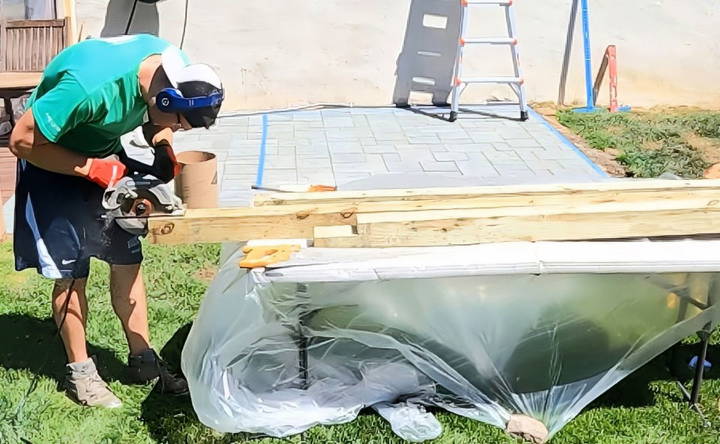
- Cutting the notches: To attach the 2x6 beams to the 4x4 posts, cut notches into the posts where the beams will sit. A combination of a circular saw and a hand saw works well for cutting these notches. Once cut, sand the notches to ensure a smooth fit.
- Staining the wood: Apply stain or outdoor paint to protect your wood from the elements. For consistency, use the same color you may have used on other outdoor structures, like decks or fences.
Step 4: Installing the Posts
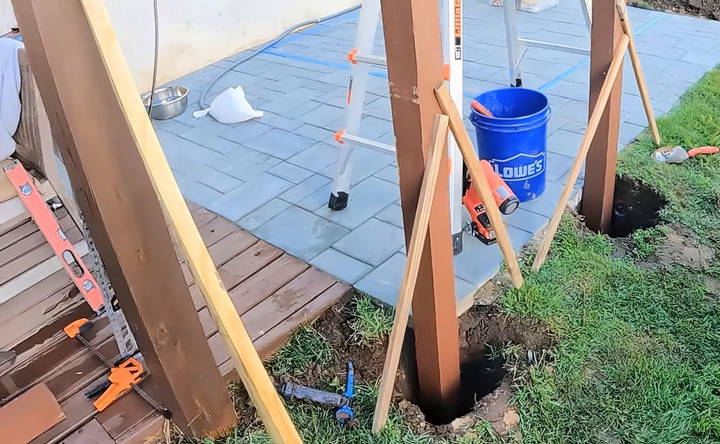
Dig the holes for your posts using a post-hole digger. Each hole should be 3 feet deep to ensure stability.
- Positioning the posts: Measure carefully to ensure the posts are spaced correctly and are in line. In this example, the posts were positioned to build a structure 9 feet tall.
- Pouring concrete: Once the posts are level, mix and pour concrete into the holes to secure the posts in place. Use a shovel and wheelbarrow to mix the concrete, and pack it down firmly once it's poured.
Step 5: Attaching the Beams
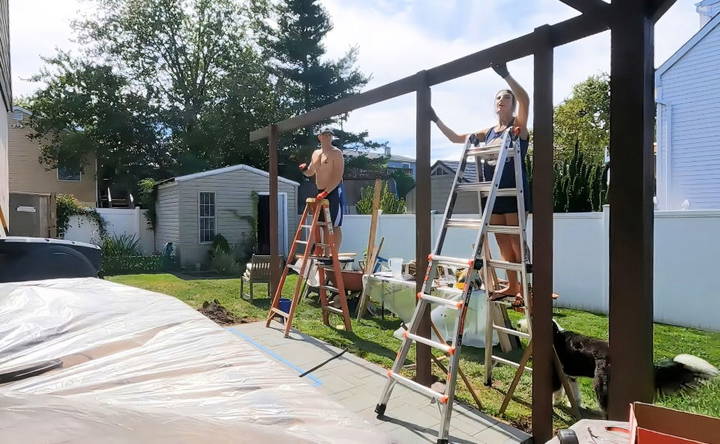
Once your posts are secure and the concrete has set, it's time to attach the front and back beams.
- Front beam: Attach the front 2x6 beam to the posts using hex bolts, washers, and nuts. Make sure the beam is level before securing it.
- Back beam: The back beam will be attached directly to the house. Use sleeve anchors to secure it to the concrete wall or brick surface. This beam will sit slightly higher than the front beam to allow for a gentle slope away from the house, ensuring proper water drainage.
Step 6: Installing the Cross Beams
With the front and back beams in place, it's time to install the cross beams.
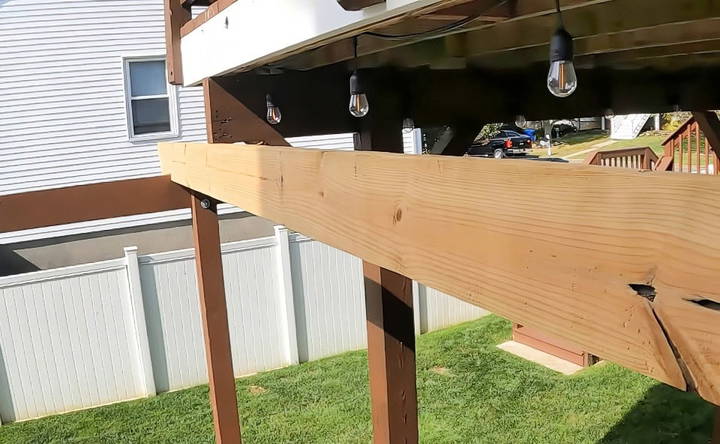
- Simpson Strong-Tie joists: Attach these joists to both the front and back beams. These will hold the cross beams securely in place.
- Cutting the cross beams: Measure and cut the 2x6 cross beams to the correct length. Each one should fit snugly between the front and back beams. You may need to adjust the length slightly if your house or structure isn't perfectly square.
- Notching the beams: Notch the cross beams so they fit securely into the joists. This will add stability and prevent the beams from warping over time.
- Securing the cross beams: Slide the beams into the joists, and use a rubber mallet to ensure they're firmly in place.
Step 7: Adding Privacy Slats
Now that the structure of the pergola is complete, you can add privacy slats.
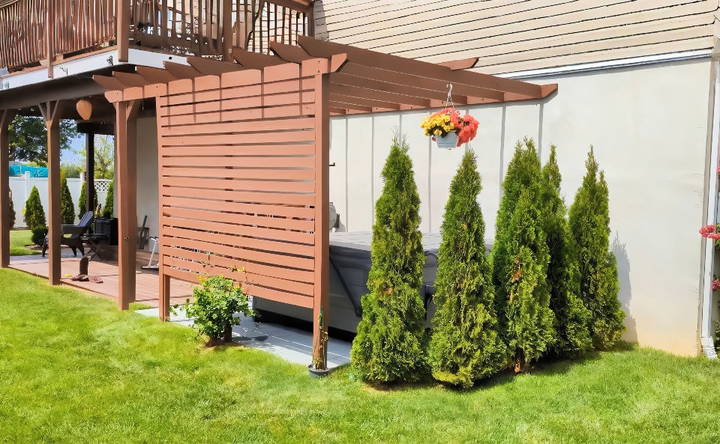
- Cut the slats: Use a miter saw to cut the 1x4 boards for the slats. Ensure each board is the same length.
- Nail the slats in place: Start by attaching a 2x1 piece of wood to the inside of the posts. This will give you something to nail the slats into. Use clamps to hold the slats in place while you nail them with a brad nailer. Maintain a consistent gap between slats, approximately ¾ inch, by using a spacer board as you go.
- Reinforce with a 2x4: To prevent the slats from warping over time, add a 2x4 horizontally between the posts. This adds stability and keeps the slats aligned.
Step 8: Final Touches and Adjustments
Once all the major components are in place, step back and check that everything is level and secure. Here are some final steps:
- Painting and sealing: Apply paint or stain to any exposed wood, especially the cross beams and privacy slats. In this example, a potato skin outdoor stain was used, which matched the deck and other backyard elements.
- Check for alignment: Ensure the slats and beams are all aligned and secure. Make any necessary adjustments to maintain uniformity.
- Test structural stability: Make sure everything is stable and sturdy. The back beam should be securely attached to the house, and the posts should be firm in the ground.
Conclusion: Enjoying Your New Pergola
Once you've completed the build, your new pergola will not only enhance the aesthetics of your backyard but also offer much-needed shade and privacy. Over time, you can further personalize the pergola with climbing plants, shades, or even lighting to make the space even more inviting.
This DIY project is a great way to extend your home's living space and build a relaxing outdoor retreat. By following these step-by-step instructions, you can confidently build a pergola attached to your house, enjoying the satisfaction of a job well done.
FAQs for DIY Pergola Attached to Your House
Discover the top FAQs for building a DIY pergola attached to your house. Get expert tips and answers to make your project a success.
Spacers are often used to create a small gap between the ledger board and the house to allow for better water drainage. This prevents moisture buildup, which can cause wood rot over time. In this build, spacers were not used because the ledger board was securely attached to concrete, which eliminates some of the drainage concerns common with wood.
Start by measuring and marking each post hole precisely, ensuring they are all at the same depth. Use a level while setting the posts in concrete, and check again when attaching the front and back beams to make sure everything stays aligned.
While the exact cost may vary depending on location and material prices, the builder in this project found that building their own pergola was significantly cheaper than purchasing a pre-built option. You can expect to spend between $500 and $1,500 on materials, depending on the size and quality of the wood.
Simpson Strong-Tie joists are used because they provide extra support and durability for the cross beams. These joists help secure the beams, ensuring they don’t shift or sag over time, especially in outdoor conditions where wood can warp.
If your cross beams are warped or bent, you can add a perpendicular 2x4 on top of the beams, making notches for them to sit in. This will help keep the beams straight and prevent further warping in the future.
It’s recommended to stain or paint the wood before assembly to protect it from the elements and ensure even coverage. In this project, the builder used a paint roller and outdoor stain for a consistent finish, applying it prior to putting the beams and posts together.
Privacy slats are an excellent way to block visibility from neighbors or passersby. In this build, slats were added to one side to build a more secluded space around the hot tub. They also provide shade and can serve as a trellis for climbing plants.
Yes, it's still possible. Measure each cross beam individually before cutting to ensure they fit properly. In this project, slight adjustments were needed because the walls weren't perfectly parallel, but the problem was easily managed by cutting beams to the correct size as needed.
Yes, concrete is necessary for setting the posts securely into the ground. It helps prevent movement and ensures that your pergola remains stable and upright, especially during wind or inclement weather.


