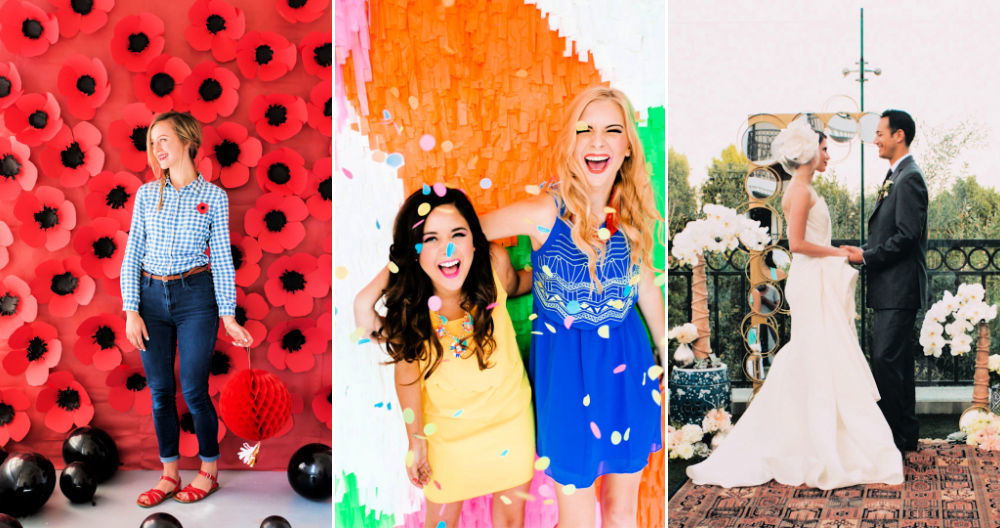
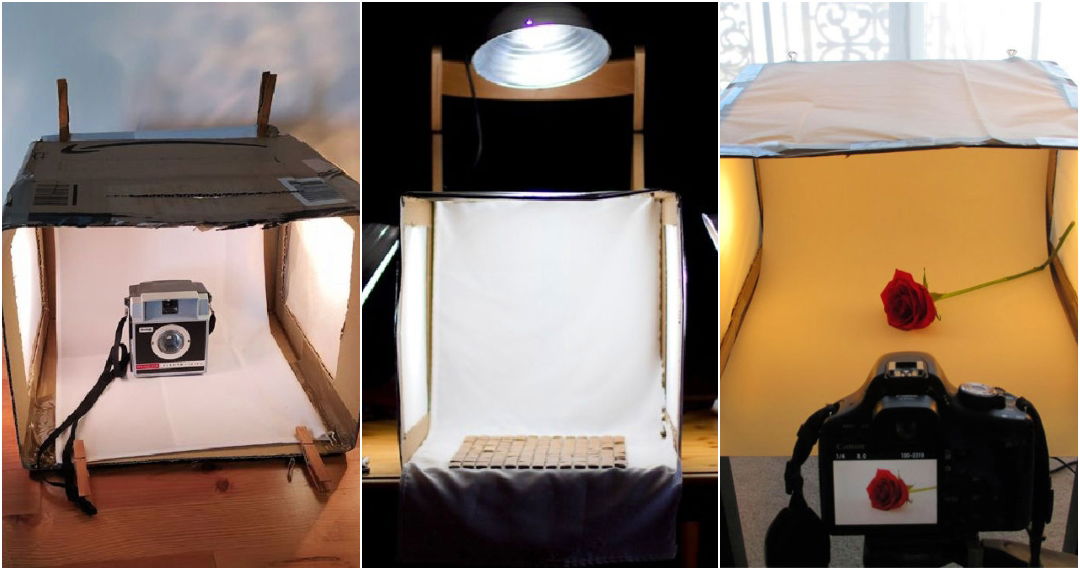
I recently threw a party that was the talk of the town, thanks to a simple yet innovative addition: a DIY photo booth. This wasn't just any photo booth—it was one I crafted myself, tailored to the theme of my event, and it was a massive hit! I was inspired to make this photo booth after watching a helpful video by Zoe Miyoko and thought it would be fantastic to share my experience and guide with you. Whether for Instagram-worthy shots or to add an extra layer of fun to your gatherings, here's a step-by-step guide to making your own photo booth.
Materials Needed:
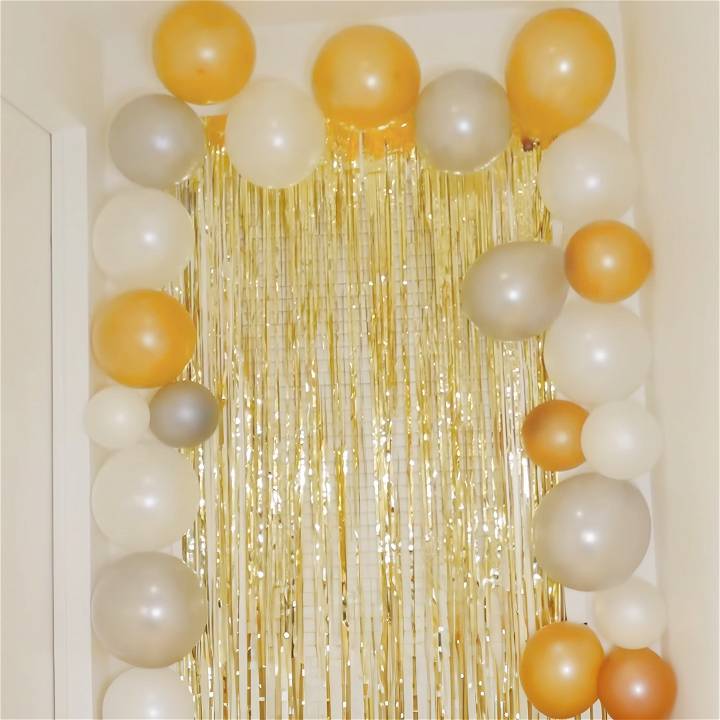
- Door Curtain or Tinsel Backdrop: I chose a glittery gold one to fit my theme, but the beauty of DIY is choosing colors that match your party. This serves as the dazzling backdrop for your photo booth.
- Clear Removable Mounting Squares: These are essential for hanging your backdrop without damaging your walls.
- Balloons in Various Colors: I went with gold, white, and silver to keep in line with my theme. Balloons add depth and vibrancy to your photo area.
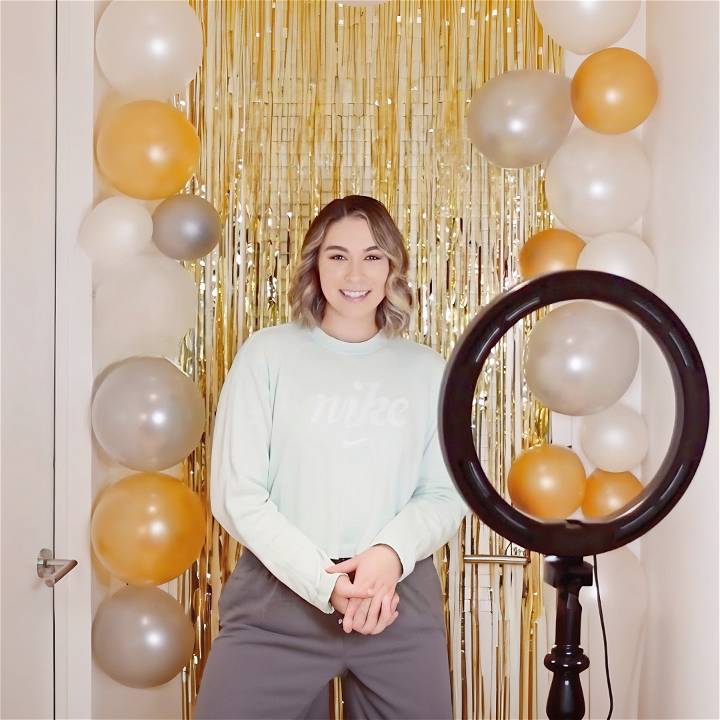
- A Ring Light (Optional): If you want to ensure your guests get well-lit photos, a ring light is a great addition.
Step-by-Step Creation:
Learn how to make a DIY photo booth step-by-step, from choosing the location to setting up the backdrop and arranging balloons. Illumination tips included!
Choosing the Location:
Identify a spot in your home or venue that's both spacious and has a plain wall. I chose in front of our rarely-used laundry closet. Ensure this area can be easily accessed by guests but won't interfere with the flow of the party.
Setting Up the Backdrop:
- Start with your door curtain or tinsel backdrop. Mine had loops at the top, which made it easy to hang with the mounting squares. Applying the mounting squares directly to the wall and then attaching the backdrop ensures it stays up throughout your event. Take care to smooth it out for the best visual effect.
Inflating the Balloons:
- This part requires the most effort but is also where you can get creative. Inflate your balloons to different sizes to make a varied and attractive layout. I recommend using a balloon pump to save time and breath!
Arranging the Balloons:
- Begin by sticking your biggest balloons around the border of your backdrop, using the mounting squares to secure them. Progressively fill in the gaps with smaller balloons to make a full, lush frame for your photo booth.
Illumination (Optional):
- If you've chosen to use a ring light, set it up in front of your photo booth area. If your ring light comes with a smartphone holder, that's a bonus for guests to snap their photos easily.
Final Touches:
After setting everything up, step back and review your creation. Adjust any balloons or parts of the tinsel backdrop as needed. If you're satisfied, you've just maked an enticing photo booth that's bound to be a hit!
DIY Photo Booth Lighting
Making the perfect ambiance for your DIY photo booth involves more than just setting up a camera and backdrop. Proper lighting plays a crucial role in capturing stunning photos that your guests will cherish. Let's explore the world of photo booth lighting and discover how to achieve professional-looking results.
1. Importance of Lighting
Good lighting is the secret sauce behind captivating photos. It can transform an ordinary snapshot into a memorable keepsake. Here's why lighting matters:
- Flattering Portraits: Well-lit subjects look their best. Soft, even lighting minimizes harsh shadows and highlights facial features.
- Vibrant Colors: Proper lighting enhances color saturation, making your photos pop.
- Mood and Atmosphere: Different lighting styles evoke various moods. Whether it's a romantic glow or a lively party vibe, lighting sets the tone.
2. Natural vs. Artificial Light
Natural Light:
- Golden Hour: The hour after sunrise and before sunset provides soft, warm light. Use this time for outdoor photo booths.
- Diffused Sunlight: Overcast days or shooting in the shade offer gentle, even illumination.
- Indoor Windows: Position your photo booth near windows to utilize natural light.
Artificial Light:
- Studio Lights: If you're indoors, invest in studio lights. Softboxes and umbrella lights make flattering illumination.
- Ring Lights: These circular lights reduce shadows and give a glamorous look.
- LED Panels: Portable LED panels are versatile and adjustable. They work well for both photo and video booths.
3. Light Placement
Where you position your lights matters:
- Front Lighting: Place the main light source (whether natural or artificial) in front of the subject. This minimizes shadows on faces.
- Backlighting: Position a light source behind the subject to make a halo effect. It adds depth and separates the subject from the background.
- Fill Light: Use a secondary light source (such as a reflector) to fill in shadows. This balances the overall lighting.
4. Lighting Equipment
Consider these options:
- Ring Flashes: Circular flashes that fit around your camera lens. They provide even illumination and eliminate red-eye.
- Softboxes: Large, fabric-covered boxes that diffuse light. Ideal for studio setups.
- Beauty Dishes: Shallow, round reflectors that make soft, flattering light on faces.
Remember, experimentation is key. Adjust your lighting setup based on the event, location, and desired mood. Whether it's a wedding, birthday party, or corporate event, great lighting ensures your DIY photo booth captures memories beautifully!
Light Placement in Your DIY Photo Booth
When setting up your DIY photo booth, light placement is a critical factor that significantly impacts the quality of your photos. Properly positioned lights can enhance your subjects' appearance, minimize shadows, and make a professional look. Let's dive into the details:
1. Front Lighting
- What Is Front Lighting? Front lighting refers to placing the main light source directly in front of your subject. It illuminates their face evenly, reducing harsh shadows.
- When to Use It:
- Portrait Shots: For classic headshots or close-up portraits, front lighting works wonders.
- Group Photos: When capturing a group of people, front lighting ensures everyone is well-lit.
- Tips:
- Soft Light: Use soft light sources (such as softboxes or diffused natural light) to avoid harsh highlights.
- Eye Level: Position the light at eye level or slightly above for flattering results.
2. Backlighting
- What Is Backlighting? Backlighting involves placing a light source behind your subject. It makes a halo effect and separates the subject from the background.
- When to Use It:
- Silhouettes: Backlighting is perfect for making dramatic silhouettes. The subject appears dark against a bright background.
- Highlighting Hair: It adds a beautiful glow to hair and outlines the subject.
- Tips:
- Adjust Intensity: Experiment with the backlight's intensity. Too much can overpower the image.
- Positioning: Place the backlight slightly above the subject's head.
3. Fill Light
- What Is Fill Light?: Fill light compensates for shadows maked by the main light source. It ensures a balanced overall illumination.
- When to Use It:
- Indoor Booths: In indoor setups, where natural light may not be sufficient, add fill light.
- Outdoor Booths: Even on sunny days, fill light softens harsh shadows.
- Tips:
- Reflectors: Use reflectors or bounce cards to bounce light back onto the subject.
- Subtle Adjustment: The fill light should be less intense than the main light.
Remember, practice makes perfect! Set up your lights, take test shots, and adjust as needed. Whether you're hosting a wedding, birthday party, or corporate event, mastering light placement will elevate your DIY photo booth game.
DIY Photo Booth FAQs
Get answers to all your DIY Photo Booth FAQs in this comprehensive guide. Find out how to set up, operate, and enhance your own photo booth at events.
1. What size of solar generator do I need for a DIY photo booth?
When setting up a DIY photo booth, having a reliable power supply is crucial. Solar generators are an excellent choice because they're eco-friendly and can keep your photo booth running smoothly. Here's what you need to know:
- Medium to large solar generator: For a DIY photo booth, consider solar generators like the Jackery Solar Generator 1000 Plus, 1500 Pro, or the larger 2000 Pro. These provide ample power to run your equipment, including lights, cameras, and props.
2. What size frame for the DIY photo booth?
The photo booth frame size depends on how many people you want to accommodate. If you're making the frame for one to two people, a size of 36 inches by 24 inches works well. Adjust accordingly if you plan to fit more guests.
3. Are DIY photo booths good for weddings?
Absolutely! DIY photo booths are a hit at weddings. They add a fun and interactive element to the celebration. Guests can take candid and memorable photos, making keepsakes that everyone will cherish. Plus, photo booths serve as boredom busters during downtime at weddings.
4. Is a photo booth worth it?
Yes, photo booths are worth it! Whether it's a wedding, birthday party, or any event, photo booths provide entertainment, capture special moments, and give guests something to take home. With a little creativity and the right setup, your DIY photo booth will be a hit!
5. What tools and materials do I need for a DIY photo booth?
Making a successful DIY photo booth requires some essential supplies:
- Camera: Use a basic digital camera with a remote-controlled shutter. A DSLR or a high-quality smartphone camera with a reliable timer function works well.
- Tripod: Keep your camera steady at eye level using a tripod.
- Props: Get creative with fun props to enhance your photo booth experience.
- Backdrop: Choose an interesting backdrop that fits the theme of your event.
- Lighting: Proper lighting is essential for great photos.
- Power Supply: Consider using solar generators like the Jackery series for continuous and reliable power.
Conclusion:
Crafting your own photo booth is a fantastic way to add a personal touch to your gatherings. It encourages guests to interact, make memories, and leave the party with a tangible reminder of the fun they had. With simple materials and a bit of creativity, you can elevate any event, making it memorable and Instagram-worthy.
In making this photo booth, I not only provided my guests with a fun activity but also demonstrated that you don't need to spend a fortune to add a special touch to your celebrations. The joy and laughter that filled the room as guests posed and snapped photos was genuinely priceless. I hope this guide inspires you to make your own unique photo booth, adding an extra layer of fun and creativity to your next event.


