Making a light box was a game changer for my photography, especially when it came to capturing the intricate details of objects. Having been inspired by numerous tutorials, I embarked on crafting a simple yet effective light box. The process allowed me to combine my passion for DIY projects with my professional photography pursuits. This guide shares my personal experiences, tips, and insights on building a light box that can elevate your photography skills.
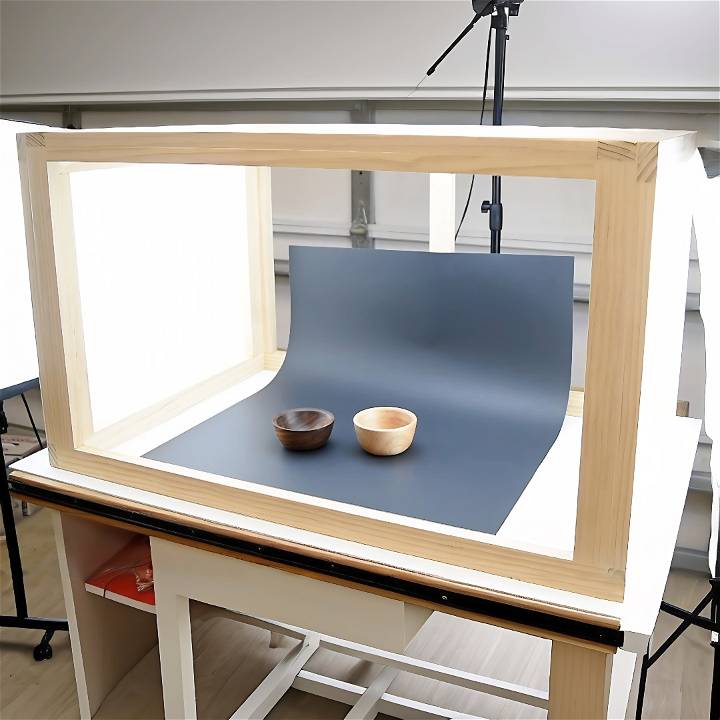
Materials Needed and Reasons
- White Poster Board: This serves as the backdrop within the box, providing a clean, uncluttered background that highlights the subject of your photographs.
- Cardboard Box: The core structure of your light box, offering a framework to diffuse light evenly around your subject.
- Tissue Paper: Used to cover the openings on the sides of the box, tissue paper acts as a diffuser for the light, softening shadows and reducing glare.
- Tape and Glue: Essential for securing the tissue paper and poster board in place, ensuring a stable and durable construction.
- LED Strip Lights or Lamps: These are your light sources. LEDs are preferred for their cooler temperature and consistent light output.
Step-by-Step Process
Discover how to build a DIY photo box for photography with our step-by-step guide. Perfect for capturing professional-looking images at home.
1. Preparing the Box
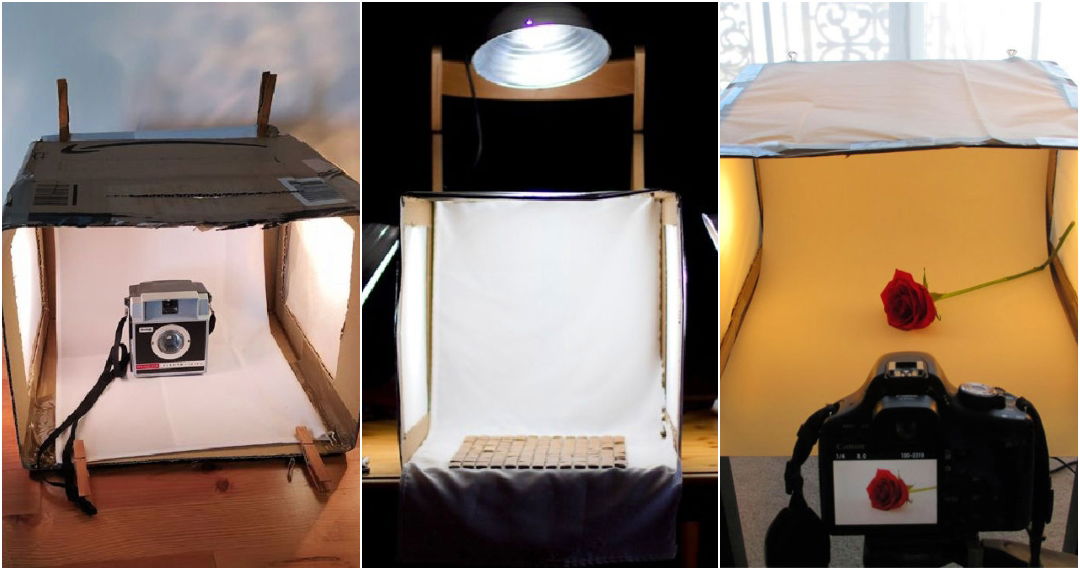
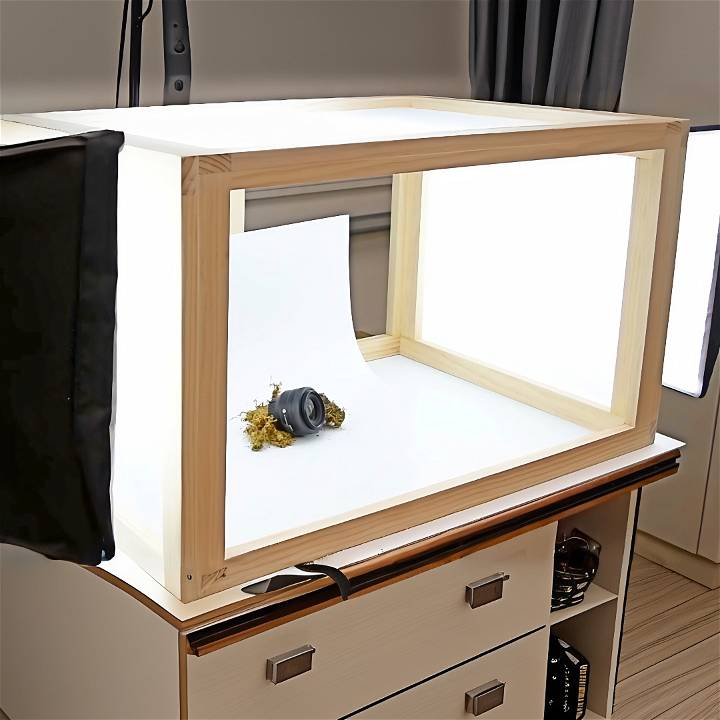
Choose a cardboard box that's the right size for the objects you plan to photograph. The box should be large enough to accommodate the subject and the backdrop but compact enough for easy storage. Cut out large windows on three sides of the box, leaving a margin around the edges for structural integrity.
2. Diffusing the Light
Cut tissue paper to the size of the windows you've just created in the box. Attach the tissue paper to the inside edges of the windows with tape, covering them completely. This will diffuse the light entering the box, eliminating harsh shadows.
3. Setting the Backdrop
Measure and cut the white poster board so that it fits inside the box, creating a seamless curve from the top to the bottom. This curve is crucial as it ensures there are no creases or angles in the background, offering a clean, infinite background effect.
4. Installing the Lighting
Position LED strip lights or lamps around the outside of the box, directing light through the tissue paper windows. The goal here is to ensure that the box is well-lit from all sides, providing even lighting around your subject.
5. Testing and Adjusting
Before starting your photography session, test the light box with a few objects. Take note of how the light affects the subject and adjust the positioning of the lights if necessary. Experimenting with different light placements can result in varying shadow and highlight effects, which can enhance the texture and details of your subject.
Tips and Insights
- Light Quality: Pay attention to the color temperature of your lights. LEDs with a neutral white light are often best for photography as they do not cast a color tint on your subject.
- Durability: If you find yourself using the light box frequently, consider reinforcing the cardboard with tape or upgrading to a more durable material like wood or plastic.
- Portability: For those who need a portable setup, look into collapsible designs or lighter materials that can be assembled and disassembled with ease.
- Customization: Don’t hesitate to customize your light box. Whether it’s adding more light sources for brighter images or painting the interior black for dramatic effects, personal touches can make a significant difference.
Photography Techniques Inside the Light Box
When using your DIY photo light box, mastering a few essential photography techniques can significantly enhance the quality of your product images. Whether you’re a beginner or an experienced photographer, these tips will help you capture stunning visuals with minimal effort.
Proper Product Placement and Composition
- Center Your Subject: Position your product in the center of the light box to create a balanced composition. This ensures that the main focus remains on the item you’re photographing.
- Fill the Frame: Zoom in or adjust your camera angle to fill the frame with the product. Avoid excessive empty space around the subject, as it can distract from the details.
- Angles Matter: Experiment with different shooting angles. Capture your product from the front, side, and top to showcase its features comprehensively. For jewelry or small accessories, close-up shots work wonders.
Lighting Techniques
- Soft, Diffused Light: The primary advantage of a light box is the soft, even illumination it provides. Place your LED lights or lamps outside the box, aiming them toward the diffuser panels. This minimizes harsh shadows and highlights.
- Avoid Direct Light: Direct light can create reflections and hotspots on glossy surfaces. Position your lights at an angle to prevent glare. If needed, use white tissue paper or fabric to further diffuse the light.
- Backlighting: For translucent or semi-transparent products (like glassware or jewelry), consider backlighting. Place a light source behind the subject to create a beautiful glow.
White Balance and Color Accuracy
- Set Custom White Balance: Most cameras allow you to set a custom white balance. Use a neutral gray card or a white sheet of paper inside the light box. Adjust the white balance settings to match the color temperature of your lights.
- Avoid Color Casts: Check your images for unwanted color shifts. If your product appears too warm (yellowish) or too cool (bluish), adjust the white balance accordingly.
Focus and Depth of Field
- Manual Focus: If your camera allows manual focus, use it. Auto-focus may struggle in low-light conditions. Focus precisely on the product’s details, especially when shooting close-ups.
- Aperture Settings: A wider aperture (lower f-number) creates a shallow depth of field, blurring the background. This technique works well for isolating the subject. Conversely, a smaller aperture (higher f-number) keeps more of the image in focus.
Post-Processing Basics
- Crop and Straighten: Use photo editing software to crop unnecessary edges and straighten horizons. A well-composed image looks more professional.
- Adjust Exposure and Contrast: Fine-tune exposure and contrast to enhance details. Avoid overexposing highlights or losing shadow details.
- Remove Dust and Blemishes: Inspect your images for dust particles or minor imperfections. Use the healing brush or clone tool to clean them up.
Experiment with different settings, angles, and lighting conditions until you achieve the desired results. Your DIY light box is a powerful tool—use it wisely to create captivating product photos.
Common Mistakes to Avoid
When setting up and using your DIY photo light box, steer clear of these common pitfalls to ensure professional-looking results:
Insufficient Lighting
- Mistake: Using inadequate lighting can lead to dull, shadowy images. Insufficient brightness affects color accuracy and detail visibility.
- Solution: Invest in bright LED lights or daylight bulbs. Ensure even illumination inside the light box. Experiment with angles to minimize shadows.
Cluttered Backgrounds
- Mistake: Busy or cluttered backgrounds distract from the product. Messy surroundings can make your photos look unprofessional.
- Solution: Use a clean, seamless white or neutral-colored backdrop. Remove any unrelated items from the frame.
Incorrect White Balance
- Mistake: Neglecting white balance settings results in unnatural color casts. Your product may appear too warm (yellowish) or too cool (bluish).
- Solution: Set a custom white balance using a gray card or white paper. Aim for neutral tones that accurately represent the product’s colors.
Overexposure or Underexposure
- Mistake: Extreme exposure levels wash out highlights or lose shadow details. Overexposed images lack contrast, while underexposed ones lack vibrancy.
- Solution: Check your camera’s histogram. Adjust exposure settings to maintain a balanced distribution of tones. Bracket shots if unsure.
Ignoring Composition Rules
- Mistake: Haphazard composition leads to unappealing photos. Centering the subject, filling the frame, and considering angles matter.
- Solution: Follow the rule of thirds—position your product at intersecting points on the grid. Frame it thoughtfully for visual impact.
Glossy Reflections and Glare
- Mistake: Harsh reflections on glossy surfaces (like glass or jewelry) can ruin an otherwise great shot.
- Solution: Angle your lights to avoid direct reflections. Use tissue paper or fabric to diffuse light. Experiment until you achieve a pleasing balance.
Not Checking for Dust and Smudges
- Mistake: Dust particles, fingerprints, or smudges on your product distract viewers.
- Solution: Inspect your images at 100% zoom. Use editing tools to remove imperfections. Keep your light box and product clean.
Relying Solely on Auto Mode
- Mistake: Leaving your camera on auto mode may not yield the best results. Auto settings may not account for specific lighting conditions.
- Solution: Learn to use manual settings—adjust aperture, shutter speed, and ISO. Take control of your camera for better outcomes.
Remember, practice and patience are key. Regularly review your photos, learn from mistakes, and fine-tune your techniques. With time, your product photography skills will flourish!
FAQs About DIY Photo Box for Photography
Learn all about DIY photo boxes for photography! Discover tips, tricks, and frequently asked questions to enhance your photography skills.
1. What is a DIY photo box, and why should I use one?
A DIY photo box (also known as a light box or photo tent) is a simple, portable setup designed to improve your product photography. It provides controlled lighting, reduces shadows, and creates a consistent background. Using a photo box can make your product images look more professional and appealing.
2. What products work well with a light box?
A light box is ideal for small to medium-sized products, such as jewelry, crafts, electronics, or food items. It’s especially useful for items with reflective surfaces or intricate details.
3. How do I position my product inside the light box?
- Centered: Place your product in the center of the box.
- Fill the Frame: Zoom in or adjust your camera angle to capture the entire product without excessive empty space.
- Angles: Experiment with shooting from different angles to highlight features.
4. What lighting techniques should I use?
- Soft Light: Position LED lights outside the box to create soft, diffused illumination.
- Avoid Glare: Angle lights to prevent reflections on glossy surfaces.
- Backlighting: For translucent items, consider backlighting to create a beautiful glow.
5. How do I edit photos taken in the light box?
- Crop and Straighten: Remove distractions and straighten horizons.
- Adjust Exposure and Contrast: Fine-tune brightness and contrast.
- Remove Imperfections: Use editing tools to eliminate dust or blemishes.
- Save in the Right Format: Choose lossless formats for archival purposes and JPEG for web use.
Remember, practice and patience will help you master product photography using your DIY light box!
Final Thoughts
Wrapping up, making a DIY photo box for photography can enhance your photos with better lighting and a professional touch. It's a simple, cost-effective solution for taking your photography skills to the next level.


