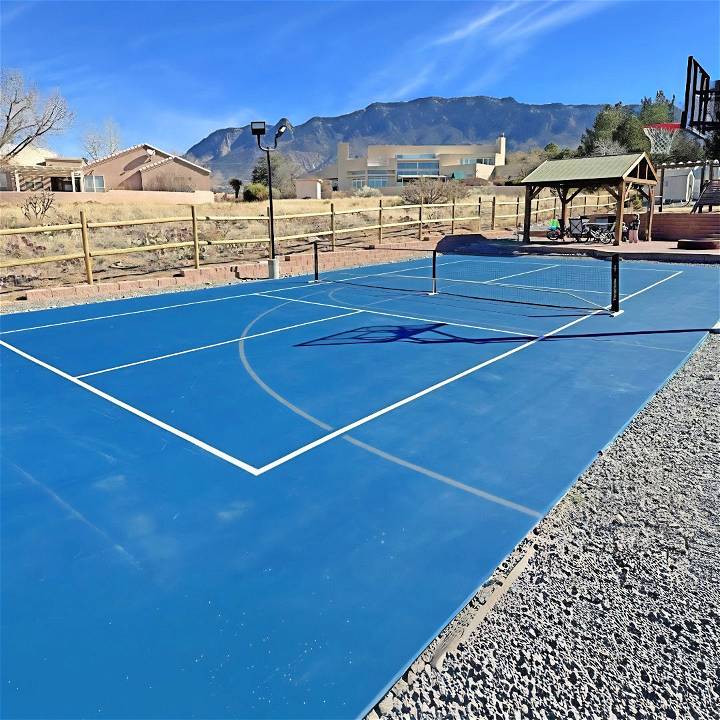
Building a DIY pickleball court in my backyard was an ambitious project that married my love for DIY with the growing popularity of pickleball in my community. I wanted to build a space where family and friends could gather, enjoy the outdoors, and engage in some friendly competition. I learned a lot through the process and I'm here to share my experience, hoping you can avoid some of the pitfalls I encountered and enjoy a smoother building journey.
Materials Needed and Why:
- Concrete Slab: The foundation of any good pickleball court. We already had a concrete slab in place, but ensure yours is at least 4 inches thick for durability.
- Sport Master Pickle Master Product Line: For painting and surfacing. It provides a good balance of grip and smoothness perfect for pickleball.
- Muriatic Acid & Safety Gear (Goggles and Gloves): This is for etching the concrete to prepare it for painting. Safety gear is crucial here as muriatic acid is highly corrosive.
- Broom & Blower: To clean the concrete slab before starting. A clean surface ensures better adhesion of materials.
- Crack Filler: For filling in any cracks or stress relief lines to prevent water from getting in and freezing, which could lead to bigger cracks.
- Roller & Squeegee: For applying the primer and surface coatings.
- Paint & Tape: Used for marking the lines of the court. Precision here makes for a professional-looking finish.
- Chalk Line: For marking the layout. Ensuring accurate measurements is essential for a standard-sized court.
Step by Step Instructions
Learn how to build a DIY pickleball court with our step-by-step instructions. Easy to follow guide for making your own pickleball court at home.
Preparing the Surface:
First, I cleaned the slab with a broom, followed by a blower to remove all debris. This step is critical for a smooth application of materials later on. I also took this opportunity to fill in any cracks or stress relief lines with crack filler, ensuring a uniform surface to work on. Always let the area dry thoroughly before moving on to the next step.
Etching the Concrete:
Using muriatic acid for etching was an intense process and not one to take lightly. Always add acid to water, not the other way around, to prevent a chemical reaction that could cause burns. The etching process opened up the pores of the concrete, which is essential for the primer and paint to adhere properly. After applying the acid, I thoroughly rinsed the slab and allowed it to dry completely.
Applying Primer and Surface Coating:
The Sport Master product came with a specific primer, which I applied using a roller. This step felt straightforward but required patience and attention to detail, ensuring an even application without puddles. The surface coating was next, and here I used a squeegee for a smooth finish. This part of the process was physically demanding but seeing the court come together was incredibly rewarding.
Marking the Court:
Accuracy in marking the court was paramount. I used a chalk line for initial guidelines, ensuring my measurements were precise to meet regulation size. Applying tape over these lines then happened, followed by painting. I discovered that applying a primer (Stripe Right) beneath the paint prevented bleeding and ensured crisp lines.
Final Touches:
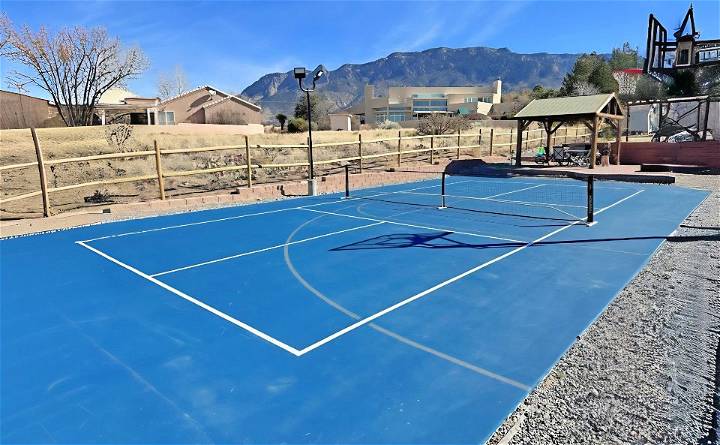
After the paint dried, I removed the tape, revealing sharp, professional-looking lines. This moment was a mixture of relief and pride. The clear lines against the blue surface looked stunning, and despite the labor-intensive process, I felt a deep sense of accomplishment.
Reflections and Advice:
After two and a half years, the court has seen a lot of use and has held up remarkably well. There are some cracks along the stress relief lines, but they're superficial and don't affect play. In hindsight, investing in a higher quality concrete slab might have prevented these, but the cost was a significant factor in my decision.
For those considering their DIY pickleball court, my advice is simple:
- Plan meticulously: Ensure you have all materials and tools before starting.
- Safety first: Don't skip on protective gear, especially when working with chemicals.
- Patience is key: Don't rush the process; taking your time ensures a higher quality finish.
- Measure twice, paint once: Accuracy is everything when marking your court. Spend extra time here to avoid frustration later.
This project shows what hard work can achieve. I hope it inspires your own DIY pickleball court project. Enjoy building something special for loved ones.
Maintenance and Upkeep of Your DIY Pickleball Court
Maintaining your pickleball court is crucial to ensure it remains a fun, safe, and inviting place to play. Regular upkeep not only extends the life of your court but also keeps it looking great and playing well. Here's a comprehensive guide on how to maintain your DIY pickleball court effectively.
Regular Cleaning
Sweep your court regularly to remove dirt, leaves, and debris. This prevents staining and keeps the surface safe for players. For a deeper clean, use mild soap with water and a soft brush to gently scrub the surface. Rinse thoroughly to avoid leaving any slippery residues.
Water Removal
After rain, promptly remove standing water with a water-broom or squeegee. This helps prevent water damage and algae growth, which can make the surface slippery and unsafe.
Line Maintenance
Over time, the painted lines on your court may fade. Repaint the lines as needed to keep them visible and clear. Use paint specifically designed for sports courts to ensure it adheres well and lasts longer.
Surface Repairs
Inspect your court for cracks or damage regularly. Small cracks can be filled with a court patch product, while larger issues may require professional resurfacing. Addressing these problems early prevents them from worsening and becoming more costly to fix.
Net Care
Check your net often for wear and tear. Tighten it if it becomes loose, and replace it if you notice significant damage. A well-maintained net ensures accurate play and safety.
Weather Protection
In areas with harsh weather, consider using a court cover to protect the surface from extreme temperatures and prolonged sun exposure, which can cause the material to deteriorate faster.
Safety First
Always ensure that your court is free of hazards. Secure any loose fencing, and if you have lighting, make sure it's in good working order to prevent accidents during evening play.
By following these simple steps, you can keep your DIY pickleball court in top condition for years to come. Regular maintenance is the key to a durable and enjoyable pickleball experience.
Permit and Legal Considerations for Your DIY Pickleball Court
Before you start building your DIY pickleball court, it's essential to understand the permit and legal considerations to ensure your project complies with local laws and regulations. Here's a detailed guide to help you navigate this process.
Research Local Zoning Laws
Start by researching local zoning laws. These laws dictate what you can build and where. You'll need to know if your property is zoned for recreational use or if there are any restrictions that could affect your court construction.
Check Homeowner Association Rules
If you're part of a homeowner association (HOA), review their rules. HOAs often have specific guidelines about the types of structures allowed and may require approval before you begin construction.
Apply for Necessary Permits
Most localities require permits for construction projects. You'll likely need a building permit, and if you're planning to install lighting, electrical permits may also be necessary. The permitting process ensures that your court meets safety standards and building codes.
Understand Setback Requirements
Setback requirements determine how close your court can be to property lines and other structures. Make sure your court layout complies with these requirements to avoid future legal issues.
Consider Noise Ordinances
Pickleball can be a noisy sport, so be aware of any noise ordinances in your area. You may need to take measures to minimize sound or limit playing hours to comply with local regulations.
Plan for Accessibility
Ensure your court is accessible according to the Americans with Disabilities Act (ADA) standards if it's open to the public. This includes proper court dimensions and accessible entrances.
Inspect and Prepare the Site
Before construction, inspect and prepare the site. Make sure the ground is level and that there are no underground utilities or other obstacles that could interfere with construction.
By following these steps, you can avoid legal issues and make sure your DIY pickleball court is a good addition to your property.
FAQs About DIY Pickleball Court
Discover all the answers to your FAQs about DIY pickleball court construction in this comprehensive guide. Learn more about building your own court today!
What is the best surface for a pickleball court?
The ideal surface for a pickleball court is concrete due to its durability and low maintenance. It provides a consistent bounce and can be coated with an acrylic surface system for better playability. Asphalt is another option, offering a bit more cushioning but may require non-slip paint for safety.
How much space do I need for a pickleball court?
For a standard pickleball court, you'll need a flat area that is 20 feet wide and 44 feet long. However, including space for players to move around, a total area of 30 feet by 60 feet is recommended. If you're adding fencing or other features, you may need more space.
Can I build a pickleball court in my driveway?
Yes, you can convert your driveway into a pickleball court if it's large enough. The surface should be flat and smooth. You'll need to ensure the dimensions fit the standard court size and that the net can be securely installed.
How thick should the concrete be for a pickleball court?
The concrete for a pickleball court should be at least 4 inches thick to ensure stability and longevity. If the court will experience heavy use or is in an area with extreme weather conditions, consider a thickness of 5 inches for extra durability.
Do I need a permit to build a pickleball court?
It depends on your local zoning laws and regulations. In many cases, a building permit is required, especially if you're making permanent changes to your property. Always check with your local government and homeowner association before starting construction.
How do I maintain my pickleball court?
Regular maintenance includes sweeping the court to remove debris, filling in cracks, repainting faded lines, and ensuring the net is tight and in good condition. If you have a concrete surface, reapply the acrylic coating every few years to keep the surface in top playing condition.
Conclusion:
Wrapping up the DIY pickleball court article, building your own court is a rewarding project that can enhance your gameplay experience. With these tips and guidelines, you'll be able to enjoy pickleball right in your backyard. Start building your court today!


