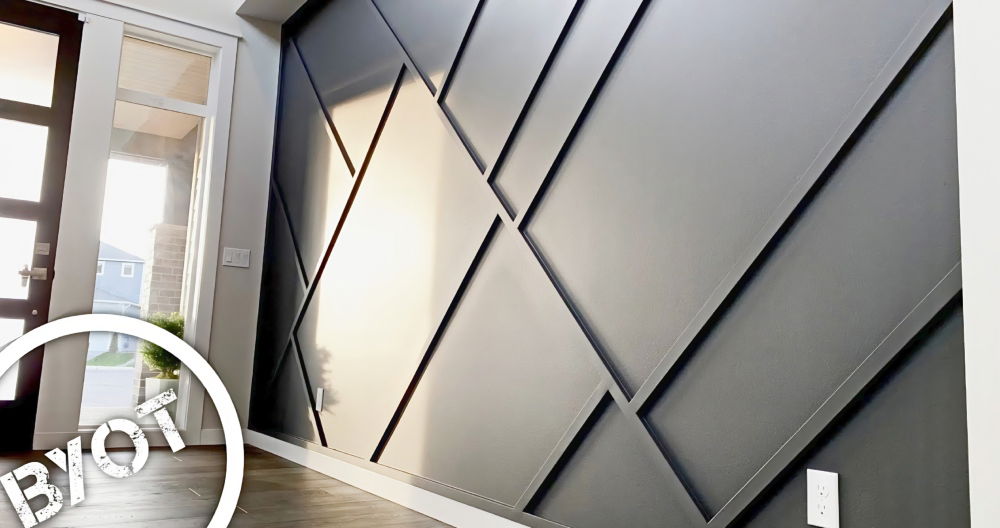
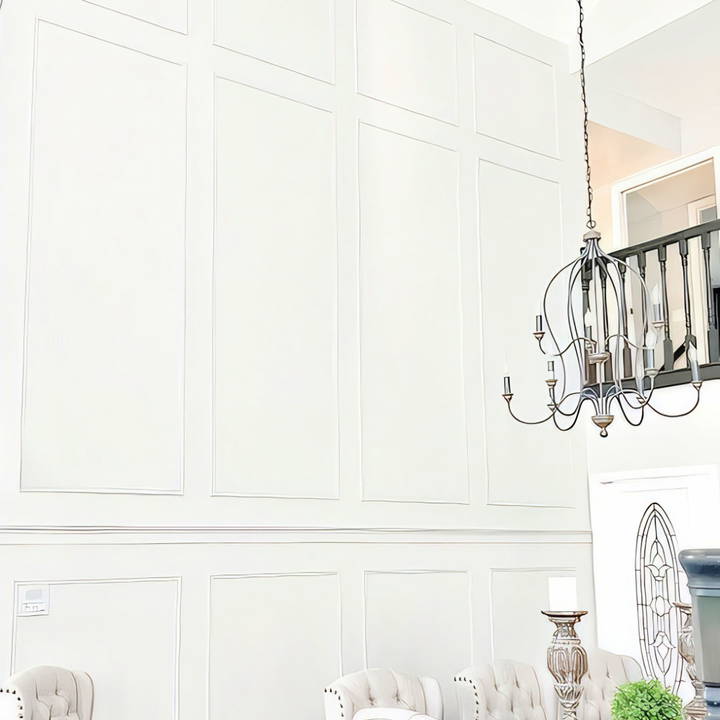
Looking to give your dining room a makeover? Adding DIY picture frame molding can completely transform your space. It's a simple, yet effective way to elevate the style of any room, making it feel more sophisticated without breaking the bank. I recently tackled this project in my parents' dining room, and I'm excited to share the process step by step.
Choosing the Right Materials
The first step in this project was selecting the right materials. When it comes to picture frame molding, the key is to pick a trim style that complements the existing decor. I visited a home improvement store to explore my options and chose a traditional colonial trim for this project. It was important to me to find something that paired well with the chair rail I had picked out—a thick, elegant profile that gives a room that extra touch of refinement.
In my experience, selecting the right materials sets the tone for the entire project. Don't rush this step. Take time to consider how different styles and thicknesses will look together. For this project, I opted for a thicker chair rail and slightly thinner picture frame molding to build visual interest.
Step by Step Instructions
Learn to make stunning DIY picture frame molding with step-by-step instructions, from measuring and cutting to assembling and finishing touches.
Measuring and Planning
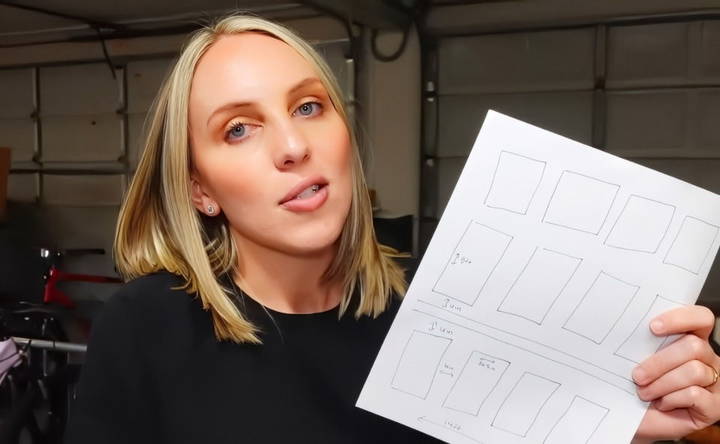
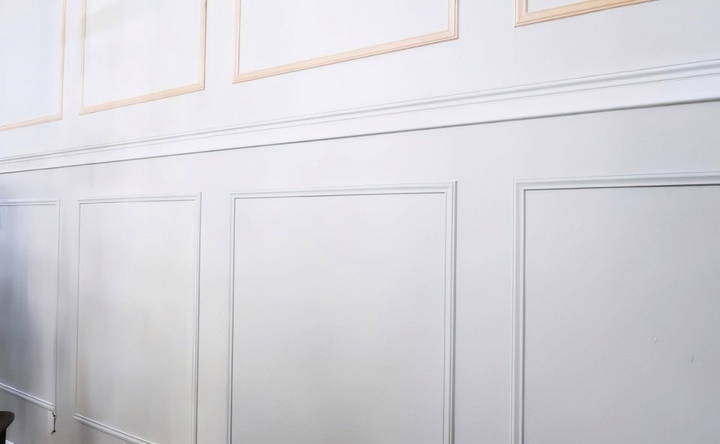
Before diving into any cuts, measuring and planning is crucial. I started by sketching the wall layout and playing around with different ideas. I knew I wanted four boxes across the wall, spaced evenly, without any artwork on the wall itself—the molding would be the statement.
Here's the simple math I used to get everything just right:
- Measure the wall width: The wall I was working on was 14 feet wide.
- Subtract space between the boxes: I wanted 6 inches of space between each box. With five spaces, that added up to 30 inches.
- Divide the remaining space: Once I subtracted the 30 inches from the total wall width, I had 138 inches left. I divided that by the number of boxes (4), giving me boxes that were each 34.5 inches wide.
This method ensures your boxes are evenly spaced and the proportions look balanced. If you're a visual person like me, using painter's tape to mock up the layout on the wall can help you see how it will all come together before committing to any cuts.
Cutting the Trim
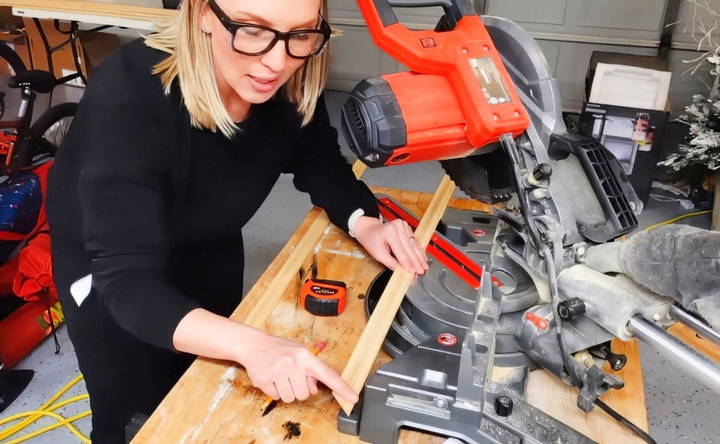
Now comes the fun part—cutting the trim! Using a miter saw, I cut all the pieces at a 45-degree angle for the corners. The most important thing here is to take your time and double-check your measurements before cutting. The biggest challenge is keeping track of which side of the trim is the inside versus the outside when making these angled cuts. Trust me, it's easy to get confused and end up with pieces that don't fit.
I found that starting with one frame and using that as a template for the others saved time and helped keep everything consistent. Once I had the first set of cuts, I used it as a guide for the rest of the frames. This step may seem tedious, but accuracy here makes the installation process much smoother.
Assembling and Installing the Frames
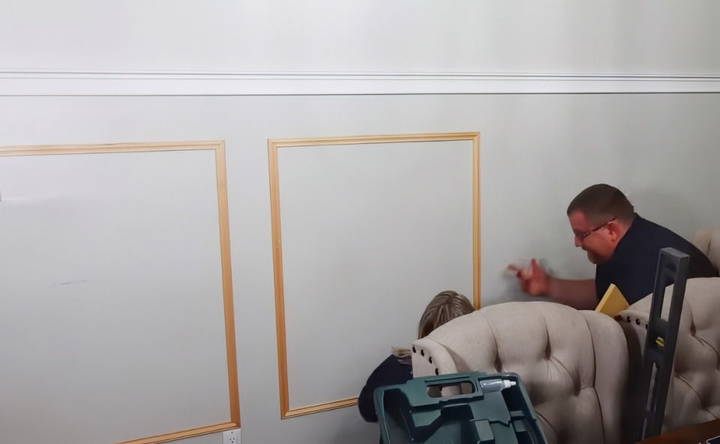
Once the trim pieces were cut, I assembled the frames. I used super glue to hold the corners together, which allowed me to handle the frames more easily during installation. However, depending on the size of your frames, you may prefer to attach the trim pieces directly to the wall one by one, especially if your wall isn't perfectly flat.
To install the frames, I used a pin nailer, which builds tiny holes that are barely noticeable. I also used a 6-inch wide piece of scrap wood as a spacer to ensure the gaps between the frames were consistent. Having a second set of hands for this part can make a big difference, especially if you're working on a large wall. My stepdad helped me level and hold the frames in place as I nailed them to the wall.
Installing the Chair Rail
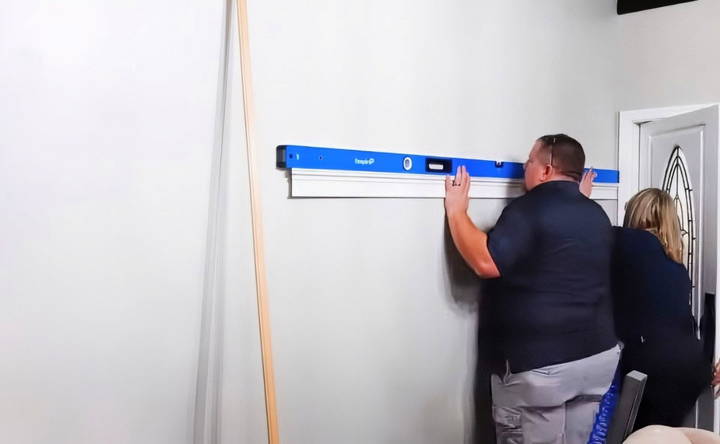
The chair rail is a defining feature of this project. I wanted it to sit just above an existing intercom box, so I used a scrap piece of wood and a level to make sure everything lined up correctly.
Since the chair rail came in 8-foot sections and my wall was 14 feet long, I needed to join two pieces together. To do this seamlessly, I made 45-degree bevel cuts on each end to build a perfect fit. This method helps hide the joint and gives the illusion of one continuous piece.
Finishing Touches: Caulking and Painting
After everything was installed, it was time to tackle the most tedious part of the project—caulking. While it may not be the most glamorous step, caulking the gaps between the trim and the wall ensures a polished, professional finish. I used a white paintable caulk, which filled in any small imperfections and gave the molding a seamless look.
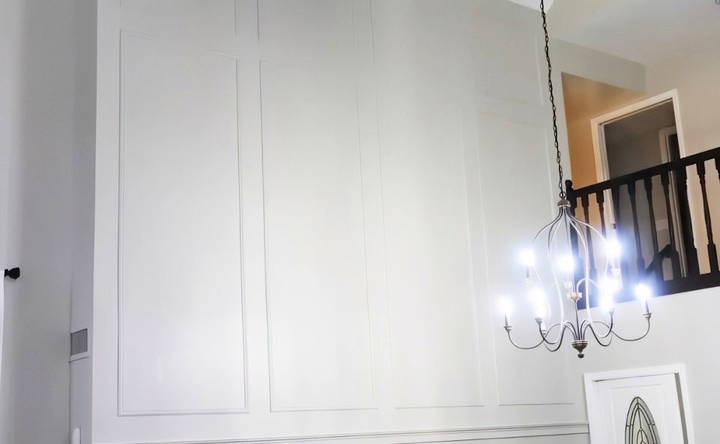
Next came the painting. I decided to keep things simple and paint the entire wall, including the trim, a soft gray color. If you want a more dramatic look, you could paint the trim a contrasting color. At one point, I considered painting the lower part of the wall a deep navy blue for added drama, but ultimately, the gray kept the room feeling elegant and timeless.
Lessons Learned
This project was a learning experience, and I picked up some valuable tips along the way:
- Measure twice, cut once: It's an old saying, but it's true. Taking the time to double-check measurements saved me from wasting materials and having to recut pieces.
- Have a plan, but be flexible: I sketched out a rough plan for the wall, but I also gave myself room to adjust things as needed. Being open to changes helped the project flow smoothly.
- Get help when you need it: I'm usually a DIY warrior, but having an extra set of hands for this project was a game-changer. My stepdad's assistance with leveling the chair rail and holding up the trim while I nailed it in place made the process faster and less stressful.
Advanced Techniques
Learn advanced techniques for decorative molding designs, custom finishes, mitered corners, using corner blocks, making shadow boxes, and adding lighting.
Decorative Molding Designs
Adding decorative elements to your picture frame molding can elevate its appearance. Here are some ideas:
- Beveled Edges: Build a sloped edge on the molding for a classic look.
- Embossed Patterns: Use a router to carve intricate designs into the molding.
- Layered Molding: Combine different molding profiles to build a unique, layered effect.
Custom Finishes
Custom finishes can make your picture frame molding stand out. Here are some techniques:
- Distressing: Give your molding a vintage look by lightly sanding the edges and applying a dark glaze.
- Gilding: Apply gold or silver leaf to the molding for a luxurious finish. Use adhesive size and carefully lay the leaf onto the surface.
- Staining: Choose a wood stain that complements your decor. Apply the stain with a brush, let it sit for a few minutes, then wipe off the excess with a cloth.
Mitered Corners
Perfect mitered corners are essential for a professional finish. Here's how to achieve them:
- Measure Accurately: Measure the length of each side of the frame carefully.
- Cut Precisely: Use a miter saw to cut the molding at a 45-degree angle. Ensure the saw blade is sharp for clean cuts.
- Test Fit: Before gluing, test fit the pieces to ensure the corners align perfectly.
Using Corner Blocks
Corner blocks can simplify the assembly process and add a decorative touch. Here's how to use them:
- Select Blocks: Choose corner blocks that match your molding style.
- Install Blocks: Attach the corner blocks to the wall first, then fit the molding between them.
- Secure Molding: Use finishing nails or adhesive to secure the molding to the wall.
Building Shadow Boxes
Shadow boxes add depth and interest to your walls. Here's how to build them:
- Plan Layout: Decide on the size and placement of the shadow boxes.
- Cut Molding: Cut the molding to the desired lengths, ensuring the corners are mitered.
- Assemble Boxes: Assemble the molding pieces into a box shape and attach them to the wall.
Adding Lighting
Incorporating lighting into your picture frame molding can highlight your artwork. Here's how:
- Choose Lighting: Select LED strip lights or small spotlights.
- Install Lights: Attach the lights to the back of the molding or within the frame.
- Hide Wires: Conceal the wiring behind the molding for a clean look.
By incorporating these advanced techniques, you can build picture frame molding that is not only functional but also a beautiful addition to your home.
Common Mistakes and How to Avoid Them
Learn about common mistakes in woodworking and how to avoid them, from measurement errors to safety issues. Improve your craftsmanship now!
Measurement Errors
Mistake: Incorrect measurements can lead to ill-fitting molding.
How to Avoid:
- Double-Check Measurements: Always measure twice before cutting.
- Use a Measuring Tape: Ensure your measuring tape is accurate and not stretched or damaged.
- Mark Clearly: Use a pencil to mark measurements clearly on the molding.
Cutting Mistakes
Mistake: Uneven or incorrect cuts can ruin the molding pieces.
How to Avoid:
- Sharp Tools: Use sharp saw blades for clean cuts.
- Miter Saw: Use a miter saw for precise 45-degree cuts.
- Cut Slowly: Take your time to ensure accuracy and avoid splintering.
Assembly Issues
Mistake: Gaps or misaligned corners can make the frame look unprofessional.
How to Avoid:
- Dry Fit: Assemble the pieces without glue first to check the fit.
- Use Clamps: Clamps help hold the pieces together while the glue dries.
- Check Angles: Use a square to ensure corners are at perfect right angles.
Finishing Problems
Mistake: Uneven paint or stain can detract from the frame's appearance.
How to Avoid:
- Sand Smoothly: Sand the molding to a smooth finish before painting or staining.
- Apply Evenly: Use a brush or cloth to apply paint or stain evenly.
- Multiple Coats: Apply multiple thin coats rather than one thick coat for a better finish.
Installation Errors
Mistake: Poor installation can cause the molding to fall off or look uneven.
How to Avoid:
- Leveling: Use a level to ensure the molding is straight.
- Secure Properly: Use appropriate nails or adhesive to secure the molding.
- Fill Gaps: Use caulk to fill any gaps between the molding and the wall.
Overlooking Safety
Mistake: Ignoring safety precautions can lead to injuries.
How to Avoid:
- Wear Safety Gear: Always wear safety glasses and gloves.
- Work in a Safe Area: Ensure your workspace is clean and free of hazards.
- Follow Tool Instructions: Read and follow the instructions for all tools and equipment.
By being aware of these common mistakes and following these tips, you can ensure your picture frame molding project is successful and looks professional.
FAQs About DIY Picture Frame Molding
Discover expert answers to all your FAQs about DIY picture frame molding. Learn techniques, materials, and tips to build stunning custom frames.
Yes, caulking is essential for a professional finish. Apply caulk to the edges of the molding to fill any gaps and build a seamless look. This step helps to prevent dust and dirt from accumulating in the gaps.
Yes, you can install picture frame molding without power tools. Use miter shears instead of a miter saw for cutting the molding. A hammer and nails can replace a nail gun. This approach is more time-consuming but still effective.
Choosing the right molding style depends on your room's decor and personal taste. Here are some tips:
Traditional decor: Opt for ornate, detailed moldings.
Modern decor: Choose sleek, simple lines.
Rustic decor: Go for distressed or reclaimed wood moldings.
Eclectic decor: Mix and match different styles for a unique look.
Yes, you can paint the molding before installation. This can save time and ensure even coverage. However, you may need to touch up the paint after installation to cover any nail holes or caulked areas.
Yes, picture frame molding can be used in any room. It's versatile and can enhance the look of living rooms, dining rooms, bedrooms, and even hallways. Just ensure the style and color match the room's decor.
Final Thoughts
By the end of the project, the dining room felt completely transformed. The DIY picture frame molding added depth and character to the space in a way that no amount of artwork could. What I love most about this project is how accessible it is. With the right tools, a little patience, and some basic math, anyone can achieve a high-end look for their home.
This DIY project not only boosted the aesthetic appeal of the room, but it also gave me a huge sense of accomplishment. If you're thinking about adding picture frame molding to your home, I highly recommend it. You'll be amazed at the difference it can make.


