Building a homemade DIY pig feeder was a game-changer for my small farm. I remember the challenge of keeping my pigs well-fed without breaking the bank. After some research and hands-on work, I buildd a simple and efficient feeder using recycled materials. This not only saved money but made feeding time much easier and more organized.
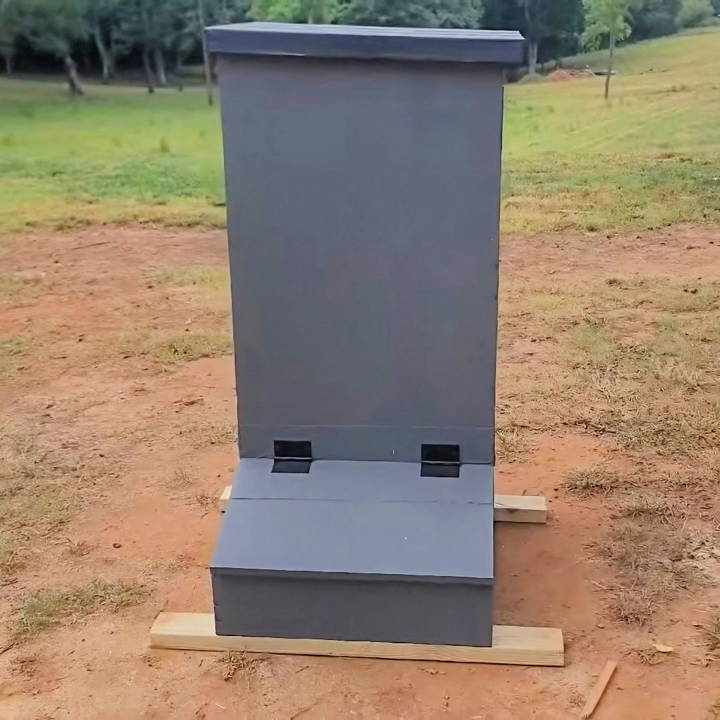
Building a DIY pig feeder involves a few basic tools and some creativity. I started with an old barrel and a few pieces of wood. Step by step, I followed a plan I made, adjusting as needed. In the end, I had a sturdy feeder that my pigs loved.
If you're planning to build one, the guide below will help you start confidently, saving you time and money.
Materials Needed and Their Purpose
- Three-quarter inch Plywood: Durable and sturdy, plywood was my main material, providing the structural integrity needed for the feeder.
- 2x4 Lumber: Used for reinforcing the structure, ensuring it could withstand the weight of the feed and the inevitable jostling by the pigs.
- Screws and Wood Glue: For assembling pieces securely. The combination of screws and glue ensures that every joint and seam would hold tight against the pressure.
- Paint and Waterproofing Material: To protect the wood from moisture, extending the life of the feeder.
- Adjustable Shelf Board: A critical component for regulating the feed's flow to prevent waste and ensure easy access for the pigs.
Step by Step Instructions
Learn how to build a DIY pig feeder with our step-by-step instructions. Easy planning, weather tips, and real-world adjustments for successful construction.
Planning and Drawing
First, I needed to ensure my idea was feasible, especially in fitting all pieces on one sheet of plywood. Drawing was crucial to maximize material use without compromising the feeder's functional aspects. My initial sketches laid the foundation for the entire project.
Weather Vs. Project Timeline
Unexpected weather delays taught me the importance of flexibility in project timelines. Heavy rain interrupted my work, pushing me to adjust my expectations and plan better for future projects.
The Construction Phase
- Back Panel Modification: Early on, I adjusted the design by removing the back panel to incorporate a sloped board directing feed downwards, preventing jamming and waste.
- Assembly Tips: Cutting the lumber at precise angles improved the flow of feed and avoided the creation of moisture traps. This step was crucial for maintaining feed quality.
- Applying Paint and Waterproofing: Before final assembly, I painted the feeder and added waterproof lining on the top lid. This step was vital for protecting against moisture, a common issue in pig pens.
- Front and Lid Installation: The feeder's front was installed with an opening large enough for the pigs but secure enough to prevent food spillage. The lid received additional waterproofing treatment to protect the feed from the elements.
- Final Touches: I didn't stop at just building; I added adjustable boards inside for regulating feed flow and secured the bottom with treated lumber. These enhancements ensured longevity and functionality.
Adjustments Based On Real-World Use
After placing the feeder in the pig pen, I observed how the pigs interacted with it, ready to make any necessary adjustments. This adaptability is crucial in DIY projects; not everything is predictable in its initial design.
Conclusions and Reflections
The project was more than just a construction task; it was a learning experience that stretched my skills and understanding of my pigs' needs. Here are some key takeaways:
- Preparation Is Key: Detailed planning saved time and materials. Understanding the project scope and requirements helps in executing without significant adjustments.
- Expect the Unexpected: Weather delays and real-world tests required on-the-fly adjustments, highlighting the need for flexibility.
- Function Over Form: While aesthetics are important, functionality, especially in farm projects, is paramount. Ensuring the feeder met the pigs' needs was my top priority.
Would I Recommend Building Your Own Pig Feeder?
Absolutely. Not only was it a fulfilling project that saved money, but it also allowed me to tailor the feeder to my exact needs, something off-the-shelf options couldn't offer.
Customization Tips for Your DIY Pig Feeder
Building a DIY pig feeder can be a rewarding project that not only saves you money but also caters to the specific needs of your pigs. Here are some tips to help you customize your pig feeder effectively:
- Adjust the Flow of Feed: Pigs come in different sizes and have varying appetites. To accommodate this, design your feeder with an adjustable flow mechanism. This could be as simple as a sliding door that controls the amount of feed that comes out. Make sure it's easy to adjust so you can increase or decrease the flow as your pigs grow or as their dietary needs change.
- Weatherproofing: If your feeder will be outdoors, it's essential to make it weatherproof. Use materials that are resistant to rust and decay, like galvanized steel or treated wood. Consider a cover to protect the feed from rain, which can also double as a shade to keep the feed cool in hot weather.
- Mobility for Rotational Grazing: If you practice rotational grazing, making your feeder mobile is a great customization. Add sturdy wheels and a secure handle. The wheels should be large enough to handle rough terrain if your pasture isn't flat.
- Ease of Cleaning: Hygiene is crucial in pig feeding. Design your feeder so it's easy to clean. Smooth surfaces are easier to wash down than rough ones. If you're using wood, make sure it's sealed or painted to prevent absorption of moisture and feed.
- Safety Features: Ensure there are no sharp edges or corners where your pigs could injure themselves. All parts should be securely fastened to prevent any accidents.
- Feed Saving Mechanisms: To minimize waste, consider a design that reduces spillage. This could include a lip around the edge of the feeding trough or a grill over the feed dispenser to prevent the pigs from rooting out too much feed at once.
- Visual Appeal: While pigs may not care about the look of their feeder, a visually appealing design can make the feeding area more pleasant for you and any farm visitors. Consider painting the feeder in cheerful colors or adding some decorative elements that don't compromise its functionality.
Use these tips to build a pig feeder that meets your pigs' needs and your farming practice. Keep it simple, safe, and efficient.
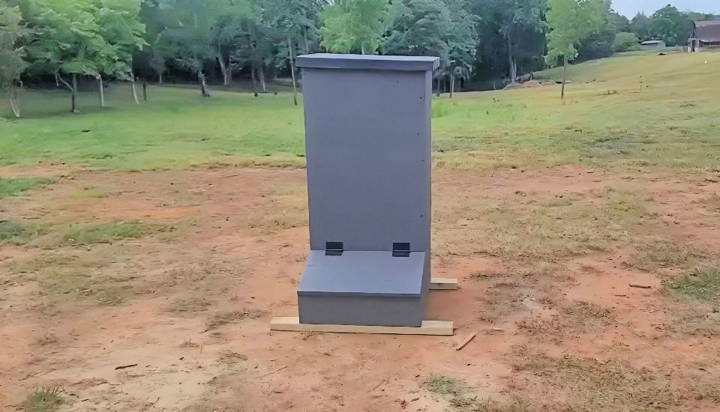
Troubleshooting Common Issues with DIY Pig Feeders
When it comes to maintaining a DIY pig feeder, being prepared to troubleshoot common issues is key to ensuring a continuous and efficient feeding process. Here's a helpful guide to identifying and resolving some typical problems you might encounter:
Feed Not Flowing Properly
- Solution: Check for blockages in the feeder's chute or dispensing mechanism. Make sure the feed is dry, as moisture can cause clogging. Adjust the flow settings if your feeder has them, and consider installing a vibrator or agitator to help move the feed along.
Pigs Tipping Over the Feeder
- Solution: Ensure the feeder is stable and heavy enough to withstand the pigs' strength. You can add weight to the base or secure the feeder to the ground with stakes. Designing a wider base can also improve stability.
Feed Becoming Wet or Spoiled
- Solution: Protect the feed from the elements by adding a roof or cover over the feeder. Ensure there's proper drainage around the feeder area to prevent water accumulation. Regularly check and remove any spoiled feed to prevent mold growth.
Pigs Wasting Feed
- Solution: If you notice a lot of feed on the ground, consider adding a lip or edge to the feeder to contain the feed. You can also install a grid or bars over the feeding area to prevent the pigs from rooting out too much feed at once.
Feeder Damage from Pigs' Rough Behavior
- Solution: Use durable materials that can withstand the pigs' strength and chewing. Reinforce the feeder's structure with additional supports or thicker materials. Regular inspections can help you spot and repair any damage early.
Difficulty in Cleaning the Feeder
- Solution: Design the feeder with cleaning in mind. Use smooth, non-porous materials and ensure all parts are easily accessible. Consider a feeder that can be disassembled or has removable parts for thorough cleaning.
Feed Attracting Pests
- Solution: Keep the feeding area clean and remove any spilled feed promptly. Use a feeder design that minimizes spillage, and consider placing the feeder on a platform to deter pests.
Addressing common issues with practical solutions keeps your DIY pig feeder running well and your pigs healthy. Regular maintenance and observation prevent and solve problems quickly.
Maintenance and Hygiene for Your DIY Pig Feeder
Keeping your DIY pig feeder clean and well-maintained is crucial for the health of your pigs and the longevity of the feeder. Here are some straightforward tips to help you maintain hygiene and ensure your feeder stands the test of time:
- Regular Cleaning Schedule: Establish a routine cleaning schedule. Daily, remove any leftover feed and debris. Weekly, give the feeder a more thorough clean with water and a mild disinfectant. This prevents the build-up of bacteria and mold.
- Easy-to-Clean Design: When building your feeder, choose materials that are easy to wipe down and resist corrosion. Smooth surfaces such as stainless steel or sealed wood are ideal. Avoid intricate designs where feed can get trapped and spoil.
- Disassembly for Deep Cleaning: Make parts of your feeder detachable. This allows for better access to all areas during cleaning. For example, a removable trough or lid can make the job much easier.
- Proper Drainage: Ensure your feeder is positioned in a well-drained area or has a built-in drainage system. This prevents water accumulation, which can lead to spoiled feed and unsanitary conditions.
- Pest Control: Keep pests away by sealing any gaps and cleaning up spilled feed promptly. Consider natural deterrents like peppermint oil or citronella near the feeder to keep insects at bay.
- Inspect for Wear and Tear: Regularly inspect your feeder for any signs of damage or wear. Look for cracks, loose parts, or areas where moisture might collect. Prompt repairs will save you time and money in the long run.
- Educate on Hygiene Practices: If others are involved in feeding, make sure they understand the importance of hygiene. A simple set of instructions posted near the feeder can serve as a helpful reminder.
By following these tips, your DIY pig feeder will stay safe and clean, crucial for their health and growth. A bit of maintenance prevents bigger problems later.
FAQs About DIY Pig Feeder
Discover all the faqs about DIY pig feeders - your ultimate guide to building and maintaining an efficient and cost-effective feeder for your pigs.
You can ensure your pig feeder is cost-effective by using readily available materials and following simple, efficient designs. For example, you can build a feeder for under $150 or even in 30 minutes for just $50, depending on the complexity and size you require.
DIY pig feeders are affordable, customizable, and can be built to accommodate the specific needs of your pigs. They also allow for a more sustainable and self-reliant approach to livestock care, often resulting in healthier and happier pigs.
Yes, you can build an automatic pig feeder. This type of feeder can distribute feed automatically, ensuring that pigs have constant access to their meals, which is ideal for busy farmers.
To maintain hygiene, design your feeder to minimize waste and prevent feed from becoming wet or contaminated. Incorporating features that promote hygienic food practices and discourage pests will help maintain a clean feeding environment.
Adjusting your DIY pig feeder to accommodate different sizes of pigs is crucial for ensuring all animals can access their food comfortably. You can do this by making adjustable slots or barriers that can be moved as pigs grow. Additionally, ensure the feeding trough is at an appropriate height for the size of the pigs you're raising.
Final Thoughts
Making your own DIY pig feeder can be fun and rewarding. With a few tools and some effort, you can design a feeder that suits your farm's needs perfectly. Enjoy the process and watch how this simple project brings big benefits to your daily routine.


