Starting a DIY pin board project can be really fun and useful. One day, I decided to make one for my workspace. I wanted a place to pin my to-do lists and notes. With just a few supplies, I was able to build a board that helped me stay organized. This DIY pin board project was simple, and I enjoyed the process.
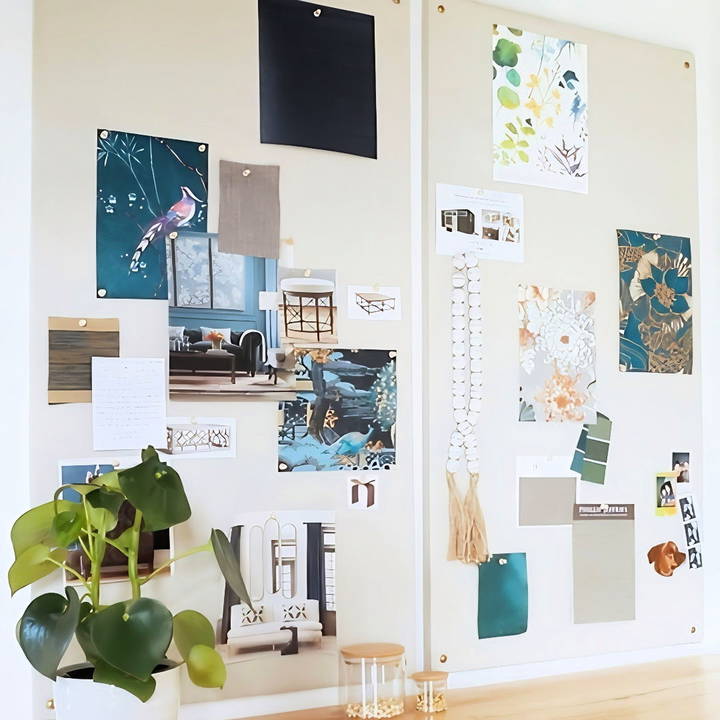
In this guide, I'm sharing how to make a DIY bulletin board just like the one I made. By the end, you can have your own board to pin anything you need. It's an easy way to keep your workspace tidy and stylish.
I'm here to help you, and I hope this inspires you to get started on your own project.
Materials You'll Need
Before starting, gather these materials. Each plays a crucial role in ensuring your pin board is both functional and beautiful:
- MDF Board (Quarter Inch): This serves as the sturdy base for your pinboard. MDF is durable yet easy to work with, making it a perfect choice.
- Foam Insulation Panels: These panels allow you to push pins into the board without damaging the underlying MDF.
- Stapler and Staples: To secure the fabric to the MDF board, you'll need a strong stapler and quarter-inch crown staples.
- Sturdy Fabric: Choose a medium—to heavy-weight fabric. It needs to withstand repeated pinning and unpinning. I chose muslin fabric.
- Hot Glue Gun: This is useful for temporarily adhering the foam to the MDF. If you don't have one, spray adhesive or any strong adhesive can work.
- Screws and Flat Washers: Use these to mount your pin board securely to the wall.
Having gathered everything, let's move on to making your pin board.
Step by Step Instructions
Learn how to make a DIY pinboard with our easy step-by-step instructions. Perfect for organizing notes and decor.
Step 1: Preparing the MDF Board and Foam Insulation
Start by sticking the foam insulation panel to your MDF board. Here's how:
- Apply Hot Glue: Apply a few lines or dots of hot glue to the MDF board.
- Attach Foam Panel: Press the foam panel onto the MDF board, ensuring the edges are flush. Press firmly to adhere the panel securely.
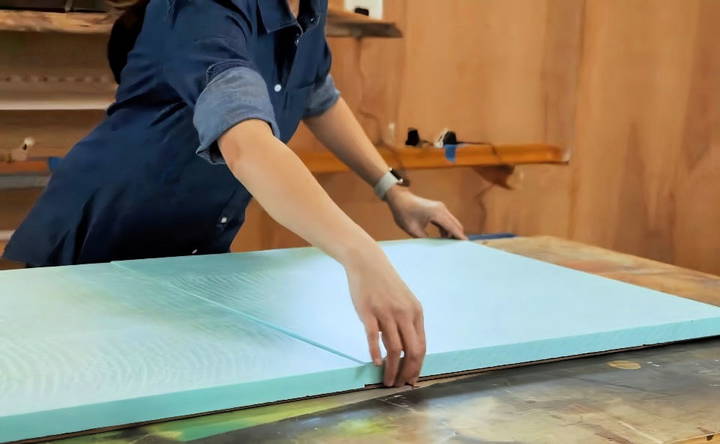
This initial adhesion is just to keep the foam in place until we wrap the fabric.
Step 2: Cutting and Preparing the Fabric
Next, prepare your fabric. The fabric needs to be large enough to wrap around the entire board with an extra margin for stapling.
- Lay Out the Fabric: Place your fabric on a flat surface and smooth out any wrinkles.
- Position the Board: Lay your MDF and foam board assembly on top of the fabric, with the foam side down.
Ensure you have at least a 2-inch margin of fabric around the edges of the board.
Step 3: Attaching the Fabric
Now, we'll secure the fabric to the board. Here's how to do it:
- Pull and Staple: Start by pulling the fabric taut over one of the long sides of the board. Staple the fabric in place at the center.
- Work Outward: Continue stapling outward from the center towards the edges. This ensures the fabric is evenly stretched.
- Repeat on Other Side: Move to the opposite long side and repeat the process.
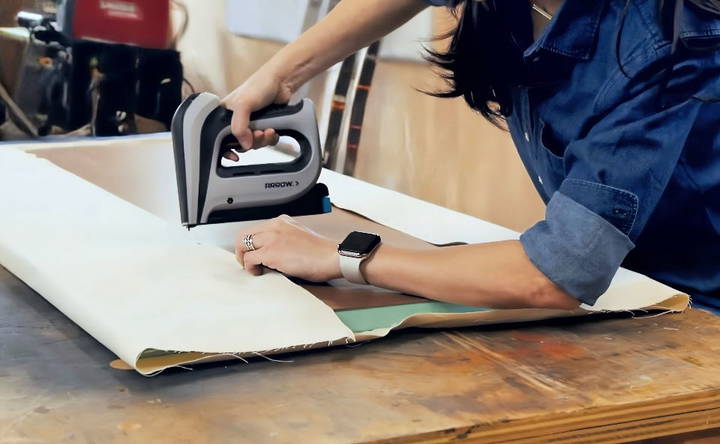
For the shorter sides:
- Fold and Staple Ends: Tuck the fabric at the corners as you would wrap a present, then staple it down, ensuring the fabric is flat.
- Complete the Edges: Finish stapling around the entire perimeter.
Helpful Tips
- Corner Folding: Pay attention to the corners. Tidy folds will ensure your board looks professional.
- Staple Size: Be mindful of staple size. Quarter-inch staples are ideal as they secure the fabric without poking through the MDF.
Step 4: Hanging Your Pin Board
With the fabric securely in place, it's time to hang your pin board.
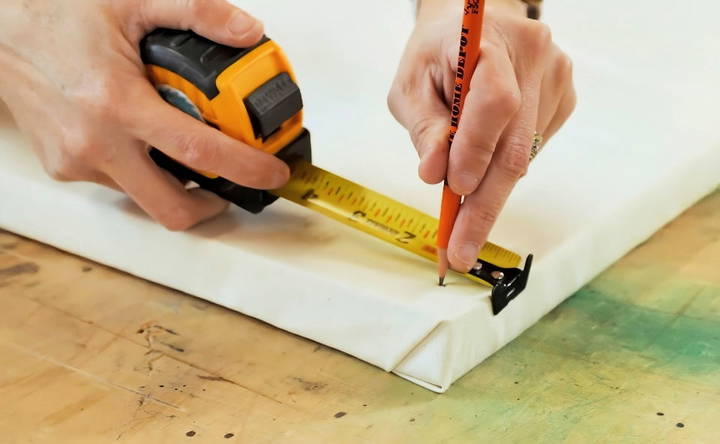
- Mark Positions: Measure and mark one inch from each corner on the back of your board. These marks will guide where to drive in the screws.
- Attach Screws and Washers: Use 2.5-inch screws with flat washers. The washers distribute pressure, preventing the screws from sinking into the board.
Here, you don't necessarily need wall anchors because the pin board is relatively light. However, if you're hanging it somewhere prone to heavy use, anchors might be a good idea for added security.
Customization Ideas for Your DIY Pin Board
Making a DIY pin board is not just about functionality; it's also an opportunity to express your personal style and creativity. Here are some customization ideas to make your pin board truly unique:
Choose Your Fabric Wisely
Selecting the right fabric can transform the look of your pin board. Opt for bold patterns or textures to make a statement, or choose a color that complements your room's decor. If you're aiming for a minimalist look, a simple linen or muslin fabric can add a touch of elegance.
Paint for Personality
A splash of paint can give your pin board a fresh vibe. Consider a chalkboard paint for a board that doubles as a writing surface, or use magnetic paint to allow for easy attachment of magnets.
Add a Frame
Framing your pinboard can enhance its visual appeal and make it look more polished. You can repurpose old picture frames or even make a frame from upcycled materials like wood or metal.
Decorative Push Pins
Customize your push pins for added flair. You can paint them, cover them with fabric, or use unique shapes. This small detail can have a big impact on the overall look of your pin board.
Lighting It Up
Incorporate string lights around or on your pin board for a cozy, illuminated display. This can build a warm ambiance and highlight the items you've pinned.
Interactive Elements
Consider adding elements that invite interaction, such as hooks for keys, small shelves for trinkets, or clips for hanging notes and pictures.
Go Green
Attach small planters or vases to your pin board to bring in some greenery. This can add life to your space and improve the air quality.
Seasonal Themes
Change up your pin board with the seasons. Use seasonal decorations or themed push pins to keep your space feeling fresh and current.
By incorporating these ideas, you can build a pin board that not only serves its purpose but also enhances the aesthetics of your space. Remember, the key is to make it personal and reflective of your style.
FAQs About DIY Pin Board
Discover the top FAQs about DIY pin board projects. Learn tips, materials, and steps to build your perfect pin board quickly and easily.
First, apply hot glue or spray adhesive to one side of the MDF board. Then, press the foam insulation board firmly onto the MDF, ensuring the edges are flush. Allow it to set before moving on to the next step.
Yes, you can use any fabric, but it’s best to choose one that is sturdy enough to handle being punctured by pins. Medium- to heavy-weight fabrics like muslin or linen are great options. Make sure the fabric is smooth and free of wrinkles before attaching it to the board.
Lay the fabric flat on your work surface, place the MDF board with the foam side down on top of it, and cut the fabric to size, leaving enough excess to wrap around the edges. Pull the fabric taut and staple it to the back of the MDF board, starting from the center and working your way out to the corners.
Once your pin board is assembled, you can hang it by attaching picture hanging hardware to the back of the MDF board. Alternatively, you can mount it directly to the wall using appropriate wall anchors and screws, depending on the size and weight of your board.
When deciding on the size of your DIY pin board, consider the space where you plan to hang it and what you'll be using it for. If it's for a home office or study area, you might want a larger board to accommodate calendars, notes, and reminders. For a smaller space or a specific project, a more compact board may suffice. Measure the wall space and decide how much of it you want the pin board to cover. Remember, you can always combine multiple foam boards to build a larger pin board if needed.
Conclusion:
I know this guide will help you build a DIY pin board that fits your needs. Give it a try and see how much more organized you can be with this simple project.


