As someone who adores throwing themed parties, the quest for the perfect party favors and decorations can often feel like a scavenger hunt that tests both your creativity and your wallet. That's where the magical world of DIY enters, offering solutions that are not only cost-effective but also provide a personal touch that ready-made store-bought items lack. My journey into crafting a DIY quick and easy pinata began with the desire to add an element of surprise and joy to my niece's birthday party without breaking the bank.
Why DIY Pinatas?
Pinatas are the heart of any celebration, symbolizing joy, abundance, and the simple pleasures of life. However, purchasing them from party stores can sometimes feel like you're paying a premium for something that's going to be enthusiastically destroyed within minutes. This realization prompted me to explore DIY options, leading me to a treasure trove of ideas and inspiration.
Materials Needed
- Paper Lunch Bag or Little Bites Mega Pack Box - Selecting one of these as your base determines the size and shape of your pinata. The paper bag option is ideal for individual loot bags, while the box can accommodate more candies and withstand a bit more of a beating.
- Crepe Streamers - Essential for decorating. They give your pinata that festive, frilly look.
- Glue Stick - For adhering your crepe streamers to the base.
- Scissors - To cut the streamers and any other adjustments.
- Paper Hole Puncher - For making holes to thread your ribbon through for hanging.
- Curling Ribbon - Serves as the pinata's hanging mechanism.
- Stapler - Can provide additional structural support if needed.
- Pencil - To mark where holes will be punched.
Step-by-Step Guide: Paper Lunch Bag Pinata
Learn how to make a paper lunch bag piñata with this step-by-step guide. From making the base to decorating, we've got you covered!
Step 1: Prepare Your Pinata Base
Start by punching two holes at the top of the paper bag for the hanging ribbon. Then, make six tiny holes at the bottom for decorative tail ribbons. Use a pencil for precision.
Step 2: Attach the Ribbon
Cut the curling ribbon, fold it, thread through the holes, and secure with knots. Remember, excess can be trimmed, so err on the side of longer ribbons.
Step 3: Decorate with Crepe Streamers
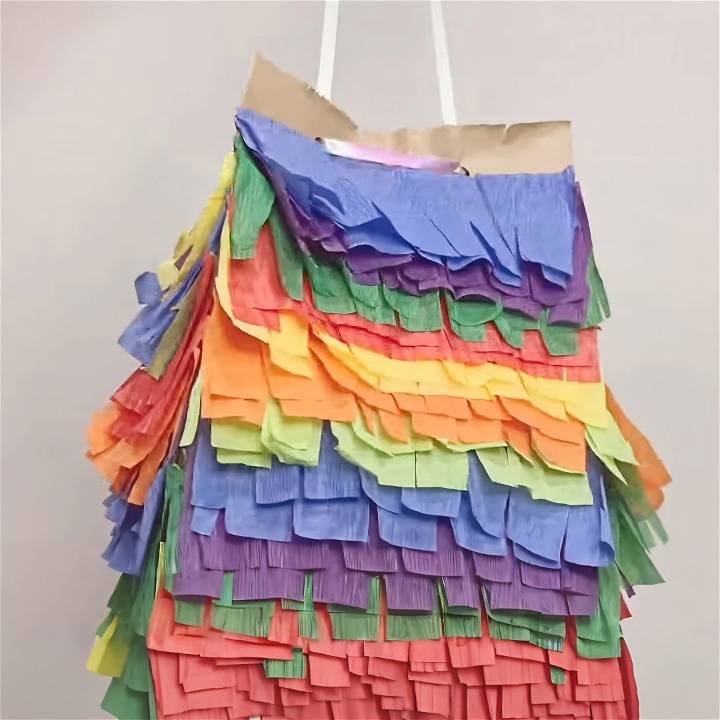
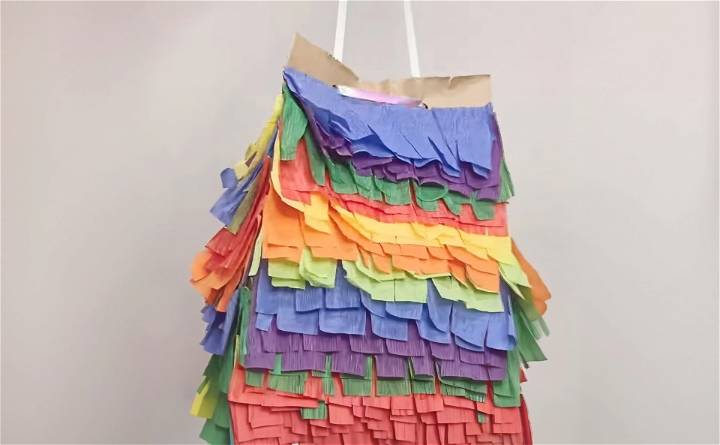
Layer and cut your streamers halfway through for that classic pinata look. Alternating colors, glue the streamers around the bag, covering it entirely for a festive look.
Step 4: Fill and Finalize
Add candies and treats to your pinata. Then, make a sturdy handle by threading a longer piece of ribbon through the top holes, securing it well.
Step-by-Step Guide: Box Pinata
Learn how to make a box pinata with our step-by-step guide. From preparing the box to adding streamers, make a fun party activity.
Step 1: Preparing the Box
Ensure the box is empty, then punch two holes at the top. Fill it with goodies and securely tape the opening closed.
Step 2: Wrapping and Decorating
Wrap the box with your chosen wrapping paper for a neat finish. Use jute or fiber twine for a durable handle by threading it through the holes, securing with a knot.
Step 3: Adding Streamers
Just like with the paper bag, layer and attach the crepe streamers around the box with glue, opting for colors that match the wrapping paper or party theme.
Personal Touches
What made this project even more special was customizing each pinata to match the birthday party's theme, utilizing color schemes, and even adding character cutouts for a more personalized touch. This not only highlighted the unique aspects of the celebration but also showcased the thoughtfulness and effort put into each piñata.
The Impact
The joy and surprise on the children's faces when they saw and eventually got to break open their pinatas were unparalleled. It turned into a beautiful, memorable moment, emphasizing that the value of a handmade piñata goes far beyond its monetary cost. It's about the love, care, and personal touch that goes into its creation.
Making a DIY quick and easy pinata proved to be an immensely rewarding experience. Not only did it allow me to explore my creativity, but it also provided a cost-effective solution to incorporating piñatas into the celebration. Whether you choose the paper lunch bag or the box method, the end result is a vibrant, festivity-boosting masterpiece that's bound to be the highlight of any party.
Creative Design Ideas for Your DIY Piñata
When it comes to crafting a memorable piñata, let your imagination run wild! Here are some creative design ideas that will make your piñata stand out at any celebration:
Favorite Animals: Whimsical Creatures Await!
- Unicorns: Transform your piñata into a magical unicorn. Use pastel-colored crepe paper for the mane and tail. Add a glittery horn for that enchanting touch.
- Dinosaurs: Roar into the party with a dinosaur-themed piñata. Craft a T. rex, stegosaurus, or triceratops. Kids (and adults) will love the prehistoric fun.
- Tropical Birds: Think vibrant parrots or toucans. Use bright feathers or tissue paper to make their plumage. Hang them at different angles for a dynamic effect.
Themed Piñatas: Match the Party Vibe
- Superhero Piñatas: Is it a superhero-themed birthday bash? Craft piñatas inspired by Spider-Man, Wonder Woman, or Batman. Use their iconic colors and symbols.
- Princess Piñatas: For royal celebrations, design a princess crown or castle. Add glitter and faux gemstones for that regal touch.
- Outer Space Adventure: Blast off with rocket ship piñatas or make a cosmic galaxy. Silver and metallic paper work wonders here.
Geometric Shapes: Modern and Chic
- Geodesic Piñatas: Inspired by geometric shapes, these piñatas resemble faceted crystals. Use triangular panels to make a 3D effect. Perfect for trendy parties.
- Abstract Designs: Break away from tradition. Craft piñatas in abstract shapes like cubes, pyramids, or hexagons. Experiment with color blocking or ombre effects.
Personalized Piñatas: Celebrate Individuality
- Initials or Numbers: Craft a piñata shaped like the birthday person's initial or age. It adds a personal touch.
- Hobbies and Interests: Does the celebrant love soccer, music, or books? Design a piñata that reflects their passion.
Remember, the key to a successful piñata design is to have fun and let your creativity shine. Whether it's a classic donkey or a fantastical creature, your unique piñata will be the highlight of the party!
FAQs About DIY Piñatas
Discover all the answers to your burning questions about DIY piñatas in this comprehensive FAQ guide. Learn how to make your own piñatas at home!
What Is a DIY Piñata?
A DIY piñata is a handmade party decoration that adds fun and excitement to celebrations. Typically made from paper, cardboard, and other craft materials, piñatas are filled with treats or small toys. When broken open, they shower the participants with surprises, making any event more memorable.
Can I Customize the Design?
Absolutely! Let your creativity shine:
- Favorite Animals: Craft unicorns, dinosaurs, or tropical birds.
- Themed Piñatas: Match the party theme (superheroes, princesses, outer space).
- Geometric Shapes: Try cubes, pyramids, or abstract designs.
- Personalized Touch: Use initials or reflect the celebrant's hobbies.
How Do I Play the Piñata Game?
- Blindfolded Fun: Blindfold a participant and spin them around.
- Swing Away: Hand them a stick (traditionally a wooden bat) and guide them toward the hanging piñata.
- Take Turns: Each person gets a chance to hit the piñata.
- Cheers and Laughter: When it breaks, everyone scrambles to collect the goodies!
Any Safety Tips?
- Supervision: If kids are involved, ensure adult supervision during piñata play.
- Blunt Tools: Use blunt scissors or craft knives to avoid accidents.
- Glue and Adhesives: Handle them carefully and in a well-ventilated area.
- Filler Choices: Consider allergies and age-appropriate fillers (avoid small parts for young children).
Remember, piñatas are all about joy and celebration. So grab your crafting supplies, get creative, and let the party begin!
Conclusion:
In conclusion, if you're looking to add a fun and colorful element to your next party, consider making your DIY pinata. It's a simple yet creative project that can be customized to suit any theme or occasion. Let your imagination run wild!


