I recently had dinner guests over and realized my dining table needed a fresh touch. I decided to make DIY placemats to give it a new look. It was easy and fun! You don't need much – just some fabric, scissors, and a bit of sewing. I found it to be a perfect way to add a personal touch to my dining space.
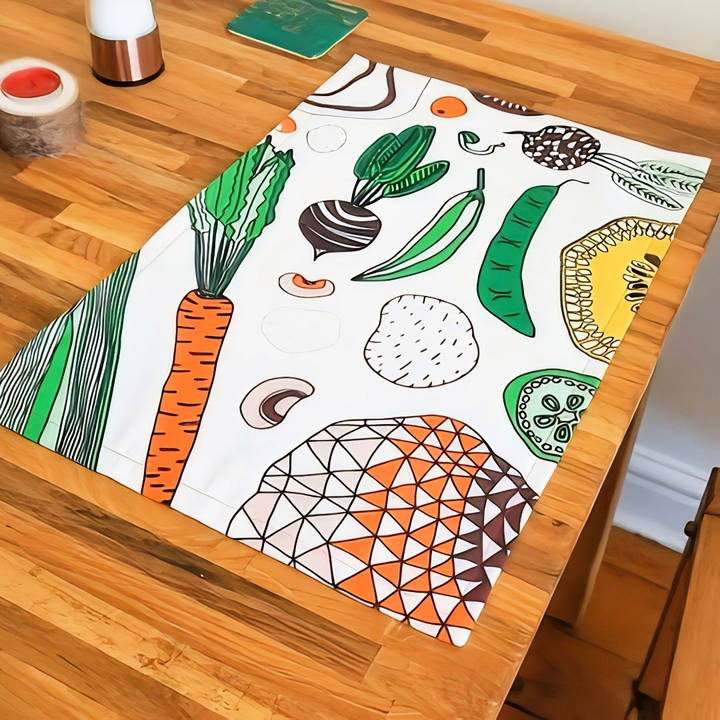
Making these placemats was a rewarding experience. The steps were simple to follow. I measured the fabric, cut it to size, and stitched the edges neatly. I felt proud of my new, stylish placemats. They truly added something special to our mealtime. DIY placemats can be both a creative project and a practical addition to your home.
Try making your own placemats using the method below; you will enjoy the process and love the result!
Materials You Need and Why
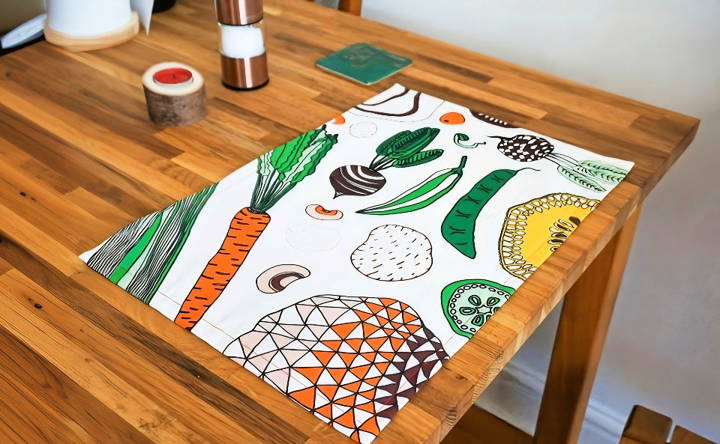
- Fabric: I opted for a medium weight home decor fabric with a charming vegetable pattern I found in a remnants bin. Sturdy and easily washable fabrics like woven cotton are ideal. Avoid knits or linen as they stretch or wrinkle easily.
- Lining Fabric (Optional): For added thickness, you can use a lightweight poly cotton. I used a plain red one which worked great.
- Fabric Pen and Metal Ruler: Essential for precise measurements and marking.
- Sewing Machine and Matching Thread: For durable stitching. A hand-stitch is an alternative, though quite time-consuming.
- Sewing Pins, Fabric Scissors: For holding fabric together and cutting accurately.
- Rotary Cutter and Cutting Mat (Optional): These make cutting straight lines easier but aren't strictly necessary.
- Iron and Ironing Board: To press the fabric for neat folds.
Step by Step Instructions
Learn how to make DIY placemats with our simple, step-by-step instructions. From washing fabrics to final stitching, make perfect placemats today!
Step 1: Wash and Iron Your Fabrics
Firstly, ensure your fabric is pre-washed and ironed. This prevents future shrinkage and removes any creases, making it easier to work with.
Step 2: Cutting Your Fabric
Measure and mark out an 18.5 by 13.5 inches rectangle on the back of your chosen fabric. This accounts for seam allowances and will ultimately result in a 16 by 11 inches placemat. It's crucial to align your markings with the grain of the fabric to ensure straightness. Once marked, cut out the rectangle with fabric scissors or a rotary cutter for precision.
Step 3: Marking and Folding
On the back of your fabric, mark two points at each corner, each 2 inches from the corner along the edges. These marks are guides for folding. Fold each fabric edge towards the center, aligning with the marks to achieve a 1-inch fold. Press these folds with your iron.
Step 4: Making Mitered Corners
Draw a diagonal line from one 2-inch mark to the other at each corner. These lines represent where you'll sew. Then, fold a quarter-inch of the fabric edges inward again and press. To form the mitered corner, fold the corner in half diagonally, right sides together, aligning the unfolded edges, and then pin in place. Sew along the diagonal line, trim the excess fabric, and turn the corner right side out.
Step 5: Adding a Lining (Optional)
Cut a piece of lining slightly smaller than your placemat size and place it underneath the folded edges of your placemat. Pin it in place, ensuring it lays flat.
Step 6: Final Stitching
Topstitch a quarter-inch in from the outer edge all around the placemat. This secures the folds and, if added, the lining.
Step 7: Final Touches
Give your finished placemat a final iron press for a professional look.
I made my first placemat and was so pleased with the easy process that I decided to make a full set. Each step, from cutting fabric to sewing corners, boosted my sewing confidence. Personalizing the fabric and sizes made the project uniquely mine. Completing a functional and beautiful home item was incredibly satisfying.
Customization Ideas for DIY Placemats
Making DIY placemats is not just about crafting something functional; it's about expressing your creativity and adding a personal touch to your dining table. Here are some customization ideas that can help you make your placemats truly unique:
Choose Your Theme
Start by deciding on a theme that reflects your personality or the occasion. It could be as simple as a color scheme or as intricate as a holiday motif. Themes can guide your choice of materials, patterns, and embellishments.
Personalize with Monograms
Adding monograms is a classic way to personalize placemats. You can use fabric paint, embroidery, or iron-on letters to add your initials or full name to each placemat. This idea is perfect for gifts or special family sets.
Play with Patterns
Don't shy away from using bold patterns. Stripes, polka dots, chevrons, or floral prints can add a lively touch to your table setting. Mix and match patterns for a playful look, or stick to one pattern for a cohesive design.
Add Textures
Incorporate different textures to add depth to your placemats. Use materials like burlap for a rustic feel, satin for a touch of elegance, or felt for a cozy vibe. Textures can make your placemats stand out.
Stenciling and Painting
Stencils are a great way to make consistent designs on your placemats. Use fabric paint and a sponge brush to apply the stencil design. Freehand painting is also an option for those who are artistically inclined.
Heat Transfer Designs
For a modern twist, use heat transfer vinyl (HTV) to apply graphic designs to your placemats. HTV comes in various colors and finishes, including glitter and metallic, and can be cut into intricate shapes and patterns.
Embellish with Accessories
Consider adding lace, ribbons, beads, or buttons for an extra decorative touch. These embellishments can be sewn or glued on and are an easy way to make your placemats pop.
Interactive Kids' Placemats
Make mealtime fun for kids by making interactive placemats. You can include educational elements like the alphabet, numbers, or a map. Alternatively, make a chalkboard placemat with chalkboard fabric or paint.
The key to customization is to have fun and let your creativity flow. There's no right or wrong way to personalize your DIY placemats. They should reflect your style and bring joy to your meals.
Styling Tips for Different Occasions
When it comes to setting the table for different occasions, the right placemats can add a special touch to the ambiance. Here are some styling tips to help you choose the perfect DIY placemats for any event:
Casual Family Dinners
For everyday meals, go for durability and ease of cleaning. Cotton and linen placemats in cheerful colors or with family-friendly designs can make daily dining more delightful. Consider reversible placemats with a different pattern on each side for variety.
Formal Gatherings
Elevate your formal dining experience with placemats made from luxurious materials like silk or satin. Choose subdued colors like ivory, navy, or burgundy. Add a touch of sophistication with placemats featuring delicate lace trim or subtle metallic accents.
Seasonal Celebrations
Celebrate the seasons by incorporating thematic elements into your placemats. Use fall colors and leaf patterns for autumn, bright florals for spring, warm tones and textures for winter, and vibrant hues for summer. Seasonal placemats can be a charming addition to your decor.
Holiday Themes
Holidays offer a chance to get creative with your placemats. Think spooky designs for Halloween, festive patterns for Christmas, or glittery fabrics for New Year's Eve. Holiday-themed placemats can also be a fun craft project for the whole family.
Outdoor Barbecues
For outdoor dining, choose materials that can withstand the elements, like oilcloth or vinyl. Bright colors and bold patterns work well for a fun, relaxed atmosphere. Consider placemats with pockets to hold utensils or a napkin.
Romantic Dinners
Set the mood for a romantic evening with placemats in soft pastels or rich reds. Materials like velvet or lace can add a luxurious feel. Consider heart-shaped placemats or those adorned with romantic quotes or imagery.
Children's Parties
Kids' parties are all about fun, so choose placemats that are colorful and interactive. Waterproof materials like silicone are practical for easy cleanup. Add elements like puzzles or coloring sections to keep the little ones entertained.
Match placemats to the occasion to enhance the dining experience, making a welcoming and stylish table that reflects your personal touch.
Troubleshooting Common DIY Placemat Issues
When crafting DIY placemats, you might encounter a few hiccups along the way. Here's a troubleshooting guide to help you solve common problems with ease:
Material Fraying
- Problem: The edges of your fabric placemats are fraying.
- Solution: Use a zigzag stitch on your sewing machine to secure the edges. For no-sew options, apply fray-check liquid or use heat-sealing techniques if the material allows.
Wrinkles and Creases
- Problem: Your placemats have wrinkles or creases that won't go away.
- Solution: Iron the fabric on an appropriate heat setting based on the material. For materials that can't be ironed, use a steamer or lay them under heavy books overnight.
Stains and Spills
- Problem: Your placemats got stained during a meal.
- Solution: Treat the stain immediately. Use a stain remover suitable for the fabric type, or try natural solutions like baking soda or vinegar for light stains.
Curling Corners
- Problem: The corners of your placemats keep curling up.
- Solution: Ensure that the placemat is cut evenly. If it's a fabric placemat, pressing the corners with an iron can help. For stiffer materials, place a heavy object on the corners when not in use.
Fading Colors
- Problem: The vibrant colors of your placemats are fading after washing.
- Solution: Always wash your placemats in cold water and avoid direct sunlight when drying. Use a gentle detergent and consider hand washing if the material is delicate.
Adhesive Issues
- Problem: Decorative elements are not sticking to the placemat.
- Solution: Make sure the surface is clean before applying adhesives. Use a stronger glue or double-sided tape designed for the material you're working with.
Uneven Shapes
- Problem: Your placemats don't have uniform shapes.
- Solution: Make a template from cardboard to trace the shape before cutting. This will ensure all your placemats are the same size and shape.
Lack of Rigidity
- Problem: Your placemats are too floppy and don't lay flat.
- Solution: Add a backing material like cork or felt to give more structure. You can also sandwich a piece of cardboard between two layers of fabric.
By anticipating these common issues and knowing how to address them, you'll be better prepared to make beautiful, long-lasting DIY placemats.
Maintenance and Care for DIY Placemats
Keeping your DIY placemats clean and in good condition is essential for their longevity and for maintaining a pleasant dining environment. Here's how you can care for them effectively:
Cleaning Fabric Placemats
- Wash fabric placemats in cold water on a gentle cycle to prevent shrinking and fading.
- Use mild detergent and avoid bleach, which can weaken fibers and cause colors to run.
- Air-dry placemats to preserve their shape and texture. If you must use a dryer, choose a low-heat setting.
Caring for Vinyl or Plastic Placemats
- Wipe down with a damp cloth after each use to prevent stains from setting.
- Avoid abrasive cleaners that can scratch the surface. Instead, use a solution of water and mild dish soap.
- Store flat or rolled up in a tube to prevent creases and cracks.
Handling Wooden or Bamboo Placemats
- Dust regularly to prevent the buildup of grime.
- Use a wood cleaner for a deeper clean, but ensure it's suitable for the type of wood.
- Oil occasionally keeps the wood from drying out and cracking.
Dealing with Cork Placemats
- Blot spills immediately to prevent staining.
- Use a soft brush to remove crumbs and debris.
- Never soak cork, as it can warp and deteriorate.
General Tips
- Check care labels for specific instructions related to the material of your placemats.
- Test any cleaning solution on an inconspicuous area first to ensure it doesn't cause damage.
- Rotate placemats if you have a set to ensure even wear and tear.
By following these simple maintenance and care tips, you can keep your DIY placemats looking fresh and inviting for every meal.
FAQs About DIY Placemats
Discover answers to common questions about DIY placemats, including materials, techniques, and design ideas for your next craft project.
The size of your placemats should be guided by the size of your table and the scale of your place settings. A standard size for rectangular placemats is 19 inches by 14 inches, but you can adjust the dimensions to fit your needs. For smaller tables or children’s use, you might consider sizes like 15 inches by 11 inches or 16 inches by 12 inches.
For beginners, the easiest way to make placemats is to start with simple shapes and no-sew methods. You can use materials like oilcloth or vinyl that are easy to cut and don’t fray. Adhesive-backed fabrics and iron-on hemming tapes can also be used to finish the edges without sewing.
Yes, reversible placemats are a great option for versatility. You can sew two different fabrics together, back to back, leaving an opening to turn them right side out. Topstitch around the edges to close the opening and give the placemats a finished look.
To add a decorative touch, consider using fabric paints, stamps, or heat-transfer vinyl to make designs. You can also add embellishments like ribbons, lace, or buttons. If you're sewing, quilting patterns or appliqué can add texture and visual interest.
For kid-friendly placemats, consider using materials that are durable and easy to clean, like vinyl. You can also make Montessori-inspired placemats with sections marked for a plate, utensils, and a cup to help children learn table setting. Heat-transfer vinyl (HTV) can be used to apply these designs before sewing the placemats together.
Conclusion
Wrapping up, making DIY placemats for your dining table is a fun and rewarding project. By personalizing your placemats, you add a unique touch to your home decor. Not only do these DIY placemats protect your table, but they also enhance its visual appeal. Gather your materials, follow the steps, and enjoy your custom-made placemats. Happy crafting!


