Maintaining a proper watering routine for your plants can be a challenge, especially if you're busy or planning to leave for a few days. This is where DIY plant watering globes come in handy. They offer a simple, cost-effective solution to ensure your plants stay hydrated, even when you're not around. In this guide, we'll cover everything you need to know about making and using DIY watering globes, based on a popular and easy-to-follow method.
What is a Watering Globe?
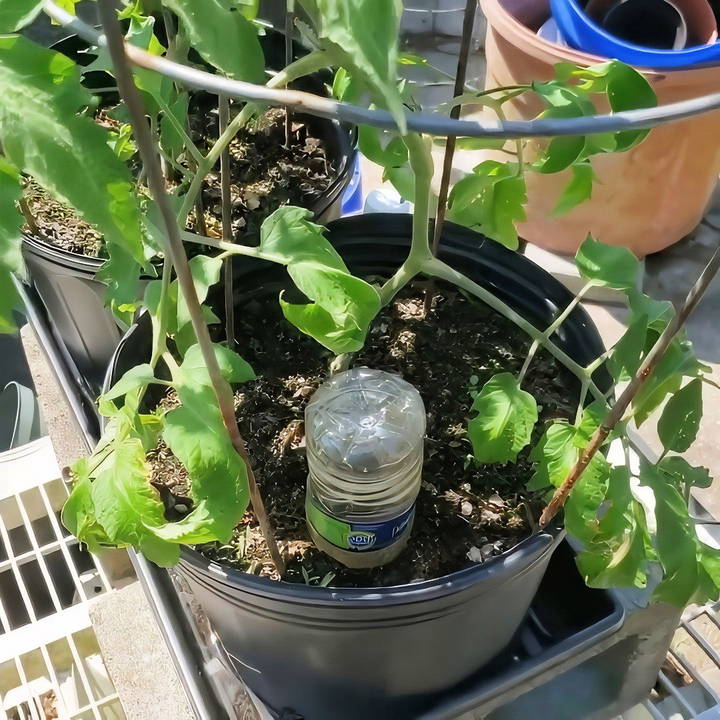
A watering globe is a device that slowly releases water into the soil, ensuring your plants get the hydration they need without the risk of overwatering. The concept is straightforward: water is released from a container into the soil as needed, based on the plant's water uptake and soil dryness.
While there are many commercially available watering globes, you can make your own at home using basic household materials like plastic bottles, making this a budget-friendly option.
Why Use a DIY Watering Globe?
There are several reasons why DIY watering globes are a great solution for plant care:
- Convenience: A watering globe can keep your plants watered for up to a week, which is perfect for those who are busy or traveling.
- Cost-Effective: DIY watering globes can be made with materials you likely already have, such as plastic bottles and push pins.
- Sustainable: Reusing plastic bottles helps reduce waste, making this a more eco-friendly option than buying new watering tools.
- Versatile: Watering globes work for a wide variety of plants, including indoor houseplants, outdoor garden plants, and even potted flowers.
How Does a DIY Watering Globe Work?
The principle behind a DIY watering globe is simple. Water is slowly released from the bottle through small holes made in the cap or body of the bottle. The release of water is controlled by the soil's moisture level: when the soil is dry, water flows more freely, but when the soil is already moist, the water flow slows down or stops altogether.
This slow-release mechanism ensures that your plants receive water as needed without the risk of overwatering, which can cause root rot and other issues.
Materials Needed to Make a DIY Watering Globe
To make your own watering globe, you'll need the following items:
- A plastic bottle (any size will do, but larger bottles will last longer between refills)
- A pushpin or needle
- A paddle or something sharp for making holes (optional but useful for larger bottles)
- Rainwater or tap water (left to sit for a few hours to allow the chlorine to evaporate)
The size of the plastic bottle you choose depends on the size of the plant and how long you want the watering globe to last before needing a refill. For smaller plants, a 500ml bottle may suffice, but for larger plants or longer periods, a 1.5-liter or larger bottle may be more appropriate.
Optional Materials:
- Decorative elements (if you want to make the watering globe look more aesthetically pleasing)
- A stand or support (to help keep the bottle upright)
Step by Step Instructions
Learn how to make DIY watering globes for plants with simple steps. Keep your plants hydrated effortlessly, perfect for easy and hassle-free care!
Step 1: Prepare the Bottle
Select a clean, plastic bottle. It's important to ensure that the bottle is clean and free of any debris. If using a bottle that previously contained a beverage, rinse it thoroughly to remove any residue.
Step 2: Make Small Holes in the Bottle
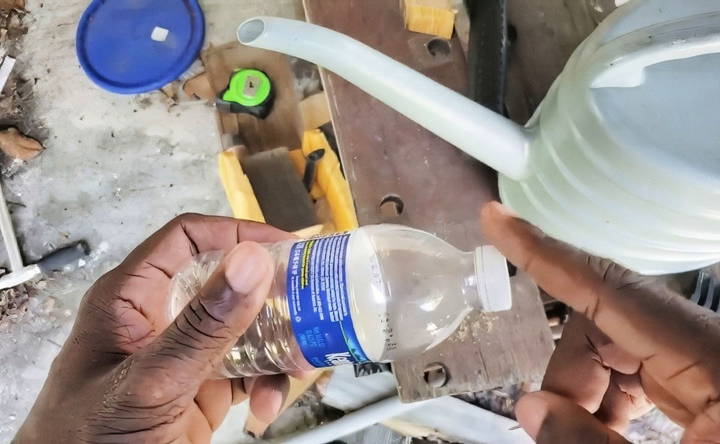
Using a pushpin, make small holes around the cap and sides of the bottle. These holes will allow the water to slowly seep out into the soil. In the video demonstration, five holes are recommended: one in the center, one on each side, one on the top, and one on the bottom of the bottle. This makes a controlled flow of water.
If you're using a larger bottle, you might want to use a paddle or a sharp object to ensure the holes are large enough for an adequate flow rate, but not so large that the water drains too quickly.
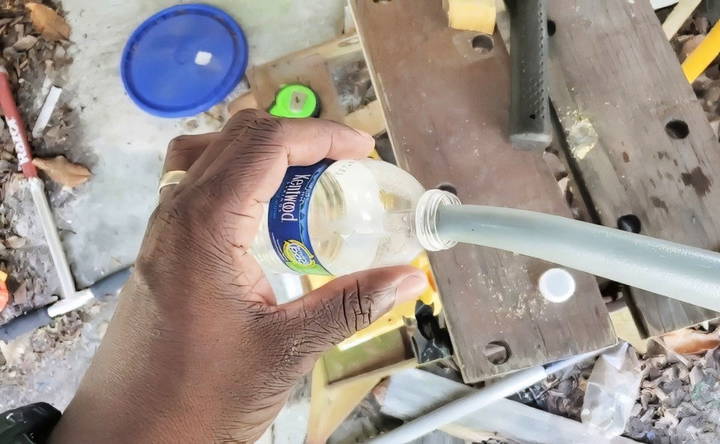
Step 3: Fill the Bottle with Water
Once the holes are made, fill the bottle with water. It's recommended to use rainwater when available, as it's more natural for plants. However, if you're using tap water, it's a good idea to let it sit for a few hours to allow chlorine and other chemicals to evaporate.
Step 4: Wet the Soil
Before inserting the watering globe into the soil, make sure the soil is already moist. Watering dry soil can cause the bottle to empty too quickly, so it's essential to start with pre-moistened soil to allow the slow-release mechanism to work properly.
Step 5: Insert the Bottle into the Soil
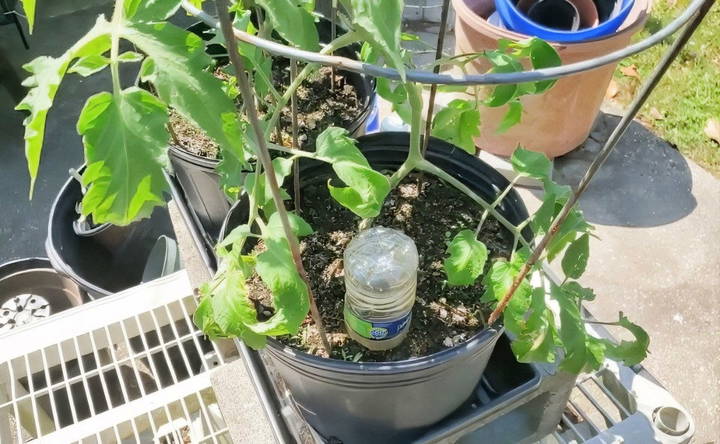
Next, take the filled bottle and insert it into the soil, cap side down. You may need to twist the bottle slightly as you insert it to ensure it's securely in place. The water will start to slowly drain into the soil, and the plant will draw water as needed.
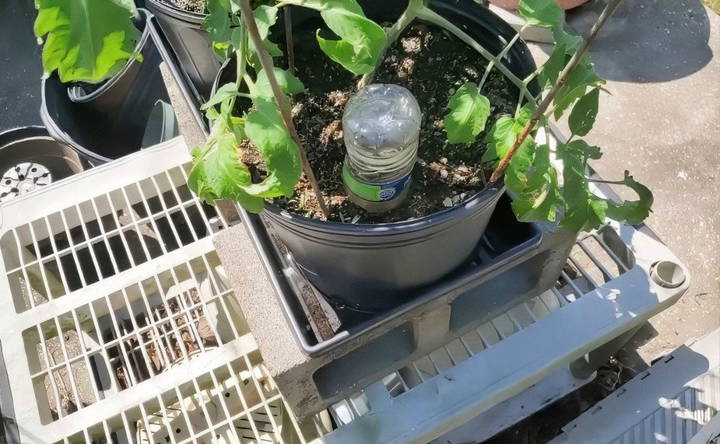
Step 6: Monitor and Refill as Needed
The amount of time the watering globe will last depends on the size of the bottle and the water needs of the plant. Smaller bottles may only last a few days, while larger bottles can provide water for up to a week. Check the water level periodically, and when the bottle is empty, simply refill it and insert it back into the soil.
Tips for Successful Use of DIY Watering Globes
- Test for Proper Water Flow: Before leaving your plant unattended, test the watering globe to ensure it's providing the right amount of water. If the water is draining too quickly, you may need to adjust the size or number of holes.
- Use the Right Bottle Size: Larger plants or plants with higher water needs will require larger bottles, while smaller plants may only need a small bottle.
- Place Globes in Shaded Areas: Direct sunlight can cause the water in the globe to evaporate faster. For outdoor plants, consider placing the watering globe in a shaded area.
- Check Soil Moisture: Even with a watering globe in place, it's important to regularly check the soil moisture to ensure the plant is getting enough water. Adjust the size of the holes or the number of watering globes as needed.
Advantages of DIY Watering Globes
- Cost-Effective: As mentioned, DIY watering globes can be made using materials you already have at home, eliminating the need to buy expensive irrigation systems.
- Ease of Use: Once set up, watering globes require minimal maintenance. You just need to refill them periodically, which can be especially helpful if you have multiple plants or a busy schedule.
- Water Efficiency: Watering globes reduce water waste by providing a steady, controlled amount of water directly to the plant's roots. This helps prevent overwatering, which can lead to root rot, and underwatering, which can cause plants to wilt and die.
Disadvantages of DIY Watering Globes
While DIY watering globes are a great solution for many plant enthusiasts, they do have a few drawbacks:
- Limited Use for Larger Gardens: DIY watering globes are ideal for small to medium-sized plants. For larger gardens, you may need a more advanced irrigation system to ensure all your plants are watered efficiently.
- Clogging Issues: Over time, soil particles can clog the small holes in the watering globe, reducing the effectiveness of the system. Cleaning the holes periodically can help prevent this.
- Not Ideal for All Plants: Some plants, particularly those that prefer drier conditions, may not benefit from the consistent moisture provided by a watering globe. It's important to research the water needs of your specific plants before relying on this method.
Conclusion: A Simple Solution for Plant Care
DIY watering globes offer a practical, affordable, and sustainable way to ensure your plants stay hydrated, even when you're not around. By using simple materials like plastic bottles and a few household tools, you can make an effective watering system that lasts for days. Whether you're heading out for a vacation or simply looking for a low-maintenance way to care for your plants, a DIY watering globe could be the perfect solution. With just a bit of preparation, you can keep your plants happy, healthy, and well-watered, no matter your schedule.
By following the steps outlined in this guide, you can make a reliable and reusable watering system for your plants. So the next time you need a break from your daily watering routine, give DIY watering globes a try—they might just become your new favorite gardening hack!
FAQs About DIY Watering Globes
Discover answers to FAQs about DIY watering globes, including tips on usage, benefits, and how they keep your plants hydrated efficiently.
Any plastic bottle can work, but larger bottles (like 1.5-liter) last longer, especially for bigger plants. Make sure the bottle is sturdy enough to withstand being inserted into the soil without collapsing.
Using a pushpin, make five holes: one in the center, one on each side, and one on the top and bottom of the bottle. This provides an even and controlled water flow into the soil.
Yes, but let the tap water sit for a few hours before using it. This allows the chlorine to evaporate, which is better for plant health.
Make sure the soil is already wet before inserting the bottle. Dry soil can cause the water to drain too quickly. Also, adjust the size of the holes if the water drains too fast.
The duration depends on the bottle size and plant water needs. Typically, a 1.5-liter bottle can last between 3 to 7 days.
Soil particles can occasionally clog the small holes. If this happens, clean the holes by removing the bottle and using a needle or pin to clear them out.
Watering globes are suitable for most plants, but some plants that prefer dry soil may not benefit from this constant moisture. Always check the specific water needs of your plant before using a watering globe.
Yes, you can also use glass bottles with the same process. Glass bottles may be more durable and aesthetically pleasing but are harder to customize than plastic bottles.


