Building custom DIY plantation shutters can be rewarding and cost-effective. I decided to give it a try to improve the look of my living room. With simple tools and an easy-to-follow guide, I was able to make cheap plantation shutters that fit perfectly in my windows. It's a fantastic way to add a touch of style and elegance to any room.
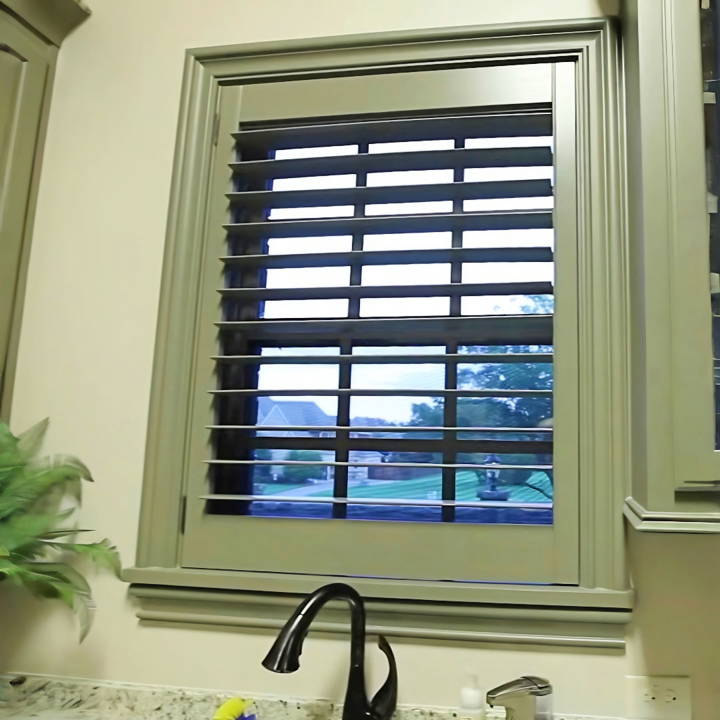
When I finished my custom plantation shutters, I felt a big sense of accomplishment. The process wasn't as tough as I thought it would be. Following the steps carefully made all the difference.
I encourage you to try making DIY plantation shutters, too. These tips and guides can really help you get started.
Understanding Plantation Shutters
Plantation shutters are a popular and timeless choice for window coverings. They are known for their wide louvers, or slats, which can be adjusted to control light, privacy, and airflow. Unlike blinds or curtains, plantation shutters are fixed to the window frame and can add a touch of elegance to any room.
Origin and Name
The name ‘plantation shutters' is derived from their association with the grand mansions on cotton plantations in the Southern United States during the 19th century. However, their history dates back even further, with roots in ancient Greece, where they were made from marble and used for light control, ventilation, and protection.
Design and Functionality
Modern plantation shutters are typically made from wood, composite materials, or vinyl. They consist of a frame that attaches to the window, with panels that can be opened or closed on hinges. The louvers within the panels can be tilted to adjust the amount of light entering the room. They are a great option for those seeking a combination of aesthetics and functionality.
Benefits
Plantation shutters offer several benefits:
- Durability: They are built to last and can withstand the test of time better than many other window treatments.
- Energy Efficiency: By providing an extra layer of insulation, they can help keep your home cool in the summer and warm in the winter.
- Easy Maintenance: They are relatively easy to clean and maintain, requiring only a quick wipe-down with a damp cloth.
- Increased Home Value: Their custom and built-in appearance can increase the appeal and value of your home.
Choosing the Right Shutters
When selecting plantation shutters, consider the following:
- Material: Choose a material that suits your climate and the room's purpose. For example, vinyl is good for high-moisture areas like bathrooms.
- Louver Size: Larger louvers offer a clearer view and can make a space feel larger, while smaller louvers provide more privacy and light control.
- Color: White or neutral-colored shutters can brighten a room and complement various decor styles.
Understand plantation shutters to decide if they suit your home. They're an investment in both beauty and functionality. Choose shutters that match your style and practical needs.
Gathering Materials: Why Each Piece Matters
The journey began with a simple step: Anyone looking to undertake this project should start by taking precise measurements of the window and then subtracting 1/4 inch from each measurement to ensure a perfect fit.
Why You Need These Specific Materials:
- Basswood Sections: I opted for two 1x6 sections for the rails and two 1x2 sections for the stiles. Basswood is light but sturdy—ideal for shutters.
- Stainless Steel Nails, Louver Pins, and Hinges: Essential hardware for assembly and functionality.
- Hidden Control Arm and Pre-router Louvers: These contribute to the aesthetics and smooth operation of the shutters.
- Rockler Shutter System Jigs: This is a game-changer for accuracy in drilling louver pin holes.
I ordered everything from Rockler. The convenience of having everything delivered to my doorstep was unbeatable.
Step by Step Instructions
Learn how to make DIY plantation shutters with our step-by-step guide, from preparing wood to final installation. Perfect for adding style and function!
Preparing the Wood
First off, I ran all the wood sections through a planer. This might not have been strictly necessary according to Rockler, but I found it essential for getting that smooth, clean surface. Alternatively, sanding could work if you don't have a planer.
Cutting to Dimensions
I then marked and cut the wood based on the precise dimensions needed, using a miter saw. For the stiles and rails, a table saw made quick work of getting them down to the right width.
The Rabbets and Dowels: Key for Assembly
Cutting rabbets was up next. I used a dado stack and table saw, but a router could easily handle this task. These rabbets are crucial for allowing the louvers to fit snugly without gaps.
Dowels were my choice for joinery, thanks to their strength and simplicity. A doweling jig helped ensure accuracy, and I strongly recommend dry-fitting everything before moving on—adjustments at this stage are much easier!
Adding Character and Function
A router came in handy for giving the stiles a decorative edge, and a 45-degree chamfer on the rails added a nice touch. Don't skip the round-over on the rabbets; it's these small details that elevate the finished look.
Drilling the louver pin holes accurately was made painless with the shutter jig from Rockler. Patience here pays off in spades.
Final Assembly and Painting
The glue-up process demands attention. Work systematically, ensuring each piece fits perfectly before moving to the next. Once assembled, I applied a coat of paint matching our trim color using an HVLP sprayer for a flawless finish. Patience is crucial here; let the paint dry completely.
Installation: The Final Stretch
Attaching the hinges and installing the shutters into the window frame was straightforward. I used magnetic clips for closure—a sleek and simple solution.
The project was tough, but the result was very satisfying. I saved a lot by avoiding expensive stores and gained skills and appreciation for bespoke home craftsmanship.
Customization Ideas for Plantation Shutters
When it comes to personalizing your home, plantation shutters offer a fantastic canvas for creativity. Here are some customization ideas that can help you make your shutters stand out and reflect your unique style:
- Painting Your Shutters: A fresh coat of paint can transform your shutters completely. Choose a color that complements your room's decor or go bold with a contrasting hue for a statement look. Remember to use paint suitable for the shutter material and consider the lighting in your room as it can affect how the color appears.
- Staining Wood Shutters: If you have wooden shutters, staining them can enhance the natural beauty of the wood grain. Select a stain that matches other wooden elements in your room for a cohesive design.
- Changing Louver Sizes: Mixing different louver sizes within the same window or across different windows can add visual interest and functionality. Larger louvers allow more light and have a more contemporary feel, while smaller louvers offer a traditional look.
- Adding Decorative Hinges and Handles: Swap out standard hinges and handles for decorative ones. This small change can make a big impact, adding a touch of elegance or rustic charm to your shutters.
- Incorporating Fabric: For a softer look, consider attaching fabric to the back of the shutters. This can add color and pattern to your windows and is an easy way to change the look with the seasons or as your style evolves.
- Building Cut-Out Designs: Adding cut-out designs to your shutters can build a stunning effect when the light shines through. Choose a design that has personal significance or complements the theme of your room.
- Using Magnets for Art Display: Attach magnets to your shutters and use them to display children's artwork, photos, or lightweight decorative items. This is a great way to keep your decor fresh and allows for easy changes.
- Layering with Curtains: Combining shutters with curtains can give you more control over light and privacy, and adds depth to your window treatments. Choose curtains that coordinate with your room's color scheme and texture.
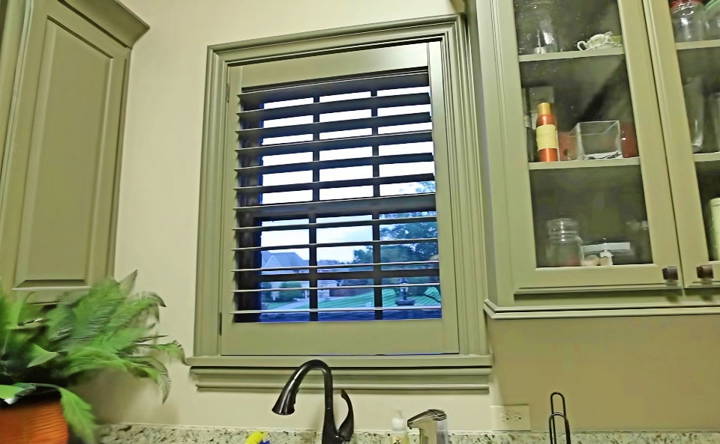
Incorporate these ideas to make your plantation shutters functional and reflect your style. Choose customizations that bring joy and enhance your space.
Troubleshooting Common Issues with Plantation Shutters
When installing or maintaining plantation shutters, you might encounter a few hiccups along the way. Here's a helpful guide to troubleshooting common issues, ensuring your shutters function beautifully and last for years.
Stiff Louvers
- Solution: If the louvers are difficult to open or close, it may be due to paint buildup or debris in the pivot points. Gently clean the area with a soft brush and apply a silicone spray to the moving parts. Avoid oil-based products as they can attract more dirt.
Louvers Won't Stay in Place
- Solution: This often happens when the tension screws on the side of the panels are too loose. Tighten the screws slightly until the louvers move smoothly and stay in the desired position.
Difficulty in Aligning Shutters
- Solution: If your shutters aren't aligning correctly when closed, check if the installation is level. Minor adjustments to the hinge plates can correct the alignment. Use a spirit level to ensure accuracy.
Shutters Won't Close Properly
- Solution: Inspect the shutters for any warping or damage. If the frame is not square, it can prevent the shutters from closing. Adjusting the frame or replacing damaged parts may be necessary.
Gaps Between Louvers
- Solution: Small gaps can appear over time as the wood expands and contracts with temperature changes. If the gaps are significant, it might be due to incorrect installation or sizing. Re-measuring and ensuring proper fit can resolve this issue.
Difficulty in Cleaning
- Solution: Plantation shutters should be easy to clean. If you're finding it difficult, switch to a microfiber cloth or a soft brush attachment on your vacuum. For deeper cleaning, use a slightly damp cloth with mild soap, but avoid excess water.
Damaged Louvers
- Solution: Accidents happen, and louvers can break. Most shutters have replaceable louvers. Contact the manufacturer for replacement parts and instructions on how to swap them out.
Discoloration
- Solution: Sunlight can cause certain materials to fade or yellow over time. If your shutters are discolored, consider repainting or replacing them with UV-resistant materials.
Proper upkeep prevents issues. Consult professionals or manufacturer guidelines when in doubt. Care keeps your shutters beautiful and functional.
Safety Considerations for Plantation Shutters
When choosing and installing plantation shutters, safety is an important factor, especially in homes with children and pets. Here are some key safety considerations to keep in mind:
- Cordless Design: Opt for cordless shutters to eliminate the risk of strangulation. Cordless shutters use a tilt rod or motorized system, making them safer for young children and pets.
- Sturdy Installation: Ensure that your shutters are securely installed. Use the appropriate anchors and screws for your wall type, and check the installation periodically to make sure it remains firm.
- Non-Toxic Materials: If you're painting or staining your shutters, choose non-toxic products. This is particularly important if your household includes children or pets who might chew on the shutters.
- Smooth Edges: Check that all edges and corners are smooth to the touch. Rough or sharp edges can cause injuries, so it's worth taking the time to sand down any problematic areas.
- Fire Safety: Consider the material's fire resistance when selecting shutters. Some materials are more flammable than others, so be mindful of this, especially if the shutters are near a kitchen or fireplace.
- Locks and Latches: If your shutters open to the outside, ensure they have locks or latches to prevent them from being opened by children. This can also provide additional security for your home.
- Regular Maintenance: Keep your shutters in good working order. Regular maintenance checks can help identify any potential hazards, such as loose fittings or damaged louvers.
- Accessibility: Make sure that shutters do not block access to windows in case they need to be used as emergency exits. It's important that shutters can be opened quickly and easily from the inside.
Adhere to safety guidelines to enjoy plantation shutters' beauty and function safely. Prioritize safety; with proper care, these shutters are a secure home addition.
FAQs About DIY Plantation Shutters
Get answers to your questions about DIY plantation shutters, including installation tips, cost, materials, and benefits—everything you need to know!
Plantation shutters are interior shutters with wide louvers, usually 2.5 to 4.5 inches wide. They’re named for their use in the mansions of the American South and the Caribbean, where they were used to protect against the heat and allow for airflow. Unlike regular shutters, plantation shutters have larger slats, which provide a clearer view outside and let in more light when opened.
To measure your windows, start by measuring the width and height of the window frame in three places: the top, middle, and bottom for width, and both sides and the middle for height. Use the narrowest width and the longest height to ensure the shutters will fit. Remember to subtract about 0.25 inches from your measurements to allow for proper clearance.
Plantation shutters are relatively low maintenance. You can dust them regularly with a microfiber cloth or use a vacuum cleaner with a brush attachment. For deeper cleaning, wipe the shutters with a damp cloth. Avoid using harsh chemicals or water on wood shutters to prevent damage.
Over time, you may face issues like loose louvers, broken slats, detached tilt rods, or sagging. To fix these, tighten any loose screws on the louvers or tilt rod. If a slat is broken, it can often be replaced without needing to replace the entire shutter. For sagging shutters, ensure they’re properly mounted to the window frame and check for any structural weaknesses.
When designing your shutters, consider the size and shape of your window, as well as the room's decor. Louver size can impact the look, with wider louvers offering a more contemporary feel. The color of the shutters should complement the room's color scheme. Additionally, ensure that the shutters open and close smoothly and fit snugly within the window frame for both functionality and visual appeal.
Conclusion:
Wrapping up, making your own custom DIY plantation shutters can save you money while adding a personal touch to your home. With simple tools and materials, anyone can transform a space with DIY plantation shutters. So, go ahead and start your project today.


