As a long-time enthusiast of DIY projects and someone who has always been fascinated by the precision of CNC machines, tackling the challenge of building a DIY CNC plasma table was a thrilling prospect. I wanted to build something truly useful in my workshop without breaking the bank. The journey wasn't simple, but the outcome was incredibly rewarding. Below, I'll share how I built a CNC plasma table for under $350, hoping to inspire and guide others in their DIY endeavors by leveraging my firsthand experience and expertise.
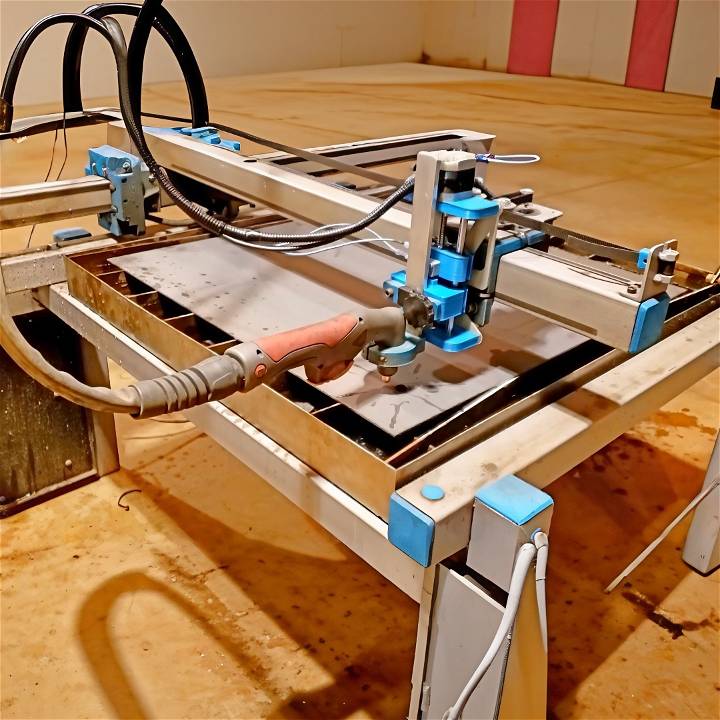
Understanding the Costs and Materials
First, let's explain why materials are needed and how much they cost. Steel is crucial for machine strength and stability. Bearings and bolts help with smooth operation, while 3D-printed parts offer affordable customization. Electronics like motors and drivers give the machine control over cutting. My project focused on cost-effective quality, showing the importance of wise shopping and material choices.
The Frame: Foundation of Your CNC Plasma Table
Why Steel Is Your Best Friend
For the frame, I chose 2x2 inch tubing, which I managed to source for $74 for a 24-foot stick—a noticeable decrease in price due to diligent sourcing. Steel's strength and rigidity are vital for a machine that needs to handle vibration and heat without warping.
Procuring the Right Parts
Shopping for steel, I learned quickly to aim for the largest supplier and ask for the "city desk" to get the best price. It's essential to buy full sticks to keep costs low, even if it means having the supplier cut it for my convenience.
Nuts, Bolts, and Bits: The Small Things Matter
Why Every Bolt Counts
Initially overlooked, the nuts and bolts added about $20 to the project cost. Opting for grade two bolts was a cost-effective choice without compromising on the machine's integrity. For specialty screws and bearings, slight increases were noted, but by being resourceful and purchasing these components by weight or from alternative suppliers like AliExpress, I significantly reduced expenses.
The Heart of the Machine: Electronics and Movement
The Brains and Brawn Behind the Cuts
The electronics, which included motors, drivers, and a power supply, came to a total cost of $140 initially. However, current pricing showed a moderate increase to $163, primarily due to the cost of the Y motor and large driver. Despite these changes, opting for generic or alternative brands helped keep costs within budget without compromising performance.
Final Cost Analysis: Staying Under $350
By meticulously tracking each component's cost and exploring alternative purchasing options, the materials' total cost was carefully managed to $316. This careful financial management included the frame, electronics, and all necessary hardware, illustrating that it's indeed possible to assemble a functioning CNC plasma table under $350.
Lessons Learned and Tips for Success
- Research and Patience Pays Off: Taking the time to source materials, compare prices, and wait for the right parts to come at the right price was crucial.
- Simplicity is Key: Starting with an XY setup before considering any complex additions like a Z-axis or rotary function kept the initial build manageable and costs down.
- Community and Support: Leveraging advice from the DIY and CNC communities online provided invaluable tips and support, making the project not only more affordable but also more enjoyable.
Advanced Techniques and Tips for DIY Plasma Tables
Building a DIY plasma table can be an enriching experience, offering the satisfaction of building something functional and the excitement of learning new skills. Here, we delve into advanced techniques and tips that can help you refine your plasma cutting projects.
Precision Cutting Tips
Precision is vital in plasma cutting. To achieve clean and precise cuts, consider the following:
- Steady Speed: Maintain a consistent speed. If you move too quickly, the cut may be incomplete; too slowly, and the metal may overheat.
- Dry Air: Use dry, compressed air to prevent rust and ensure a clean cut.
- Correct Distance: Keep the torch at the right distance from the metal. Typically, this is about 1/8 inch.
Optimizing Your Setup
Optimizing your setup can significantly improve your cutting experience and results. Here's how:
- Proper Grounding: Ensure your table is properly grounded to prevent electrical hazards and improve cut quality.
- Material Support: Use appropriate support for your materials to avoid warping and to ensure a steady cut.
- Torch Height Control: A torch height control system can automatically adjust the torch height, which is especially useful for uneven materials.
Enhancing Cutting Quality
To enhance the quality of your cuts, implement these practices:
- Fine-Tune Amperage: Adjust the amperage settings based on the thickness of the material.
- Replace Consumables: Regularly check and replace worn consumables to maintain cut quality.
- Avoid Overcutting: Plan your cutting path to minimize overcutting at corners.
By incorporating these advanced techniques and tips, you can take your DIY plasma table projects to the next level.
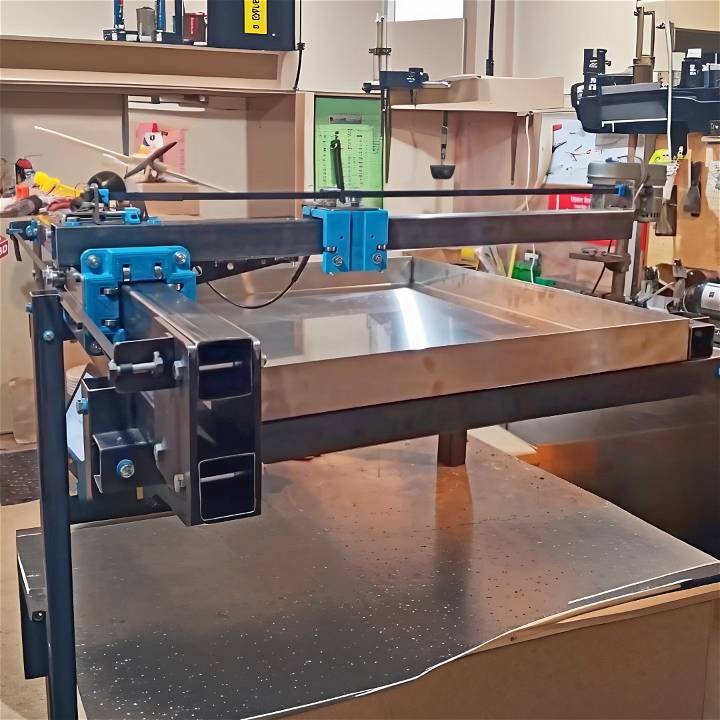
The Future of Plasma Cutting: Embracing Automation and Sustainability
The plasma cutting industry is on the brink of a significant transformation, driven by advancements in technology and a growing emphasis on sustainability. This section explores the innovations shaping the future of plasma cutting, making it more efficient, precise, and environmentally friendly.
Automation in Plasma Cutting
Automation is becoming increasingly prevalent in manufacturing, and plasma cutting is no exception. The integration of automated systems is streamlining processes, reducing the reliance on manual labor, and enhancing operational efficiency. Here's what's on the horizon:
- Automated Material Handling: Machines that move materials quickly and economically.
- Automated Cutting Processes: Systems that improve precision and reduce waste.
- Smart Factories: Facilities that use data and connectivity to optimize production.
Sustainability and Recycling
The focus on the recycling sector is growing, with plasma cutting playing a crucial role. Equipment capable of recycling a wide range of materials is in high demand, reflecting a shift towards more sustainable practices. Key points include:
- Recycling of Metal Scraps: Turning waste into valuable resources.
- Eco-friendly Cutting Practices: Reducing the environmental impact of cutting operations.
- Innovative Recycling Equipment: Machines designed for a variety of recyclable materials.
Data-Driven Plasma Cutting
The future of plasma cutting is also data-rich, with consumable technology becoming smarter. This leads to:
- Optimized Consumable Use: Predicting the life of consumables with greater accuracy.
- Reduced Downtime: Best practices that prevent common issues and enhance efficiency.
- Specialized Applications: Addressing the needs of unique cutting operations with purpose-built consumables.
By adopting trends, manufacturers are preparing for the future and promoting sustainability in industrial practices. Plasma cutting's future lies in innovation for a greener, more automated tomorrow.
DIY Plasma Table FAQs
Discover all answers to your DIY plasma table questions. Save time and money with our comprehensive FAQ guide. Get started today!
What is a DIY Plasma Table?
A DIY plasma table is a computer-controlled cutting table that uses a plasma torch to cut through materials like steel and aluminum. It's a popular tool among hobbyists and small businesses for making precise cuts and intricate designs in metal.
How Much Does It Cost to Build a DIY Plasma Table?
Building your own plasma table can be significantly less expensive than buying a pre-made one. Depending on the materials and parts you choose, you can set up a basic table for under $1,000. However, for a more advanced setup with higher quality components, you might spend upwards of $2,000.
What Materials Do I Need to Build My Own Plasma Table?
To build a plasma table, you'll need various mechanical parts such as linear rails, stepper motors, a power supply, and a control board. You'll also need metal tubing for the frame, caster wheels for mobility, and a gear rack for movement precision.
Can I Build a Plasma Table Without Prior Experience?
Yes, with a detailed guide and the right tools, even beginners can build their own plasma table. It's important to follow the instructions carefully and take safety precautions when working with tools and machinery.
How Do I Maintain My DIY Plasma Table?
Regular maintenance includes cleaning the components, checking for loose connections, and lubricating moving parts. It's also important to inspect the plasma torch for any signs of wear and replace consumable parts as needed.
Conclusion
Building a DIY CNC plasma table on a tight budget required creativity, patience, and a willingness to learn. By understanding the essentials of the build, sourcing materials wisely, and leveraging my personal experience along with the collective wisdom of the CNC community, I constructed a machine that met my needs without exceeding the $350 budget. This project is a testament to the fact that with the right approach and resources, anyone can dive into the rewarding world of DIY CNC projects without spending a fortune.


