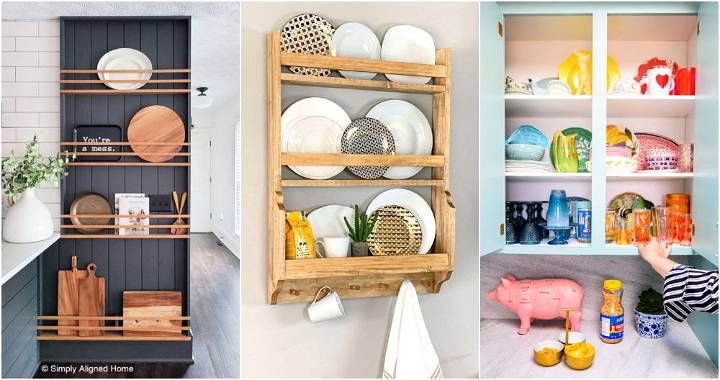
Are you tired of struggling to find the perfect way to display your beautiful collection of plates and platters? A plate rack can not only offer a practical solution for storage but also serve as a stunning statement piece in your home. In this guide, I'll walk you through the process of building a DIY plate rack that brings charm and character to any room. This plate rack is designed with a farmhouse cottage look in mind, ideal for those who love vintage-inspired decor.
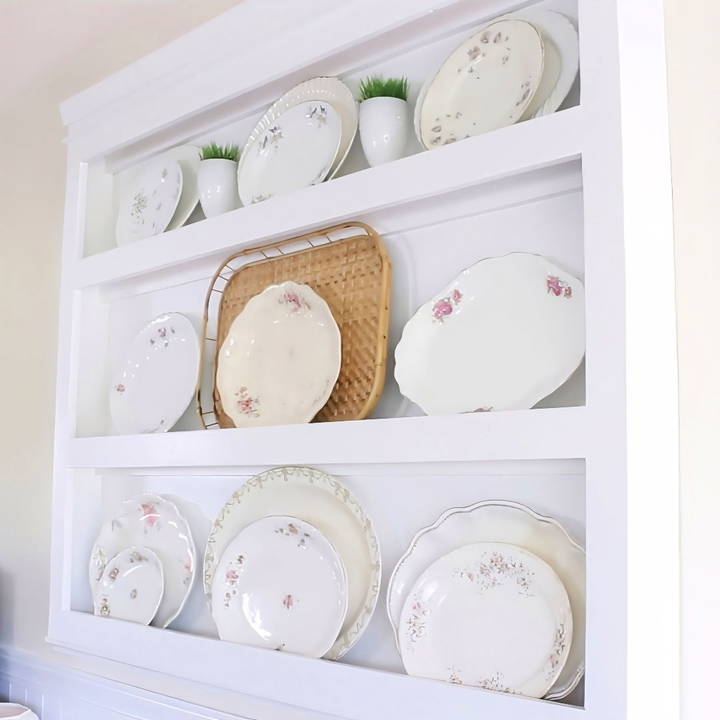
Whether you're an experienced carpenter or a beginner with some basic tools, this step-by-step guide will show you how to build a plate rack that looks like a piece of furniture built directly into your wall.
Why Build a Plate Rack?
Plate racks have become increasingly popular, especially in spaces like kitchens, dining rooms, and even living rooms. They offer a stylish way to display your favorite china, vintage trays, and platters. More than just decorative, plate racks also serve as an organizational tool, allowing you to neatly store and display your most prized dishware.
In this project, we'll build an oversized plate rack that not only holds several plates but also builds a focal point on any large, empty wall. This DIY version is customizable to your needs, whether you want a smaller design or a large, eye-catching centerpiece.
Materials You'll Need:
To get started on your DIY plate rack, you'll need the following materials:
- 1x4 boards for the main structure (sides, top, bottom, and shelves)
- 1x3 boards for trim and support
- 1x2 boards for additional shelf support
- Decorative molding (optional for added flair)
- Wood glue
- Finishing nails
- 1 ⅝ inch screws for assembly
- Primer and paint
- Sandpaper and a mouse sander
Additionally, you will need some essential tools like a miter saw, a drill, and a tape measure to complete this project.
Step by Step Instructions
Learn how to build a stylish, functional DIY plate rack with our step-by-step DIY instructions. From design to final touches, transform your kitchen today!
1. Design and Planning
The first step in any woodworking project is designing the piece. Robin from the video mentioned having an idea of what she wanted the plate rack to look like before even beginning. She aimed for a design that would appear oversized, almost like a piece of furniture attached to the wall, adding character to her dining space.
Before starting, take some time to sketch your design. Decide how many shelves you want, how large you want the rack to be, and where it will go. This planning will help ensure that your plate rack fits perfectly into your desired space.
2. Cutting the Wood
For this project, Robin used the following dimensions for her plate rack:
- Top and bottom pieces: Two 1x4 boards, each cut to 54 inches.
- Side pieces: Two 1x4 boards, each cut to 45 ½ inches.
- Shelves: Two 1x4 boards, each 54 inches long.
- Support pieces (under each shelf): Three 1x2 boards, each 54 inches long.
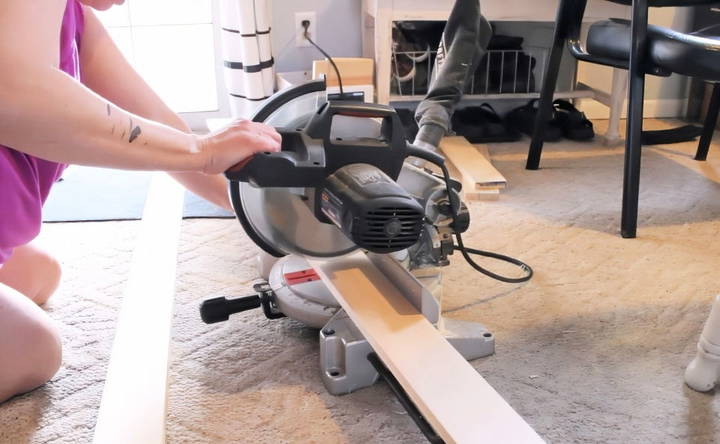
Using a compound miter saw, cut the boards to the exact lengths needed for your plate rack. If you are following Robin's plan exactly, these measurements will work perfectly for a medium-to-large size plate rack.
3. Building the Frame
Once you have your boards cut, start by assembling the frame of the plate rack. The frame is essentially a box that will hold the shelves.
- Top and Bottom Pieces: Line up the top piece (1x4) three and a half inches from the top of one of the side pieces (also 1x4). This space will serve as the header board at the top of your plate rack.
- Screwing It Together: Pre-drill holes through the outside pieces and into the top and bottom pieces of the frame. Use 1 ⅝ inch screws to attach everything together, and make sure the screws are countersunk so they sit flush with the wood. This will give the rack a cleaner look and ensure the screws don't stick out.
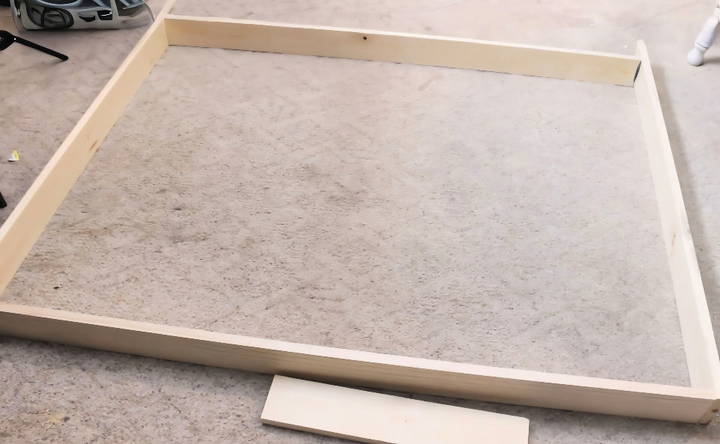
Repeat the process to attach the other side and bottom pieces to complete the frame.
4. Attaching the Shelves
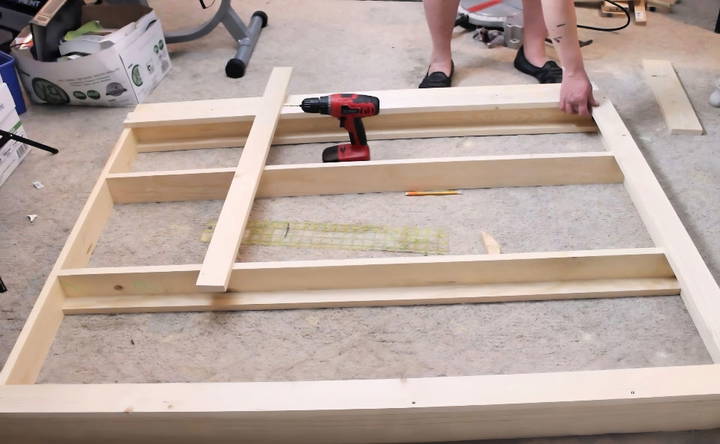
With the frame completed, it's time to add the shelves. Robin added two shelves in her plate rack:
- Measure up 14 inches from the bottom for the first shelf.
- Then measure another 15 ½ inches above that for the second shelf.
Once you've marked where the shelves will go, cut two additional 1x4 boards to 54 inches and place them inside the frame. Secure the shelves by pre-drilling and adding screws on each side.
To make the shelves more secure, you'll add support boards (1x2) underneath each shelf. This will prevent the shelves from sagging over time. Attach these 1x2 boards under each shelf by screwing them in from the top.
5. Adding a Header Board
One of the features that gives this plate rack a finished look is the header board. This board sits at the top and allows for decorative molding to be added later.
- Cut a 1x4 board to 54 ½ inches and attach it flush with the front of the rack, using screws on both ends and along the top.
This not only adds structure but will also provide a spot to attach additional decorative trim if you want to add some design flair.
6. Adding the Trim
To give the plate rack a more polished, built-in look, Robin added trim around the frame and shelves. Here's how she did it:
- Cut two 1x3 boards to 55 ½ inches for the top and bottom trim.
- Cut another two 1x3 boards to 37 ¼ inches for the sides.
- Finally, cut two more 1x3 boards to fit the front of the shelves.
Once the boards are cut, center them on the front of the shelves and attach them using screws or finishing nails.
7. Decorative Molding and Shelf Supports
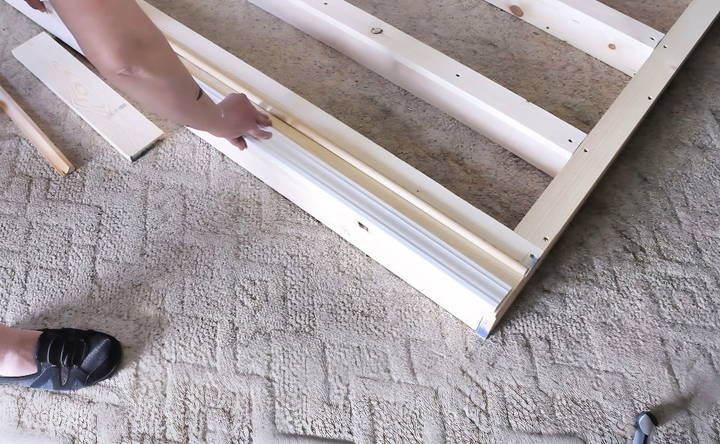
For a truly custom touch, you can add decorative molding around the plate rack's edges and supports underneath the shelves. Robin chose simple chair rail molding for the top and a half-round trim to cover the seams.
- Cut the molding to fit the top, bottom, and sides of the plate rack. Be sure to miter the corners for a seamless, professional finish.
- Use wood glue to attach the molding and secure it in place with finishing nails.
Painting and Finishing
Once your plate rack is fully built, it's time to prep it for painting.
- Sanding: Use sandpaper or a mouse sander to smooth down the surfaces of the wood. Focus on the corners and any rough edges to ensure a soft, polished finish.
- Filling Holes: Apply wood filler to any visible screws or nail holes. Once it's dry, sand down the excess to leave a smooth surface.
- Priming and Painting: Robin used Bullseye 123 Primer for the first coat, followed by two coats of semi-gloss enamel in white. Semi-gloss enamel is a great choice for plate racks because it offers durability and a sleek finish.
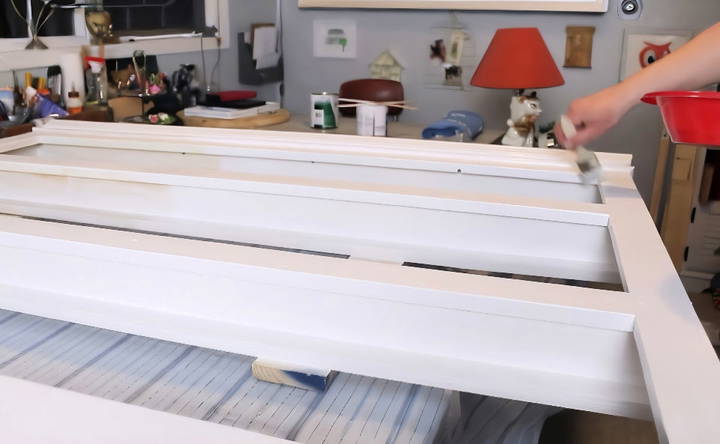
Let the paint dry completely before moving on to the next step—installation!
Installing the Plate Rack
Once your plate rack is fully constructed and painted, it's time to get it up on the wall. Installing a large piece like this can be intimidating, but with the right tools and techniques, you'll have it securely mounted in no time.
1. Choose the Perfect Wall
One of the most important considerations is the location of your plate rack. For most homes, a large wall in the dining room, kitchen, or living area works best. In the case of Robin's project, she chose a dining room wall that had always been a challenge to decorate. If you have a similar blank wall, this plate rack can make a beautiful focal point.
Make sure the wall you choose is sturdy enough to support the weight of the plate rack and the plates you'll display. Avoid thin partition walls or walls with excessive wiring or plumbing behind them.
2. Find the Wall Studs
Since your plate rack will be holding plates and other heavy items, it's crucial to anchor it to the studs in your wall. Studs are the solid wooden frames behind your drywall, and they provide the strength needed to support your plate rack.
- Use a stud finder to locate the studs in the wall where you want to install the rack.
- Mark the positions of the studs with a pencil, making sure to align the marks with where the screws will go when attaching the plate rack.
If you can't attach the plate rack to the studs directly, use heavy-duty wall anchors that are rated to support significant weight.
3. Level and Mark
Before you start drilling holes, you need to make sure the plate rack is level. Even the slightest tilt can be very noticeable, especially when your plates are on display.
- Use a level to ensure the top of the plate rack is perfectly horizontal.
- Mark where the top of the plate rack will sit on the wall, as well as where the screws will go based on your stud locations.
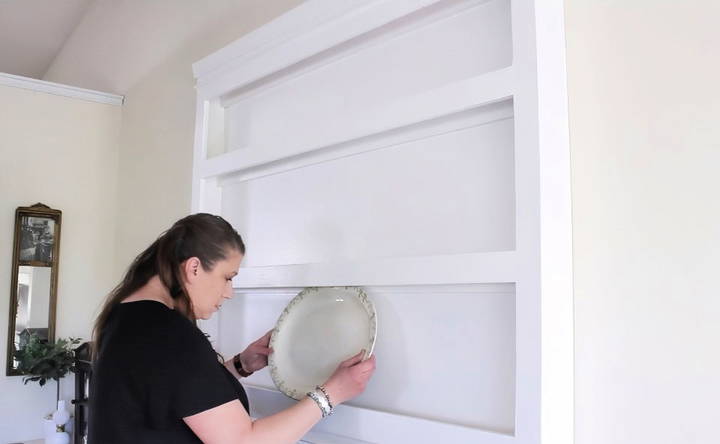
4. Pre-Drill Holes
Pre-drilling is an important step that will prevent the wood from splitting and make it easier to install screws into the wall.
- Once your marks are in place, pre-drill holes through the back of the plate rack's frame. Make sure the holes align with the wall studs or anchors.
5. Mounting the Plate Rack
Now it's time to attach the plate rack to the wall. You may need a second person to help hold the plate rack in place while you secure it.
- Hold the plate rack up to your pre-marked positions on the wall.
- Use long screws (at least 2 ½ to 3 inches) to attach the plate rack to the studs. These screws should go through the frame and into the wall for a secure hold.
- If you are using wall anchors instead of studs, follow the instructions that come with your anchors to ensure they are installed properly.
After securing the screws, double-check that the plate rack is still level before tightening the screws completely.
6. Double Check Stability
Once the rack is mounted, gently apply pressure to various points to make sure it is secure. The last thing you want is for the plate rack to wobble or come loose after you've filled it with dishes.
Decorating Your Plate Rack
Now comes the fun part: decorating your plate rack! This is where you can really let your creativity shine. The beauty of a plate rack is that it's not just for plates—it can also hold trays, platters, or even decorative elements like glassware and greenery.
Here are a few styling tips to help you build a stunning display:
1. Start with Your Favorite Plates
Since it's a plate rack, start by selecting a few of your favorite plates. Whether you're displaying vintage plates, family heirlooms, or modern dinnerware, this is your chance to highlight what you love.
- Place the largest plates on the bottom shelf and smaller plates toward the top for balance.
- If you have matching sets, consider alternating plate designs or stacking a few plates together for variety.
- You can mix and match different patterns and styles for an eclectic, curated look.
2. Add Platters and Trays
In addition to plates, large platters and trays are great for filling in empty space on the plate rack. They can serve as a backdrop for smaller plates or stand on their own as statement pieces.
Robin mentioned using a variety of trays and platters from her collection to fill out her rack. Don't be afraid to experiment with sizes and shapes—oval, rectangular, and round pieces all add visual interest.
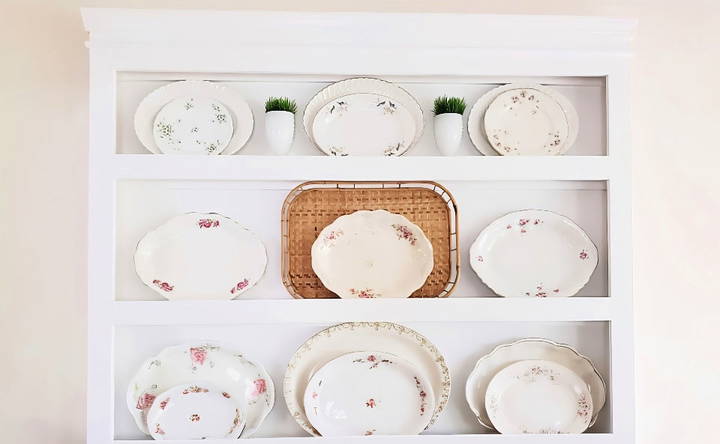
3. Incorporate Glassware and Vases
For an added touch of elegance, consider placing decorative glassware, goblets, or vases on the shelves. Robin used milk glass goblets to add texture and variety to her display. Adding a few pieces of greenery, such as small plants or floral arrangements, can also breathe life into the display.
- Choose items that complement the plates and platters in terms of color and style.
- Use smaller, delicate pieces on higher shelves and larger items on lower shelves to maintain balance.
4. Mix in Textures and Accents
To prevent the plate rack from looking too uniform, mix in a few decorative elements such as wooden cutting boards, framed artwork, or even small signs. These accents add personality and warmth to the overall look.
For instance, Robin used decorative molding on the plate rack to enhance its farmhouse charm. You can complement this by choosing rustic or vintage accents to tie the whole look together.
5. Consider Seasonal Themes
One of the great things about a plate rack is that it can easily be updated with the seasons. Switch out plates and accents to reflect the current season or holiday:
- Spring: Use floral plates and pastel-colored accents, with vases of fresh flowers.
- Summer: Incorporate bright colors, citrus-themed plates, or coastal-inspired decor.
- Autumn: Warm up the display with rustic plates, wooden accents, and small pumpkins.
- Winter: For a cozy winter look, use neutral tones, evergreen branches, and maybe some twinkle lights.
Final Touches and Enhancements
After decorating your plate rack, step back and admire your work. You can make a few final tweaks to balance the display or add extra elements if needed. Here are some additional enhancements you might want to consider:
1. Lighting
Adding lighting to your plate rack can make the entire display pop. Consider installing small wall sconces on either side of the rack, as Robin mentioned doing in her project. This will not only highlight the plates but also add warmth to the space.
You can also use LED strip lighting under the shelves for a soft glow, which works especially well if your plate rack is in a dim corner of the room.
2. Wall Art or Sconces
If your plate rack is large, like Robin's, there may be space on either side for additional decor. Wall sconces, artwork, or mirrors can help frame the plate rack and complete the look.
Robin mentioned planning to add sconces on either side of her rack, and this can help bring symmetry and additional character to the wall.
3. Top Shelf Display
If you added a shelf along the top of the plate rack, this is a great place to display larger items like framed pictures, plants, or decorative jars. Since this shelf will likely be out of reach, use it for items that are purely decorative and don't need to be moved frequently.
Conclusion: Your Custom Plate Rack Awaits
Building a DIY plate rack can be a rewarding project that transforms a plain wall into a functional and beautiful focal point. By following the steps above, you'll have a custom piece that not only displays your favorite dishes but also adds personality and charm to your space.
Whether you keep the decor simple with a few cherished plates or go all out with seasonal displays, your new plate rack will be a unique addition to your home. Enjoy experimenting with different items and arrangements, and don't be afraid to change it up regularly to keep the look fresh.
Once installed and decorated, your DIY plate rack will become a conversation piece, adding both practical storage and a touch of farmhouse charm to your home.
FAQs About DIY Plate Rack
Discover FAQs about DIY plate racks! Get tips on materials, designs, and installation for your custom kitchen project.
To securely mount the plate rack, pre-drill countersunk holes and use long 2.5-3 inch screws. Make sure to screw directly into the wall studs to support the weight of the plates. If wall studs aren’t available, heavy-duty wall anchors can be used. Always check that the plate rack is level before securing all screws.
Yes, you can adjust the plate rack’s dimensions based on the available wall space and the size of your plates. Simply modify the length of the 1x4 and 1x3 boards to make a smaller or larger version. Ensure to adjust shelf placement accordingly for stability.
Using softwoods like pine is a cost-effective and widely available option. However, for more durability and a polished look, hardwoods such as oak or maple can be used. Make sure to sand all surfaces for a smooth finish before painting.
No, this project is suitable for beginners with basic tools and woodworking knowledge. The key is to follow the measurements and ensure you use square cuts for proper alignment. A compound miter saw will help achieve accurate cuts for the frame and trim.
For a professional finish, sand the entire rack using a fine-grit sandpaper, particularly on edges. Apply a wood filler to any holes or imperfections, and then sand again. Finish the plate rack with primer and two coats of paint or stain to your desired color.
Yes, you can add decorative moldings to give the plate rack a more refined look. Robin added chair rail molding to the top for a cottage-inspired design. Feel free to experiment with different molding styles that match your home's aesthetic.
To accommodate different plate sizes, adjust the height and depth of the shelves. Ensure the shelves are deep enough to support larger platters without tipping forward. Adding a small ledge at the front of each shelf can prevent plates from sliding off.
You'll need a compound miter saw for cutting, a drill with a countersink bit for securing the screws, a tape measure, sandpaper or a mouse sander, wood glue, and finishing nails. These tools will help you build a sturdy and well-finished plate rack.
While screws provide the strongest hold, you can also use wood glue and finishing nails to build a plate rack for lighter items. However, screws are recommended for holding heavier loads, such as multiple large plates or platters.
Once your rack is built, you can style it by displaying a mix of plates, platters, and decorative items such as glassware, plants, or seasonal decorations. Robin suggests rotating items depending on the season or using themed dishes for a fresh look year-round.


