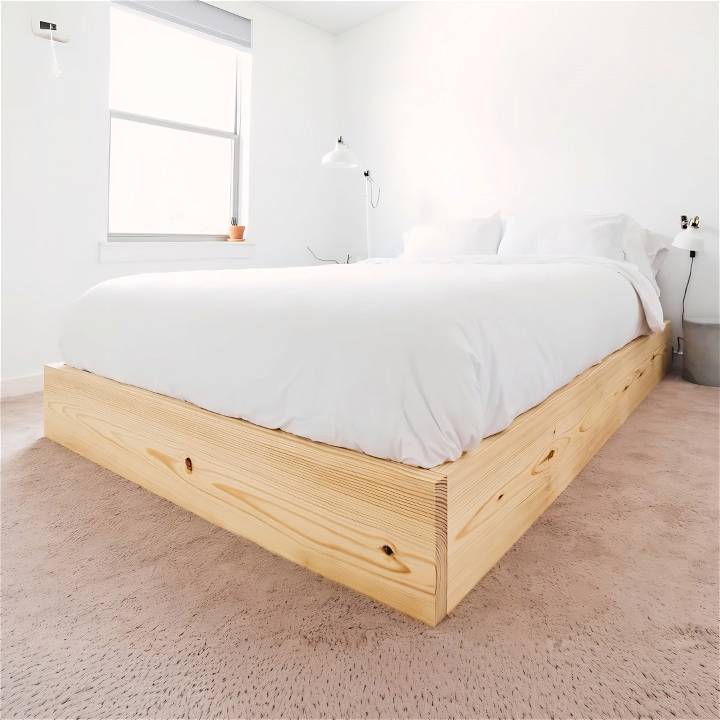
Have you ever found yourself scrolling through countless online furniture stores, wondering why everything seems so extravagantly priced, especially the simple pieces? I experienced this firsthand while hunting for a minimalist bed frame that wouldn't break the bank. That's when I stumbled upon a fantastic DIY solution that ticked all the boxes for me — affordability, simplicity, and the sweet satisfaction of building something with my own hands. Let's dive into how I built an easy DIY bed platform, and I'll guide you through each step so you can do it too.
Materials Needed and Their Purpose
Before getting our hands dirty, let's talk about the materials needed for this project. I sourced everything from a local home center to keep things convenient and cost-effective:
- Four 2x12s: These boards are the stars of the show, providing the outer frame's structure — comprising the two sides, headboard, and footboard.
- One 2x4: Split down the middle, this becomes the two side rails that will support the mattress slats.
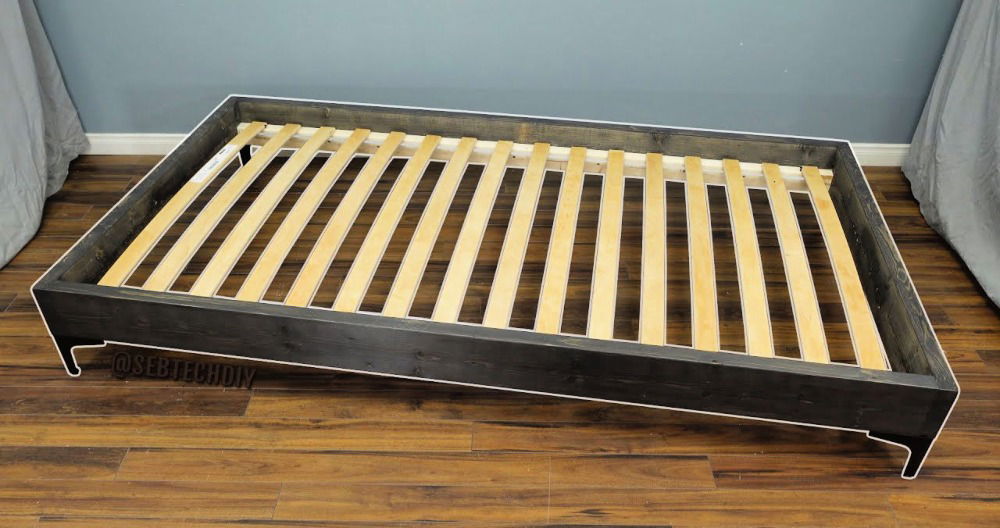
- 1x4s for Slats: These will support your mattress, spaced out across the frame to ensure breathability.
- Pocket Hole Jig, Screws, and Wood Glue: Essential for holding our frame together securely and discreetly.
- Circular Saw: For cutting our boards to length and width.
- Belt Sander and Sandpaper (220 grit): For smoothing out all surfaces and edges for a professional finish.
- Water-Based Finish: To protect and seal the wood without altering its natural color too much.
My motivation behind choosing these materials centered around durability and ease of assembly (and disassembly). The choice of a water-based finish was to maintain the wood's natural beauty while protecting it from everyday wear and tear.
Step by Step Instructions
Learn how to build a DIY platform bed with our step by step instructions. Save money and customize your bedroom with this easy project.
Step 1: Cutting the Boards
The first step involved cutting the 2x12s to build the frame's sides, headboard, footboard, and the center support beam. I ensured each board had a fresh edge by trimming off a small portion from the ends. After cutting them to length with a circular saw, I took them to the table saw to cut them to the desired width, also removing the rounded edges typical of 2x boards. This gave the project a sleeker look.
Step 2: Sanding and Preparing the Wood
Next, I used my belt sander to give the outside pieces a thorough once-over, targeting factory stamp markings and any scuffs. This step was crucial to achieve a smooth, clean surface necessary for a polished finished look.
Step 3: Assembling the Outer Frame
The frame's design called for pocket holes for a seamless look, so I drilled these next. To ensure the durability of the structure while allowing for easy movement, I avoided using glue on these joints. The 2x4 split earlier was attached to the side boards with wood glue and screws — this would support the slats.
Step 4: Applying the Finish
Before final assembly, I gave all pieces a last pass with 220-grit sandpaper, then applied a water-based finish. This not only protected the wood but ensured it kept its natural light color. I applied the finish evenly, following the grain of the wood, and allowed adequate time for drying.
Step 5: Assembling the Bed Platform in Its Room
With the cuts and finishes completed, I moved everything into the bedroom for assembly. Starting with the outer frame, I carefully aligned each corner, securing them with pocket hole screws. Clamps ensured everything held square and true during this process. The center support was then added, with its height matching the side rails for a flush support surface across the frame.
Step 6: Adding the Slats
For the slats, I used 1x4 boards, cutting them to length and distributing them evenly across the frame. This spacing is vital for mattress ventilation. Pre-drilling and countersinking holes, I secured each slat with screws, embedding them to avoid any risk of snagging the mattress fabric.
Customization Options
When it comes to making your own platform bed, customization is the name of the game! Tailoring your bed frame to match your personal style and needs is not only fun but also rewarding. Let's explore some delightful customization options that will elevate your DIY platform bed project:
1. Stain or Paint: Adding Color and Character
- Staining: If you adore the natural beauty of wood grain, consider staining your platform bed. Choose from a variety of wood stains, such as warm oak, rich walnut, or rustic ebony. Stains not only enhance the wood's appearance but also provide protection against wear and moisture.
- Painting: Inject personality into your bed frame by painting it in your favorite color. Opt for calming pastels, bold primaries, or even a chic matte black. Remember to use paint specifically designed for wood surfaces. A fresh coat of paint can breathe new life into your bedroom!
2. Headboard Magic: Upholstery and Beyond
- Upholstered Headboards: Transform your platform bed into a cozy haven by adding an upholstered headboard. Choose soft fabrics like linen, velvet, or faux leather. Upholstered headboards provide comfort when sitting up in bed and build a luxurious focal point.
- Carved Headboards: For a touch of elegance, consider a carved wooden headboard. Intricate patterns or simple geometric designs can turn your bed into a work of art. You can find pre-carved panels or try your hand at carving one yourself.
- Floating Shelves: Get creative with floating shelves attached to the headboard. These functional shelves can hold books, plants, or decorative items. Plus, they save space and add visual interest.
3. Under-Bed Storage Solutions
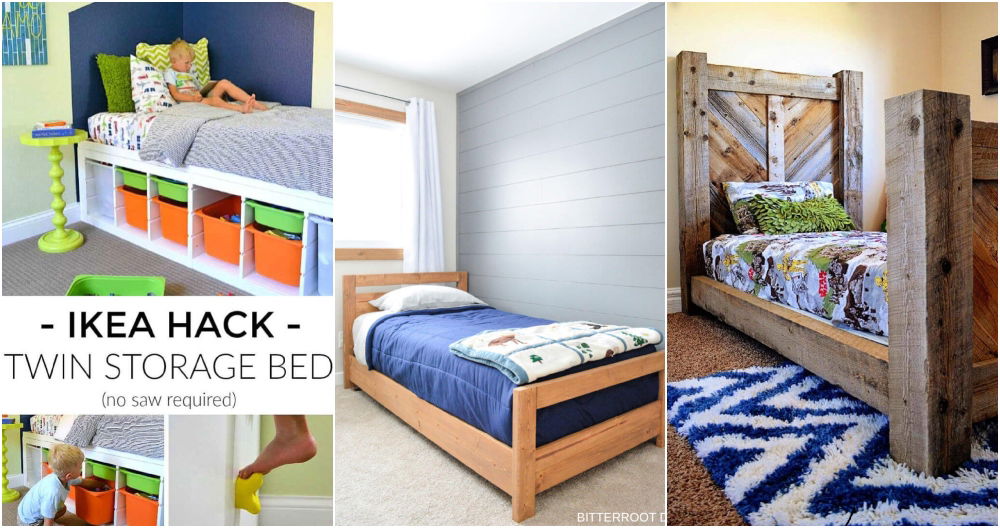
- Drawers: Maximize your platform bed's functionality by incorporating built-in drawers. These discreet storage compartments are perfect for stashing extra bedding, seasonal clothes, or shoes. Install them along the sides or at the foot of the bed.
- Open Cubbies: If you prefer an open and airy look, consider cubbies instead of drawers. Arrange woven baskets or fabric bins within the cubbies to keep items organized. It's a stylish way to declutter your bedroom.
- Rolling Trundle: Need extra sleeping space for guests? Build a rolling trundle that fits neatly under your platform bed. When not in use, it slides out of sight. Add a comfortable mattress, and voilà—an instant guest bed!
4. Lighting Ambiance
- LED Strip Lights: Build a cozy atmosphere by installing LED strip lights underneath your platform bed. These lights emit a soft glow and are perfect for bedtime reading or setting the mood. Choose warm white or colored LEDs to match your room's vibe.
- Wall Sconces: Mount wall sconces on either side of the headboard. They provide focused task lighting for reading or working in bed. Opt for adjustable sconces to direct light where you need it most.
Feel free to mix and match these customization ideas or invent your own! Whether you're a minimalist, a bohemian spirit, or a classic enthusiast, your platform bed can reflect your unique taste and enhance your sleep sanctuary.
FAQs About DIY Platform Bed
Get answers to common questions about DIY platform beds, from materials and tools needed to step-by-step instructions. Start building your dream bed today!
1. What Is a DIY Platform Bed?
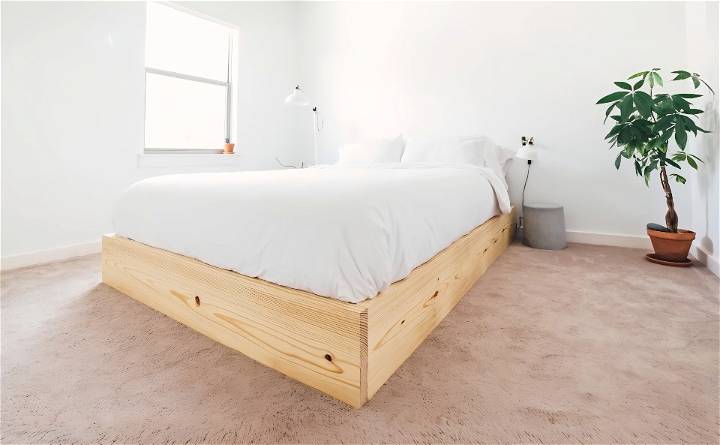
A DIY platform bed is a simple and stylish bed frame that you can build yourself. Unlike traditional beds with box springs, platform beds have a solid base (the platform) that supports the mattress directly. They often feature clean lines, minimalistic design, and ample storage space underneath.
2. Why Choose a DIY Platform Bed?
- Cost-Effective: Building your own platform bed can save you money compared to buying a pre-made one.
- Customization: You have full control over the design, size, and finish. Personalize it to match your bedroom decor.
- Space-Saving: Platform beds are great for small rooms because they eliminate the need for a bulky box spring.
- Modern Aesthetics: The sleek, low-profile look of platform beds adds a contemporary touch to any bedroom.
3. How Can I Make My Platform Bed Sturdy?
- Reinforce Joints: Use corner brackets or dowels to strengthen connections.
- Level Surface: Ensure all legs are of equal length to prevent wobbling.
- Quality Wood: Invest in solid wood for durability.
- Proper Assembly: Follow instructions carefully to avoid weak points.
4. What About Mattress Support?
- Slats: Most platform beds use wooden slats to support the mattress. Space them evenly across the frame.
- Bunkie Board: A thin, solid board placed on top of the slats provides additional support.
- Box Spring Alternative: If you prefer a higher bed, consider using a bunkie board or a low-profile box spring.
Remember, building a DIY platform bed is a rewarding project that combines creativity, practicality, and craftsmanship.
Final Thoughts
Building this bed platform was not just a project; it was a journey into self-reliance and craftsmanship. The final product, A sturdy, minimalist bed frame far exceeded my expectations — and at a fraction of the cost of store-bought alternatives.
I hope this guide inspires you to take on your own DIY bed platform project. The satisfaction of sleeping on a bed frame you've built yourself is immeasurably rewarding. Remember, detailed plans are your roadmap, good materials are your foundation, and patience is your best tool.


