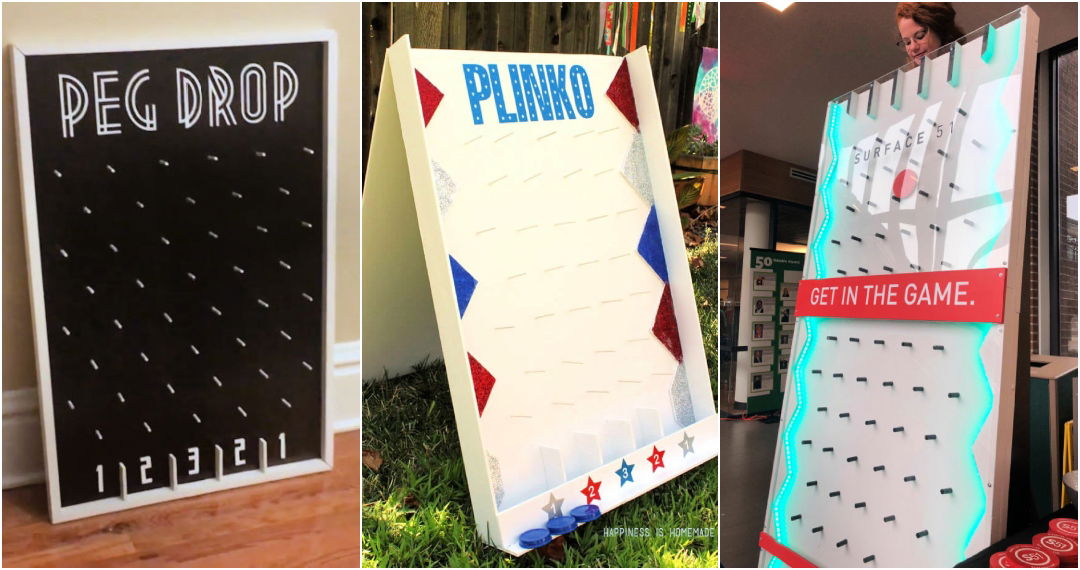
Building a DIY Plinko board can add fun and excitement to your parties and events. This guide will walk you through the steps on how to make a Plinko board, from gathering materials to final assembly. Whether it's for a birthday party, corporate event, or simple gathering, a Plinko board can be a big hit, offering endless entertainment for guests of all ages.
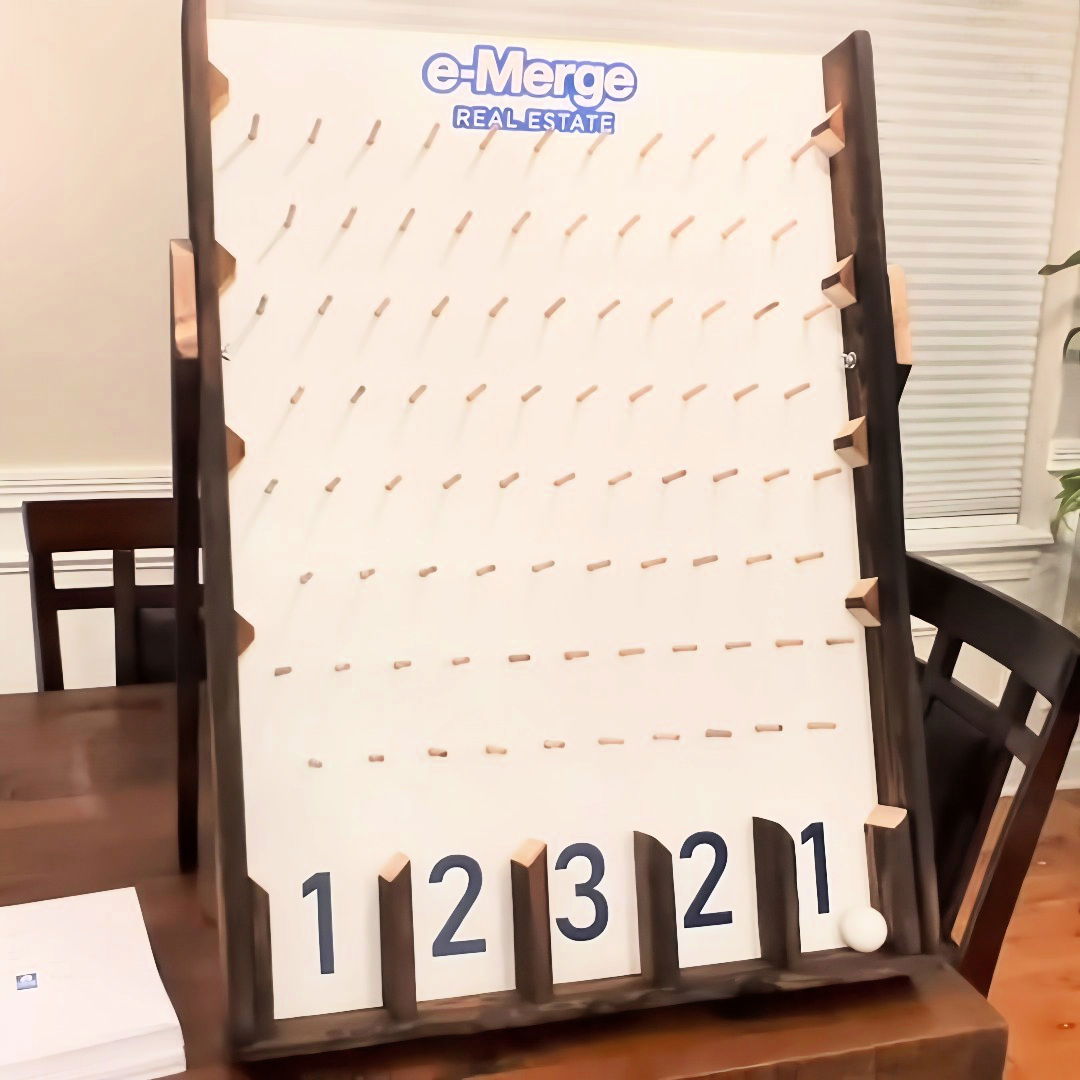
In the next section, we will detail each step to ensure your Plinko board is both functional and visually appealing. The materials required are easy to find, and with a little effort, you'll have a Plinko board ready in no time. Let's dive into the specifics and make your party unforgettable.
Materials You'll Need
Before diving into the assembly, gather the essential materials:
- 1x4 Lumber: Used for the frame of the Plinko board.
- Quarter-inch MDF Panel: Acts as the playing surface.
- Two-inch Wood Dowels: Used for the pegs.
- Boiled Linseed Oil: Helps protect and beautify the wood.
- Wood Glue: Ensures strong bonding of the parts.
- Nylax Flat Brush: For the brushing technique.
- Propane Torch: For the Shou Sugi Ban technique.
- Ping Pong Balls: The game pieces.
- Brad Nails and a Brad Nailer: Secure parts together.
- Forstner Bit and Screws: Attach parts securely.
Tools
- Table Saw
- Miter Saw
- Drill and Drill Bits
- Clamps and Clamping Squares
- Speed Square
- Cricut Machine (for customization)
These materials and tools are essential to build a sturdy and aesthetically appealing Plinko board.
Step by Step Instructions
Learn how to make a DIY plinko board with easy, step-by-step instructions. Perfect for game enthusiasts and DIY project lovers!
Step 1: Preparing the Frame Lumber
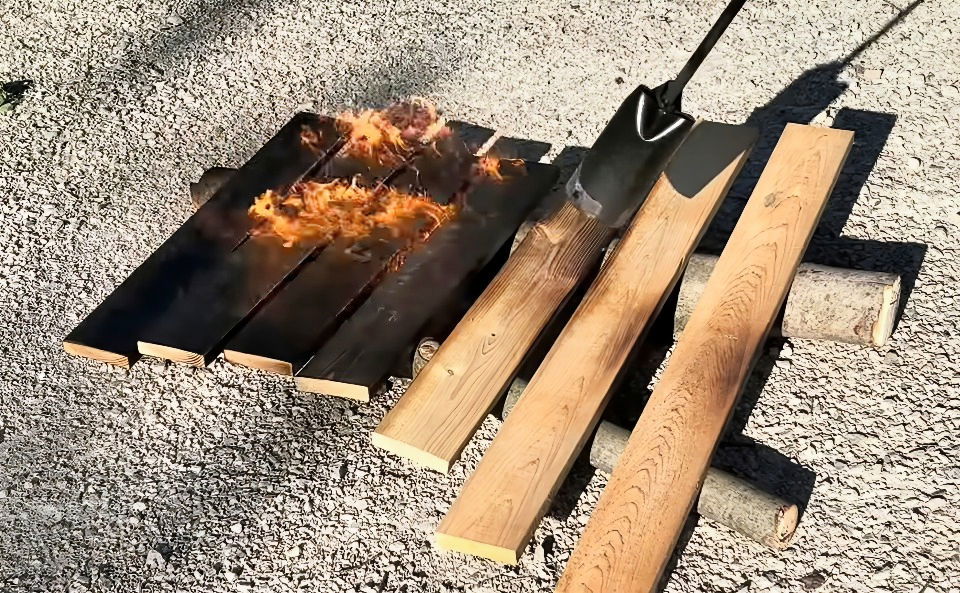
First, I took some 1x4 lumber from my lumber rack. They weren't in the best shape, so I decided to use a Shou Sugi Ban technique—burning the wood with a propane torch to make the grain pop and add a unique, durable finish.
Shou Sugi Ban Technique
- Burn the Wood: Consistently move the torch across the wood to achieve an even burn. I prefer a deep burn for a more dramatic effect.
- Brushing: Use the Nylax flat brush to remove the soot, revealing the wood grain. Different brushes offer different finishes—80 grit for a rougher look and 240 grit for a smoother finish.
- Applying Oil: After brushing, apply boiled linseed oil. This enhances the grain and protects the wood.
Step 2: Cutting the MDF Panel
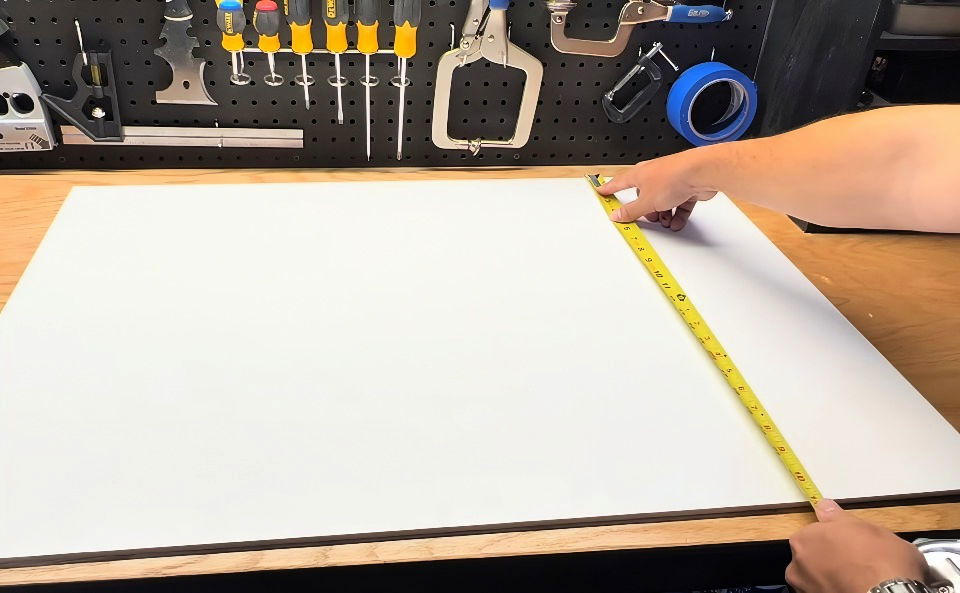
Using an MDF panel from an old dresser, I trimmed off the damaged corner on my table saw. This piece was already white and smooth, perfect for the Plinko board's surface.
Final Dimensions
- Height: 33 inches
- Width: 23 inches
Mark and cut the boards to these dimensions, ensuring the cuts are precise.
Step 3: Assembling the Frame
Learn the steps for assembling the frame with precise measuring and cutting techniques. Follow our guide for a perfect assembly every time.
Measuring and Cutting
- Vertical Sides: Cut two pieces of lumber to 33 inches.
- Horizontal Supports: Cut three 23-inch pieces for the inner frame supports and one 24.5-inch piece for the bottom of the frame.
Assembling the Frame
- Dry Fit: Mock up the frame to ensure everything fits.
- Pocket Holes: Use a Kreg Jig to make pocket holes on the ends of the supports.
- Assembly: Assemble the frame using pocket hole screws, ensuring the use of clamping squares to maintain accurate right angles.
Step 4: Preparing the Plinko Board
Discover how to prepare your plinko board by expertly drilling holes for pegs. Enhance your DIY game skills with our step-by-step guide.
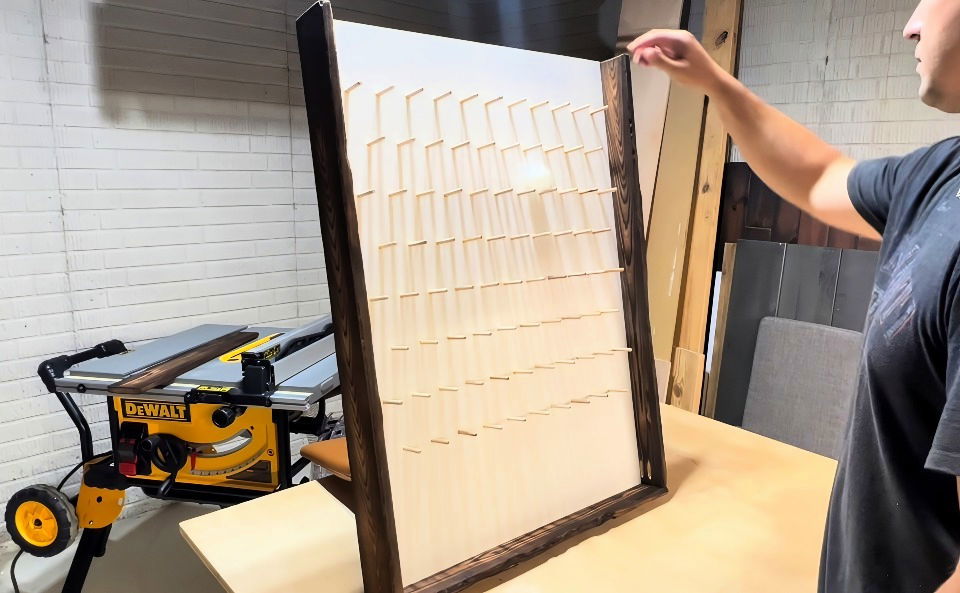
Drilling Holes for Pegs
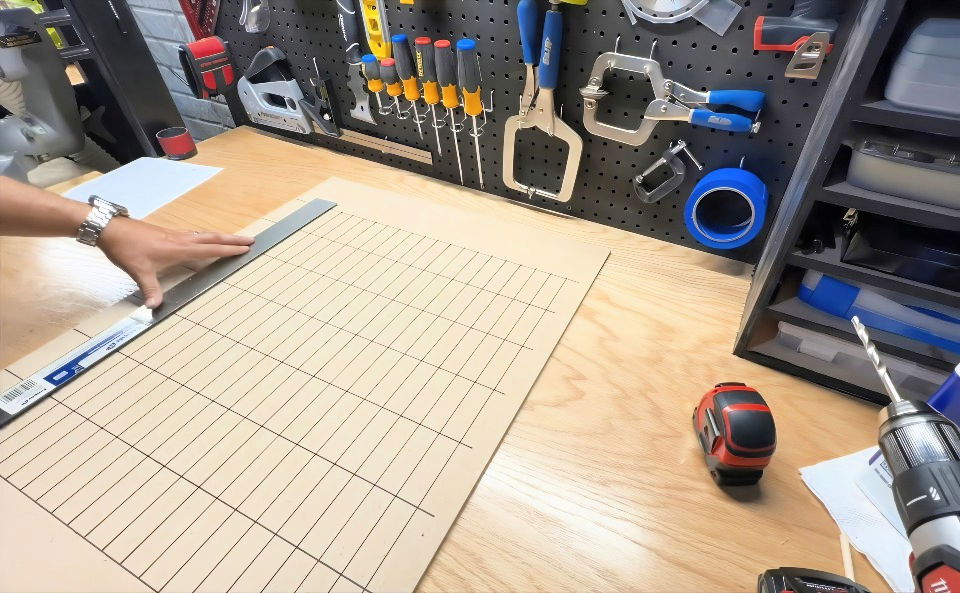
- Mark the Grid: Start 8 inches from the bottom and mark every 3 inches up to 29 inches. Mark horizontal lines every 1 inch, leaving a 1.5-inch gap on each side.
- Drill Holes: Drill 84 holes using a quarter-inch bit. Make sure to support the board underneath with scrap lumber to prevent tear-out.
Step 5: Inserting the Dowels
Glue the ends of the dowels and insert them into the holes. Ensure they are straight and let them dry.
Step 6: Attaching the Plinko Board to the Frame
- Dry Fit the Board: Check the fit of the board within the frame.
- Gluing: Apply wood glue to the inner supports.
- Securing: Use clamps to hold the board in place while the glue dries. Add screws for extra security.
Step 7: Adding the Dividers
Learn how to cut and install dividers with ease. Step-by-step guide to adding, cutting, and installing dividers for your space.
Cutting the Dividers
- Bottom Dividers: Cut a piece of lumber to 2 1/8 inches tall, this will ensure the ball doesn't get stuck.
- Dividers: Cut six 5-inch long pieces. Using a table saw, cut these at a 45-degree angle.
Installing Dividers
- Position and Glue: Position the outermost dividers first. Apply glue and secure with brad nails.
- Space and Install: Fit and glue the remaining dividers ensuring the spaces are equal (around 3 3/4 inches wide).
Step 8: Making and Attaching Legs
- Cut Legs: Measure and cut the legs to 26 inches.
- Attach Legs: Clamp them in place and secure with screws and wing nuts for easy removal.
Step 9: Testing and Final Adjustments
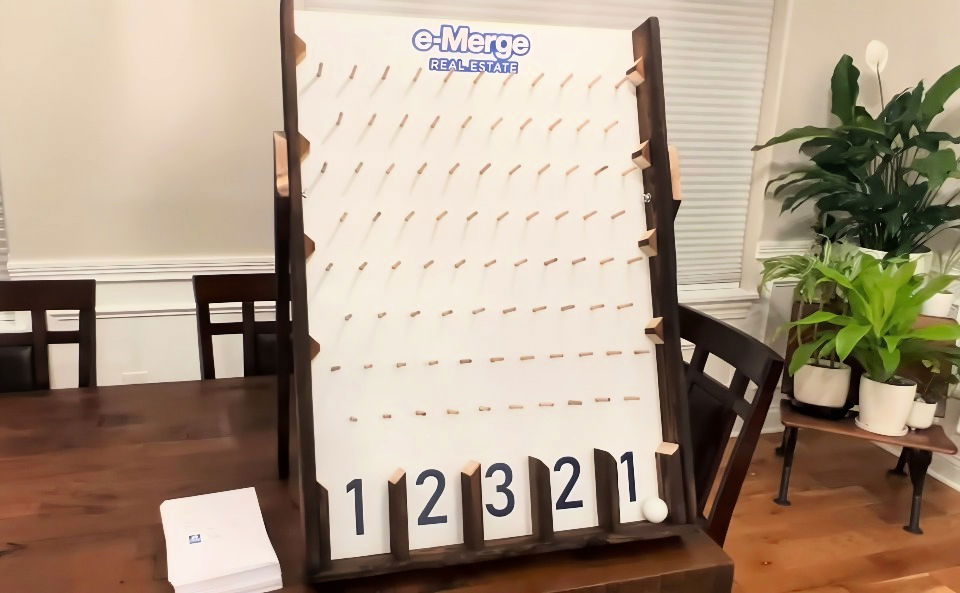
Before the final touches, ensure the ping-pong balls move smoothly. I discovered that adding small triangles above the outermost pegs helped prevent the balls from getting stuck.
Customization
Using a Cricut machine, I added a custom logo and number decals to give the board a professional look.
Design Customization Ideas
Building a DIY Plinko board is not just about functionality; it's also an opportunity to express your creativity. Here are some design customization ideas that can make your Plinko board stand out:
- Choose a Theme: Start by selecting a theme that resonates with you or the event where the board will be used. Themes can range from classic game show styles to holiday celebrations, sports teams, or even personal milestones like birthdays or weddings.
- Color It Up: Use colors to bring your board to life. If it's for a party, match the colors to the party's theme. For a more personal touch, use your favorite colors or those that evoke certain emotions, like calm blues or energetic reds.
- Add Patterns and Graphics: Incorporate patterns or graphic elements into your design. This could be anything from chevron patterns to polka dots, or even images like stars, hearts, or custom illustrations that reflect the theme.
- Personalize with Names or Messages: If the board is for a special occasion, personalize it with names, dates, or messages. For example, “Sarah's 30th Birthday Bash” or “Welcome Home, Sgt. Johnson” can add a meaningful touch.
- Interactive Elements: Consider adding elements that interact with the game, like sections that light up when hit or sound effects that add excitement to the gameplay.
- Materials Matter: The materials you choose can also contribute to the design. For instance, a sleek, glossy finish might give a modern look, while a rustic wood finish could lend a cozy, vintage feel.
- Accessorize: Don't forget the accessories. The pucks can be customized too, perhaps with stickers or painted designs. Even the prize slots at the bottom can be decorated with labels or icons.
The goal is to make your plinko board not only fun to play but also a joy to look at. keep it simple, keep it you, and most importantly, have fun with it!
Advanced Customization
For those who love a challenge and want to take their DIY Plinko board to the next level, advanced customization can transform a simple game into a dazzling centerpiece. Here's how you can incorporate technology and intricate design elements into your Plinko board:
- Incorporate Lighting: LED strips can be added along the edges or behind the board to make a dynamic backlight effect. You can program these lights to change color when a puck passes by or when it lands in a specific slot.
- Sound Effects: Small sound modules, like those used in greeting cards, can be installed to play a sound when a puck lands. Choose from applause, cheers, or even personalized messages.
- Digital Scoreboard: If you're handy with electronics, consider adding a digital scoreboard using an LCD screen. This can keep track of scores or display messages.
- Motorized Elements: Add a motorized mechanism to reset the board or release pucks automatically. This could be as simple as a servo that tilts the board to return pucks to the start.
- Smartphone Integration: With a Bluetooth module, you can connect your Plinko board to a smartphone app. This could control the lights and sounds and even keep score.
- Custom Pucks: 3D printing allows you to make custom pucks with unique shapes or embossed designs. You could also embed RFID chips to trigger specific lights or sounds when used.
- Interactive Display: For a truly high-tech board, incorporate a touchscreen display where players can select their game mode or view instructions.
- Sensors: Use sensors to detect where a puck lands and trigger specific actions, like starting a light sequence or adding points to the scoreboard.
The key to advanced customization is planning. Sketch out your ideas, list the materials and tools you'll need, and take it step by step. And most importantly, ensure all electrical components are safely installed and enclosed to prevent any accidents.
Troubleshooting Common Issues
When crafting a DIY Plinko board, you might encounter a few hiccups along the way. Here's a guide to troubleshooting common issues, ensuring your Plinko game runs smoothly:
Pucks Don't Slide Well
- Solution: Ensure the surface is smooth and clean. If it's a wooden board, a fine sandpaper can help smooth out any rough spots. Applying a layer of wax can also reduce friction.
Pucks Get Stuck
- Solution: Check for any nails or screws that may be protruding and gently hammer them flat. Also, make sure the pegs are evenly spaced and securely fastened.
Inconsistent Bouncing
- Solution: If the pucks are bouncing unpredictably, it might be due to uneven peg placement. Use a ruler or template to ensure all pegs are aligned and evenly spaced.
Board is Unstable
- Solution: A wobbly board can be fixed by adding a sturdy base or adjusting the support legs to ensure they're of equal length and properly attached.
Prize Slots are Too Tight or Loose
- Solution: Measure the slots carefully and adjust as necessary. For too tight slots, widen them slightly with a file. For loose slots, add a piece of felt or rubber to make a snug fit.
Difficulty Seeing the Puck
- Solution: If visibility is an issue, consider painting the pucks a bright color or adding reflective tape. Good lighting can also make a big difference.
Wear and Tear
- Solution: Regular maintenance is key. Tighten any loose screws, replace worn-out parts, and give your board a fresh coat of paint or sealant when needed.
By addressing these common issues, you'll ensure that your DIY Plinko board provides hours of fun and stays in great condition for future use.
FAQs About DIY Plinko Board
Learn everything about DIY plinko boards! Get answers to FAQs on building, materials, and tips for a perfect homemade plinko game.
Measure and mark the locations for your pegs on the MDF panel, ensuring they are evenly spaced. Drill holes at these marks and insert dowels to act as pegs. The dowels should fit snugly but not so tight that they split the wood.
Customization can be as simple as painting the board in your favorite colors or as intricate as adding LED lights for a modern twist. You can also add labels or point values at the bottom slots to make a scoring system.
Yes, to enhance durability:
Use a sealer or varnish on the wood to protect against moisture
Ensure all joints are securely fastened
Consider using plexiglass over the MDF panel for a smooth, long-lasting surface
Regularly check and tighten any loose parts.
To ensure even spacing of the pegs, start by drawing a grid on your MDF panel using a ruler or a straight edge. The common spacing is about 2 to 3 inches apart in staggered rows. Once the grid is drawn, mark the intersection points where the pegs will go. Use a drill with a bit that matches the size of your dowels to make holes at these points. Insert the dowels into the holes, making sure they’re perpendicular to the board for the best gameplay experience.
Yes, even if you're new to woodworking, you can still make a Plinko board. Start with a simple design and pre-cut materials available at most hardware stores. Follow step-by-step instructions carefully, and don't hesitate to ask for help when needed. There are also kits available that include all the necessary parts and detailed instructions, making the process easier for beginners.
Final Thoughts
Building a DIY Plinko board was a fantastic project combining creativity, functionality, and a touch of customization. It's a delightful game that adds fun to any event, and the steps outlined ensure you can make your version with ease and precision.


