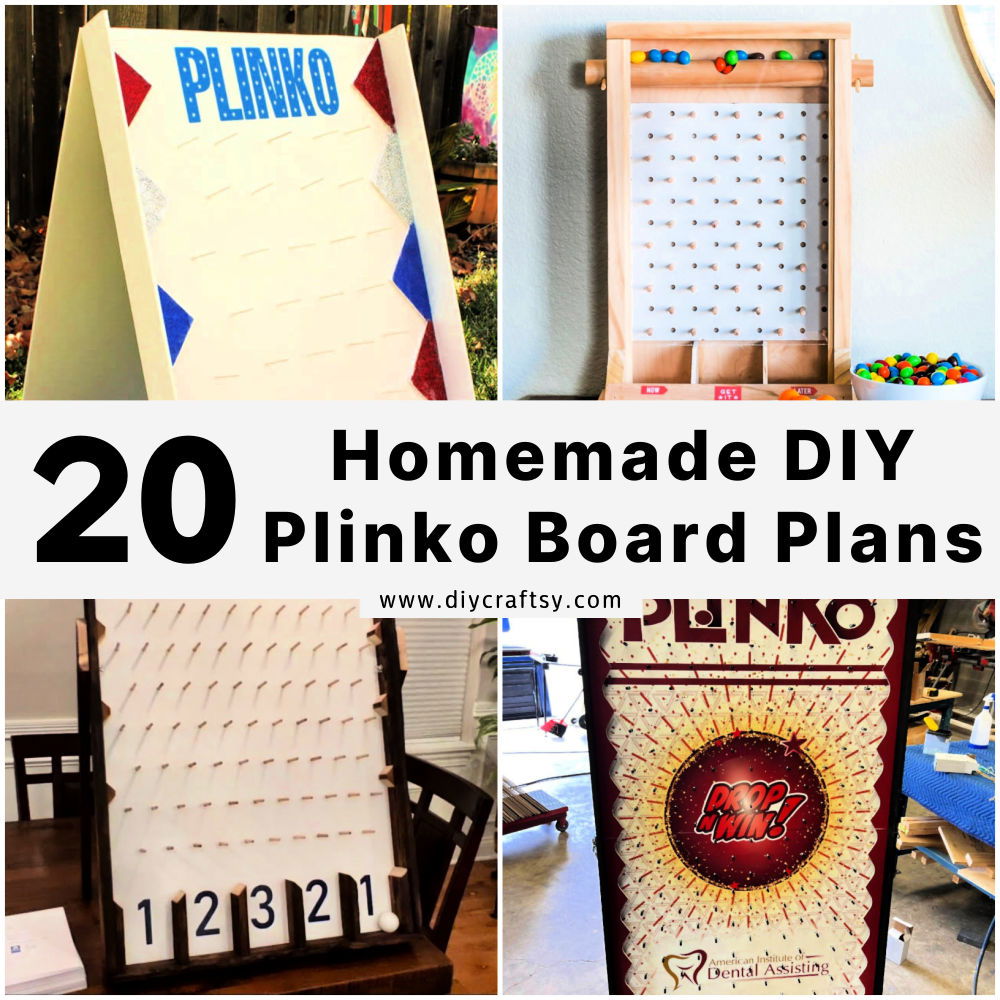
Making your very own DIY Plinko board can bring a touch of fun and creativity into your home, sparking joy and engaging everyone in timeless entertainment. These 20 homemade DIY Plinko board plans offer a comprehensive guide on how to craft this classic game from scratch, ensuring that the end result is both functional and visually appealing. With precise instructions and a detailed list of necessary materials and tools, your journey to making a custom Plinko board starts here.
The process of making a Plinko board is not just about assembling wood and nails; it's an opportunity to develop your crafting skills, experiment with design, and maybe even bond with loved ones over a shared project. By following these step-by-step instructions, from preparing the frame to the final touches of adding legs and dividers, you'll learn not only the basics of woodworking but also the small details that make a DIY project truly yours. So, get ready to embark on this creative endeavor that promises lots of fun and a sense of achievement upon completion.
Why Make a DIY Plinko Board?
Making your own Plinko board isn’t just a fun project; it offers numerous benefits that extend beyond the joy of playing the game. Here's why you should consider building one:
- Cost-Effective: Making a Plinko board yourself can be significantly cheaper than buying a premade one. You can often use materials you already have at home or can easily access, saving you money.
- Customization: DIY allows you to tailor your Plinko board to your specific desires. Whether it’s size, color, or theme, you have the freedom to make it uniquely yours.
- Family Bonding: Building a Plinko board can be a fantastic family activity. It encourages teamwork, teaches valuable skills, and results in a product that everyone can enjoy together.
- Educational: For those with children, this project can be a fun and interactive way to teach measuring, cutting, and the importance of accuracy. It also introduces basic principles of physics and probability.
- Entertainment Value: A Plinko board is a hit at parties, family gatherings, or even as a solo pastime. It’s a game that’s easy to play but hard to stop enjoying.
- Satisfaction: There’s a unique sense of accomplishment that comes from building something with your own hands. This satisfaction is something that buying a premade board simply cannot offer.
Making a DIY Plinko board is a rewarding project that offers entertainment, education, and the opportunity to make something special for your home.
Choosing the Right Materials for Your DIY Plinko Board
Creating a DIY Plinko board can be a fun and rewarding project. The materials you choose will significantly impact the cost, durability, and gameplay of your Plinko board. Here's a guide to help you make informed decisions.
The Backboard
Plywood
- Cost: Generally affordable, making it a great option for those on a budget.
- Durability: Quite durable but susceptible to warping if exposed to moisture.
- Smoothness: Smooth enough for gameplay but may require sanding and painting for an optimal surface.
MDF (Medium Density Fiberboard)
- Cost: Comparable to plywood, slightly more expensive but still budget-friendly.
- Durability: Less prone to warping than plywood but can swell and deteriorate if it gets wet.
- Smoothness: Offers a very smooth surface, ideal for the seamless movement of the Plinko puck.
Acrylic
- Cost: The most expensive option among the three.
- Durability: Highly durable and resistant to breaking, withstanding lots of use.
- Smoothness: Extremely smooth, allowing the puck to glide effortlessly.
The Pegs
Wooden Dowels
- Ease of Installation: Simple to install; you just need to drill holes and glue them in.
- Sturdiness: Fairly sturdy but may loosen over time, especially with vigorous gameplay.
Nails
- Ease of Installation: Very easy to hammer into place but might not provide the most uniform look.
- Sturdiness: Can be quite sturdy, but there's a risk of bending or rusting over time.
Screws
- Ease of Installation: Requires pre-drilling but ensures a secure fit.
- Sturdiness: Offers excellent durability and sturdiness, unlikely to loosen with use.
The Cover
Plexiglass
- Impact on Gameplay: Clear, offering good visibility while protecting the board and pegs.
- Safety: Shatter-resistant, making it a safer option than standard glass.
- Cost: More expensive than not using a cover but more affordable and safer than glass.
Standard Glass
- Impact on Gameplay: Offers excellent clarity but doesn't provide any additional gameplay benefits over plexiglass.
- Safety: Can shatter if impacted, posing a safety risk.
- Cost: Can be expensive, depending on the thickness and type of glass chosen.
No Cover
- Impact on Gameplay: No barriers to gameplay; however, pegs and the board are more susceptible to damage.
- Safety: No risk of shattering, but exposed pegs might catch or scratch.
- Cost: The most cost-effective option as it eliminates the need for additional materials.
When choosing materials for your DIY Plinko board, consider how often you'll use it, where it will be stored, and who will be playing. Each material has its trade-offs, but the right choices will ensure your Plinko board is a hit at any gathering.
How to Make a Plinko Board
Making a Plinko board can add fun and excitement to any event. Whether for personal enjoyment or enhancing a business booth, follow these simple steps to build your own Plinko game. This guide is designed to be helpful, easy to understand, and focused on providing people-first content.
Materials and Tools You Will Need
- 1x4 lumber for the frame
- Quarter-inch MDF panel
- Wood dowels (2 inches)
- Wood glue
- Screws (half an inch)
- Boiled linseed oil
- Tools: Saw, drill, sander, pocket hole jig, Kreg jig, clamps, speed square, forstner bit, miter saw, table saw
Step 1: Preparing the Frame
Grab some 1x4 lumber and cut two pieces to 33 inches for the height of the frame and one piece to 24.5 inches for the bottom. You will also need three 23-inch boards to support the top, middle, and bottom of the Plinko board. If your lumber isn't in the best shape, consider using a technique like shou sugi ban to add a nice finish and make the wood grain pop.
Step 2: Preparing the Board
Use a quarter-inch MDF panel, which can be repurposed from old furniture. Ensure it's cleanly trimmed to fit within your frame dimensions, ideally 33 inches by 23 inches.
Step 3: Burning and Brushing (Optional)
For added character, you can char the wood with a propane torch, then brush it to reveal varying shades within the wood. Remember to use safety gear like gloves and eye protection during this process.
Step 4: Applying Finish
Protect and seal the wood by applying boiled linseed oil with a rag, following the wood grain direction. Only apply oil to visible parts of the frame.
Step 5: Marking and Drilling the Board
Mark a grid for where you want your Plinko pegs to go. A good starting point is eight inches from the bottom, marking every three inches up, and marking every one inch across with a 1.5-inch gap on the sides. Drill holes using a quarter-inch drill bit.
Step 6: Adding Pegs
Insert two-inch wooden dowels into the drilled holes. Glue the dowels in place, making sure they're straight.
Step 7: Assembling the Frame
Build the frame using the cut lumber, attaching the pieces with pocket hole joinery for a clean look. Secure the three 23-inch supports inside the frame.
Step 8: Attaching the Frame to the Board
Once the pegs are set, glue and clamp the board to the frame. For extra security, you can use screws, ensuring they go deep enough to grip both the board and the frame.
Step 9: Adding Legs and Dividers
Determine the height for the legs, so your Plinko board stands at a desirable angle. For the dividers at the bottom, segment the bottom edge into equal sections for the Plinko slots and attach using glue and nails.
Step 10: Test and Enjoy
Before making the final touches, test your Plinko board to ensure the ball flows smoothly through the pegs and into the dividers without getting stuck.
Troubleshooting
If you notice the ball gets stuck at any point, specifically between the end pegs and frame, consider adding angled pieces to guide the ball away from these areas.
Video Tutorial
For a step-by-step video tutorial on how to make a Plinko board, watch this YouTube video.
It pairs well with this written guide, adding a dynamic perspective to the crafting process.
Following these instructions will help you make a custom Plinko board perfect for any gathering. Enjoy the process and the fun that comes after!
Customizing Your DIY Plinko Board Design
Personalizing your Plinko board can make it truly special. Let's dive into the ways you can customize your board, from peg patterns to creative flourishes, ensuring your Plinko board is a one-of-a-kind creation.
Peg Patterns
- Triangle: The most common pattern, resembling a triangle, evenly spaces the pegs in rows. This pattern offers a predictable yet random path, making the game fair and exciting.
- Diamond: A diamond pattern creates a more complex journey for the puck. It can speed up the game and make the landing slot less predictable.
- Random: For a truly unpredictable game, random peg placement challenges players by creating a unique path every time. This setup requires careful planning to ensure it's still possible for the puck to reach every slot.
Printable Template: To simplify the layout process, consider using a printable template. This can help you evenly space the pegs and experiment with different patterns before committing.
Slot Ideas
- Simple Slots: Classic, straightforward slots with different point values or labels are easy to create and understand, making them perfect for quick games.
- Prize Boxes: Each slot could lead to a small box or compartment containing different prizes. This adds an element of surprise and excitement to the game.
- Themed Designs: Tailor your Plinko board to fit a theme, such as holidays, sports teams, or popular movies. This can include themed slots that match the overall design, enhancing the visual appeal and engagement.
Creative Touches
- Painting Themes: A coat of paint can transform your Plinko board. Choose a theme or color scheme that resonates with you, from vibrant patterns to your favorite team's colors.
- Decorative Borders: Adding a decorative border not only enhances the board's appearance but also helps contain the puck. Consider using moldings or even LED strips for a modern look.
- Lights and Sound Effects: For the ultimate Plinko experience, incorporate lights that flash when a slot is hit or sound effects that play. This could be as simple as battery-operated string lights or more complex with programmable electronics.
Creating a DIY Plinko board lets you craft a unique game reflecting your style and creativity for fun family nights or game-themed parties.
Game Variations and Rules
Plinko is a beloved game that combines luck and a bit of strategy. Whether you’re crafting a DIY Plinko board for a party, family game night, or educational purposes, understanding the classic rules and exploring variations can make your game even more enjoyable.
Classic Plinko
Basic Point System: In Classic Plinko, players drop pucks from the top of the board. The board is vertically positioned and filled with a field of pegs that disrupt the puck's path as it falls. The bottom of the board has slots marked with different point values. Wherever the puck lands, the player earns those points. Typically, the slots in the center have higher points, making them more desirable but harder to hit.
How to Win: The winning criteria can vary, but a common approach is setting a target score. Players take turns dropping pucks until someone reaches or surpasses this score. Alternatively, each player gets a set number of pucks, and the highest total score after all pucks have been played wins.
Variations
- Double-Drop Pucks: Introduce a special puck that, when played, allows the player to drop two regular pucks simultaneously on their next turn. This can double the points earned, adding an exciting twist.
- Obstacles on the Board: Adding movable obstacles, such as small barriers or additional pegs, can alter the difficulty. Players can strategically place these before their turn, aiming to direct the puck to high-point slots.
- Themed Prize Slots: Instead of point values, the bottom slots can hold different prizes or challenges. This variation is perfect for parties. Prizes can range from small toys to chore exemptions, making the game adaptable to various settings.
Fairness and Difficulty
- Adjusting Peg Spacing: The spacing between pegs greatly affects the game's difficulty. Closer pegs create a more challenging path, as the puck has less room to fall straight down. Wider spacing offers an easier game, suitable for younger players.
- Board Angle Adjustment: The angle of the board also dictates the game’s challenge level. A steeper angle results in a faster drop and less predictable path, raising the difficulty. A more gradual angle provides a slower descent, giving players a slight edge in aiming for high-value slots.
By adjusting these elements, you can fine-tune your Plinko board for different audiences and occasions, ensuring everyone has a fair chance and a great time.
Tips and Troubleshooting
Creating a DIY Plinko board can be a fun and rewarding project. However, achieving a game that's both fair and functional requires attention to detail, especially when it comes to puck paths, safety, and avoiding common mistakes.
Perfecting Puck Paths
Uneven Bounces: If your Plinko pucks are not bouncing as expected, resulting in predictable or uneven paths, it might be time to adjust your peg placement. Pegs should be evenly spaced in a staggered pattern to ensure random bounces. If you notice a consistent pattern, try shifting some pegs slightly to disrupt the path. Minor adjustments can make a significant difference.
Dead Zones: Dead zones, where pucks get stuck, can halt the fun. To fix this, ensure there's enough space between your pegs and the board's sides. Pegs should be no closer than 2 inches from the board's edges. If pucks frequently get stuck behind pegs, consider slightly reducing the peg diameter or increasing the space between pegs in problem areas.
Safety Considerations
Using Plexiglass: For the cover, plexiglass is a popular choice due to its clarity and durability. When installing, ensure the edges are smooth to prevent injuries. Secure the plexiglass with screws at the corners and along the edges at intervals of 10-12 inches to keep it firmly in place.
Securing the Board: To prevent your Plinko board from tipping over during use, ensure it has a sturdy base. If you're using it on a table, consider attaching non-slip pads or weights at the base. For freestanding boards, a wider base or support legs at the back can help maintain stability.
Common Mistakes
Overcrowding Pegs: Packing too many pegs onto the board can lead to frequent dead zones and less enjoyable gameplay. Ensure there's ample space for the puck to navigate the pegs.
Ignoring Angle: The angle of your Plinko board is critical for smooth gameplay. Too steep, and the pucks may fly too quickly to enjoy the game; too shallow, and they might not have enough momentum. A good starting angle is between 15 to 20 degrees.
Forgetting Test Runs: Before finalizing your peg placement, conduct several test runs with the pucks. This allows you to identify and correct issues with puck paths, dead zones, and bounce behavior.
By focusing on these tips and troubleshooting common issues, you can create a Plinko board that's not only fun to play but also safe and visually appealing.
DIY Plinko Board FAQS
Making a DIY Plinko board can be a fun and rewarding project. To help you on your journey, here are some commonly asked questions and their answers.
What materials do I need to make a DIY Plinko board?
To make your own Plinko board, you will typically need:
- 1x4 lumber for the frame
- A quarter-inch MDF panel for the board
- Wood dowels, 2 inches in length, for the pegs
- Wood glue and screws (half an inch) for assembly
- Boiled linseed oil or your choice of finish
- Tools including a saw, drill, sander, and clamps
Can I customize my Plinko board?
Absolutely! One of the joys of making a Plinko board yourself is the ability to customize it. You can choose the size, color, and theme according to your preferences or the event it's being made for.
Is it cheaper to build a Plinko board than to buy one?
In many cases, yes. Building a Plinko board can be significantly more cost-effective, especially if you already have some of the required materials or can repurpose items such as old furniture for the board.
What is the best wood to use for a Plinko board?
For the frame, 1x4 lumber is sturdy and easy to work with. For the board itself, a quarter-inch MDF panel is recommended due to its smooth surface, which is ideal for the Plinko pegs and the ball to slide down.
How can I ensure the pegs are securely attached?
When inserting the wooden dowels into the drilled holes on your board, using wood glue will help to secure them in place. Make sure the pegs are straight before the glue dries for the best gameplay experience.
How do I prevent the ball from getting stuck?
During the testing phase, if you notice the ball tends to get stuck, consider adding angled pieces or adjustments at the problematic areas to guide the ball away from corners or between pegs.
Can I make a Plinko board if I'm new to woodworking?
Yes, making a Plinko board can be a beginner-friendly project. Many guides, including the ones mentioned in this article, provide step-by-step instructions that are easy to follow, even for those new to the craft.
How do I apply finish to the Plinko board?
Applying a finish like boiled linseed oil can protect the wood and give it a polished look. Use a rag to apply the oil along the wood grain direction, focusing on the visible parts of the frame for a consistent appearance.
What tools do I need to build a Plinko board?
The essential tools include a saw for cutting the wood, a drill for making holes for the pegs, a sander to smooth the surfaces, and clamps to hold pieces together as you work. Depending on the design, additional tools like a pocket hole jig or a forstner bit may be helpful.
Where can I find a video tutorial on making a Plinko board?
YouTube is a great resource for finding video tutorials on making a Plinko board. Many DIY enthusiasts and craftsmen share their projects, offering visual guidance that complements written instructions.
Building your own Plinko board can be a fun project with practical benefits, from saving money to enjoying a custom game at home. With the right tools and materials, plus a bit of creativity, you can make a board that brings joy to family gatherings, parties, and events for years to come.
20 Homemade DIY Plinko Board Plans (How to Make)
Discover 20 homemade DIY plinko board plans and learn how to make your own exciting game with step-by-step instructions. Start making today!
1. How to Make a Plinko Game Board
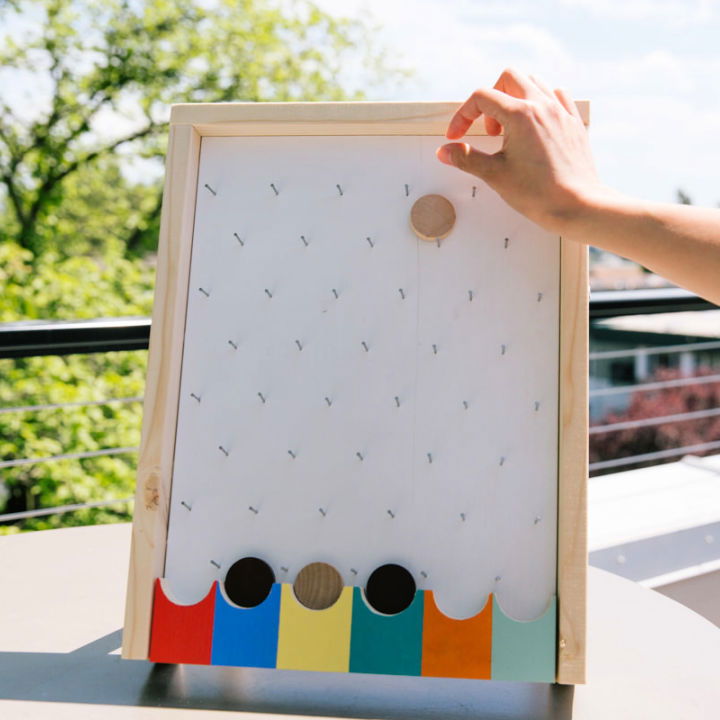
Discover how to make your own Plinko game board with this step-by-step guide from Dunn DIY. Perfect for summer backyard fun, this DIY project simplifies the process with clear instructions, making it an engaging activity for crafters. Learn to measure, cut, and assemble the board, add a colorful touch, and set up your game for hours of enjoyment.
With practical tips and a focus on usability, you'll have a homemade Plinko board that's not only easy to store but also a hit at gatherings. Get ready to drop tokens and score points with your very own handcrafted game board.
2. Simple DIY Wooden Plinko Board
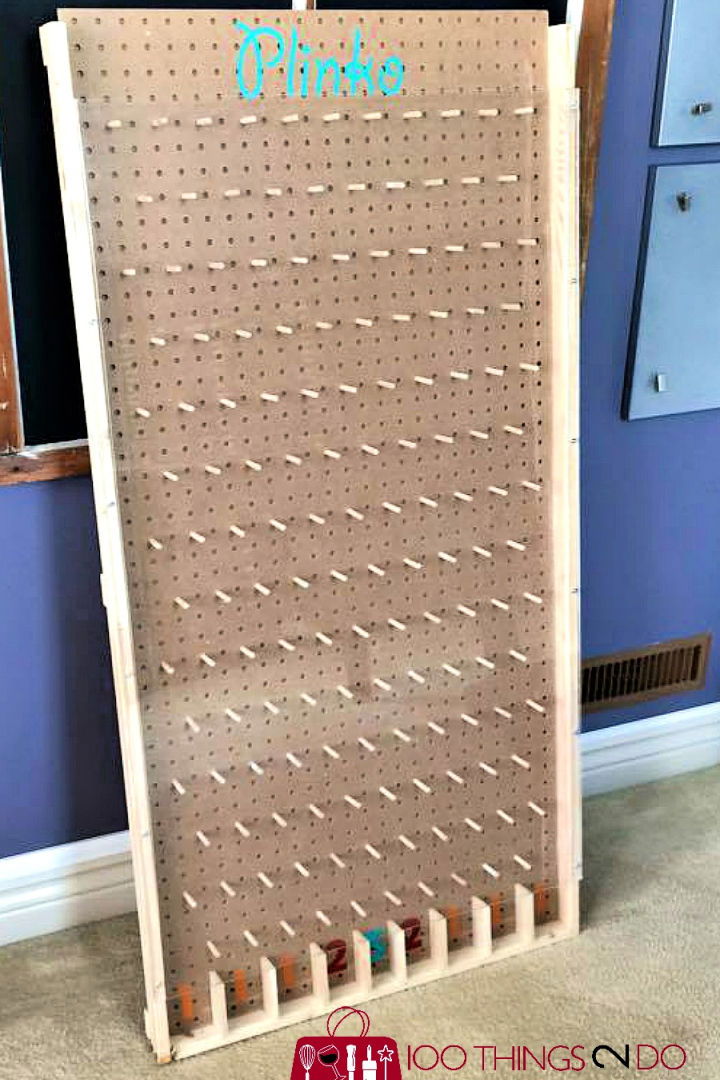
Making a Plinko board can be a thrilling project for school carnivals or family gatherings. At 100 Things 2 Do, you'll find clear instructions to build your own giant Plinko game. With a straightforward materials list and simple steps, anyone can craft this entertaining board.
The guide helps you assemble a sturdy frame, perfectly place the pegs, and suggests materials for your Plinko chips. Whether you aim to fundraise or just enjoy some backyard fun, this DIY Plinko board is a hit that's also easy to store. Follow the guide for a rewarding build and hours of enjoyment.
3. Free Plinko Board Woodworking Plan
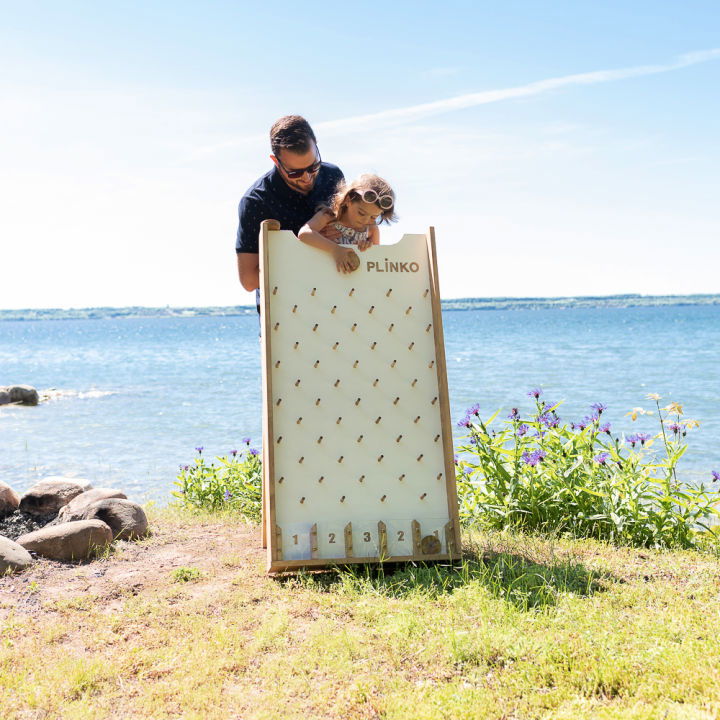
Ready to add a touch of nostalgic fun to your gatherings? Nick + Alicia offers free plans for crafting a Plinko board, perfect for livening up backyard parties, school events, or adding excitement to a playroom. With easy-to-follow instructions, this project doesn't demand expert woodworking skills, making it accessible to all DIY enthusiasts.
Dive into the detailed guide and enjoy the satisfaction of making your own game that spans generations. Build, play, and watch as family and friends revel in the excitement of this timeless game. Share your finished Plinko board with us; we're eager to celebrate your handiwork!
4. Handmade Backyard Plinko Party Game Board
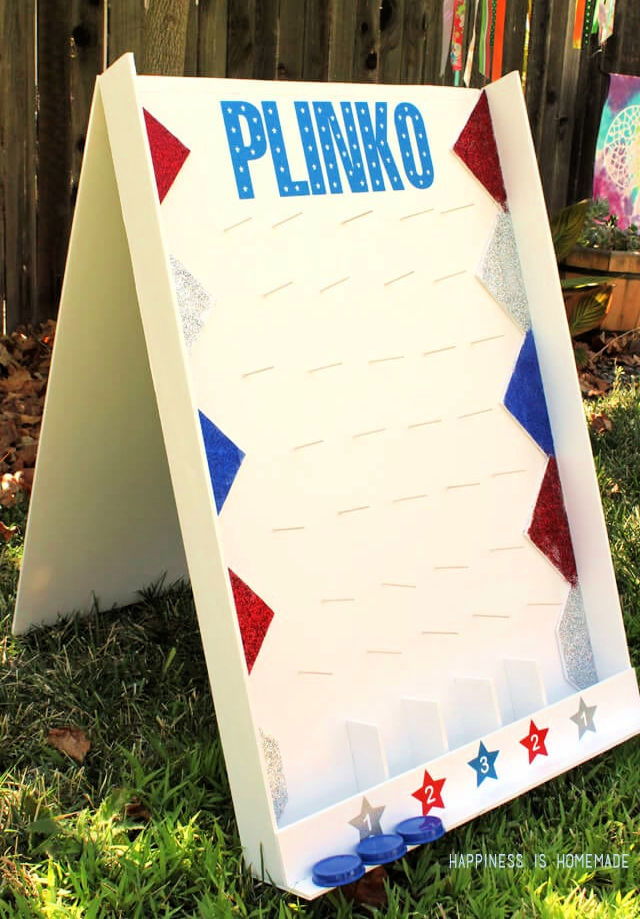
Make a DIY backyard Plinko game with Happiness is Homemade's easy guide, perfect for spicing up your next party or carnival. All you need is Elmer's Foam Board, some glue, and a few other materials to craft this classic game with a personal touch.
Follow the step-by-step instructions to assemble and decorate your game board, make durable pegs, and prepare for hours of enjoyment. With this homemade Plinko, you'll not only entertain guests but also help kids sharpen their math skills during play. Get ready for a memorable Labor Day weekend or any festive gathering with this engaging and creative activity.
5. Building a Plinko Board With Step by Step Instructions
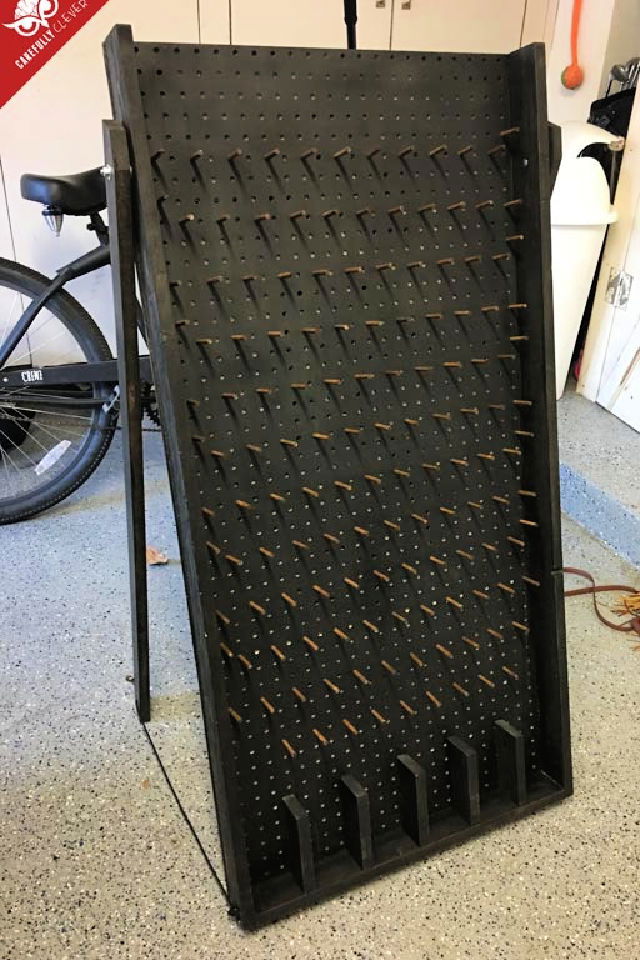
Making a Plinko board, popularized by "The Price is Right," is a fun and straightforward DIY project that adds excitement to any gathering. Carefully Clever provides a comprehensive guide on constructing your own Drinko version, ideal for events like Fantasy Football draft parties. You'll need basic supplies such as pegboard, dowels, and wood for the frame, alongside tools like a saw and sander.
The instructions are clear, from cutting the wood to assembling the frame and adding the finishing touches. Painting and personalizing your board allows for a unique touch, while the use of a ping pong ball ensures smooth play. With Carefully Clever's helpful and engaging steps, you'll be ready to entertain in no time with your handcrafted game.
6. Beginner-Friendly DIY Plinko Board
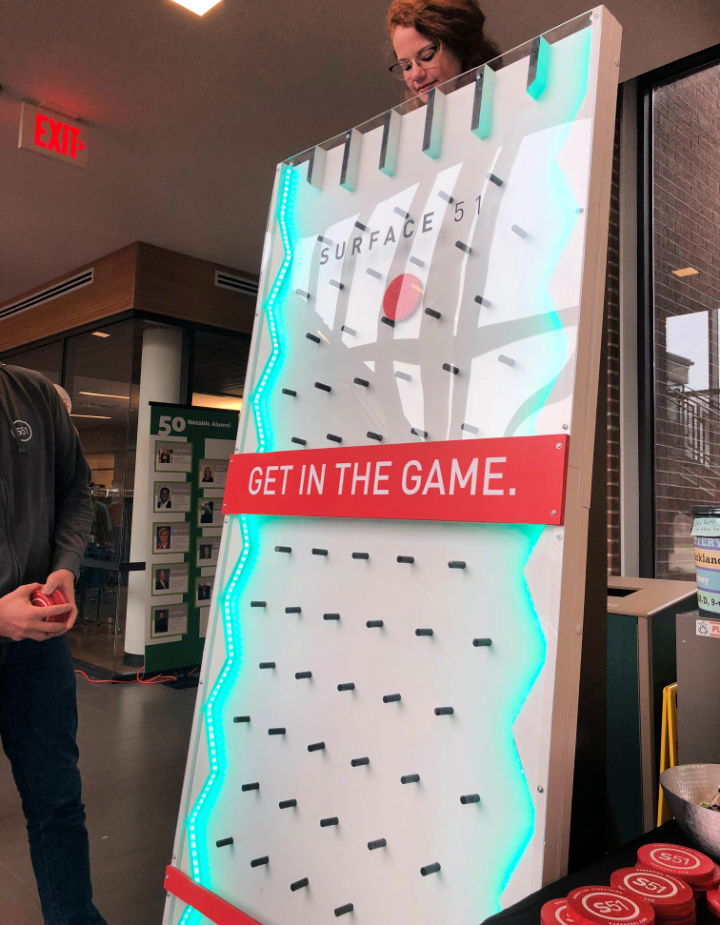
Discover how to make a Plinko board with Imgur user BarryAbrams' engaging guide. As a tech director at a branding and marketing agency, Barry demonstrates his woodworking prowess beyond digital creations. His instructive post details the process of designing and constructing a 7-foot-tall Plinko board for a local networking event.
He offers insights into the planning phase, utilizing Sketchup for structural design, and optimizes his work around standard plywood dimensions. This helpful and engaging content is perfect for DIY enthusiasts eager to tackle a fun, interactive project. Enjoy a step-by-step journey into crafting a game that's sure to be a hit at any gathering.
7. How to Build a Plinko Board
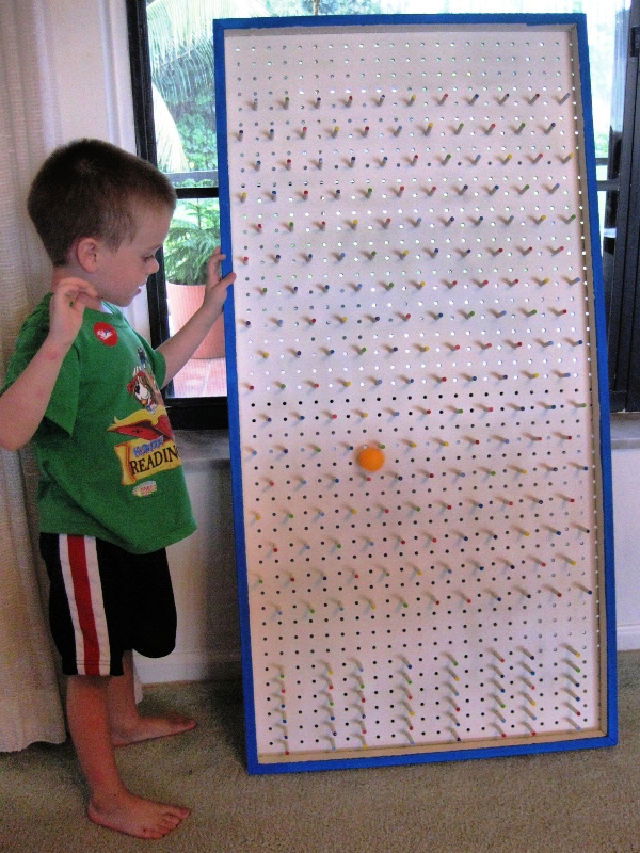
Making a Plinko board is an inventive and engaging way to bring fun into activities with children. If you're working with youngsters and looking to spice up your interaction, this hands-on project is ideal. Gather materials like a pegboard, wood for framing, dowels, dot stickers, and paint to start. Cut and assemble the wooden frame, then lay out your pin design with stickers for guidance.
Next, attach the dowel pins using wood glue and give them a gentle tap to secure them. Once your pins are in place, add a base coat of paint and let your creativity shine by adding colorful touches. After the paint dries, it's time to test your board and enjoy the game with your eager participants. This crafty endeavor promises to transform any dull moment into an exciting, playful experience. Clarksiler
8. Easy DIY Plinko Board for Classroom
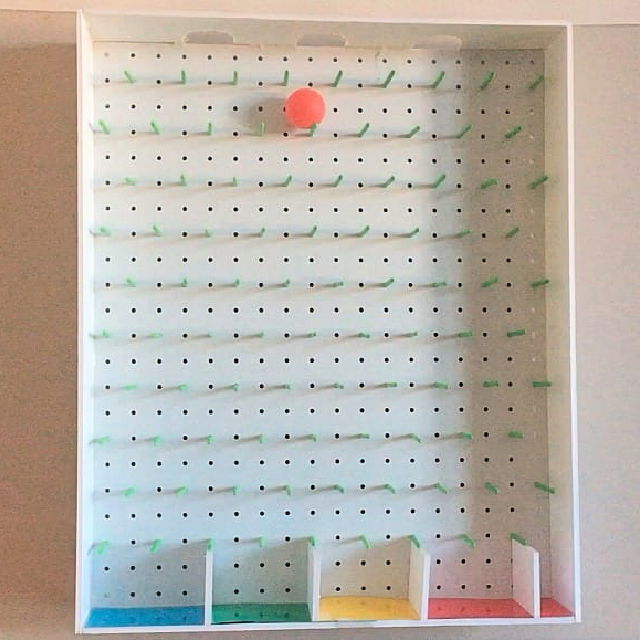
Transform your classroom into a hub of excitement and learning with a homemade Plinko board! Ideal for teachers looking to inject fun into their reward systems and review sessions, this engaging craft can be assembled with simple supplies such as a plastic pegboard, foam core board, golf tees, and ping pong balls.
We Are Teachers offers a step-by-step guide that ensures a smooth crafting experience. With your Plinko board ready, tailor it to any subject or age group, making education an interactive and rewarding adventure. Get ready to captivate your students and watch their enthusiasm for learning soar! We Are Teachers
9. Making a Cardboard Plinko Money Board
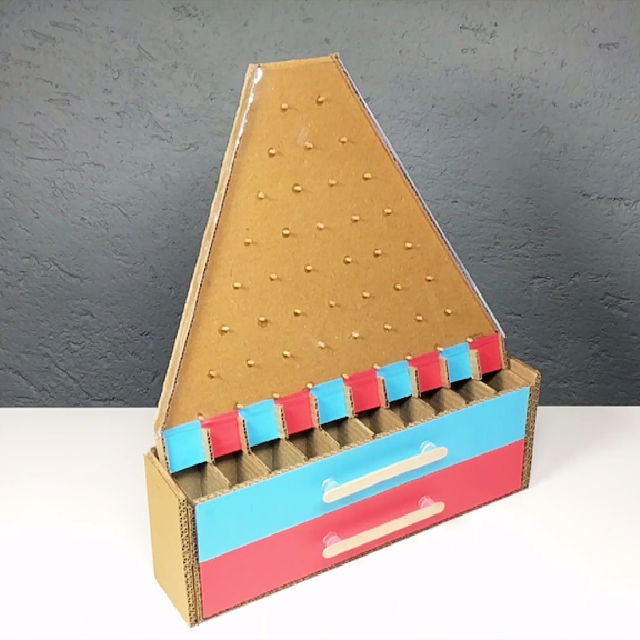
Make your own PLINKO Money Making Board Game with this step-by-step guide from Instructables. Ideal for a family game night or to keep the kids entertained, this DIY project transforms simple cardboard into a classic game of chance.
With clear instructions and a list of materials, you'll be guided through each stage of construction, ensuring a successful build. Emphasize precision and creativity to craft a game that's both fun and visually appealing. Engage in this hands-on activity that promises a rewarding outcome and hours of enjoyment.
10. Homemade Father’s Day Plinko Board
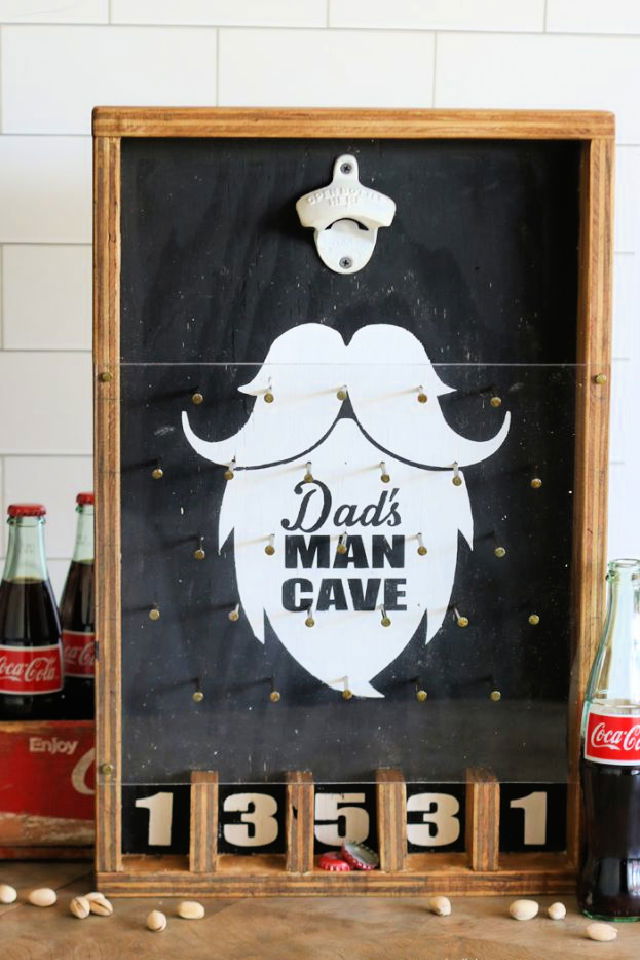
Make a fun and budget-friendly Father's Day Plinko Board for just $24 (excluding tax) with this beginner-level DIY project. You'll need tools like a circular saw, Brad Nailer, Hammer, Drill, 7/64” drill bit, measuring tape, pencil, safety goggles, and a sanding block.
In just 45 minutes, you can craft this entertaining game using sanded plywood, clear acrylic sheets, coated sinker nails, and brad nails. Follow simple steps like measuring and marking cuts on the plywood, making a nail pattern, building a frame, attaching dividers, securing the acrylic sheet, and adding a bottle opener. Make Dad's Day special with this unique homemade gift! Lollyjane
11. Easy-Peasy DIY Wood Plinko Board
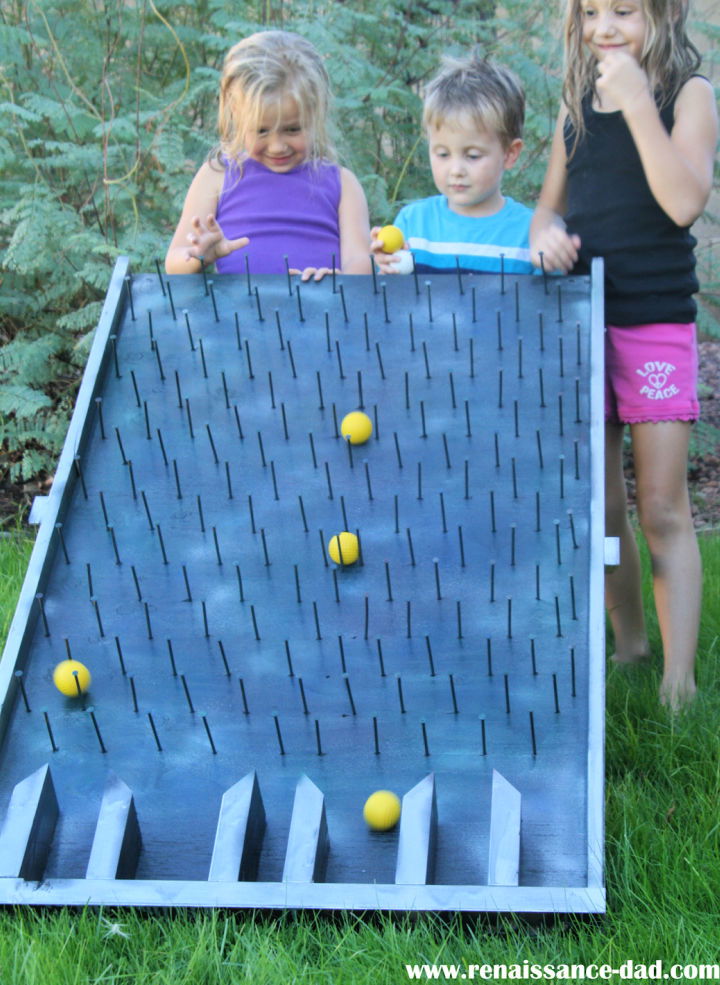
Discover how to make your own Plinko board with our engaging guide. Perfect for school carnivals, birthday parties, church events, or selecting chores in a fun way, this DIY project is both cost-effective and rewarding.
Our step-by-step instructions make it simple to craft a board from scrap materials, ensuring hours of enjoyment without spending a penny. Learn to size your board, space nails correctly, and construct secure chutes for the ultimate game of chance. Join in on the building excitement and share your Plinko adventure with us! Renaissance Dad
12. How to Build a Plinko Board With a Step-By-Step Guide
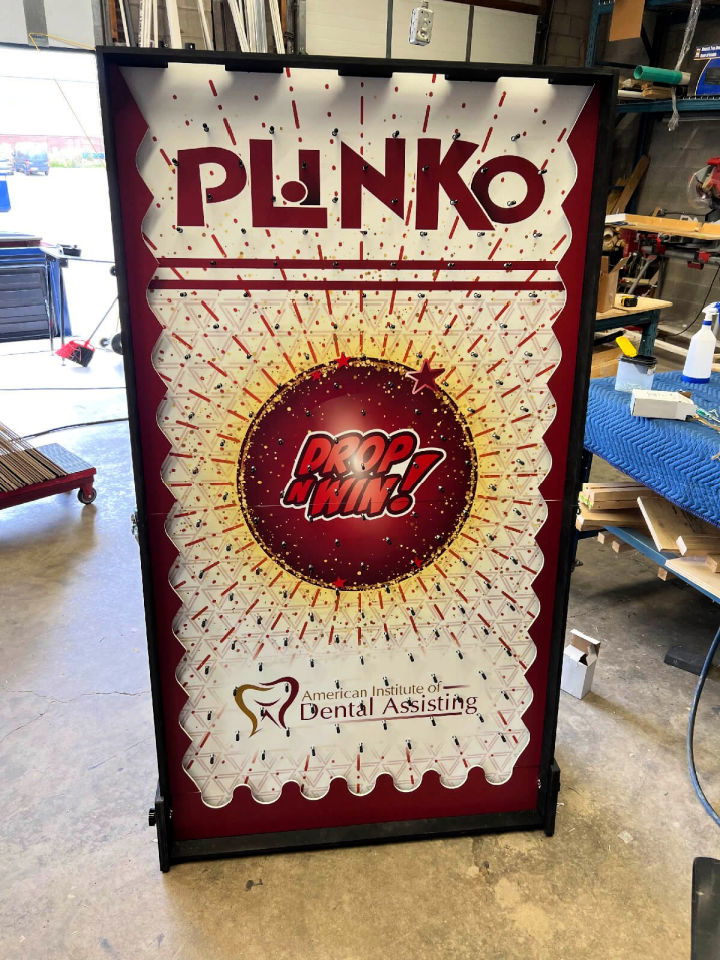
Making a Plinko board is a fun and engaging project that adds excitement to any event. POP49 offers a straightforward guide to crafting your own game board. Start with a smooth surface, carefully place the pegs to ensure tokens slide down effortlessly, frame the board for a neat finish, and add slots for scoring. Don't forget to attach legs for the perfect angle. This DIY guide is ideal for those eager to make a personalized plinko board for their next gathering, ensuring hours of entertainment for guests.
13. Make a Plinko Board Candy Dispenser
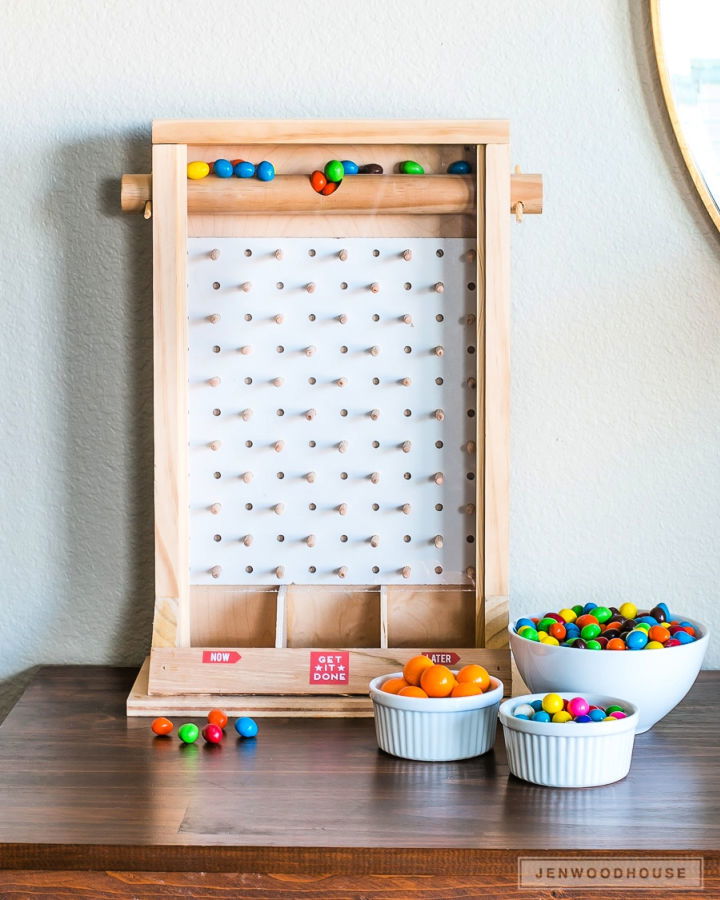
Ready to craft a unique DIY Candy Dispenser Plinko Game? The House of Wood offers a creative way to combine sweet treats with playful fun. Ideal for Father's Day or any special occasion, this engaging project transforms a simple box into a game of chance that dispenses your favorite candies.
Follow the step-by-step guide to build the dispenser, complete with a pegboard back, hinged top, and dowel pins to guide the treats. It's a hands-on activity that results in a charming and functional piece, perfect for making decision-making a bit sweeter. With clear instructions and a touch of humor, you'll enjoy crafting this delightful game that's sure to be a hit. Jen Wood House
14. DIY Wood Plinko Board Tutorial
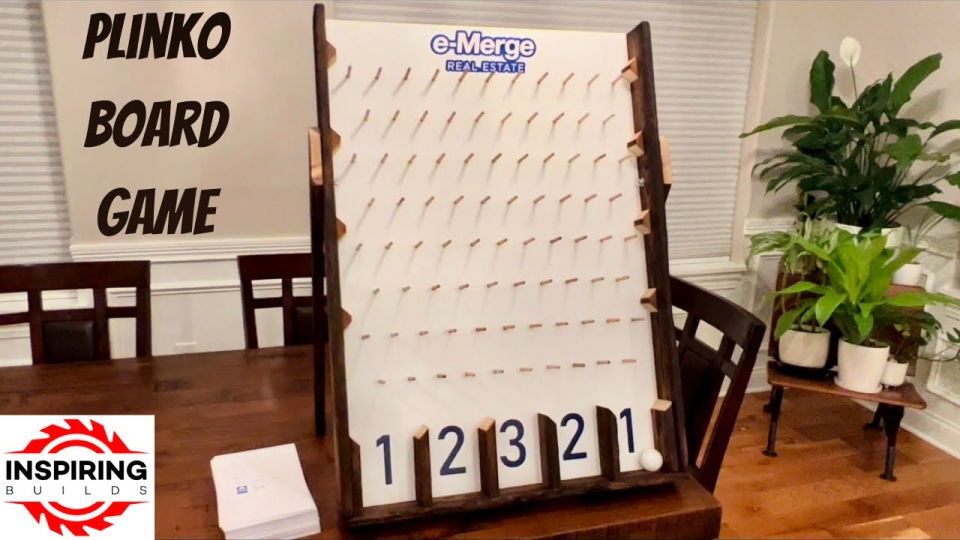
Learn how to craft a Plinko board in this step-by-step guide from Inspiring Builds on YouTube. Designed for a real estate booth, this project involves using 1x4 lumber, an MDF panel, and some creative finishing techniques.
The video walks you through every detail, from charring the wood for a rustic look to applying linseed oil for a polished finish. You'll also discover how to make the Plinko board dividers and ensure the ping pong ball doesn't get stuck. Plus, customize your board with winning slots and prizes. With these instructions, you'll be building your own entertaining Plinko board in no time!
15. How to Make a Plinko Board With Limited Tools
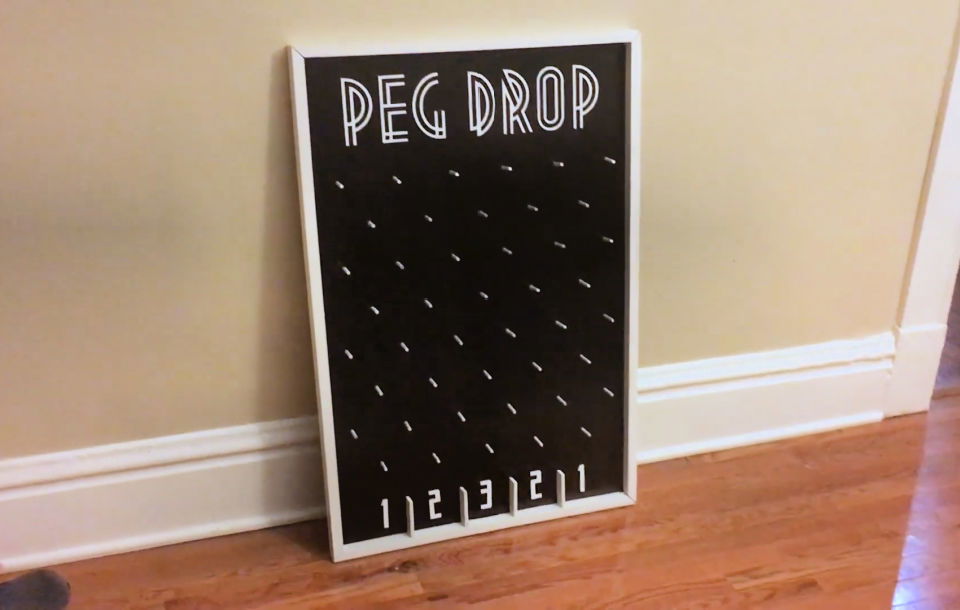
Make your own entertaining Plinko board with minimal tools and effort! This DIY project is perfect for freeing up storage space and providing endless fun at events or in your home. Using just a hand saw, drill, clamps, sander, and a vinyl cutter, along with a peg board for stenciling a hole pattern, you can easily craft this engaging game.
It's a fantastic activity for both adults and children. Watch the build video shot on an iPhone 6s to see how to assemble this exciting Plinko board. Enjoy hours of entertainment with this simple yet enjoyable project!
16. Make a Cardboard Plinko Game Board
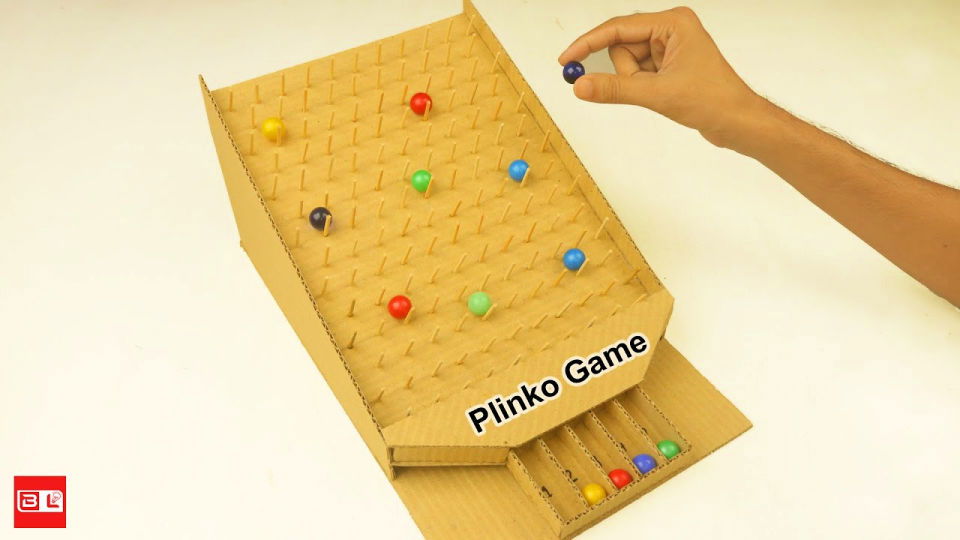
Make your very own Plinko game using cardboard for hours of entertainment and a dash of nostalgia. This engaging DIY project is accessible, requiring only basic materials such as sturdy cardboard, glue, scissors, and small pucks or discs. The preparation involves cutting the cardboard into a board and dividers, ensuring a straightforward assembly process.
Follow simple instructions to construct the game board, strategically place the dividers, and make a landing area for scoring. Perfect for parties, educational purposes, or as a unique gift, this homemade Plinko game promises endless fun and creativity. Dive into crafting this classic game and enjoy the thrill of the drop!
17. Budget-Friendly DIY Tabletop Plinko Board
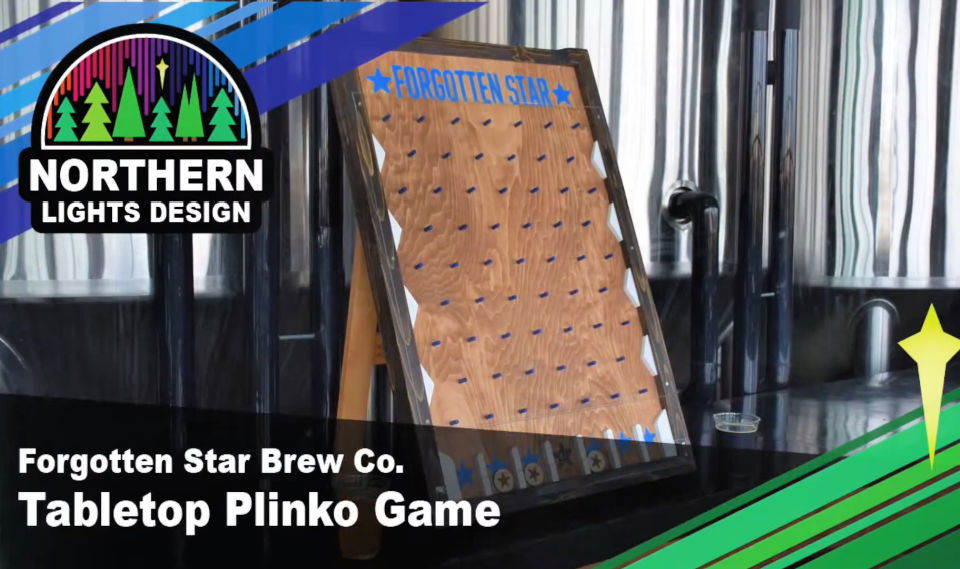
Make a bespoke Tabletop Plinko Board for enhancing the ambiance at Forgotten Star Brewing's events, blending inspiration from various online designs for a tailor-made gaming experience. Essential materials include plywood, nails, and a hammer for the board, with custom markers for players.
Start by sketching your layout, then strategically position nails to guide the marker's path. This DIY project not only adds a personal touch to gatherings but also serves as an engaging activity for guests. Ideal for those hosting or attending events, this unique Plinko board promises to be a memorable highlight, offering endless entertainment with a handcrafted twist.
18. Free Wooden Plinko Board Plan
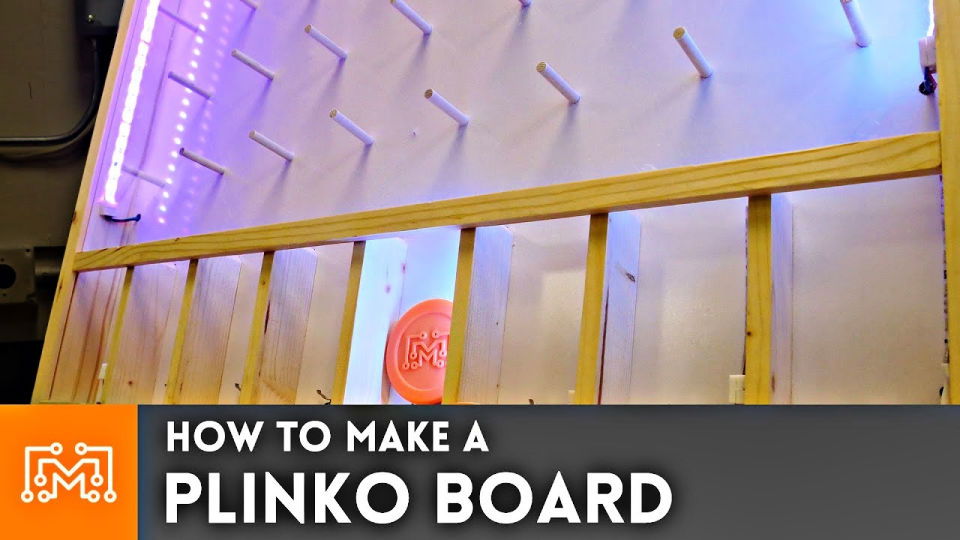
Make your own Plinko board with this comprehensive guide, perfect for adding a fun twist to any gathering. Starting with a sturdy base of 3/4 inch plywood paired with sleek whiteboard material, this project ensures a smooth slide for the pucks.
Detailed steps include cutting, gluing, and assembling the frame, along with precise drilling for pegs to make the classic Plinko layout. Incorporate a touch of technology by adding LED lights and micro switches for an interactive experience. With common woodworking tools and materials like dowels, Plexiglas, and a touch of creativity, you can build an entertaining game that doubles as a striking piece of decor.
19. Build a Plinko Game Board With Cardboard
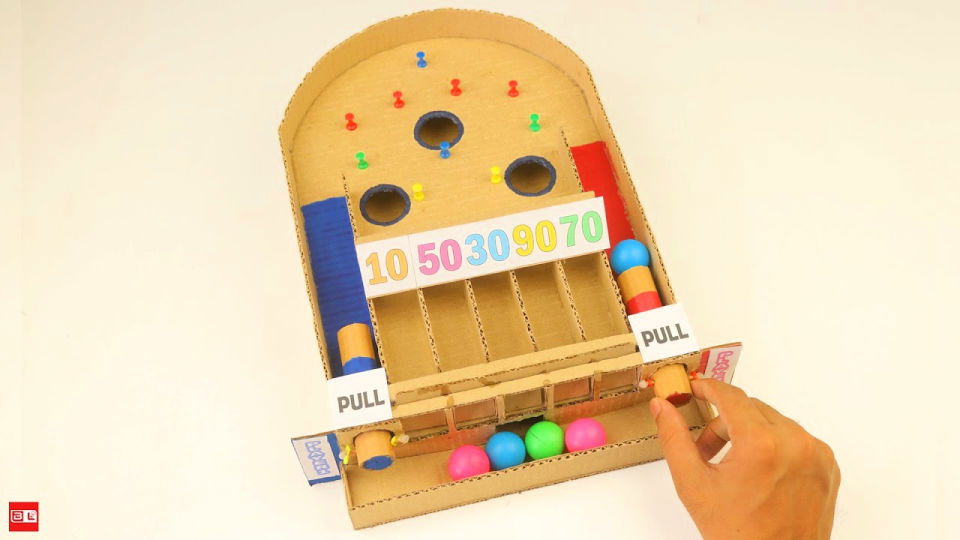
Make your very own Plinko board game with ease and bring endless entertainment to your home! Sue guides you through crafting this classic game using materials like thick cardboard, clear plastic, wooden sticks, colored paper, and hot glue.
This DIY project is not only a creative outlet but also a fantastic way to engage friends and family in fun activities. With these simple supplies and straightforward instructions, you'll have your personalized Plinko game ready in no time. Perfect for game nights, this handmade creation promises a blend of joy and creativity for all ages. Start building today and let the fun begin!
20. Modern DIY Wooden Plinko Board
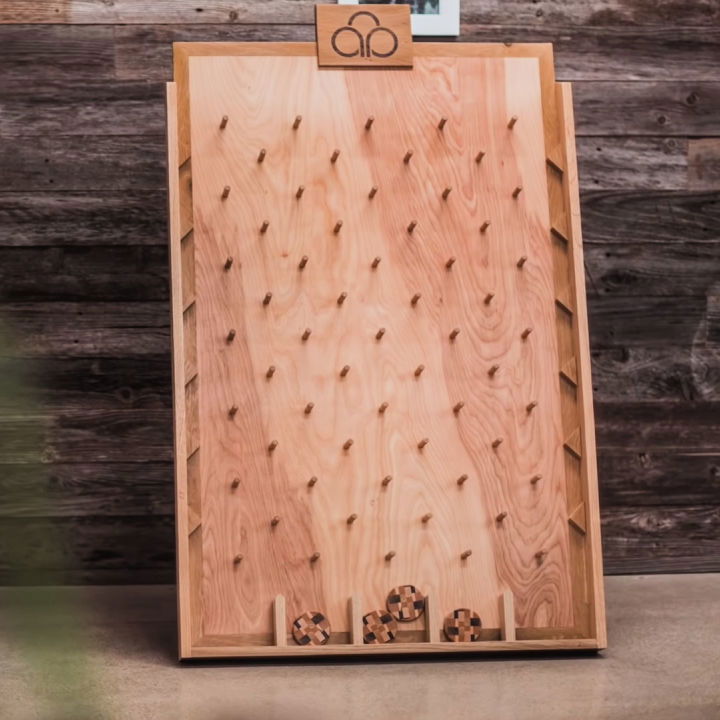
Make your own DIY modern custom plinko board and add a fun, personalized touch to game nights! This engaging project lets you design a sleek, contemporary version of the classic game, perfect for entertaining friends and family.
You'll need basic materials like plywood, nails, a hammer, and paint to bring your vision to life. The guide walks you through every step, from cutting the board to painting it in your choice of colors, ensuring a unique piece that stands out. Ideal for parties or as a handmade gift, this Plinko board is not only a creative outlet but also a source of endless entertainment. Get started on crafting a game that's sure to be a hit! youtube
Conclusion:
In conclusion, 20 homemade DIY plinko board plans Provide an engaging, practical guide to making your very own plinko board from scratch. This article has illuminated every step of the way, from sourcing materials to enjoying the final product. Crafting a plinko board can add a unique, personalized touch to your game nights, events, or even as a distinctive home decor piece.
Now that you have all the necessary knowledge and tools at your disposal, it's time to embark on this creative journey. The process not only promises a fun and rewarding outcome but also ignites creativity and hones your woodworking skills. Start making your Plinko board today and get ready to enjoy endless entertainment with a personal touch.


