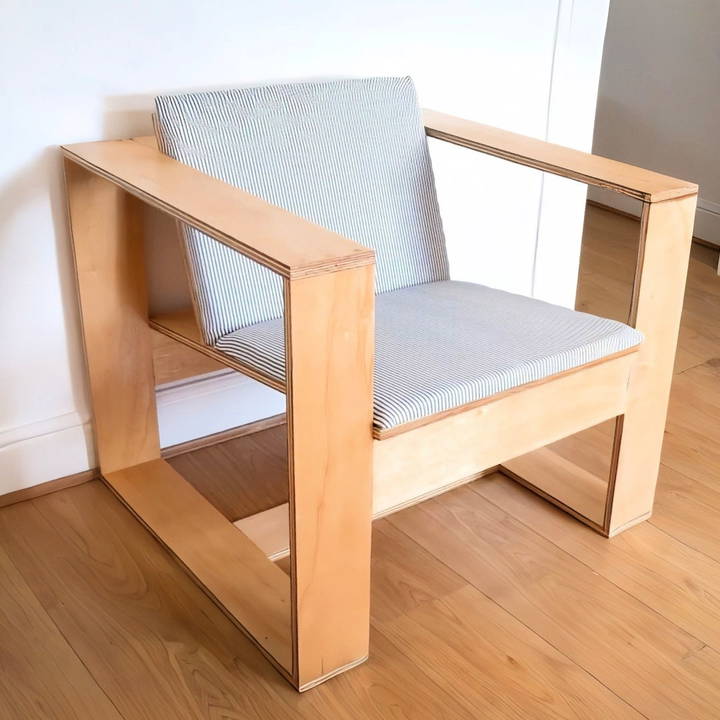
When one of my favorite woodworkers, John Heisz, got in touch about collaborating on a project, I was over the moon. We decided to design and build a DIY plywood armchair. This challenge pushed my creativity and woodworking skills to new heights.
Brainstorming the Project
John and I tossed around several ideas before settling on the plywood chair concept. The simplicity of using a single sheet appealed to both of us. We aimed to build something functional, stylish, and efficient in material use. I wanted the chair to have a modern look with clean lines, so I began sketching out ideas.
Choosing the Right Materials
I initially hoped to use high-quality birch plywood, but it was quite expensive here in the UK. Instead, I opted for an 18mm thick Far Eastern hardwood plywood from my local timber merchant. To make transportation easier, I had them cut the sheet roughly in half lengthwise so it would fit into my van and through my workshop doors.
Tools and Supplies
Gathering the right tools was crucial for this project. Here's what I used:
- Circular Saw and Table Saw: For cutting the plywood to size.
- Clamps: Essential for holding pieces together during gluing.
- Wood Glue and Screws: For strong joints.
- Dowels and Drill: To reinforce joints.
- Sandpaper and Varnish: For finishing touches.
- Upholstery Materials: Foam and fabric for cushions.
Step by Step Instructions
Learn how to build a DIY plywood armchair with step-by-step instructions, from cutting plywood to upholstering cushions and adding the final touches.
Designing the Chair
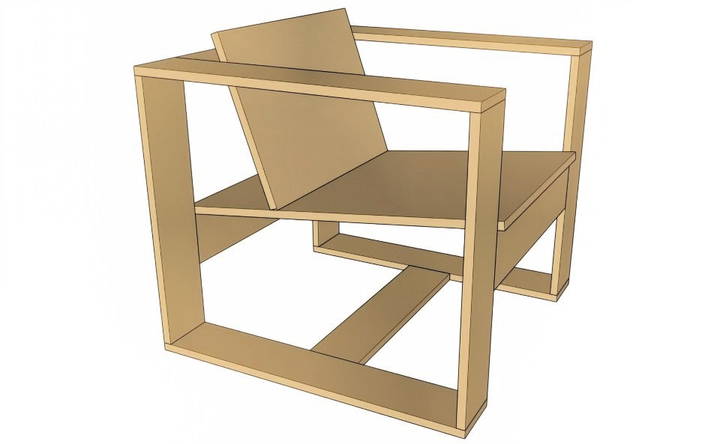
Designing the chair was a significant part of the process. Using SketchUp, I buildd a 3D model to visualize the final product and work out the dimensions. This step helped me plan the cuts and assemble the chair efficiently. I focused on a design that was both aesthetically pleasing and comfortable.
Cutting the Plywood to Size
Handling large sheets of plywood in my small workshop wasn't practical, so I started by cutting the sheet into manageable pieces with a circular saw. I made rough cuts slightly oversized, then moved to the table saw for precise cuts.
1. Building the Arm Pieces
I needed eight pieces to form the two rectangular arms of the chair—four longer and four shorter pieces. Using the table saw, I cut these pieces to the exact dimensions of my design.
Assembling the Arm Frames
Learn how to assemble arm frames using glue, screws, top panels, and dowels. Detailed steps for making a doweling jig and inserting dowels are included.
Joining with Glue and Screws
I began assembling the arm frames by gluing and screwing the bottom pieces together. I used a speed square to ensure the corners were at 90 degrees. The screws provided strength and were placed on the bottom, so they wouldn't be visible.
Adding the Top Panels
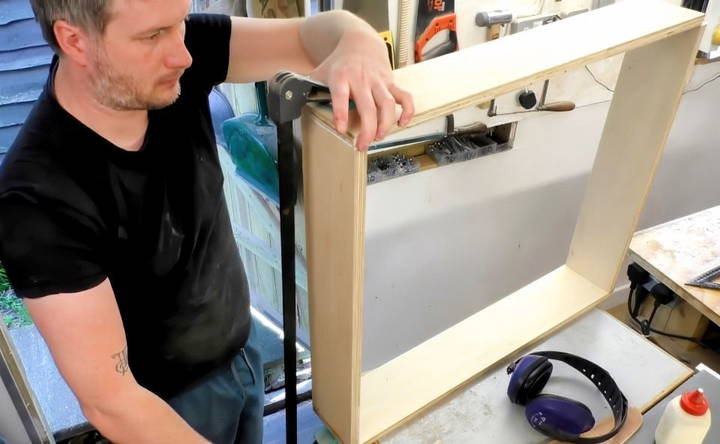
For the top of the arms, I used glued butt joints without screws to keep the surface clean. Clamps held everything in place while the glue dried. This method required patience to ensure the edges were flush.
2. Reinforcing with Dowels
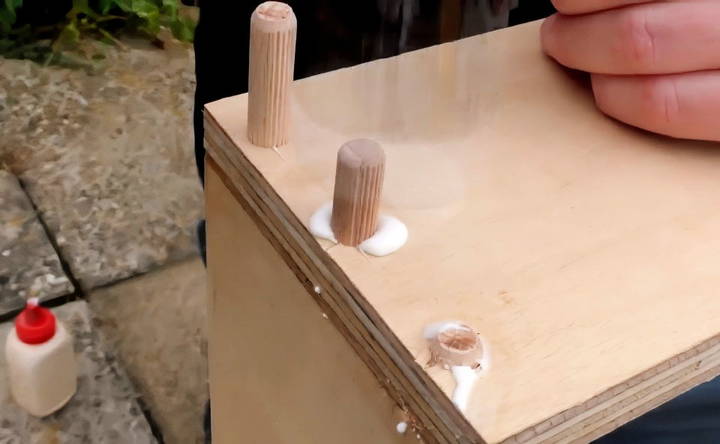
To strengthen the joints, I decided to add dowels. I made a simple jig from scrap plywood to ensure consistent spacing and alignment for drilling. Using the drill press helped keep the holes perpendicular.
Making the Doweling Jig
The jig was crucial for accurate dowel placement. I marked the desired spacing on a scrap piece of plywood, drilled holes using a drill press, and attached a fence to align it with the workpieces.
Inserting the Dowels
After drilling, I applied wood glue to the holes and tapped the dowels in with a mallet. Once the glue dried, I sawed off the excess dowel protruding from the joints and sanded everything smooth.
3. Preparing the Bracing Pieces
The chair required four braces: top, front, back, and bottom. All were cut to the same width as the arm pieces but varied in length and angle.
Cutting Beveled Edges
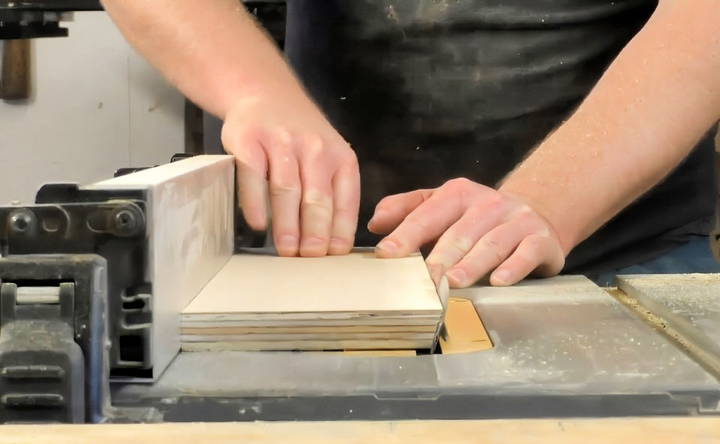
Some braces needed angled cuts to fit properly. Using SketchUp's protractor tool, I determined the exact angles—83 degrees for the front and back braces and 71 degrees for the top brace.
Adjusting the Table Saw Angle
I used a digital angle gauge to set the table saw blade accurately. This tool was invaluable for achieving precise angles, ensuring the braces fit snugly against the arm frames.
4. Assembling the Chair Frame
Learn how to assemble the chair frame with steps on drilling dowel holes, connecting braces to arms, gluing and clamping, and fixing mistakes.
Drilling Dowel Holes in Braces
I adapted my doweling jig to drill holes into the ends of the braces. By adding another fence to the jig, I could align it properly for end-grain drilling.
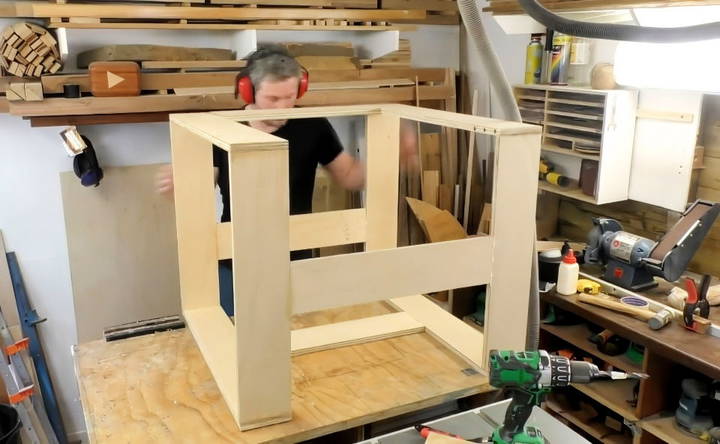
Connecting Braces to Arms
Carefully marking the positions on the arm frames, I drilled corresponding holes for the dowels. This step required attention to detail to ensure everything lined up correctly.
Gluing and Clamping
With glue applied, I inserted the dowels and assembled the braces between the arm frames. Clamps were essential here to hold everything tight while the glue set.
Dealing with a Mistake
At one point, I drilled holes on the wrong side of an arm piece. Rather than starting over, I filled the holes with dowels and sanded them flush. It was a lesson in the importance of double-checking measurements.
5. Adding the Seat and Backrest
Learn how to add the seat and backrest with detailed steps including cutting the panels, attaching the seat panel, and securing the backrest panel.
Cutting the Panels
Using the remaining plywood, I cut panels for the seat and backrest. The backrest required an angled cut to fit against the seat properly.
Attaching the Seat Panel
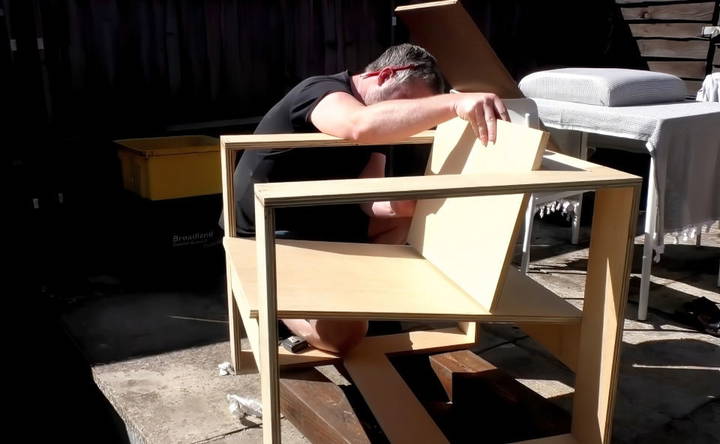
I glued the seat panel between the arms and clamped it securely. For additional strength, I drilled pilot holes from underneath and screwed the seat in place.
Attaching the Backrest Panel
After applying glue, I positioned the backrest and secured it with screws from beneath the seat and brad nails at the top. The brad nails held the backrest in place while the glue dried.
6. Sanding and Finishing
Discover expert tips on sanding and finishing your chair, from meticulous sanding and applying varnish to adding a personal maker's mark for a perfect finish.
Sanding the Chair
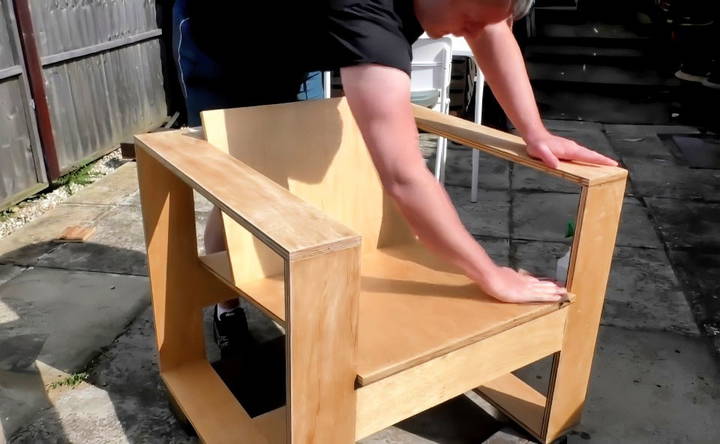
I thoroughly sanded the entire chair with 120-grit sandpaper, focusing on smoothing the dowel joints and plywood edges. Softening the sharp corners by hand prevented any potential splinters.
Applying Varnish
To enhance the wood's natural grain, I applied a coat of spray varnish. After it dried, I wet sanded with 400-grit sandpaper to achieve a smooth finish, then applied a second coat.
Adding My Maker's Mark
Using a branding iron, I placed my maker's mark on the back of the chair. This personal touch made the project feel complete.
7. Making the Cushions
Learn how to make cushions with our step-by-step guide, including preparing bases, cutting foam, upholstering, and finishing touches.
Preparing the Cushion Bases
I used thin offcuts of plywood and MDF as bases for the cushions, cutting them to match the seat and backrest dimensions.
Cutting the Foam
With a sharp knife, I cut 25mm thick upholstery foam to size. The foam provided comfortable padding for the cushions.
Upholstering with Fabric
I had fabric from old curtains I bought at a charity shop. Placing the foam on the base and wrapping the fabric around, I stapled it securely on the underside. While wadding is typically used for a smoother finish, I made do with what I had.
Finishing the Cushions
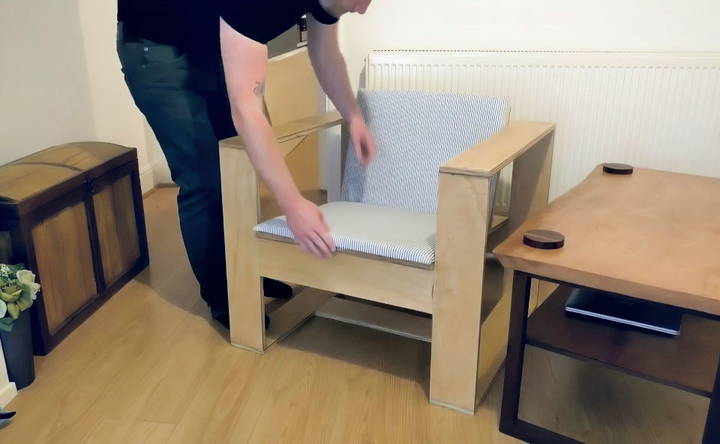
After trimming excess fabric, I ensured the corners were neat and the fabric was taut. The cushions added both comfort and a finished look to the chair.
8. Reflections on the Project
Working on this chair was both challenging and rewarding. Designing it from scratch required careful planning. The dowel joinery was time-consuming, and I realized how much easier it would have been with specialized tools like a proper doweling jig or a Festool Domino.
Lessons Learned
- Double-Check Measurements: My mistake with the dowel holes reminded me to verify every step.
- The Right Tools Matter: Investing in quality tools can save time and improve results.
- Embrace Imperfections: Small mistakes are part of the learning process.
Collaboration with John Heisz
Collaborating with John was an honor. His work has inspired me for years, and sharing this project with him was a fantastic experience. Comparing our approaches to the same challenge was enlightening.
Make It Your Own: Customization Options
Your DIY plywood armchair doesn't have to look like everyone else's! Here are some fun ideas to personalize it and make it truly unique:
Finishes:
- Natural: Embrace the beauty of the wood by simply sanding and sealing the plywood with a clear finish. This lets the natural grain shine through.
- Paint: Add a pop of color with your favorite paint shade. Choose a bold color for a statement piece, or a neutral tone to blend in with your decor.
- Stain: Apply a wood stain to enhance the natural wood grain and add warmth. Experiment with different shades to achieve the look you want.
Upholstery:
- Cushions: Sew or buy custom cushions to add comfort and style. Choose fabrics that complement your decor or express your personality.
- Throw Pillows: Layer on throw pillows in various colors, patterns, and textures for a cozy and inviting feel.
- Backrest Upholstery: Cover the backrest with foam and fabric for added comfort and support.
Design Tweaks:
- Armrests: Adjust the height or shape of the armrests to suit your preference. You can even add padding for extra comfort.
- Backrest Angle: Modify the angle of the backrest for a more relaxed or upright seating position.
- Legs: Replace the standard legs with hairpin legs, tapered legs, or even casters for a unique touch.
- Storage: Incorporate hidden storage compartments under the seat for blankets, books, or other items.
Extra Touches:
- Stencils or Decals: Add decorative designs with stencils or decals. This is a great way to showcase your creativity.
- Woodburning: Use a woodburning tool to build intricate patterns or designs on the plywood.
- Carving: If you're skilled with woodworking, try carving details into the armrests or legs.
The possibilities are endless! Let your imagination run wild and build a plywood armchair that reflects your personal style and taste.
- Pro Tip: Before making any permanent changes, test your customization ideas on scrap pieces of plywood to ensure you're happy with the results.
Troubleshooting: Don't Get Stuck!
Even the best DIY projects can hit a snag. Here are solutions to some common problems you might run into when building your plywood armchair:
Problem: Plywood is splitting when cutting or drilling.
- Solution: Use sharp tools and make sure they are designed for cutting plywood. Drill pilot holes before screwing into the plywood to prevent splitting.
Problem: The armchair feels wobbly or unstable.
- Solution: Double-check that all joints are tight and secure. Make sure the legs are even and the chair is sitting flat on the floor. Add additional bracing or support if needed.
Problem: The finish is uneven or blotchy.
- Solution: Sand the plywood thoroughly before applying any finish. Apply thin, even coats and allow each coat to dry completely before applying the next. If necessary, sand lightly between coats for a smooth finish.
Problem: The cushions are slipping or sliding off.
- Solution: Attach non-slip pads to the bottom of the cushions or use fabric glue to secure them to the seat. You could also add ties or velcro to keep them in place.
Problem: The armchair is uncomfortable.
- Solution: Adjust the angle of the backrest or add more padding to the seat and back. Consider using different types of foam or batting for customized comfort.
Remember
Don't be afraid to ask for help! If you're stuck on a particular step or encounter a problem not listed here, reach out to online DIY communities or consult a local hardware store for assistance.
- Pro Tip: Take your time and don't rush the process. Building a plywood armchair is a rewarding project, but it requires patience and attention to detail.
FAQs About DIY Plywood Armchair
Discover answers to FAQs about DIY plywood armchairs. Get tips, materials, and step-by-step guidance to build your stylish, custom chair.
Yes, you can! While Baltic birch plywood is a popular choice for its strength and stability, other options like maple or oak plywood can also be used. Consider the desired look, budget, and availability when selecting your plywood.
Use wood filler or plugs to conceal screw holes. Wood filler can be sanded and painted or stained to match the surrounding wood. Plugs are small wooden circles that are glued into the holes and can be sanded flush with the surface.
You can often substitute tools or adapt techniques. For example, if you don't have a jigsaw, you might use a handsaw for curved cuts. Consider borrowing tools from friends, renting from a hardware store, or adapting the design to simplify construction.
Pay close attention to the angles and measurements of the seat, backrest, and armrests. Consider adding lumbar support or adjusting the seat depth to ensure a comfortable fit for your body. Test the chair throughout the building process and make adjustments as needed.
It's best to design your armchair with disassembly in mind. Use screws instead of nails for key joints and consider adding removable components like cushions or armrests. This makes it easier to move, store, or modify the chair in the future.
Final Thoughts
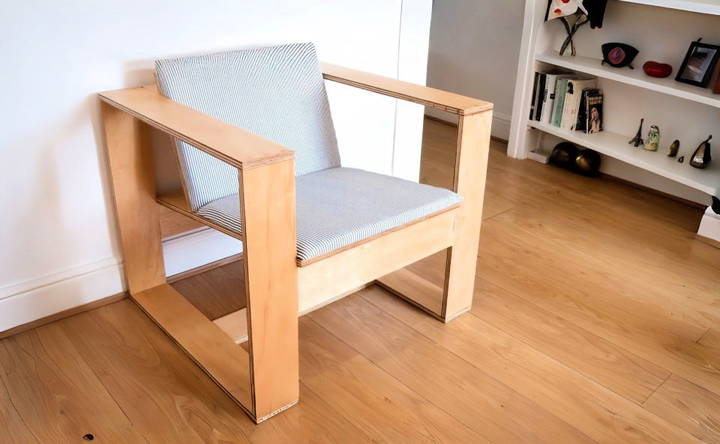
In the end, I used about 60% of the plywood sheet, leaving material for future projects. The chair turned out to be both stylish and comfortable, aligning with the modern aesthetic I envisioned. This project pushed me to innovate and refine my woodworking skills.


