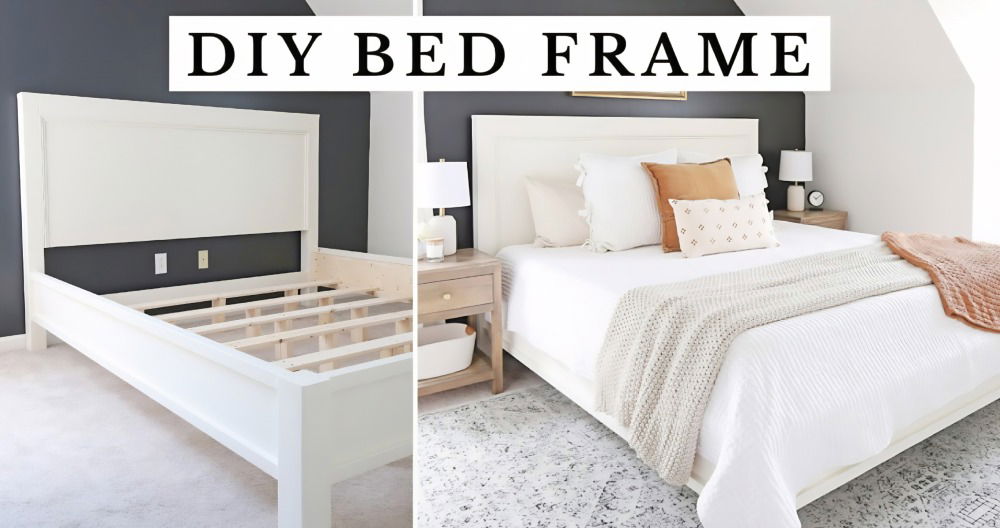
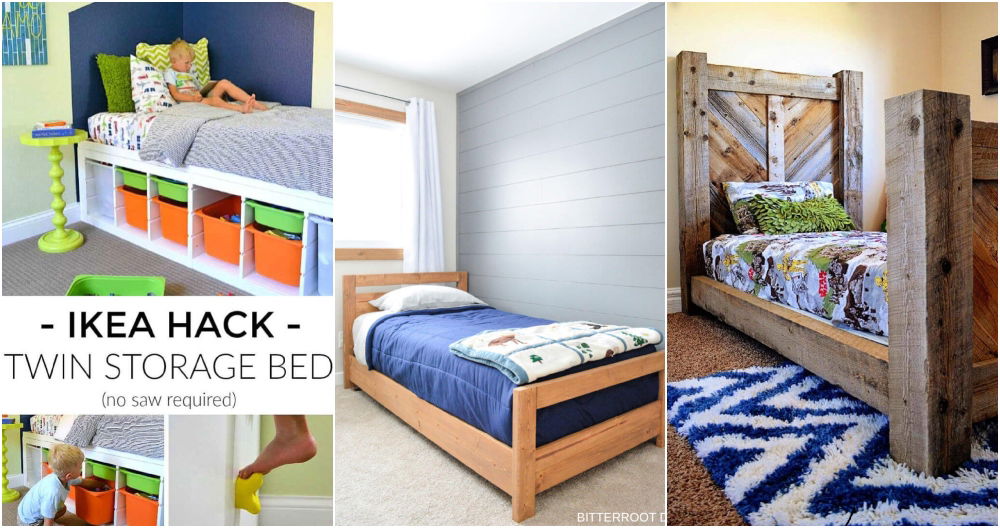
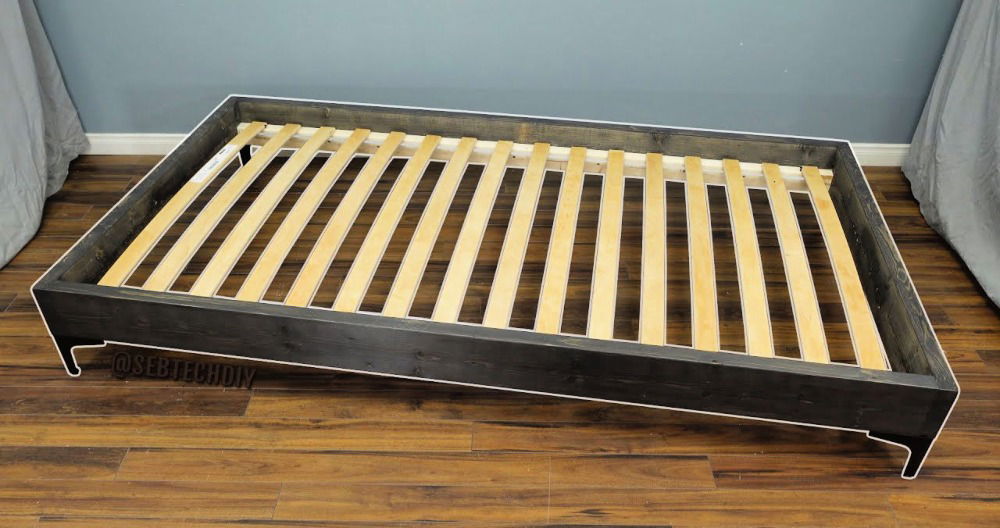
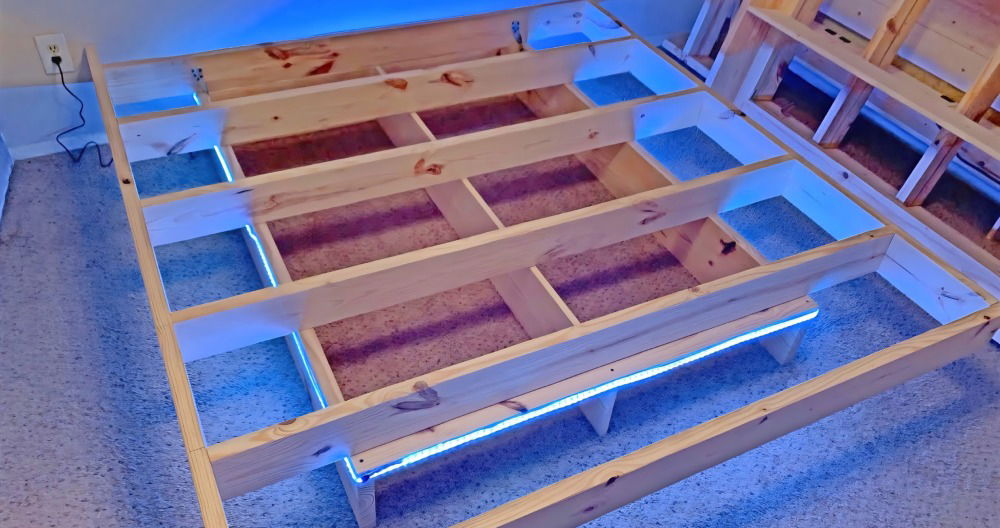
Building a DIY plywood bed frame is simpler than you might think, and it can save you a lot of money. I remember the first time I built my own, I was amazed at how straightforward the process was. With just a few materials and tools, you can build a sturdy and stylish plywood bed frame that perfectly fits your space. It's also a great way to get hands-on with a project that you'll use every day.
If you're ready to make your own plywood bed frame, this guide will walk you through everything you need to know. From selecting the right type of plywood to cutting and assembling the pieces, I'll be helping you step by step. I'm sharing this because I know how satisfying it feels to finish a project like this. Let's get started—you'll see how simple and rewarding it can be to build your own DIY plywood bed frame.
By following these instructions, you'll have a bed frame that's not only functional but built by your own hands. Let's dive into it!
Gathering Materials and Tools
Before starting, I gathered all the materials and tools I needed. The main materials were:
- Three-quarter-inch plywood sheets
- 2x8 lumber
- Steel brackets for the legs and headboard
The tools I used were simple:
- Circular saw
- Jigsaw
- Drill
- Orbital sander
I chose these materials because plywood is strong yet easy to work with, and 2x8s add extra sturdiness. The steel brackets not only support the bed but also add a modern touch.
Step by Step Instructions
Learn how to build a DIY plywood bed with built-in side tables, from cutting to finishing, and build the perfect home project with ease!
Cutting the Frame Components
Learn how to cut frame components, prepare plywood and 2x8s, and add built-in side tables for your project effectively.
Preparing the Plywood and 2x8s
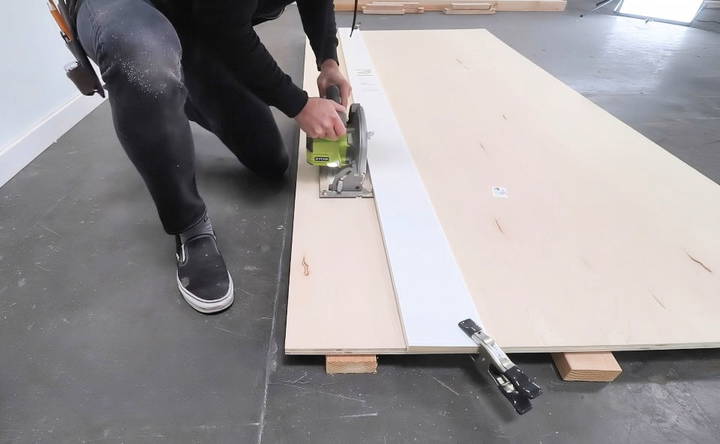
I started by cutting the 2x8s using my circular saw, guided by a speed square to keep the cuts straight. For the long cuts along the plywood, I clamped down a straight trim board to guide the saw. This made the process smoother and the cuts cleaner.
Adding Built-In Side Tables
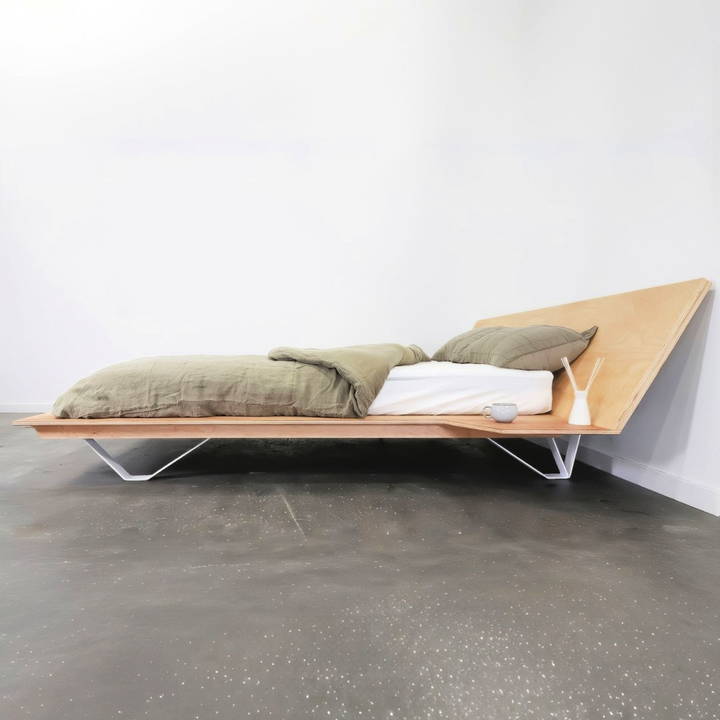
I wanted my bed to have built-in side tables. To build these, I made cuts in the plywood almost all the way through, stopping about 22 inches from the end. Then, I used a jigsaw to finish the remaining cuts. The circular saw gave me straight lines, and the jigsaw helped with the detailed cuts.
Assembling the Side Supports with Built-In Side Tables
Learn how to assemble side supports with built-in side tables, build long supports, reinforce with 2x8s, and build cross supports.
Building the Long Supports
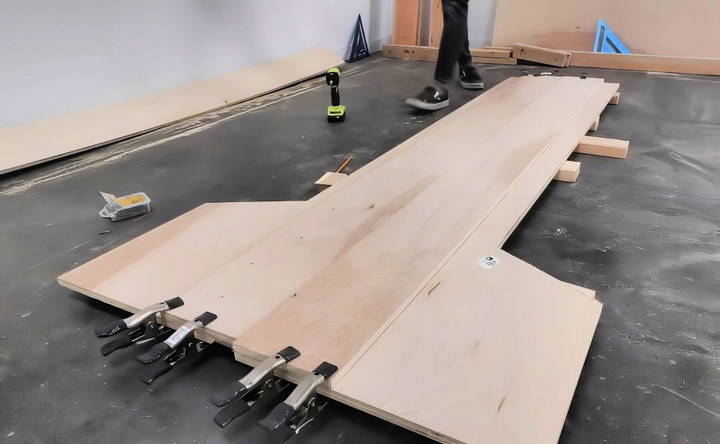
To make the side supports, I glued two layers of plywood together but offset them by three inches. I temporarily screwed three-inch-wide pieces of plywood to help with alignment. After applying glue, I clamped the boards together and secured them from the bottom with one-and-a-quarter-inch finish screws. This three-inch overlap buildd a ledge to hold the slats that support the mattress.
Reinforcing with 2x8s
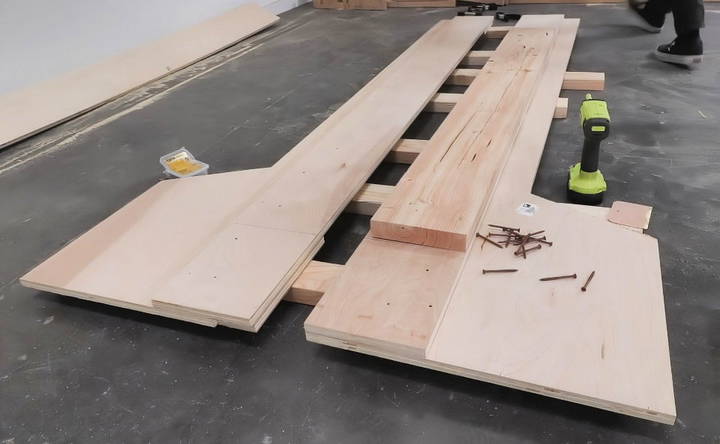
An inch and a half of plywood is strong, but I wanted extra sturdiness. I glued and screwed pieces of 2x8 lumber to the underside of the plywood. After spreading the glue evenly, I attached the 2x8s using two-and-a-half-inch deck screws. For the thinner ledge part, I used two-inch screws from the top down.
This combination of plywood and lumber made the frame both strong and efficient. After the glue dried, I removed the temporary spacers. Now, I had two long, super-strong supports with built-in side tables.
Building the Cross Supports
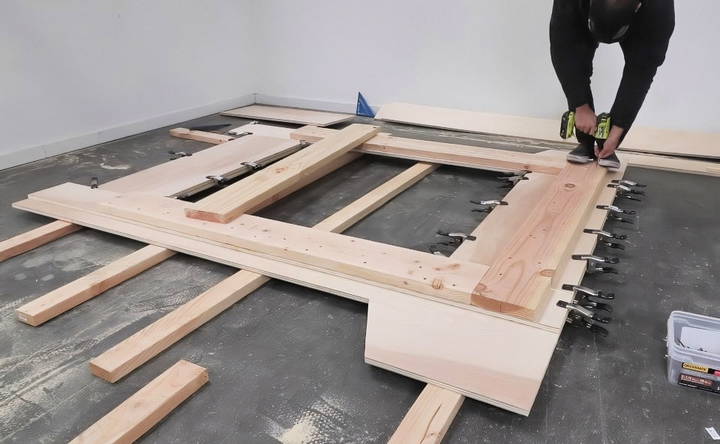
I connected the long supports with cross supports made the same way: two layers of plywood reinforced with 2x8s. I glued all the pieces together for maximum strength. If you prefer to make the bed easy to disassemble, you could use screws without glue.
I cut the plywood cross supports to overlap nicely with the ledge for the slats. Using two-and-a-half-inch deck screws, I secured the 2x8s to the plywood. I cut the 2x8s so they overlapped the plywood joints, adding stability at the corners.
Trimming and Finishing the Frame
Learn how to trim and finish a frame perfectly, including cutting angles for headboard brackets, crafting the headboard, and sanding edges smoothly.
Cutting the Angles for the Headboard Brackets
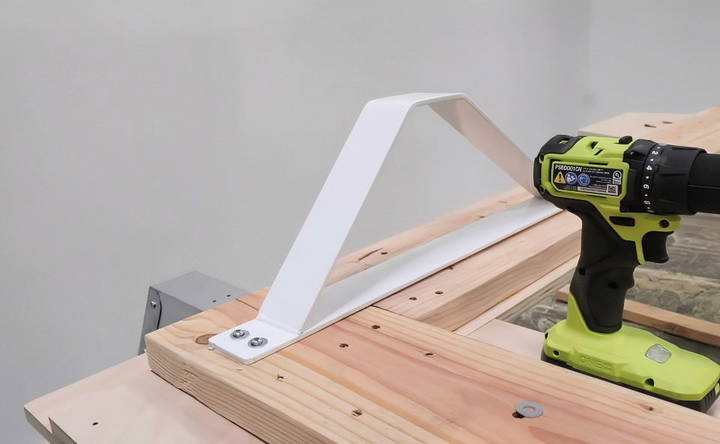
Once the frame was assembled and the glue had cured, I flipped it over. I needed to trim the end at a 30-degree angle to attach the steel brackets for the headboard. I clamped down a trim board, set my circular saw blade to 30 degrees, and carefully cut through the two layers of plywood.
Crafting the Headboard
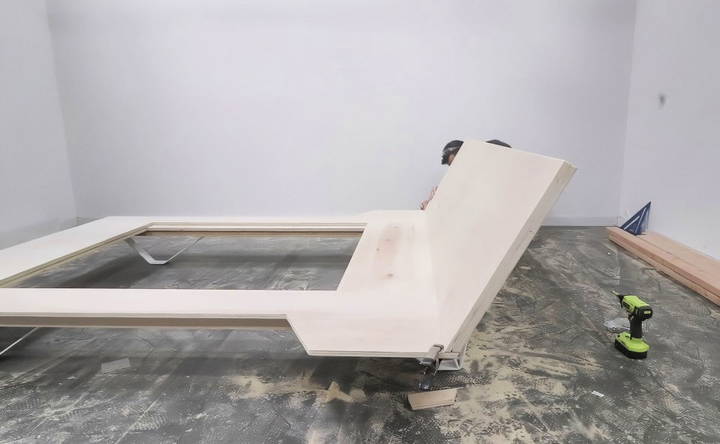
For the headboard, I took another sheet of plywood and ripped it down the middle to make it two feet wide. I glued these two panels together to make a thicker headboard. After the glue dried, I clamped down my straight edge and trimmed the edge at a 30-degree angle to match the frame.
I switched the saw blade back to 90 degrees and trimmed the edges of the headboard so it lined up perfectly with the ends of the side tables. I also trimmed the base of the bed's platform for a clean look.
Sanding and Smoothing the Edges
To give the bed a polished appearance, I used wood putty to fill in any cracks or screw holes. I then sanded the edges of the plywood with an orbital sander, starting with 100-grit paper and working up to 150-grit. Rounding over the edges made them smooth to the touch and safer.
Attaching the Legs and Headboard Brackets
I attached heavy-duty steel brackets to serve as the legs and to hold the headboard. These brackets are sturdy and add a modern flair to the bed. I used screws to secure them, and although some angles were tight, a right-angle drill made the job easier.
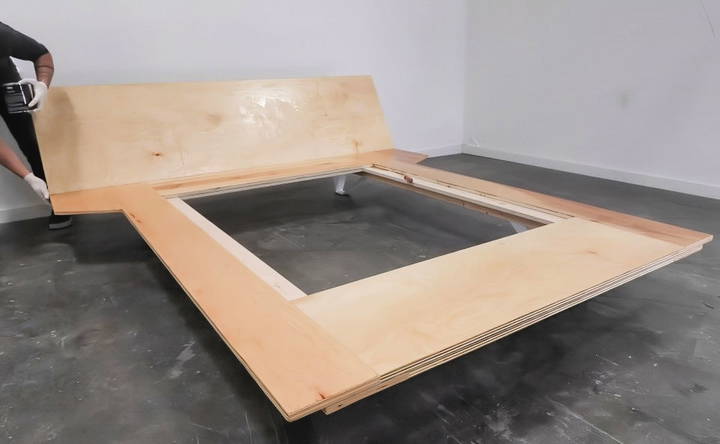
To hide the sides of the 2x8s, I ripped pieces of plywood and cut the ends at 30 degrees to build a skirt. I screwed these on with finish screws and covered the screw heads with wood putty for a seamless look.
Adding the Finishing Touches
Learn how to achieve flawless results in your woodworking projects by applying wood putty, sanding, and finishing. Perfect your craftsmanship today!
Applying Wood Putty and Sanding
After attaching all the pieces, I did another round of sanding. I made sure all surfaces were smooth and that the wood putty was flush with the wood. This step is important for a professional finish.
Applying the Finish
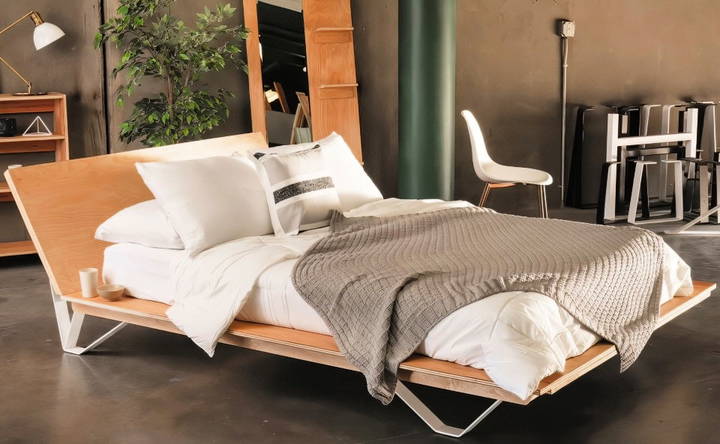
I wanted a finish that would protect the wood and highlight its natural beauty. I chose a low-VOC, plant-based finish. Using clean, lint-free rags, I applied a thick coat, letting it soak in for about 10 minutes. I checked for any dry spots, added more where needed, and then wiped off the excess with a clean rag. The result was a rich, warm tone that showcased the wood's grain without harsh chemicals.
Installing the Slats and Mattress
With the frame complete, I added plywood slats across the ledges to support the mattress. I spaced them evenly to provide good support. Then, I placed the mattress on top. Seeing the bed come together was incredibly satisfying.
Advanced Techniques & Customization
Ready to unleash your inner craftsman and elevate your plywood bed beyond the basics? Let's explore some advanced techniques and customization options that will truly make your bed one-of-a-kind.
Intricate Joinery:
- Dovetails: These iconic, interlocking joints add a touch of elegance and incredible strength to your bed frame. Mastering them takes practice, but the results are stunning.
- Mortise and Tenon: This classic joinery method offers exceptional durability and a clean, professional look.
- Finger Joints: Buildd with a router, these joints offer a modern aesthetic and ample glue surface for strong connections.
Shaped Edges:
- Curves & Contours: Soften the sharp edges of your plywood bed with gentle curves or graceful contours. A jigsaw or router can help you achieve these beautiful, organic shapes.
- Chamfers & Bevels: These angled edges add subtle dimension and visual interest to your bed frame.
Creative Finishes:
- Exotic Veneers: Apply thin sheets of beautiful wood veneer to your plywood for a luxurious look without the high price tag of solid wood.
- Intarsia & Inlays: Embed contrasting wood or other materials into your plywood to build stunning patterns and designs.
- Carving & Engraving: Use hand tools or a CNC machine to etch intricate designs or personalize your headboard with names or initials.
- Unique Stains & Paints: Experiment with different staining techniques or bold paint colors to give your bed a unique character.
Functional Enhancements:
- Hidden Storage: Incorporate clever storage solutions into your bed frame, such as drawers under the platform or a lift-up mechanism for accessing a spacious compartment beneath.
- Built-in Lighting: Install LED strips or recessed lighting to build a cozy ambiance or make reading in bed easier.
- Headboard Customization: Design a headboard with built-in shelves, integrated nightstands, or even charging ports for your devices.
Remember:
- Plan Carefully: Sketch out your ideas and consider the complexity of the techniques before diving in.
- Practice: If trying a new technique, practice on scrap plywood first to gain confidence.
- Safety First: Always use appropriate safety gear when working with power tools.
Transform your plywood bed into a unique masterpiece with patience, practice, and creativity. Unleash your imagination and customize it!
Comparison of Plywood with Other Bed Frame Materials
When crafting your DIY bed frame, the choice of material plays a crucial role. Let's compare plywood with some popular alternatives to help you make an informed decision.
Plywood vs. Solid Wood
- Affordability: Plywood is typically more budget-friendly than solid wood, making it a great choice for DIYers.
- Strength: Both materials offer excellent strength and durability.
- Versatility: Plywood's consistent thickness and flatness make it easier to work with, especially for beginners.
- Aesthetics: Solid wood often boasts a more natural, luxurious feel, while plywood can be customized with veneers or finishes.
The Plywood vs. Metal
- Weight: Metal frames are often lighter and easier to move, but plywood is still manageable for most DIY projects.
- Durability: Both materials are long-lasting. Plywood resists warping, while metal is less prone to scratches.
- Style: Metal offers a sleek, modern look, while plywood can be adapted to various styles with the right finish.
- DIY-Friendliness: Plywood is generally easier to cut and assemble at home than metal.
Plywood vs. Upholstered Frames
- Comfort: Upholstered frames add a touch of softness and luxury, while plywood provides a firm foundation.
- Maintenance: Upholstery requires more upkeep to prevent stains and wear, while plywood is easy to clean.
- Customization: Upholstered frames offer greater flexibility in fabric and color choices, while plywood can be customized with paint or stains.
- Cost: Upholstered frames are generally more expensive due to the additional materials and labor involved.
The Plywood Advantage
Overall, plywood strikes a great balance between affordability, strength, and ease of use. It's a versatile choice that can complement various design styles, making it ideal for DIY bed frames.
Your choice will depend on your budget, style preferences, and DIY skills. Consider the weight of your mattress and the overall design of your bedroom when making your decision.
FAQs About DIY Plywood Bed
Find answers to FAQs about DIY plywood beds, from materials needed to step-by-step instructions. Build your custom bed with ease!
Absolutely! Plywood is an excellent choice for beginner DIYers due to its affordability, availability, and ease of use. With basic tools and a clear plan, you can confidently build a sturdy and stylish bed frame. Start with a simple platform design and gradually explore more advanced techniques as your skills grow.
For a bed frame, opt for a high-quality hardwood plywood like birch or maple. These offer good strength, durability, and a smooth surface for finishing. Avoid using construction-grade plywood, as it may contain voids or imperfections. Choose a thickness of at least ¾ inch for adequate support.
Squeaking can occur due to friction between the frame parts. To minimize this, ensure all joints are tight and secure. You can also add felt pads or silicone lubricant to contact points and consider reinforcing the frame with additional corner braces or center supports if needed.
Yes, you can paint or stain your plywood bed frame to match your bedroom décor. Sand the surface smooth before applying a primer and your chosen finish. For a natural look, consider using a clear coat or wood oil to enhance the wood grain.
Beyond the techniques mentioned earlier, you can personalize your bed with upholstered headboards, decorative legs, or unique hardware. Get creative with stencils, decals, or even hand-painted designs to add a touch of personality.
Use quality materials and follow a well-designed plan. Ensure all joints are strong and secure, and consider adding extra support for larger beds or heavier mattresses. Test the bed frame thoroughly before use to ensure it's stable and doesn't wobble.
Reflections and Variations
Building this DIY plywood bed frame was a rewarding project. The built-in side tables are perfect for holding a book or charging a phone. The angled headboard makes it comfortable to sit up and read or work on a laptop.
If you're considering building your own bed, there are many ways to customize this design:
- Adjust the Size: I made a full-size bed, but the same design works for a queen or king.
- Change the Materials: You could use all plywood or all lumber, depending on your preference.
- Modify the Features: If you prefer, you can omit the side tables or use different styles of legs.
This project taught me that with some planning and basic tools, it's possible to build sturdy and attractive furniture. Working with plywood and lumber was straightforward, and the steel brackets added both strength and style.
Building your own plywood bed frame bed not only saves money but also gives you a piece of furniture that you can be proud of. It's tailored to your needs and tastes, and you gain valuable skills along the way.
Whether you're an experienced woodworker or just starting out, I encourage you to give this project a try. It's a practical and enjoyable way to enhance your home with something you've built yourself.


