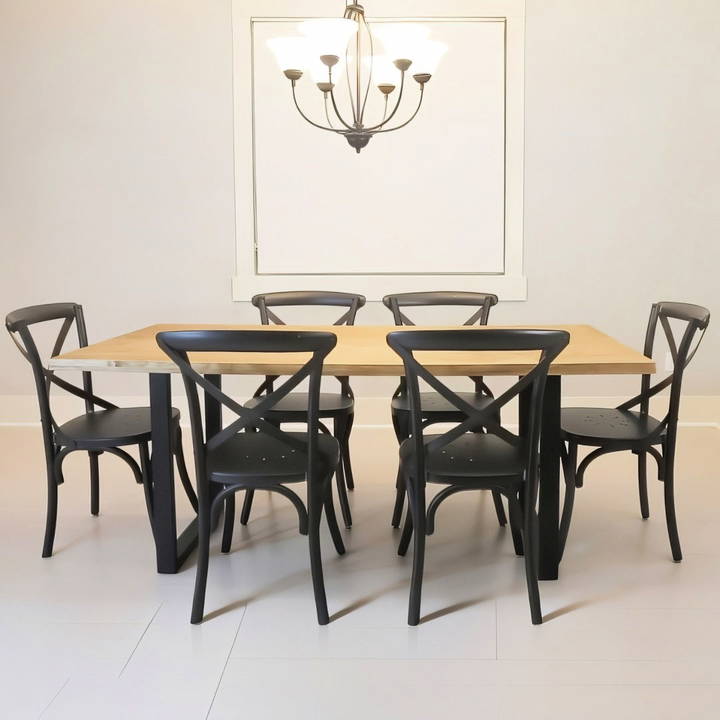
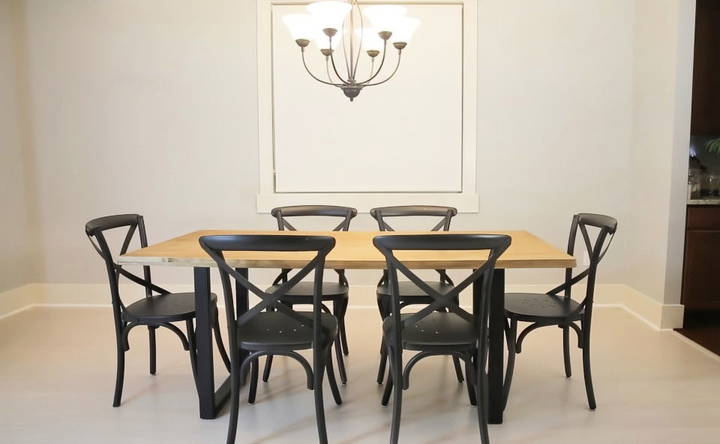
There's something incredibly satisfying about transforming a single sheet of plywood into a sleek, modern DIY plywood dining table using just a circular saw and a drill. When I set out to build my own dining table, I wanted a project that was both economical and achievable with minimal tools. The result was a stylish piece of furniture that not only serves its purpose but also adds a touch of contemporary design to my home.
Materials and Tools Needed
To keep things simple and cost-effective, I used:
- One sheet of 3/4-inch birch plywood (4x8 feet)
- Wood glue
- Wood screws
- Pocket hole screws (1.5-inch and 3/4-inch)
- Sandpaper
- Danish oil finish
- Furniture pads
- Iron-on birch veneer edging (optional)
For tools, I relied on just two power tools:
- Circular saw
- Power drill
Additionally, I used some basic equipment:
- Clamps
- Measuring tape
- Straight edge or level
- Handheld iron (if applying veneer edging)
- Paintbrush or rag for applying finish
Step by Step Instructions
Learn how to build a DIY plywood dining table with our step-by-step instructions. Perfect for beginners and includes tips on cutting, framing, and finishing!
Designing the Table
Before cutting anything, I sketched out the design. I aimed for a modern look with clean lines and an industrial touch. By painting the plywood legs black, they mimic the appearance of metal, adding to the contemporary aesthetic.
Preparing the Plywood
Learn how to make straight cuts with a circular saw jig on plywood. Follow our guide for precise, clean cuts every time.
Making Straight Cuts with a Circular Saw Jig
Cutting straight lines with a circular saw can be challenging, so I built a simple jig to guide the saw. This jig ensures precise, straight cuts every time. Building it was straightforward:
- Attach a straight piece of wood (the guide) to a base piece.
- Run the circular saw along the guide to trim the base, making a custom-fit edge.
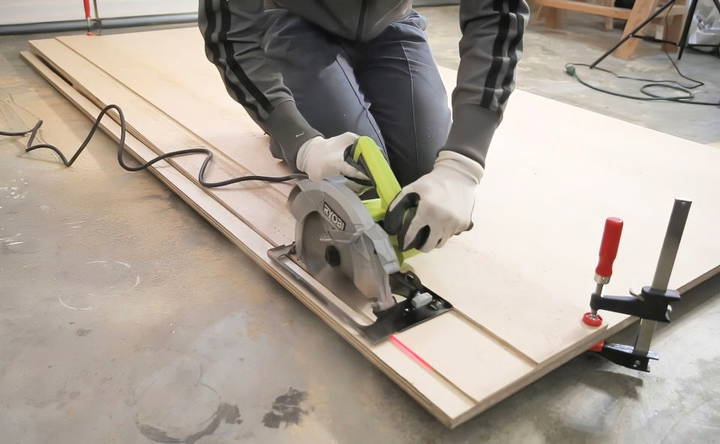
With the jig ready, I felt more confident in making accurate cuts without a table saw.
Building the Tabletop
Learn how to build and cut a tabletop with optional mitered corners. Step-by-step guide for making a perfect tabletop.
Cutting the Tabletop Pieces
I started by cutting the main tabletop piece from the plywood sheet. The dimensions depended on the desired table size, but for my project, I went with a standard dining table size.
Optional: Mitered Corners
I chose to miter the corners of the tabletop for a seamless look. This step is optional and can be tricky with a circular saw. If you're up for the challenge:
- Adjust the circular saw to a 45-degree angle.
- Use the jig to guide the saw along the cut lines.
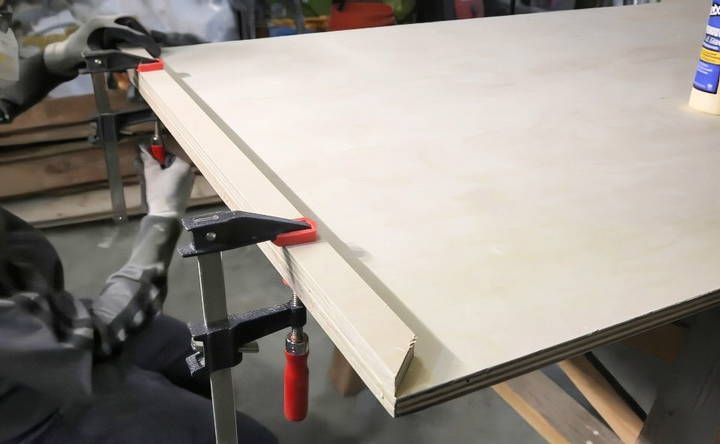
If mitered corners seem daunting, it's perfectly fine to stick with straight cuts.
Framing the Underside
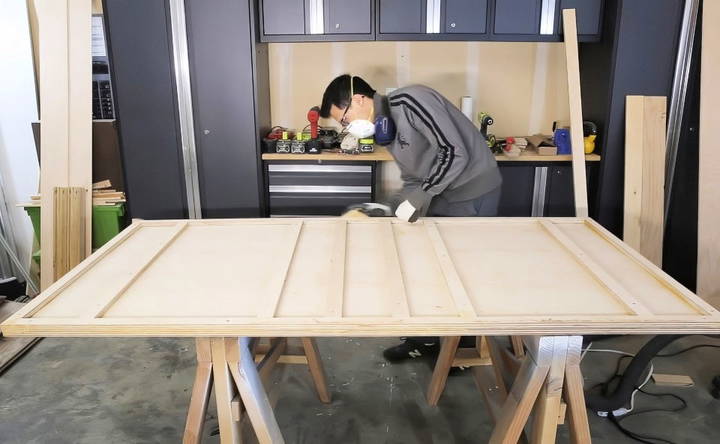
To add stability and a more substantial appearance, I framed the underside of the tabletop.
Steps:
- Cut strips of plywood to frame the perimeter of the underside.
- Attach the strips using wood glue and screws:
- Apply wood glue along the edge of the tabletop.
- Position the strips flush with the edges.
- Clamp them in place.
- Pre-drill holes to prevent splitting.
- Countersink the holes for a flush finish.
- Secure with wood screws.
This framing not only strengthens the table but also provides a solid base for attaching the legs.
Crafting the Legs
Learn how to craft, and build sturdy legs, and paint them perfectly for your projects. Follow our guide for flawless leg crafting.
Building Sturdy Legs
The legs are crucial for both the table's function and its aesthetic.
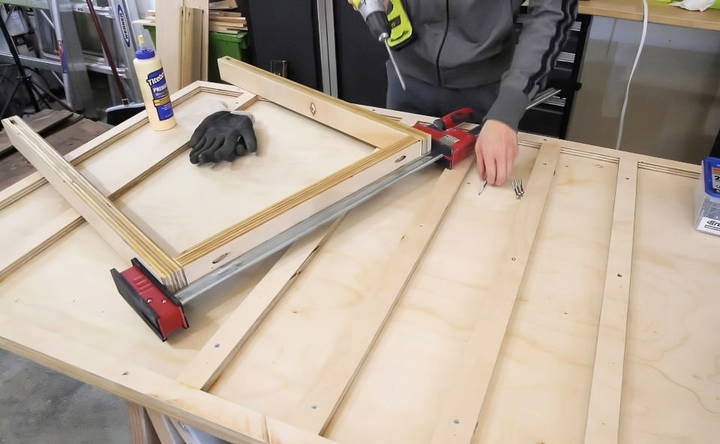
- Cut four leg pieces from the plywood.
- Glue two pieces together for each leg to build a thicker profile:
- Apply wood glue between the two pieces.
- Clamp them tightly and allow the glue to dry.
- Sand the edges smooth.
By doubling up the plywood, the legs become more robust and have a more substantial look.
Painting the Legs
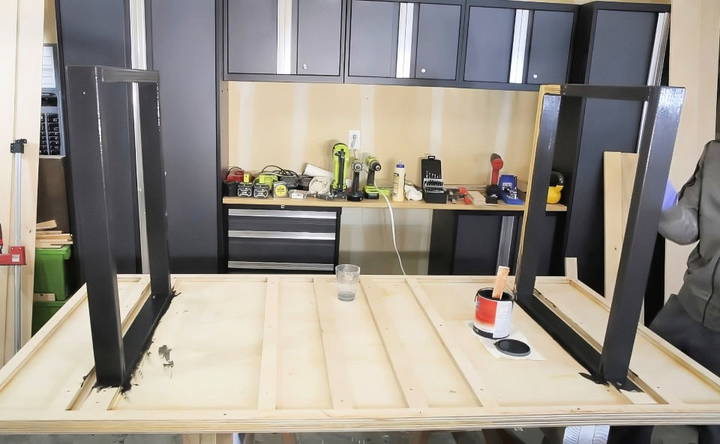
To achieve the industrial, metal-like appearance:
- Apply a primer suitable for wood.
- Paint the legs with black paint:
- Use a paintbrush for a hand-painted look.
- Alternatively, use spray paint for a smoother finish.
I opted for a primer and paint mixture applied by hand. It gave the legs a unique texture and saved me from needing additional tools.
Assembling the Table
Learn the steps to assembling the table, from attaching the legs to adding support, with our easy-to-follow guide.
Attaching the Legs
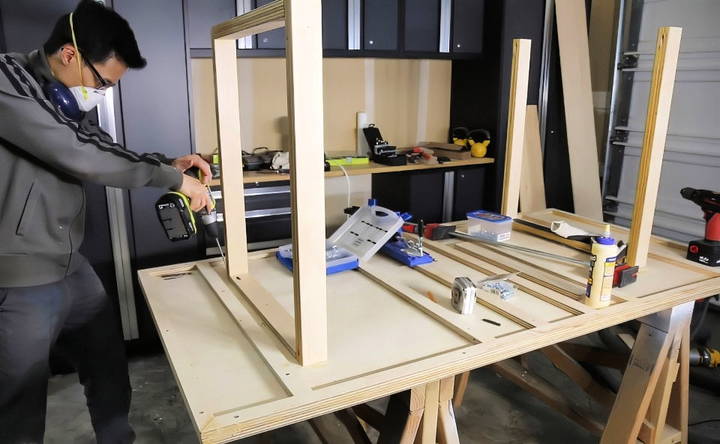
To securely attach the legs to the tabletop, I used pocket-hole joinery.
- Use a Kreg jig to drill pocket holes into the tops of the legs:
- Drill 3/4-inch pocket holes at the top of each leg.
- Position the legs at the corners of the framed underside.
- Attach the legs using pocket hole screws:
- Use 1.5-inch screws for a strong connection.
Adding Support
For additional stability, I added support pieces between the legs.
- Cut two pieces of plywood to fit between the legs on each side.
- Attach them using wood glue and screws.
These supports prevent wobbling and ensure the table remains sturdy over time.
Finishing Touches
Complete your project with expert tips on sanding, veneer edging, tabletop finishing, and floor protection. Discover the perfect finishing touches!
Sanding
A smooth surface is essential for both appearance and safety.
- Sand all surfaces of the table:
- Start with a coarse grit to remove any roughness.
- Progress to a finer grit for a smooth finish.
I did all the sanding by hand. While it takes more time, it allowed me to pay close attention to details.
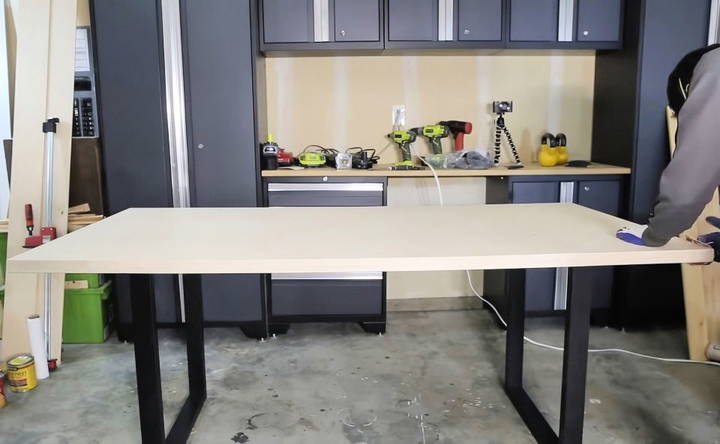
Applying Veneer Edging (Optional)
If the exposed edges of the plywood aren't appealing, veneer edging offers a polished look.
- Cut strips of iron-on birch veneer edging to match the lengths needed.
- Heat up a household iron to a medium setting.
- Position the veneer on the edge and iron it on:
- Apply steady pressure and heat to activate the adhesive.
- Trim any excess veneer with a sharp utility knife.
- Lightly sand the edges for a seamless transition.
Finishing the Tabletop
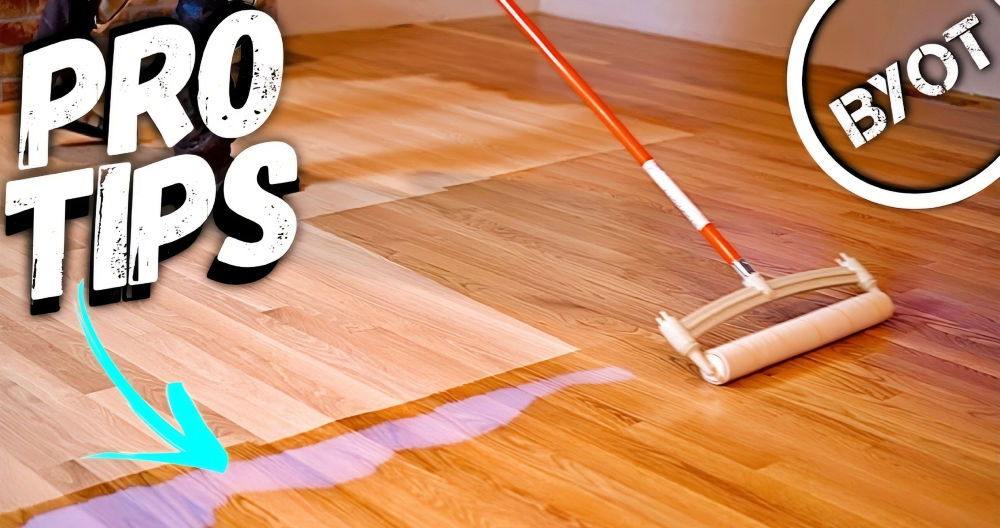
To protect the wood and enhance its natural beauty, I used Danish oil.
- Apply the oil with a clean cloth or brush:
- Work in the direction of the grain.
- Allow it to penetrate the wood for the recommended time.
- Wipe off any excess oil.
- Let it dry completely before use.
The Danish oil serves as both a stain and a protective finish, simplifying the finishing process.
Protecting the Floors
To prevent scratches on the floor:
- Attach furniture pads to the bottom of each leg.
- Ensure they are securely in place.
Lessons Learned
Reflecting on the project, there are a few things I would do differently next time.
Adjusting the Assembly Order
I realized it would have been more efficient to attach the legs before installing the support slats underneath the table. This adjustment would:
- Simplify the assembly process.
- Reduce material waste by cutting supports to fit around the legs rather than the other way around.
Considering Tool Options
While I managed with just a circular saw and drill, having access to additional tools like a miter saw or orbital sander could:
- Make precise angled cuts easier.
- Speed up the sanding process.
However, I'm proud that I could complete the project with minimal tools, proving that it's accessible to many DIY enthusiasts.
Spice Up Your Table: Design Ideas & Customization
Discover creative design ideas for your table. Learn about shapes, leg styles, and customization options to add your personal touch.
Table Shapes: Find the Perfect Fit
- Rectangular: Classic and versatile, fits most dining areas. Great for larger groups.
- Square: Ideal for smaller spaces or intimate gatherings. Builds a cozy feel.
- Round: Encourages conversation and equal seating. Works well in open-concept layouts.
- Oval: Combines the best of rectangular and round tables. Offers plenty of space and a welcoming atmosphere.
Think about your space and how many people you usually host when choosing a shape.
Legs: Support Your Style
- Wood: Traditional and warm. Pairs well with most tabletops.
- Metal: Modern and sleek. Choose hairpin legs for a minimalist look or thicker metal legs for an industrial vibe.
- Plywood: Simple and affordable. Can be customized with paint or stain.
- Mixed Materials: Combine wood and metal for a unique and eclectic look.
Leg placement matters too! Consider center legs for maximum legroom or corner legs for a clean design.
Add Your Personal Touch
- Live Edge: Showcase the natural beauty of wood with a live edge tabletop.
- Inlay Designs: Add a pop of color or pattern with geometric inlays or contrasting wood species.
- Stain or Paint: Choose a color that complements your home decor. Try a two-tone effect for a modern twist.
- Unique Base: Explore alternative bases like a trestle, sawhorse, or even repurposed materials.
The most important thing is to build a dining table that you love and that fits your lifestyle. Have fun with the design process!
Smooth Sailing: Tips & Troubleshooting
Realize essential tips and troubleshooting for smooth sailing. Learn common mistakes, finishing touches, and maintenance for lasting shine.
Common Mistakes & How to Fix Them
- Uneven Tabletop: Make sure your plywood sheets are flat and level before attaching them. Use clamps and shims to correct any warping.
- Wobbly Legs: Double-check that your legs are attached securely and at a 90-degree angle. Add corner braces for extra stability.
- Visible Screws: Countersink your screws and fill the holes with wood filler for a smooth finish.
- Uneven Stain: Sand your plywood thoroughly before staining and apply the stain evenly in the direction of the wood grain.
Finishing Touches: Make it Shine
- Sanding: Sand your table with progressively finer grits of sandpaper until it's smooth to the touch.
- Staining: Choose a stain that complements your decor and apply it evenly with a brush or cloth.
- Sealing: Protect your table from spills and stains with a clear coat of polyurethane or lacquer.
Maintenance: Keep it Looking its Best
- Clean Up Spills Immediately: Wipe up spills as soon as they happen to prevent stains.
- Use Coasters and Placemats: Protect your table from heat and scratches.
- Re-apply Finish as Needed: Over time, the finish on your table may wear down. Re-apply a fresh coat every few years to keep it looking new.
Don't be afraid to ask for help! If you run into any problems during your build, consult a friend, family member, or local hardware store for advice.
With a little patience and attention to detail, you'll be able to build a beautiful and sturdy plywood dining table that you'll enjoy for years to come.
FAQs DIY Plywood Dining Table
Discover FAQs on DIY plywood dining tables. Learn tips, techniques, and important details to build your perfect table effortlessly.
While various plywood options are available, prioritize hardwood plywood or Baltic birch plywood for dining tables. These options offer superior durability and stability, ensuring your table withstands daily use and lasts for years. Avoid using softwood plywood or MDF, as they are more prone to dents and scratches.
Plywood warping can be minimized by storing it flat in a dry environment before construction. During assembly, ensure proper support for the tabletop and avoid exposing it to excessive moisture or heat. Sealing all sides of the plywood with a finish can also help prevent warping.
To achieve a clean and polished look, consider using edge banding tape or wood veneer to conceal the plywood edges. Iron-on-edge banding is a simple and effective solution for DIYers. Alternatively, you can create a thicker edge by attaching solid wood strips to the plywood's perimeter.
Apart from the design variations already mentioned, you can add a touch of personality to your plywood dining table with decorative elements like stencils, woodburning, or decoupage. Additionally, experiment with different finishes like a distressed look or a high-gloss epoxy resin coating to build a one-of-a-kind piece.
While plywood isn't inherently weather-resistant, you can build an outdoor dining table with proper precautions. Choose marine-grade plywood, specifically designed for exterior use, and apply multiple coats of a high-quality exterior sealant. Ensure the table is stored in a covered area when not in use to prolong its lifespan.
Final Thoughts
Building this DIY plywood dining table was a rewarding experience. Transforming a single sheet of plywood into a functional piece of furniture showed me the potential of simple materials and tools. The table not only serves as a gathering place for meals but also as a testament to the value of hands-on creation.
I've learned that with patience and creativity, it's possible to craft beautiful items without a fully equipped workshop. This project has inspired me to take on more DIY challenges and continue exploring what I can build with my own two hands.
Additional Tips
- Safety First: Always wear appropriate safety gear, such as goggles and gloves, when working with power tools.
- Take Your Time: Rushing can lead to mistakes. Measure twice, cut once.
- Customization: Feel free to adjust the design to fit your style and needs. Different finishes or paint colors can dramatically change the look.
By sharing my journey, I hope to encourage others to embark on their own DIY projects. Building something yourself brings a unique satisfaction that can't be bought in a store.


