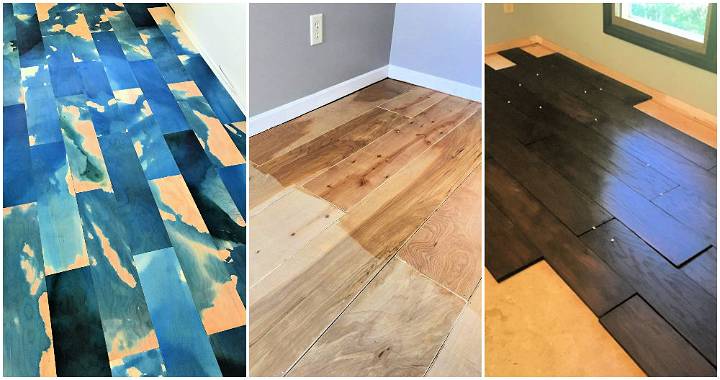
Installing plywood flooring was one of the most rewarding DIY projects I've tackled. To start, I measured my room and selected high-quality plywood sheets. After gathering all the necessary tools, like a saw and a hammer, I carefully cut the plywood to fit the space. I laid down a moisture barrier to prevent any water damage. This preparation made the installation smoother and ensured long-lasting results.
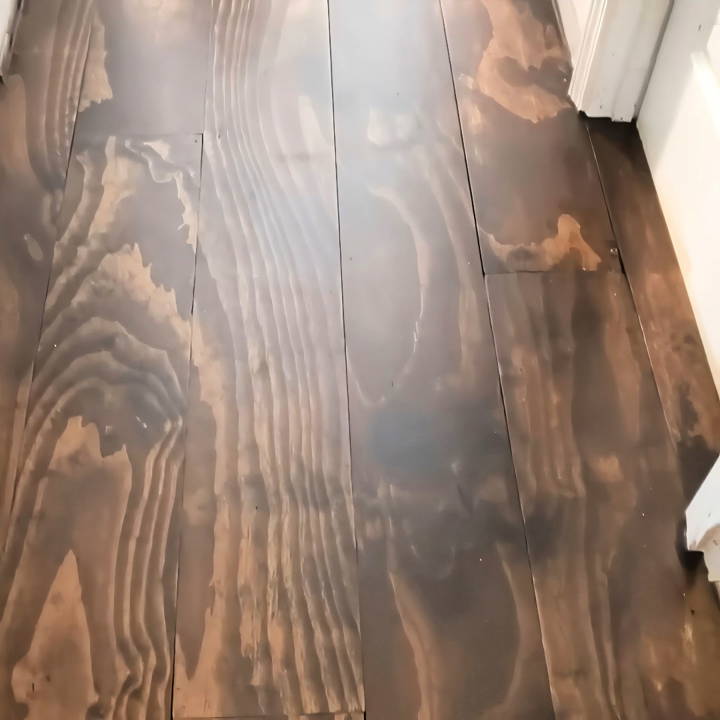
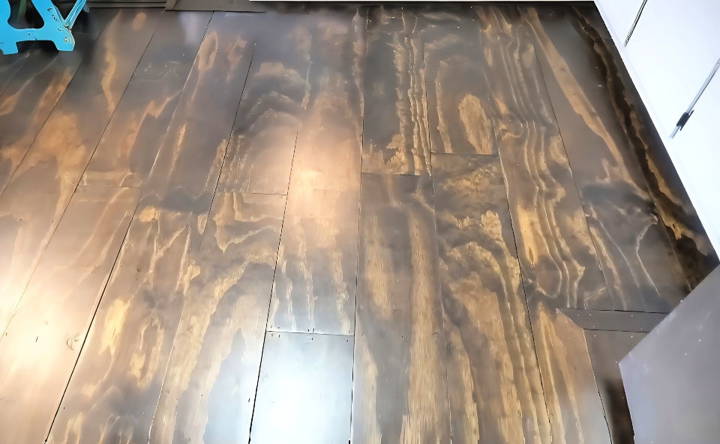
This modern plywood flooring combines simplicity with elegance. I began attaching the plywood sheets with nails and adhesive, ensuring each piece was snugly in place. Finishing touches included sanding and sealing, which gave the floor a refined look.
This project was not only cost-effective but also allowed me to personalize my space. I'm helping with this to ensure you have a beautiful, functional floor.
Step by Step Instructions
Learn how to install plywood flooring with our step-by-step guide, from choosing the right plywood to expert installation tips for a flawless finish.
Selecting the Right Plywood
First things first, the choice of plywood is crucial. Not all plywood is buildd equal, and the quality can drastically affect the outcome of your floors. I opted for Radiata Pine plywood, also known as Cabinet Grade plywood. This variant is pre-sanded, offering a smooth finish, and lacks the yellow tint seen in lower grades. It's slightly more expensive than the basic options but far cheaper than actual hardwood, striking a perfect balance between cost and aesthetics.
Why Cabinet Grade Plywood?
- Smoothness: The pre-sanded surface saves time and labor.
- Appearance: It mimics the look of real wood floors.
- Durability: It's designed for cabinets, so it's sturdy enough for flooring.
Preparing the Plywood Planks
With my plywood sheets chosen, the next step was transforming them into planks. Aiming for a hardwood look, I decided on 8-inch wide planks. Using a circular saw fitted with a Craig tool rip-cut attachment allowed for precision and uniformity, ensuring each plank was identical in size. Though the task seemed daunting at first, this method proved efficient and straightforward.
Materials Needed:
- Circular Saw: To cut the plywood sheets into planks.
- Craig Tool Rip-Cut Attachment: Ensures straight, uniform cuts.
- Thick Foam Sheet: Protects the surface underneath during cutting.
Laying the Foundation
Before the planks could be laid, the subfloor needed preparation. I used roofing paper as an underlayment, which serves a dual purpose by providing a water barrier and reducing floor creaks. Laying out and stapling down the roofing paper was a breeze, with its guidelines ensuring straight application. This extra step, though optional, added a layer of protection that was well worth the effort in my opinion.
Why Roofing Paper?
- Moisture Barrier: Protects against potential spills.
- Sound Dampening: Minimizes floor noise.
Installing the Plywood Planks
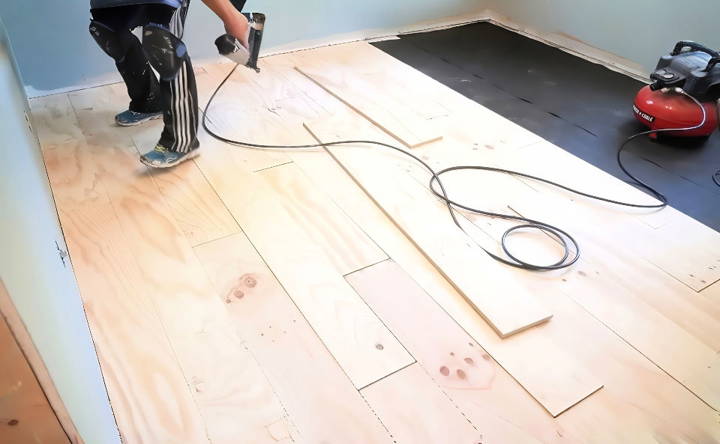
Installation day arrived, filled with excitement and a bit of apprehension. Starting from one end of the room, I opted for a straightforward approach rather than squaring the room from the center. This personal preference made the installation process smoother for me. A pneumatic nail gun became my best friend to secure the planks, and its efficiency and ease of use speeded up the process considerably.
Staggering the planks was more art than science, aiming for a rustic look without adhering to a strict pattern. However, keeping the staggering to either two or three feet helped maintain some uniformity across the room. The biggest takeaway here was the importance of ensuring the planks were as close together as possible, a task made easier by employing a simple lever bar and, quite frankly, my own weight to snug the planks tightly before nailing them down.
Installation Tips:
- Use an Oscillating Multi-Tool: For trimming door casings to ensure a flush fit.
- Pre-fit Sections: Lay out a small section, fit it perfectly, then nail down.
- Adjust Psi Level of Nail Gun: Test on scrap wood to get the perfect nail depth.
Challenges and Solutions
No DIY project is without its hurdles, and mine was no exception. Adjusting door casings to accommodate the thickness of the plywood planks was a challenge initially, but the oscillating multi-tool proved indispensable, making precise cuts a breeze. The learning curve of using a nail gun efficiently and safely was also steep at first, but practice and patience paid off.
Customization Ideas for DIY Plywood Floors
DIY plywood flooring lets you customize the look to suit your style and home decor. Here are some ideas to make your plywood floors unique:
Choose Your Plywood Wisely
Start by selecting the right type of plywood. Look for higher-grade plywood with attractive grain patterns, as this will be the canvas for your creativity.
Staining Techniques
Staining your plywood floors can dramatically change their appearance. Experiment with different stains to find the shade that complements your space. You can even try mixing stains to build a custom color.
Painting Plywood Floors
For a bolder look, consider painting your floors. Use painter's tape to build patterns such as stripes, chevrons, or checkerboards. You can also use stencils to add intricate designs.
Whitewashing
Whitewashing can give your floors a rustic, beachy feel. It's a technique that partially allows the wood's natural grain to show through, offering a subtle, textured look.
Polycrylic vs. Polyurethane
Choose the right finish to protect your floors. Polycrylic is water-based and offers a crystal-clear finish, while polyurethane is oil-based and adds a warm amber hue.
Add a Personal Touch
Incorporate personal elements into your floor design. This could be anything from a hand-painted family crest, favorite quotes, or a compass rose to guide you through your home.
Borders and Inlays
Consider adding borders or inlays for an elegant touch. Use contrasting colors or different wood species to build a visual frame around the room or an accent feature.
The Distressed Look
For a vintage feel, distress your floors. This involves techniques like denting, scratching, and sanding to build an aged appearance.
Eco-Friendly Finishes
If sustainability is important to you, choose eco-friendly finishes. Look for products with low volatile organic compounds (VOCs) to minimize environmental impact.
Mix and Match
Don't be afraid to mix and match different customization techniques. For example, you could stain the majority of your floor but paint a colorful border.
Transform your plywood floors to reflect your style with these ideas. Plan carefully, take your time, and enjoy making something unique for your home.
Troubleshooting Common Issues with DIY Plywood Floors
When embarking on a DIY plywood flooring project, you might encounter a few hiccups along the way. Here's a helpful guide to troubleshooting common issues, ensuring your project stays on track:
Warping or Buckling Plywood
- Cause: Often due to moisture or uneven subfloor.
- Solution: Ensure the subfloor is level and dry before installation. Leave a slight gap between plywood sheets to allow for expansion.
Squeaky Floors
- Cause: Usually from nails that aren't securely fastened or subfloor movement.
- Solution: Use screws instead of nails for a tighter fit. Add additional screws to areas that squeak when stepped on.
Visible Seams
- Cause: Improper alignment or spacing of plywood sheets.
- Solution: Use wood filler to cover seams, then sand the area smooth before finishing.
Difficulty Cutting Plywood
- Cause: Using the wrong type of saw or blade.
- Solution: Use a circular saw with a fine-toothed blade for straight cuts and a jigsaw for curved cuts.
Uneven Stain or Paint Finish
- Cause: Inconsistent application or wood not properly prepped.
- Solution: Sand the plywood evenly before applying finishes. Test stain or paint on a scrap piece to ensure even application.
Scratches and Dents
- Cause: Heavy furniture or sharp objects.
- Solution: Apply multiple coats of a durable finish like polyurethane. Use furniture pads to protect the floor.
Adhesive Not Sticking
- Cause: Dusty or unclean surface.
- Solution: Thoroughly clean the subfloor and back of the plywood before applying adhesive.
Finish Peeling or Flaking
- Cause: Moisture exposure or incompatible layers of finish.
- Solution: Ensure the floor is dry before applying finishes. Use compatible products if layering different types of finishes.
Prepare for common issues for a successful DIY plywood flooring. Patience and detail are key. If new problems arise, consult a professional.
Maintenance and Care for DIY Plywood Floors
Proper maintenance and care are crucial for ensuring your DIY plywood floors remain beautiful and durable over time. Here's a straightforward guide to keeping your floors in top condition:
Regular Cleaning
- Sweep or Vacuum: Regularly sweep or vacuum to remove dirt and grit that can scratch the surface.
- Mopping: Use a damp mop with a mild detergent. Avoid excessive water, which can seep into seams and damage the wood.
Preventative Measures
- Furniture Pads: Place felt pads under furniture legs to prevent scratches.
- Rugs and Mats: Use rugs or mats in high-traffic areas to minimize wear.
Dealing with Spills
- Immediate Action: Clean spills immediately to prevent staining or water damage.
- Appropriate Cleaners: Use cleaners specifically designed for wood floors. Harsh chemicals can strip the finish.
Scratch and Scuff Repair
- Minor Scratches: Fill minor scratches with a matching wood filler or a bit of the same finish.
- Deep Scratches: Sand the affected area lightly and reapply the finish.
Refinishing
- Surface Check: Over time, the finish may wear. Check high-use areas annually.
- Reapply Finish: If the finish is thinning, a new coat will be reapplied to protect the wood.
Avoid Harsh Elements
- Sunlight: Protect floors from prolonged direct sunlight, which can fade the wood.
- Humidity: Maintain a stable indoor humidity level to prevent warping.
Routine Checks
- Inspect Seams: Periodically check seams and edges for signs of lifting or damage.
- Tighten Fasteners: If you hear squeaking, tighten any loose screws or nails.
By following these simple maintenance and care tips, your DIY plywood floors will continue to look great and function well for years to come.
FQAs About DIY Plywood Floors
Plywood flooring is a versatile and cost-effective option for many homeowners. Here are some frequently asked questions to help you understand more about this flooring choice.
Plywood flooring is a type of flooring material made from thin layers of wood veneer that are glued together at alternating angles to form a strong, stable sheet. It’s a popular alternative to traditional hardwood floors due to its affordability and DIY-friendliness.
Plywood is quite durable due to its layered construction, which resists expansion and contraction. However, it’s softer than hardwood and can be prone to dents and scratches. Applying a hard topcoat, like polyurethane, can protect the surface and extend its lifespan.
Plywood floors are suitable for any room where you'd install hardwood. However, they're less ideal for kitchens and bathrooms due to potential water damage. Basements can also be problematic because of moisture issues that may cause the plywood to delaminate.
Plywood flooring can be installed by either refinishing the existing plywood subfloor or laying new plywood planks over an existing subfloor. The key to a successful installation is to take your time, pay attention to detail, and finish with a protective topcoat.
The design possibilities with plywood flooring are vast. You can cut plywood into planks, squares, or even intricate shapes for a medallion design. Finishes range from natural seals to stains, paints, and even unique techniques like paper bagging for a marbled effect.
Final Thoughts
Wrapping up, installing easy DIY plywood flooring is a great way to enhance your home with a modern touch. This project provides a cost-effective solution that guarantees durability and style. By following this guide, you'll achieve smooth and professional-looking plywood flooring that transforms any space. Enjoy the beauty and practicality of modern plywood flooring in your home today!


