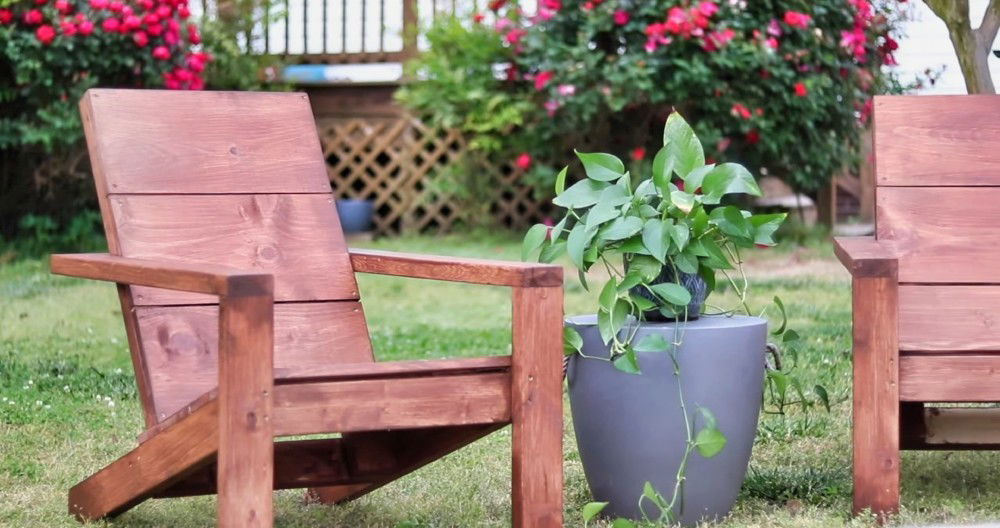
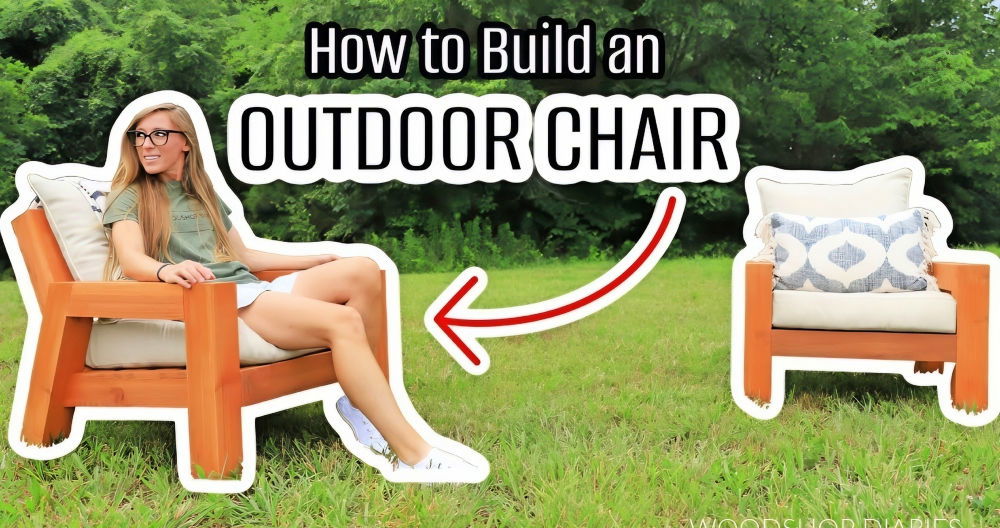
Making furniture yourself can be incredibly satisfying. I recently built a DIY plywood lounge chair, with a built-in side table and custom leather cushions. This isn't the first time I've built a lounge chair; I've learned a few valuable lessons from previous projects that made this version more functional and visually appealing.

The steps I'll share will take you through the entire process, from cutting the wood to assembling and adding cushions. It's achievable even if you're relatively new to woodworking, especially if you've got access to the right tools.
Materials and Tools You'll Need
Before starting, let's talk about the key materials and tools that will be necessary:
- Walnut plywood: This is the star of the show. Walnut Europly is great because it combines strength and a beautiful finish.
- Walnut dowels: For the joinery, we'll use half-inch walnut dowels to help line everything up.
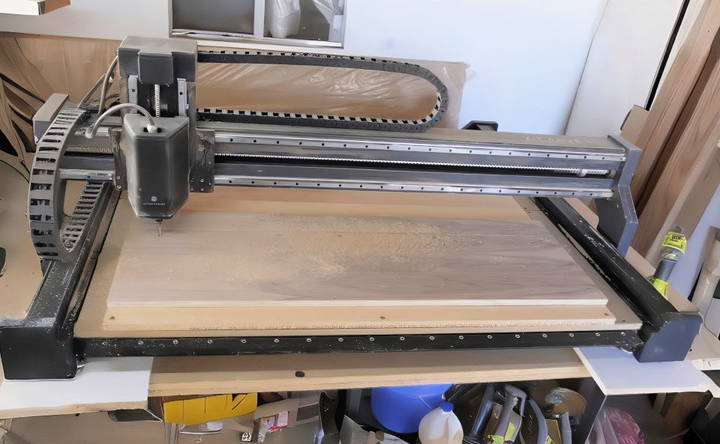
- CNC machine: I used the X-Carve Pro CNC to cut all the plywood pieces. If you don't have a CNC machine, don't worry—I'll explain alternatives later.
- Palm router: For smoothing edges and making sure the wood pieces fit perfectly.
- Jigsaw: To cut the tabs that hold the plywood pieces in place after CNC cutting.
- Kreg pocket hole jig: A favorite for drilling angled screw holes.
- Sandpaper (up to 220 grit): To smooth the wood, giving it a refined finish.
- Leather and foam: For the DIY cushions.
- Wood finish: I used Maker Brand Simple Finish to bring out the walnut's natural beauty.
Step by Step Instructions
Learn how to build a DIY lounge chair with a built-in side table and leather cushions. Follow step-by-step instructions from cutting pieces to wood finishing.
Cutting the Pieces for the Chair
The cutting process is where precision matters most. Using a CNC machine makes things easier, but it's not essential. For those without a CNC machine, a palm router and jigsaw will do the trick if you have some patience.
- Prepare the CNC Machine: I loaded my walnut plywood onto the X-Carve Pro and cut all the pieces. The great thing about the CNC machine is that it leaves small tabs to hold the pieces in place, which I cut with a jigsaw later on.
- Manual Cutting Option: If you're going manual, cut your plywood sheets using a circular saw or jigsaw. I'd recommend making a template first, so you have clear, precise cuts. You'll also need to smooth the edges with a router after cutting.
Assembling the Chair Frame
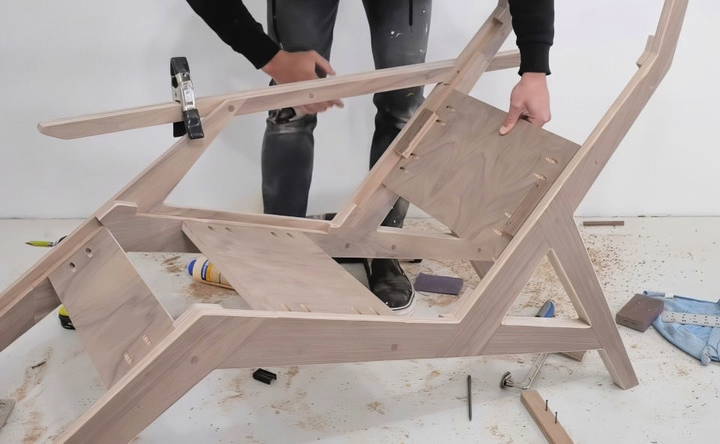
One of the tricks I picked up during this project is adding alignment holes to the plywood pieces. These holes help line up the parts and make the assembly much quicker and easier.
- Alignment Holes and Walnut Dowels: I drilled half-inch holes for walnut dowels that fit perfectly, allowing the parts to snap into place. The alignment holes go all the way through on one side but only halfway through on the other, so they don't show through the walnut veneer.
- Glue and Dowels: Once the pieces are aligned, glue them in place and insert the walnut dowels. This keeps the chair sturdy and ensures that the pieces fit snugly. While trimming the dowels adds a step, it simplifies assembly and results in a better finish.
- Side Panels and Shelf Bracket: I glued the side panels together with the shelf bracket separately. The shelf bracket, which fits into the geometry of the side panels, is secured with screws that get hidden under the cushions later.
- Support for the Seat: The chair needs to support the removable cushions, so I cut some walnut plywood to act as the support panels. Using the Kreg pocket hole jig, I drilled angled holes and attached these supports to the side panels.
- Secure Fit: Temporarily attaching scrap plywood during this step can help align the pieces more easily. Once everything is glued and screwed in, the frame is ready.
Adding the Built-In Side Table
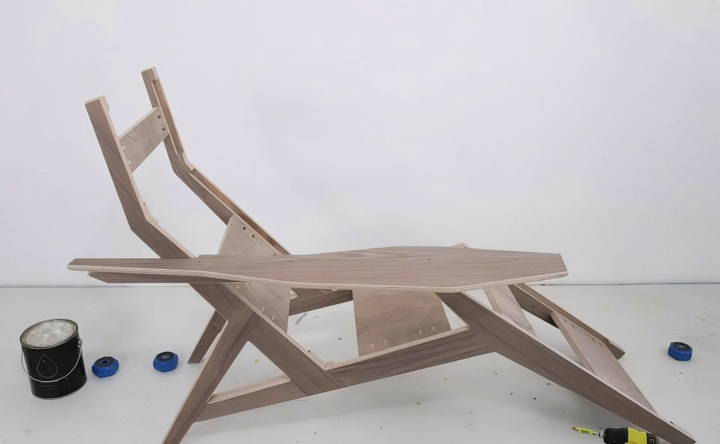
This version of the chair has an asymmetrical built-in side table, which I designed to be long enough to hold a book or a drink.
- Design: The angular, asymmetrical look gives the side table a modern feel, and its size ensures it's functional without being overwhelming. You'll have plenty of room to charge your phone or keep a drink nearby.
- Assembly: I glued and screwed the table top in place, hiding the screws by filling the holes with wood putty that matches the walnut.
Sanding and Finishing
Before the chair comes together, it's essential to sand every piece. Start with rougher sandpaper, then gradually work your way up to finer grit, finishing with 220-grit sandpaper.
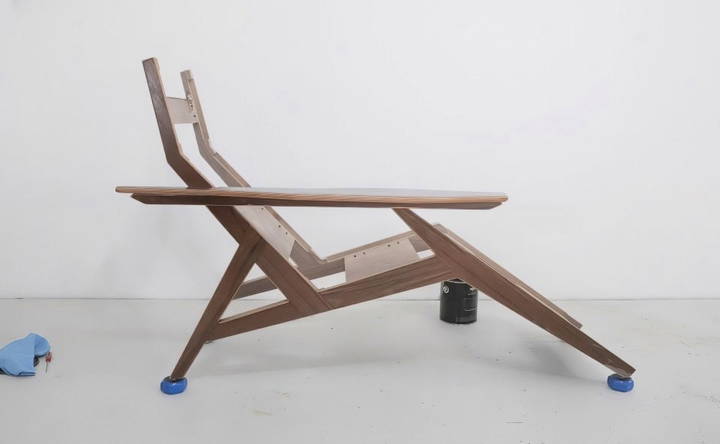
- Round the Edges: I used a round-over bit on the router to smooth the edges of the plywood. This step makes the chair more comfortable to sit on and gives it a polished look.
- Apply Wood Finish: Once the sanding is done, apply a finish to protect the wood and bring out its natural color. I used a heavy coat of Maker Brand Simple Finish, which is plant-based and really enhances the walnut.
DIY Leather Cushions
Now for the cushions, which add comfort and style to the chair.
- Cutting the Foam and Leather: I used half-inch firm foam, cutting it to match the recesses in the chair. The foam provides good support, and cutting it to the exact dimensions ensures a snug fit.
- Assembling the Cushions: I wrapped the foam with leather and secured it in place with staples. To hide the unsightly staples, I cut quarter-inch plywood panels and stained them with ebony wood stain.
- Attach the Panels: Once the leather is secured, I screwed the plywood panels to the back of the cushions. These panels provide a clean aesthetic from all angles of the chair.

Lessons Learned and Adjustments
One challenge I faced was making sure the chair would be comfortable for people of different heights. When building multiple versions, I found that adjusting the chair's size to the person's height significantly improves the ergonomics.
- Customization: To account for different body types, I experimented with making chairs in various sizes. This tailored approach made each chair more comfortable.
- Template for DIYers: For those without a CNC machine, I'm working on templates so you can use basic tools like a drill, router, and circular saw to cut your own pieces.
Customization Tips
Customizing your DIY lounge chair can make it unique and perfectly suited to your style and needs. Here are some easy and creative ways to personalize your lounge chair:
Choose Different Types of Wood
Selecting different types of wood can change the look and feel of your lounge chair. For a rustic look, use reclaimed wood. For a sleek, modern appearance, opt for hardwoods like oak or maple. Each type of wood has its own texture and color, adding a distinct character to your chair.
Paint and Stain Options
Painting or staining your lounge chair can dramatically alter its appearance. Choose a bright color to make a bold statement, or a natural stain to highlight the wood's grain. You can also use a combination of paint and stain for a unique look. For example, paint the frame and stain the seat and backrest.
Add Cushions and Upholstery
Adding cushions or upholstery can enhance comfort and style. Choose fabrics that are durable and weather-resistant if your chair will be outdoors. You can mix and match patterns and colors to build a vibrant look. Consider adding ties or Velcro to keep the cushions in place.
Incorporate Built-In Features
Think about adding built-in features like a small side table, cup holders, or even a magazine rack. These additions can make your lounge chair more functional and convenient. Use sturdy materials and ensure they are securely attached to the chair.
Personalize with Accessories
Accessories can add a personal touch to your lounge chair. Consider adding decorative elements like throw pillows, blankets, or even a small canopy for shade. You can also attach hooks for hanging items like hats or bags.
Experiment with Shapes and Sizes
Don't be afraid to experiment with different shapes and sizes. You can adjust the dimensions of the chair to better fit your space or to make it more comfortable for different users. For example, a wider seat can be more accommodating, and a higher backrest can provide better support.
Use Eco-Friendly Materials
If you're environmentally conscious, consider using eco-friendly materials. Bamboo, recycled plastic, or sustainably sourced wood are great options. These materials are not only good for the environment but also add a unique touch to your lounge chair.
Add Personal Engravings or Designs
For a truly unique touch, consider adding personal engravings or designs. You can carve patterns into the wood or use a wood-burning tool to build intricate designs. This can make your lounge chair a one-of-a-kind piece.
By incorporating these customization tips, you can make a lounge chair that is not only functional but also a reflection of your personal style.
Common Mistakes to Avoid
Building a DIY lounge chair can be a rewarding project, but it's easy to make mistakes along the way. Here are some common pitfalls and how to avoid them:
Incorrect Measurements
One of the most common mistakes is not measuring accurately. Always double-check your measurements before cutting any materials. Use a reliable measuring tape and mark clearly. Remember, “measure twice, cut once.”
Using the Wrong Tools
Using the wrong tools can lead to poor results and even injury. Make sure you have the right tools for the job, such as a saw, drill, and sander. If you're unsure, do some research or ask for advice at your local hardware store.
Poor Quality Materials
Choosing low-quality materials can affect the durability and appearance of your lounge chair. Invest in good quality wood and hardware. It might cost more upfront, but it will save you time and money in the long run.
Skipping the Sanding Process
Skipping sanding can leave your chair with rough edges and splinters. Sand all surfaces thoroughly to ensure a smooth finish. Start with a coarse grit and gradually move to a finer grit for the best results.
Ignoring Safety Precautions
Safety should always be a priority. Wear protective gear such as gloves, goggles, and a dust mask. Make sure your workspace is well-ventilated and free of clutter. Follow all safety instructions for your tools.
Rushing the Assembly
Rushing through the assembly can lead to mistakes and a poorly constructed chair. Take your time to ensure each piece is properly aligned and securely fastened. Use clamps to hold pieces in place while you work.
Not Pre-Drilling Holes
Not pre-drilling holes can cause the wood to split. Always pre-drill holes before inserting screws or nails. This will make the assembly process smoother and prevent damage to the wood.
Overlooking Weatherproofing
If your lounge chair will be used outdoors, it's important to weatherproof it. Use outdoor-grade paint or sealant to protect the wood from moisture and UV damage. This will extend the life of your chair.
Neglecting Maintenance
Once your chair is built, regular maintenance is key to keeping it in good condition. Clean it periodically and check for any loose screws or nails. Reapply paint or sealant as needed to keep it protected.
Not Following Instructions
If you're using a plan or guide, make sure to follow the instructions carefully. Skipping steps or improvising can lead to problems. If you're unsure about a step, seek clarification before proceeding.
By avoiding these common mistakes, you can ensure your DIY lounge chair project is successful and enjoyable.
Safety Precautions
Ensuring safety while building your DIY lounge chair is crucial. Here are some essential safety precautions to follow:
Wear Protective Gear
Always wear protective gear to safeguard yourself from potential injuries. This includes:
- Safety goggles: Protect your eyes from dust, wood chips, and debris.
- Gloves: Shield your hands from splinters, cuts, and chemicals.
- Dust mask: Prevent inhalation of dust and fumes, especially when sanding or painting.
Use Tools Properly
Using tools correctly is vital for safety and efficiency:
- Read manuals: Familiarize yourself with the user manuals of all tools.
- Check tools: Ensure tools are in good working condition before use.
- Use the right tool: Always use the appropriate tool for each task to avoid accidents.
Maintain a Clean Workspace
A tidy workspace reduces the risk of accidents:
- Clear clutter: Keep your work area free of unnecessary items.
- Organize tools: Store tools properly when not in use.
- Clean spills: Immediately clean up any spills to prevent slips and falls.
Follow Proper Techniques
Using the correct techniques can prevent injuries:
- Lift properly: Bend your knees and keep your back straight when lifting heavy materials.
- Cut safely: Always cut away from your body and use clamps to secure materials.
- Drill carefully: Pre-drill holes to prevent the wood from splitting and to make screwing easier.
Ensure Adequate Ventilation
Good ventilation is important, especially when working with chemicals:
- Work outdoors: If possible, work outside to avoid inhaling fumes.
- Use fans: If working indoors, use fans to circulate air and reduce fumes.
- Take breaks: Step outside for fresh air regularly.
Handle Chemicals with Care
Chemicals like paints and sealants can be hazardous:
- Read labels: Follow the instructions and warnings on chemical labels.
- Store safely: Keep chemicals in their original containers and store them out of reach of children and pets.
- Dispose properly: Dispose of chemical waste according to local regulations.
Secure Your Workpiece
Securing your workpiece can prevent accidents:
- Use clamps: Clamp materials to your workbench to keep them steady.
- Check stability: Ensure the workpiece is stable before cutting, drilling, or sanding.
Be Mindful of Electrical Safety
Electrical tools require special precautions:
- Inspect cords: Check for frayed or damaged cords before use.
- Avoid water: Keep electrical tools away from water to prevent shocks.
- Unplug tools: Always unplug tools when changing accessories or when not in use.
Keep a First Aid Kit Handy
Accidents can happen, so be prepared:
- Stock essentials: Include bandages, antiseptic wipes, and adhesive tape in your kit.
- Know first aid: Familiarize yourself with basic first aid procedures.
- Emergency contacts: Have emergency contact numbers readily available.
By following these safety precautions, you can ensure a safe and enjoyable DIY project.
FAQs About DIY Lounge Chairs
Discover answers to common FAQs about DIY lounge chairs, including materials, tools, and step-by-step guides to build your perfect lounge chair.
The time required can vary based on your experience and the complexity of the design. Generally, it can take anywhere from a few hours to a couple of days.
For outdoor use, it's best to choose weather-resistant woods like cedar, teak, or redwood. These types of wood are durable and can withstand various weather conditions.
Yes, treating the wood with a sealant or outdoor varnish can protect it from moisture, UV rays, and pests. This will extend the life of your lounge chair.
Adding cushions or padding can significantly increase comfort. You can also design the chair with ergonomic features like a curved backrest or adjustable recline.
Yes, you can add adjustable features such as reclining backrests or extendable footrests. These features can enhance comfort and functionality.
Conclusion:
Wrapping up, making a DIY plywood lounge chair is a rewarding and creative project that adds a stylish and functional piece to your home. With the right materials and tools, you can easily craft a comfortable chair that fits your style. Whether for a living room, patio, or reading nook, this DIY plywood lounge chair will provide both comfort and satisfaction.


