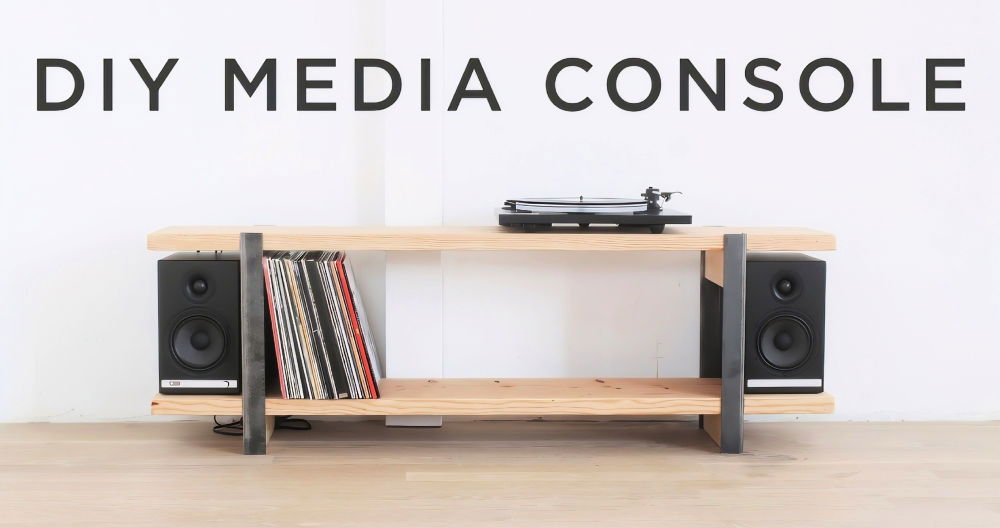
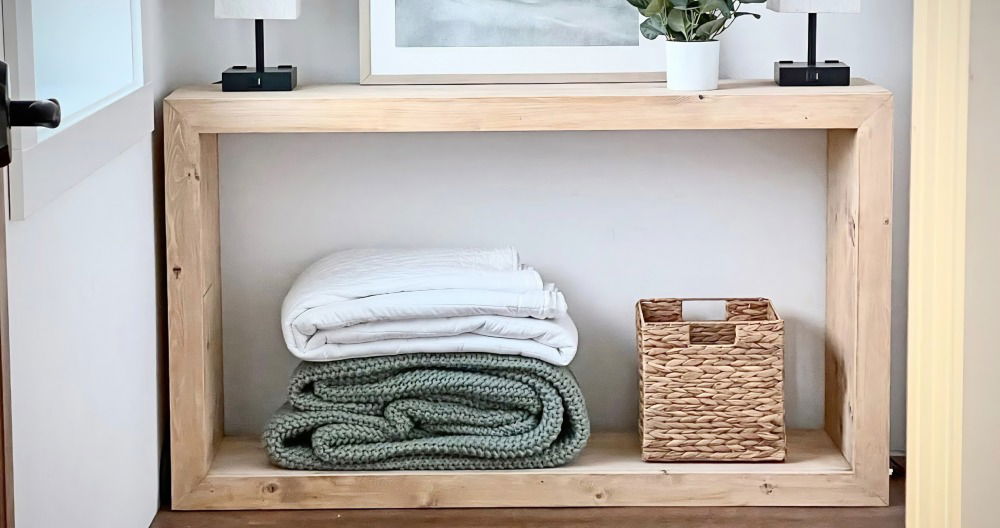
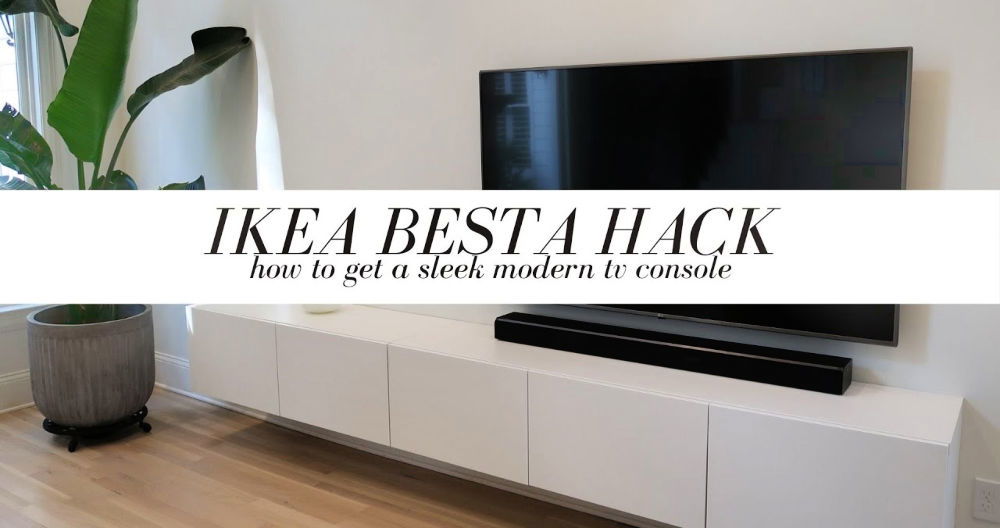
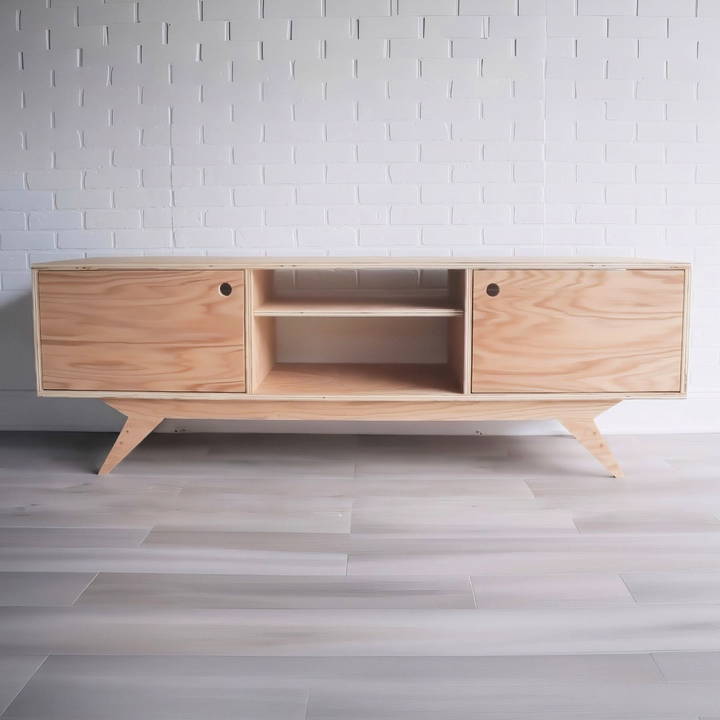
I've always been captivated by the sleek lines and timeless appeal of mid-century modern furniture. The simplicity and elegance of the design speak to me, and I wanted to bring that aesthetic into my living space. So, I rolled up my sleeves and decided to build my own DIY plywood media console—a project that turned out to be both rewarding and surprisingly straightforward.
Gathering Materials and Tools
Before diving into the build, I made sure to gather all the necessary materials and tools. Having everything on hand not only saves time but also makes the process smoother and more enjoyable. Quality materials and the right tools are crucial for a successful project.
Materials Needed
I chose two sheets of 3/4-inch red oak plywood for this project. Red oak offers a beautiful grain pattern that adds warmth and character to the piece, perfectly aligning with the mid-century modern vibe.
- Two sheets of 3/4-inch red oak plywood
- Brass shelf pins (for adjustable shelving)
- 3/8-inch oak dowels (for a clean finish on screw holes)
- Wood glue
- Inch and a quarter screws
- Euro hinges (for fully inset doors)
- Simple Finish by Maker Brand (or your preferred wood finish)
Essential Tools
Having the right tools makes all the difference. Here's what I used:
- Circular saw (for cutting plywood)
- Kreg ACS Project Table (Adaptive Cutting System for precise cuts)
- Pocket hole drill bit (for recessing screws)
- Drill and drill bits
- Japanese pull saw (for flush cutting dowels)
- Rockler hinge installation jig (for accurate hinge placement)
- Forstner bit (for drilling holes for hinges and handles)
- Multi-square tool (for laying out angled cuts on the base)
- Sandpaper (various grits for smoothing surfaces)
- Protective gear (RZ mask for dust protection)
Step by Step Instructions
Build a stylish DIY plywood media console with our step-by-step instructions. From cutting to final assembly, transform your space effortlessly!
Breaking Down the Plywood
The first step was to break down the large sheets of plywood into the individual pieces needed for the console. Working with full sheets can be unwieldy, so I took precautions to make the process safe and accurate.
I laid a piece of polystyrene insulation on the floor to act as a cutting mat. This simple setup elevates the plywood off the ground, protecting both the floor and the saw blade from damage.
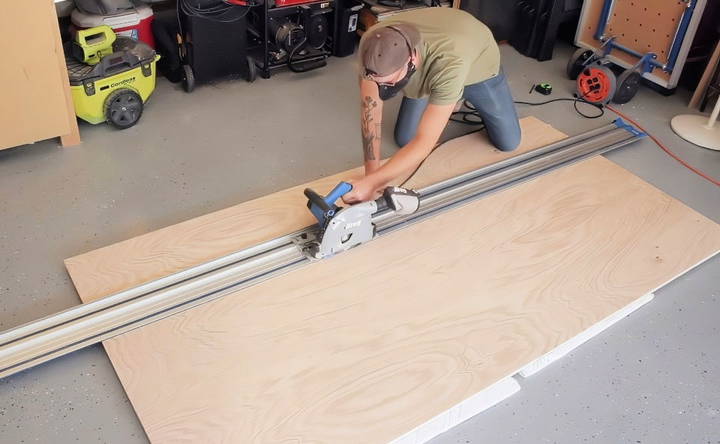
Using my circular saw, I carefully cut the plywood into strips. The console's depth is 18 inches, a standard size that comfortably accommodates most media equipment. From each 18-inch wide strip, I cut two side pieces and one top piece. The leftover piece, about 70 inches long, served as the top or bottom panel of the console.
The Kreg ACS Project Table was invaluable during this process. Its integrated guides and stops allowed me to make repeatable, precise cuts, ensuring all pieces were uniform. The adjustable track saw made it easy to achieve straight, clean cuts—a critical factor for a professional-looking finish.
- Tip: Always double-check your measurements before cutting. It's a simple step that can save you from costly mistakes.
Drilling Shelf Pin Holes
I wanted the interior of the console to be as versatile as possible, so I decided to use adjustable shelves supported by brass shelf pins. This was a new technique for me, and I was excited about the added functionality it would bring.
I marked evenly spaced points along the inside faces of the side panels and the internal dividers. Spacing the holes every two inches provided plenty of options for shelf placement.
To ensure I didn't drill all the way through the plywood, I wrapped a piece of masking tape around the drill bit at the desired depth. This simple visual cue helped me maintain consistent hole depths throughout.
I also placed masking tape over the drilling area on the plywood surface. This trick minimizes chipping and tear-out of the veneer, resulting in cleaner holes.
Drilling the holes required patience and a steady hand. I used a drill guide to keep the holes perpendicular to the surface, which is crucial for the shelf pins to sit properly.
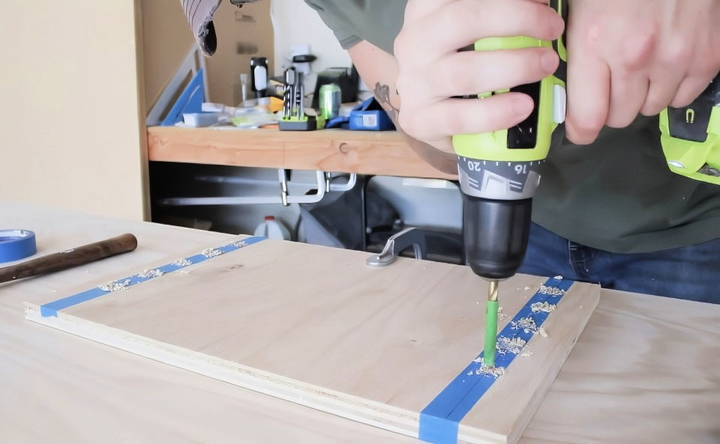
- Tip: Take your time with this step. Accurate hole placement ensures your shelves will be level and sturdy.
Assembling the Cabinet
With all the pieces prepared, it was time to assemble the cabinet. This is where everything starts to take shape, and seeing the components come together is incredibly satisfying.
I applied wood glue along the edges of the panels before joining them. To keep the pieces from shifting, I used plywood clips—handy little devices that act like an extra set of hands.
Using an inch and a quarter screws, I secured the sides, top, and bottom together. Before driving the screws, I drilled pilot holes using a pocket hole drill bit to build recesses for the screw heads. This allowed me to later fill the holes with oak dowels for a seamless look.
After assembling the main structure, I inserted 3/8-inch oak dowels into the screw holes. A dab of wood glue ensured they stayed in place. I paid attention to the grain direction of the dowels, aligning them vertically for a consistent appearance.
Using a Japanese pull saw, I carefully trimmed the dowels flush with the surface. The result was a series of neat, circular wooden plugs that added a subtle design detail to the cabinet.
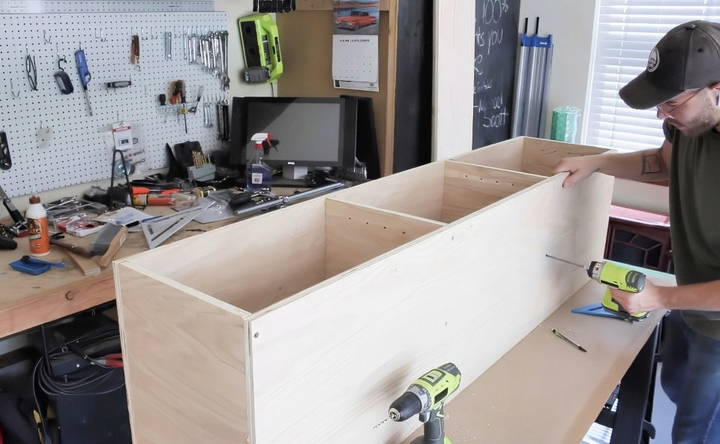
- Tip: When trimming the dowels, use a fine-tooth saw and go slowly to avoid scratching the surrounding surface.
Adding the Doors
The doors are a key feature of the console, and I wanted them to blend seamlessly with the cabinet's clean lines. I opted for fully inset doors without a face frame, which means they sit flush within the cabinet openings.
I cut the door panels from the remaining plywood, ensuring they fit snugly but could open and close smoothly. Precision is crucial here, so I double-checked all measurements before cutting.
To install the hinges, I used a Rockler hinge installation jig along with a Forstner bit. This setup made it easy to drill the recesses for the Euro hinges accurately. The jig ensured consistent placement, which is vital for proper door alignment.
I wanted to add a unique touch to the doors, so I decided to build round door handles at the corners. Using the same Forstner bit and jig, I drilled out circular recesses that serve as finger pulls. This design not only looks stylish but also keeps the front of the doors smooth and uncluttered.
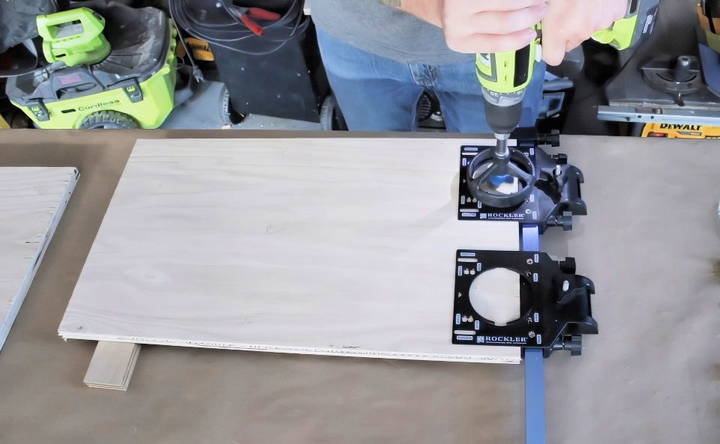
- Tip: When drilling the handle recesses, place a scrap piece of wood behind the door panel to prevent blowout as the bit exits the material.
Finishing the Cabinet
With the cabinet assembled and the doors ready, the next step was to sand and finish all the surfaces. This process enhances the wood's natural beauty and provides protection against wear and tear.
I always wear my RZ mask during sanding to protect myself from dust particles. Starting with medium-grit sandpaper, I worked my way to a fine-grit for a smooth finish. Sanding between coats of finish helps achieve a professional look.
After wiping away all the dust with a tack cloth, I applied a coat of Simple Finish by Maker Brand. This oil-based finish penetrates the wood, bringing out the rich grain of the red oak. I love how it gives the plywood a warm, natural appearance without obscuring the wood's character.
I allowed the finish to dry thoroughly before moving on. Patience is key here; rushing can lead to a sticky or uneven finish.
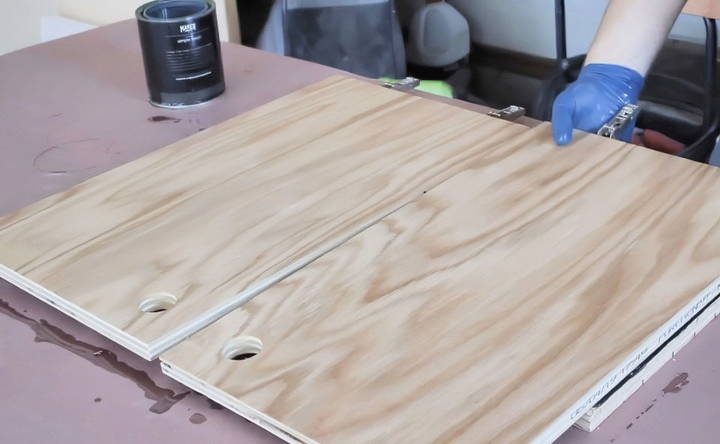
- Tip: Apply the finish in thin, even coats, following the wood grain. This helps prevent streaks and bubbles.
Building the Base
The base is a simple yet elegant design that complements the mid-century modern aesthetic of the console. It relies on 15 and 45-degree angles, giving it a distinctive look without being overly complicated.
Using a multi-square tool, I laid out the angles directly onto the plywood. Connecting the marks buildd the shape of the base. This method was straightforward and didn't require any complex calculations.
I used the Kreg ACS Project Table to make the straight cuts. For the interior corners where the saw couldn't reach, I finished the cuts with my Japanese pull saw. This combination allowed me to achieve precise cuts with clean edges.
To assemble the base, I used wood glue and screws, just like with the cabinet. I extended the visible dowel detail to the base by filling the screw holes with oak dowels. This tied the design elements together, making a cohesive look.
After assembling, I applied the same finish to the base as I did to the cabinet. Consistency in materials and finishes is important for a unified appearance.
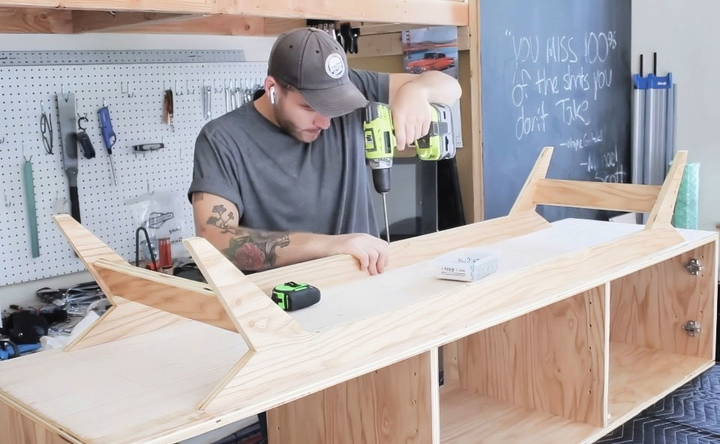
- Tip: Ensure all angles are accurate before cutting. Small deviations can lead to gaps or misalignment during assembly.
Final Assembly
Attaching the base to the cabinet was the final step. I carefully measured and marked the placement, aiming for a three-quarter-inch reveal on all sides. Using spacer blocks helped maintain consistent spacing.
I drilled pilot holes through the bottom of the base and into the cabinet, then secured it with screws. Since I wanted a clean interior, I made sure the screws didn't penetrate through to the inside of the cabinet.
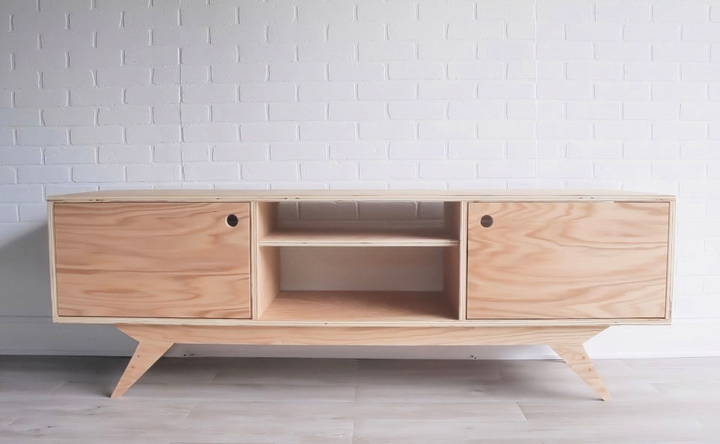
With the base attached, I reinstalled the doors and inserted the brass shelf pins. Placing the shelves inside, I stepped back to admire the finished piece.
Seeing the console come together was incredibly satisfying. The combination of the rich oak grain, the clean lines, and the subtle details like the dowel plugs and brass pins made all the effort worthwhile.
Customization and Style Ideas: Make it Uniquely Yours
Your DIY plywood media console is a blank canvas, waiting for your personal touch. Let's explore some ideas to elevate its style and match it perfectly to your home decor:
Color and Finish Options:
- Paint: Transform your console with a vibrant coat of paint. Choose a bold color to build a statement piece or a neutral tone to blend seamlessly into your room.
- Stain: Enhance the natural beauty of the plywood with a rich wood stain. This can add warmth and depth to the console's appearance.
- Natural Finish: Embrace the raw look of the plywood by simply sealing it with a clear coat. This option showcases the wood's unique grain and texture.
Hardware Upgrades:
- Handles and Knobs: Swap out the basic hardware for something more eye-catching. Choose from a variety of styles, from sleek and modern to vintage and ornate.
- Door Pulls: Replace standard door pulls with leather straps, rope handles, or even decorative metal brackets for a unique touch.
- Feet or Legs: Elevate your console with new feet or legs. Options include hairpin legs, tapered legs, mid-century modern legs, or even casters for easy mobility.
Decorative Accents:
- Stenciling or Decoupage: Add patterns or designs to your console with stencils or decoupage techniques.
- Woodburning: Make intricate designs or personalize your console with woodburning.
- Metal Accents: Incorporate metal trim, corner brackets, or decorative inlays for an industrial or modern look.
Remember:
- Consider your existing décor: Choose colors, finishes, and hardware that complement your home's overall style.
- Get creative: Don't be afraid to experiment with different techniques and ideas to build a one-of-a-kind piece.
- Have fun: The most important thing is to enjoy the process and build a media console that you love.
With a little creativity and effort, you can transform your DIY plywood media console into a stylish and personalized centerpiece for your living space.
Additional Features and Modifications: Elevate Your Media Console
Your DIY plywood media console is already a functional and stylish piece, but why stop there? Let's explore some exciting additional features and modifications to truly personalize and enhance its utility:
Hidden Storage Compartments
- Secret Drawers: Incorporate cleverly concealed drawers within the existing framework. Perfect for storing remotes, gaming controllers, or other small items you'd like to keep out of sight.
- Pull-Out Shelves: Install smooth-gliding shelves behind doors or within open compartments. These can be used for additional media storage, books, or even a hidden bar area.
- False Bottoms: Make compartments beneath a seemingly solid base. This can provide ample space for larger items you may not need access to on a daily basis.
Cord Management Solutions
- Rear Access Panels: Design removable or hinged panels at the back of the console for easy access to cables and outlets.
- Cable Grommets: Install grommets in strategic locations to neatly route cords through the console and prevent tangles.
- Built-in Power Strip: Consider incorporating a power strip within the console for convenient plug-in access and a centralized power source.
Built-in Lighting
- LED Strip Lights: Add LED strips along the back or underside of the console to build a warm and inviting ambiance.
- Puck Lights: Install small puck lights inside shelves or compartments to highlight display items or provide task lighting.
- Motion-Sensor Lights: Consider adding motion-activated lights to illuminate the console's interior when doors are opened, adding a touch of luxury.
Other Creative Modifications
- Turntable Shelf: If you're a vinyl enthusiast, design a dedicated shelf or compartment to accommodate your turntable and record collection.
- Game Storage: Incorporate vertical slots or drawers to neatly store video game consoles and controllers.
- Pet Bed Integration: Make a cozy nook within the console for your furry friend to relax.
- Plant Shelf: Add a small shelf or ledge to showcase your favorite houseplants.
These are just ideas to get you started. Feel free to get creative and customize your console to suit your specific needs and preferences.
Troubleshooting and Common Mistakes: Smooth Sailing Ahead
Even the most skilled DIYers encounter hiccups along the way. Let's address some common mistakes and offer solutions to keep your project on track:
Warping:
- Problem: Plywood can warp if not stored or handled properly. This can lead to uneven surfaces and gaps in your console.
- Solution:
- Store plywood flat in a dry location.
- Use clamps and weights during glue-ups to ensure even pressure and prevent warping.
- If minor warping occurs, try steaming or gently bending the wood back into shape before assembly.
Uneven Finish:
- Problem: Blotchy or uneven stains or paint can mar the appearance of your console.
- Solution:
- Sand the plywood thoroughly before applying any finish.
- Use a pre-stain wood conditioner to help the stain absorb evenly.
- Apply stain or paint in thin, even coats.
- Allow ample drying time between coats.
Doors Not Closing Properly:
- Problem: Doors may not align or close flush due to hinge placement or swelling of the wood.
- Solution:
- Double-check hinge placement before attaching them.
- Use shims to adjust the doors if they're not closing evenly.
- If wood swelling is an issue, consider sanding down the edges of the door or frame slightly.
Other Common Issues:
- Splits or Cracks: Use wood filler to repair minor splits or cracks before applying a finish.
- Loose Joints: Reinforce loose joints with additional screws or wood glue.
- Scratches or Dents: Sand and refinish affected areas to remove minor imperfections.
Remember:
- Measure twice, cut once: Careful planning and accurate measurements can prevent many mistakes.
- Take your time: Don't rush the process. Allow adequate drying time for glue and finishes.
- Don't be afraid to ask for help: If you encounter a problem you can't solve, reach out to a friend, family member, or online community for assistance.
By being aware of these common issues and their solutions, you can build a beautiful and functional DIY plywood media console that will be a source of pride for years to come.
FAQs About DIY Plywood Media Console
Discover answers to common questions about building a DIY plywood media console, from material selection to assembly tips and tools needed.
A sturdy console starts with the right plywood thickness. Opt for at least ¾-inch plywood for the main structure and shelves. Reinforce joints with wood glue and screws, and consider adding corner braces or center support for extra strength, especially if you have a large TV or heavy components.
Several options exist to keep cords tidy. You can drill holes in the back panel for cable routing, install cable grommets, or use cable organizers and ties to bundle cords together. Consider incorporating a built-in power strip to centralize power sources and minimize visible cables.
Absolutely! Adding casters to the bottom of your console allows for easy movement, especially useful for cleaning or rearranging your space. Choose locking casters to keep the console securely in place when needed.
Apply a durable topcoat, such as polyurethane or lacquer, to seal and protect the finish. Use coasters and placemats to prevent water rings and scratches. Regularly dust and clean the console with a soft cloth and mild cleaning solution.
Don't worry, mistakes happen! If you cut a piece incorrectly, you may be able to salvage it by adjusting your design or incorporating the mistake creatively. Wood filler can fix minor gaps or cracks, and sanding can smooth out imperfections. Remember, the beauty of DIY is that it's a learning process!
Conclusion:
Wrapping up, and making a DIY plywood media console is an adorable project that adds a personal touch to your home. With the right materials and a little time, you can build a stylish and functional piece that complements your space. By following the steps carefully, you'll have a media console that meets your needs and showcases your craftsmanship. Enjoy the process and take pride in your finished project!


