Revamping a garage floor with a durable polyurea coating is a popular DIY project that can add immense value to your space, making it more functional, easier to clean, and visually appealing. Unlike traditional epoxy coatings, polyurea offers greater flexibility and strength, often drying faster and providing enhanced durability. Here's a step-by-step guide, inspired by a real-life project, to help you apply a polyurea floor coating to your garage. This process is typically manageable in one day, assuming you've done the necessary preparation in advance.
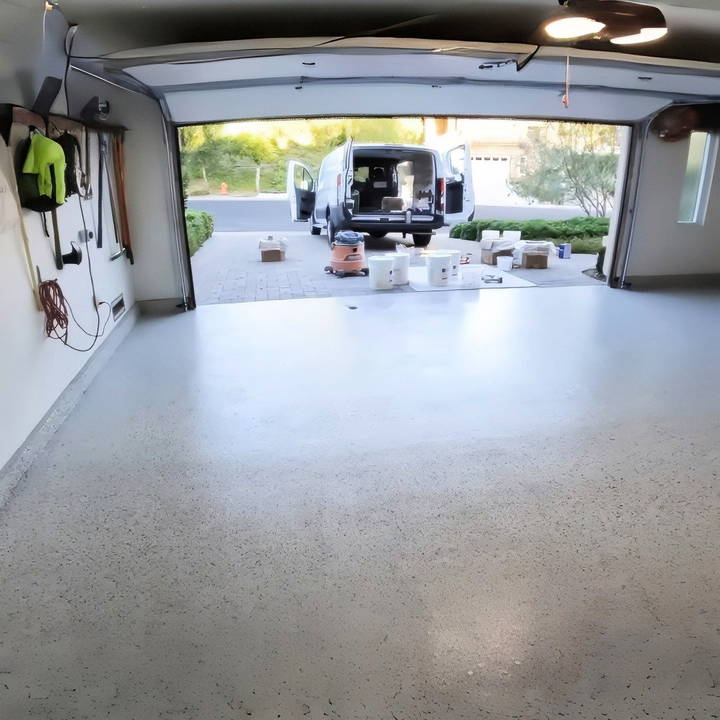
Why Choose Polyurea Over Epoxy?
Before diving into the process, let's explore why polyurea might be your top choice for garage flooring. While epoxy has long been a go-to option, polyurea offers unique benefits that are hard to ignore.
- Fast Curing: Polyurea typically dries within 30 minutes, allowing for quick project completion.
- Durability: Polyurea is highly resistant to chemicals, abrasions, and UV exposure, making it ideal for garages that see heavy use.
- Flexibility: Unlike epoxy, polyurea can flex slightly with temperature changes, reducing the likelihood of cracks or chips.
- Aesthetic Appeal: Polyurea coatings come in a range of pigments and can be enhanced with decorative flakes, offering a professional finish.
Now, let's walk through each step, from preparation to final coating.
Step by Step Instructions
Learn how to apply a DIY polyurea garage floor coating with step-by-step instructions for a flawless finish and long-lasting protection.
Step 1: Prepare the Garage Floor
Preparation is critical for a flawless finish. Any dirt, moisture, or surface damage can compromise adhesion, so taking the time to clean and repair your floor will ensure the longevity of your polyurea coating.
Floor Preparation Essentials
- Clean the Floor: Start by thoroughly sweeping and washing the floor. Remove any debris, grease, or oils that could hinder adhesion.
- Repair Damaged Areas: Address cracks, chips, and other imperfections. Polyurea requires a smooth surface to ensure even coverage. For deep cracks or holes, use a concrete patching compound and allow it to dry completely.
- Grind the Floor: A concrete grinder will help roughen the surface, improving adhesion. Use a grinder with a 60- to 80-grit diamond wheel to lightly roughen the surface without making grooves.
- Moisture Barrier Application: If your garage is prone to moisture issues, consider applying a moisture barrier. This step helps prevent bubbling or peeling, especially in older garages with potential moisture seepage.
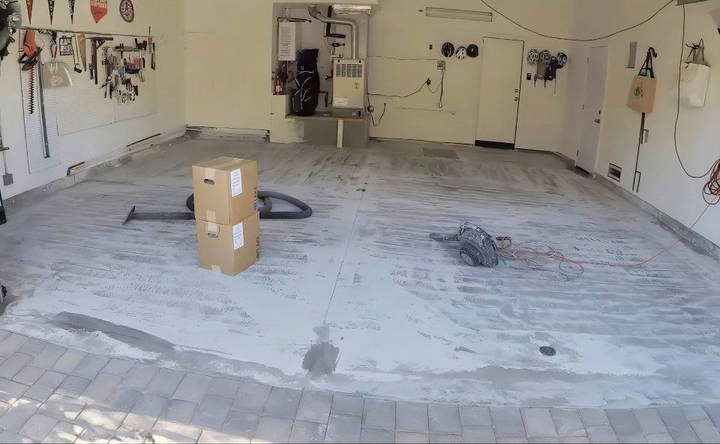
Pro Tip: Many DIY enthusiasts find renting a concrete grinder from a local hardware store to be cost-effective and efficient for surface preparation.
Step 2: Apply the Base Coat and Edge Coating
Once your floor is prepped, you can begin applying the polyurea base coat. This step involves coating the edges first and then moving on to the main floor area.
Edge Application
- Tools Needed: Use a 3-inch chip brush for the edges and a 6-inch roller for tighter spaces.
- Method: Start with the edges and stem walls. Use the brush to work around corners and small crevices where a larger roller won't fit. The key here is to apply a consistent layer of the polyurea along all edges.
- Quick Work: Polyurea dries fast, so keep your pace steady. With only about 20-30 minutes of work time before it becomes too tacky, it's essential to work efficiently.
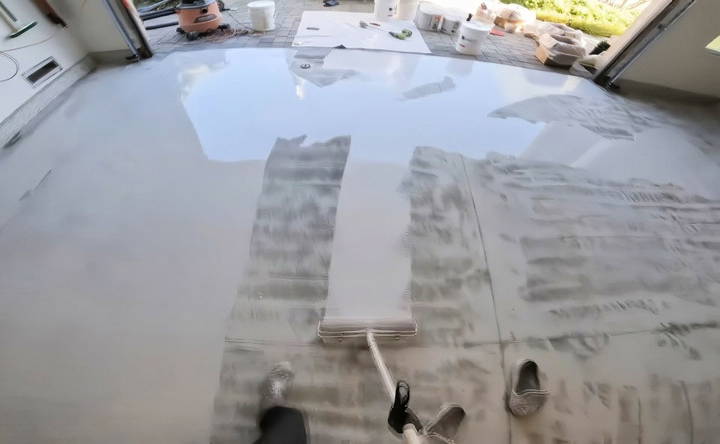
Base Coat for the Floor
- Roller Setup: For the main floor area, attach an 18-inch roller to cover larger spaces quickly. Tighten the roller securely with a wrench to avoid interruptions from a loose handle.
- Application Technique: Begin at one corner and roll in a consistent, even motion, covering the entire floor. Remember to back-roll over areas with fresh concrete patches, as they tend to absorb more of the coating.
Pro Tip: If working alone, start from the back corner and work your way towards the exit, minimizing the chance of stepping on freshly coated areas.
Step 3: Broadcasting Decorative Flakes
Adding decorative flakes is an excellent way to enhance your garage floor's aesthetics and provide a slight anti-slip texture. This step is optional but recommended for a more professional and appealing finish.
- Flake Selection: Choose a blend of colors that complements the overall look of your garage. Beige, gray, white, and black flakes build a versatile finish that works well with most base colors.
- Even Distribution: Start broadcasting flakes at the front of the garage and work towards the back. Applying flakes in a heavier concentration near the entrance adds visual interest.
- Blower Assistance: To spread flakes uniformly, use a blower. This helps distribute the flakes across the floor without using excess material. Be cautious to hold the blower at an angle and distance to avoid peeling flakes off the wet polyurea.
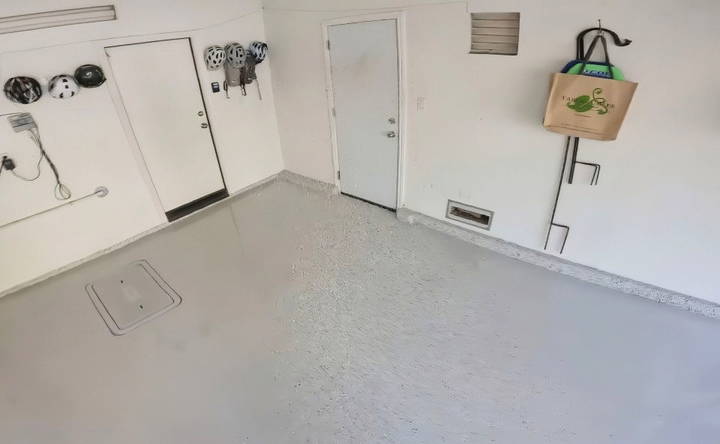
Pro Tip: Avoid oversaturating any area with flakes. Too many flakes can lead to an uneven surface, while too few can make the color coat visible. Strike a balance by testing your technique on a small section first.
Step 4: Cleaning Up Excess Flakes
After the polyurea has dried (about 30 minutes), it's time to clean up any flakes that didn't adhere to the base coat.
- Blowing Excess Flakes: Use a blower to gather loose flakes into one corner of the garage. This is faster and more effective than using a vacuum for larger areas.
- Sweeping: Once collected, sweep the flakes into a dustpan and dispose of them or save them for future touch-ups.
- Scraping the Edges: Use a small scraper to clean up the edges where flakes may stick out or appear chunky. This will help you achieve smooth, clean lines along the walls.
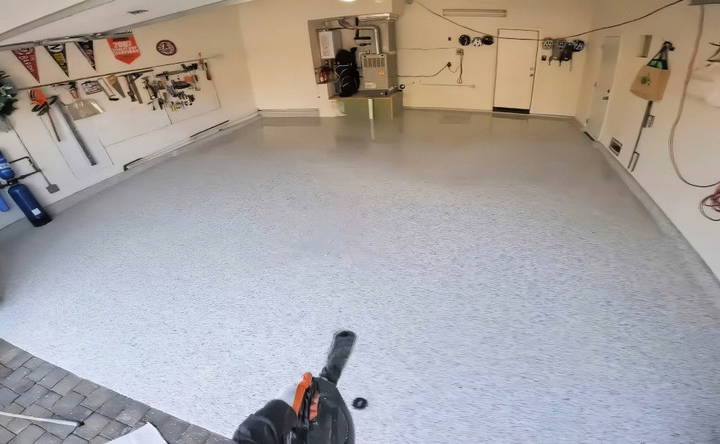
Pro Tip: Choose a “good corner” of the garage where it's easiest to blow and collect the flakes, ideally away from doors to avoid the flakes spreading outside the garage.
Step 5: Scraping the Floor and Final Clean-Up
Once the loose flakes are cleared, scrape the main floor area to ensure a smooth surface before applying the topcoat. This step is critical to achieving a professional-grade finish.
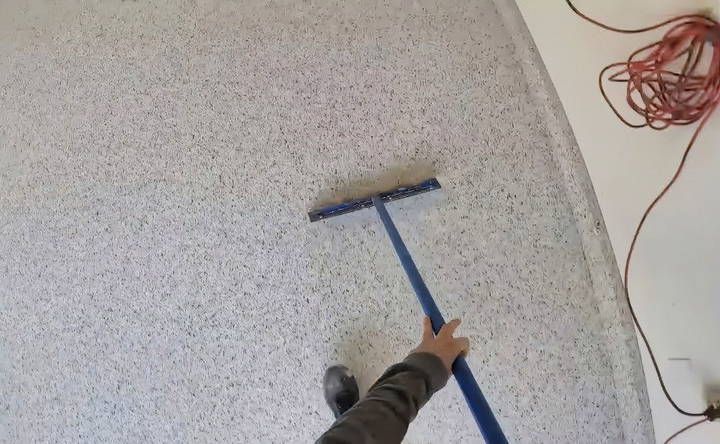
- Floor Scraper: Use a larger floor scraper, and scrape in multiple directions (front to back, side to side, then back to front). This helps remove any loose flakes and builds an even surface.
- Vacuuming: After scraping, vacuum up any remaining flakes in the corner. A thorough clean-up will prevent unwanted particles from ending up in the topcoat.
Step 6: Applying the Clear Topcoat
With the base coat and flakes in place, the final step is to apply a clear topcoat. This layer seals in the decorative flakes, provides a glossy finish, and adds an extra layer of protection. The topcoat is especially important for a garage floor, as it helps resist stains, abrasions, and impacts from dropped tools or car tires.
Preparing for the Topcoat
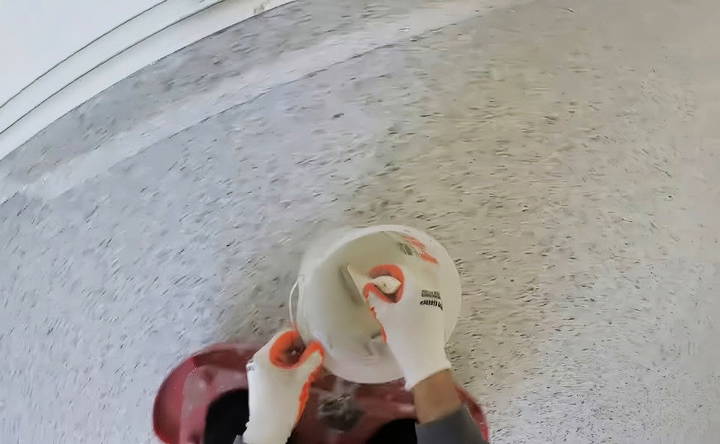
- Mixing the Topcoat: Follow the manufacturer's instructions to mix the clear polyurea topcoat thoroughly. Polyurea is often thick, and over time, it can get thicker as it reacts with air, so mix just before application.
- Fresh Mix for Edges: Start with the edges, as a fresher, more liquid consistency makes it easier to apply. As polyurea thickens, it becomes harder to work into crevices, so using a fresh mix for edges minimizes drips and puddling.
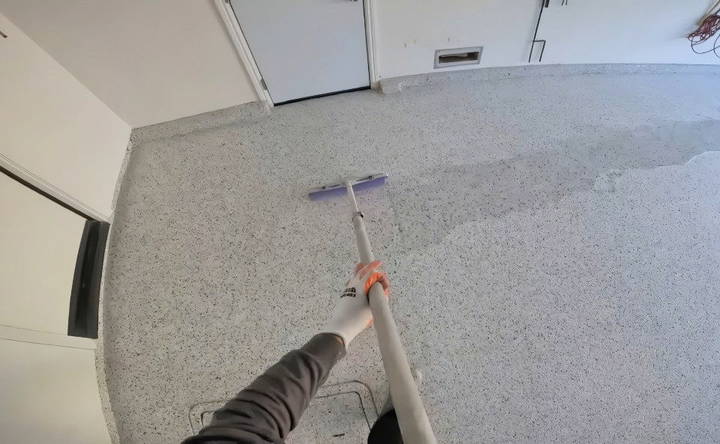
Applying the Topcoat to Edges and Stem Walls
- Horizontal Edges First: Begin by coating any horizontal edges along the stem wall or garage entry with a chip brush. This approach helps ensure that excess liquid doesn't drip down the walls.
- Vertical Edges Second: Move to the vertical edges. By this point, the topcoat should be slightly thicker, which reduces the likelihood of runs or drips.
Main Floor Topcoat Application
- Roller Application: For the main floor, use an 18-inch roller and start from the back of the garage, working towards the front. Apply a consistent layer without missing any areas, ensuring each section is evenly coated.
- Back Rolling for Consistency: To prevent streaks, back-roll the topcoat. Let the roller rest lightly on the surface without adding pressure, which allows the coat to settle evenly and reduces any visible brush or roller marks.
Pro Tip: Aim to complete the topcoat before dusk. Natural light is beneficial as it provides a reflective surface, allowing you to check for an even finish across the floor. Artificial lights might not reveal any imperfections, especially when applying the topcoat in the evening or night.
Step 7: Final Touches and Curing
With the topcoat applied, the floor now needs time to cure. Polyurea typically cures within 24 hours but may vary depending on environmental conditions. Avoid walking on or placing heavy items on the floor during this time to prevent any unwanted marks or dents.
Ensuring a Proper Cure
- Ventilation: Ensure proper ventilation in the garage by opening windows or leaving the garage door partially open. Adequate airflow helps the polyurea cure faster and reduces the fumes commonly associated with coatings.
- Temperature Considerations: Avoid extreme temperature conditions during the curing phase. If temperatures are too cold, the topcoat might take longer to cure; too hot, and it could set too quickly.
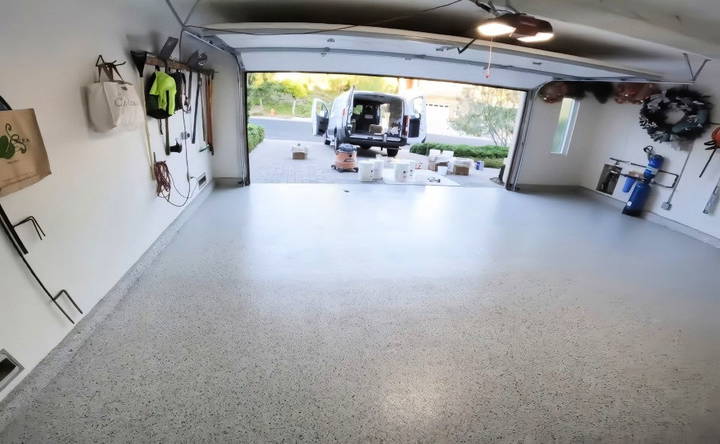
Inspecting the Finished Floor
- Final Inspection: Once the topcoat is cured, take a close look to ensure that there are no streaks, uneven areas, or visible flaws. A properly applied polyurea coating should have a smooth, glossy finish with a consistent texture.
- Touch-Up if Needed: If you notice small imperfections, consider doing touch-ups with a fresh brush or roller. This is much easier to address soon after application rather than waiting until the floor has fully hardened.
Maintenance Tips for Your Polyurea Garage Floor
Polyurea-coated floors are low maintenance, but keeping them in top condition will extend their lifespan. Here are some maintenance tips to ensure your new garage floor stays looking fresh and clean for years to come.
- Regular Sweeping: Dust and debris can accumulate quickly in garages. Use a soft-bristle broom to sweep regularly, preventing dirt from building up.
- Mild Soap Cleaning: For stains or spills, a mix of mild soap and warm water should be enough. Avoid harsh chemicals, as they can damage the polyurea surface.
- Avoid Dragging Heavy Objects: To prevent scratches, lift heavy items rather than dragging them across the floor.
- Mat Placement: Use mats in high-traffic areas, such as in front of workbenches or near doorways, to reduce wear over time.
Benefits of a DIY Polyurea Garage Floor Coating
Opting for a DIY polyurea coating instead of hiring a professional contractor can save a significant amount of money, often costing half or less than professional rates. With careful preparation and attention to detail, achieving a professional-looking finish is entirely possible on your own.
Key Advantages of Polyurea Coating
- Durability: Polyurea is highly resistant to abrasions, impacts, and UV damage, making it suitable for garages exposed to constant wear and tear.
- Easy to Clean: The glossy finish repels dirt, oil, and chemicals, simplifying maintenance and keeping the floor looking pristine.
- Aesthetic Appeal: With the addition of color pigments and decorative flakes, polyurea-coated floors transform any standard garage into a polished, showroom-quality space.
Cost-Effectiveness and Longevity
While polyurea may be more expensive than epoxy upfront, its longevity and low maintenance make it cost-effective in the long run. A well-maintained polyurea floor can last 10-20 years without significant repairs or reapplications, offering greater value over time.
Conclusion: DIY Polyurea Garage Floor Coating in a Day
Transforming your garage with a polyurea floor coating is a rewarding project that enhances both the aesthetics and functionality of your space. By following these steps, you'll achieve a durable, low-maintenance, and visually appealing floor that can handle the demands of a busy garage.
With the right preparation, tools, and techniques, anyone can complete this project in a day, transforming their garage from a plain concrete space to a professional-grade floor. Whether it's for personal satisfaction, increased home value, or simply a cleaner workspace, a polyurea garage floor coating is an investment worth making.
FAQs About DIY Polyurea Garage Floor Coating
Discover answers to common questions about DIY polyurea garage floor coating for a durable, easy-to-maintain, and stylish garage floor upgrade.
Yes, cleaning the mixing paddle between coats is important to prevent buildup and ensure smooth application. Use a solvent like acetone or a recommended cleaning agent for polyurea to remove residue before it hardens. Clean the paddle immediately after mixing, as polyurea cures quickly and can be difficult to remove once set.
While applying the base coat, it's possible for glue to get on the stem walls if not careful. Use a smaller brush around edges and corners where walls meet the floor, which gives better control. If glue does get on the walls, it can usually be removed before it fully dries without causing lasting marks.
The base coat usually remains workable for about 20-30 minutes before it starts to dry. Begin flake application right after rolling the base coat on each section, so the flakes adhere properly. Applying flakes after the surface is tacky ensures they stick well but prevents them from sinking into the coating.
Using a blower can help control flakes, but use it at a distance and angle to avoid dislodging glued flakes. Direct flakes toward a “good corner” away from doors to avoid them scattering outside. This keeps your cleanup contained within the garage and minimizes unwanted mess.
While it’s possible to do it solo, a helper can make the process faster, especially when spreading flakes and applying the topcoat. Polyurea dries quickly, so having another person can improve efficiency. However, with good planning and pacing, working alone is manageable.
If streaks appear, back-roll with a light touch, letting the roller rest on the surface without added pressure. Work in sections and pull the roller behind you gently. This minimizes streaks and helps the topcoat settle evenly across the surface.
To prevent drips on vertical edges, apply the topcoat when it's slightly thickened after mixing. Start with horizontal edges first, letting excess topcoat distribute evenly. Then, when applying on vertical surfaces, use a brush to avoid heavy buildup and prevent drips.


