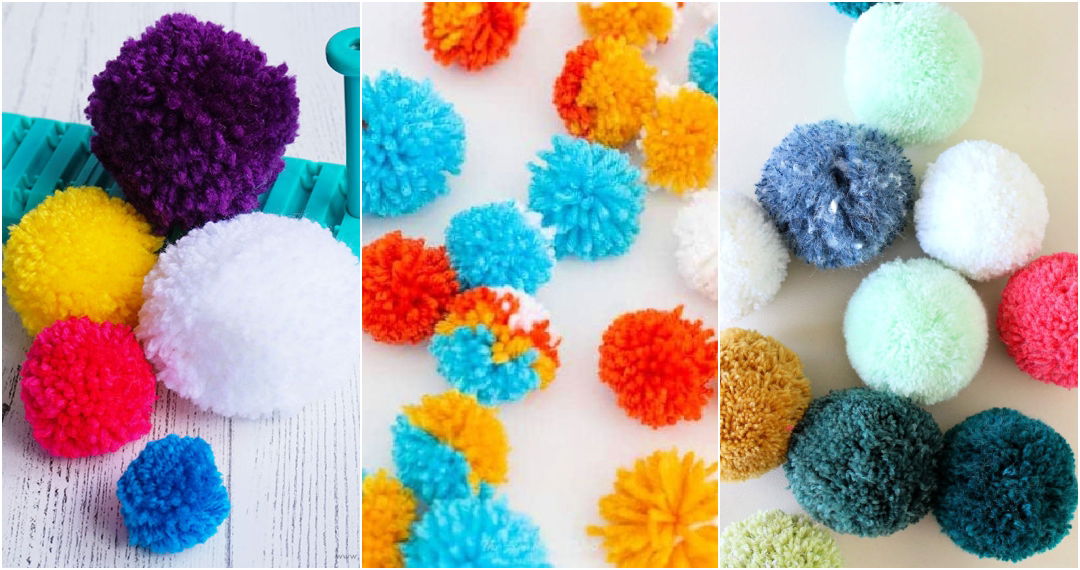
Making pom poms is a fun and simple craft. This guide will teach you how to make an easy DIY cardboard pom pom maker. The materials required are minimal – just some cardboard and scissors. With this homemade tool, you can produce colorful and fluffy pom poms for various decorations or art projects. It's a cost-effective and enjoyable activity for any age.
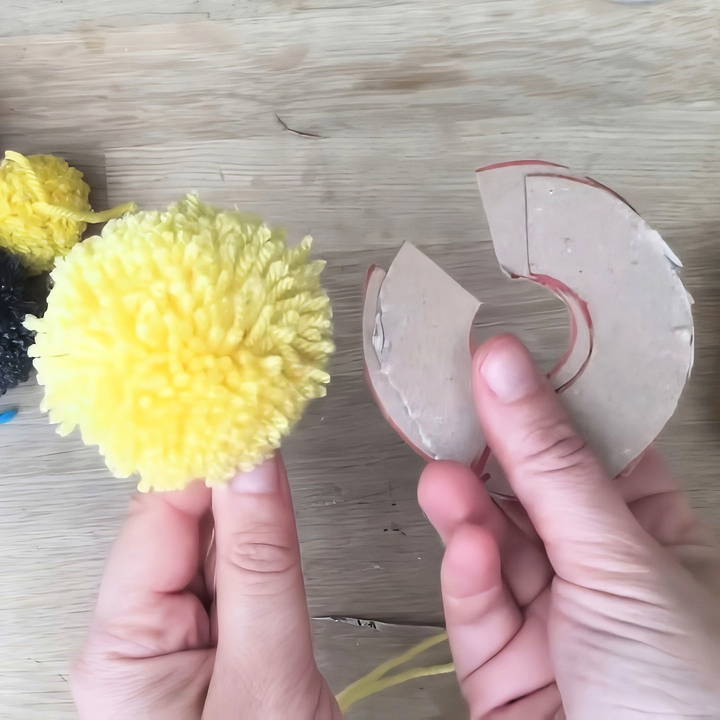
Learn how to make a DIY cardboard pom pom maker easily. Follow our step-by-step guide below for fun, creative pom-pom projects!
Materials Needed
Before we start, let's gather our materials:
- Cardboard: You'll need a piece of sturdy cardboard to make the template for your pom pom maker.
- A glass or any circular object: This will be used to trace the large outer circle.
- A coin or another small circular object: To mark the smaller inside circle, which will determine the size of your pom pom's core.
- Sharp scissors: Essential for cutting the cardboard and yarn.
- Yarn: The primary material for making the pom pom. Choose any color you like.
- Pencil: For tracing the circles.
Why These Materials?
- Cardboard: Gives structure and durability to your pom pom maker.
- Circular objects (glass and coin): Ensure uniform size and shape for consistent results.
- Scissors: For precise cuts.
- Yarn: The star of the show – you can't have a pom pom without it!
- Pencil: For neat, visible lines to cut along.
Step by Step Instructions
Learn to make your own DIY pom pom maker with easy step-by-step instructions. Perfect for craft enthusiasts seeking a fun and creative project.
Step 1: Tracing the Circles
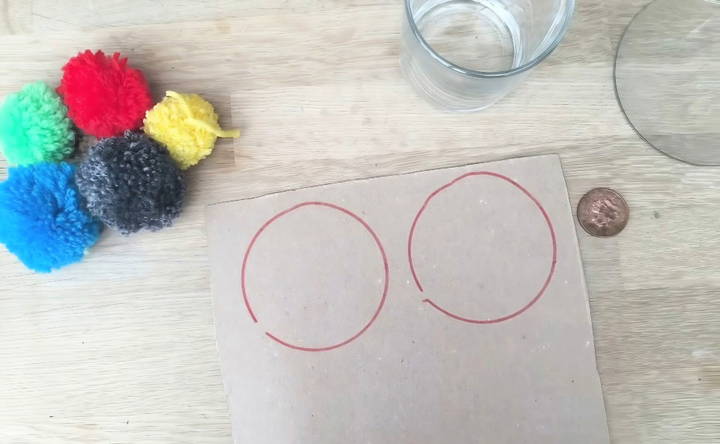
First, place your cardboard on a flat surface. Take the glass or any circular object you have and position it on the cardboard. Use the pencil to trace around the outer edge of the glass, making a large circle.
Next, take the coin and place it in the center of the large circle you just traced. Trace around the coin to make a smaller circle inside the larger one.
The size of the outer circle determines the overall size of your pom pom, while the size of the inner circle determines how dense and fluffy your pom pom will be. A smaller inner circle means a fluffier pom pom.
Step 2: Cutting Out the Template
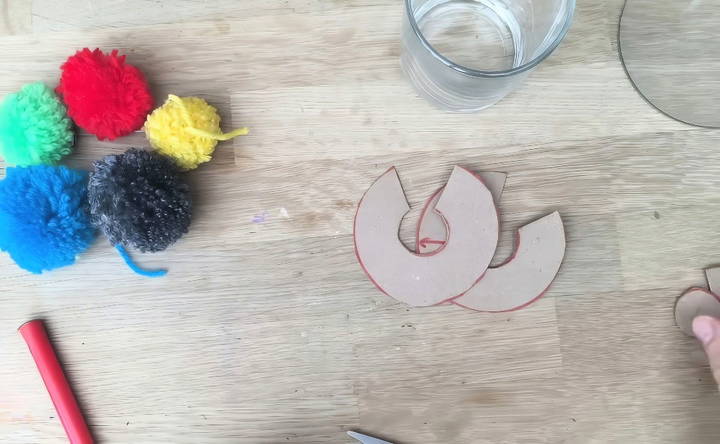
Now, it's time to cut out the traced circles. Carefully cut around the edge of the large circle first. Once you have the outer circle cut out, proceed to cut out the inner circle to make a donut shape.
You'll need two identical donut-shaped pieces of cardboard. So, trace and cut out another piece following the same steps as above.
Step 3: Assembling the Pom Pom Maker
Take the two cardboard donuts and place them together. They should align perfectly since they are identical in size.
Step 4: Wrapping the Yarn
Now for the fun part! Take your yarn and start wrapping it around the cardboard donuts. Begin by threading the yarn through the center hole and wrapping it around the outer edge. Continue wrapping until the entire donut is covered with a thick layer of yarn.
- Here's a tip: try not to wrap the yarn too tightly, as it can make the next steps a bit tricky. The goal is a snug fit without being overly taut.
Step 5: Cutting the Yarn
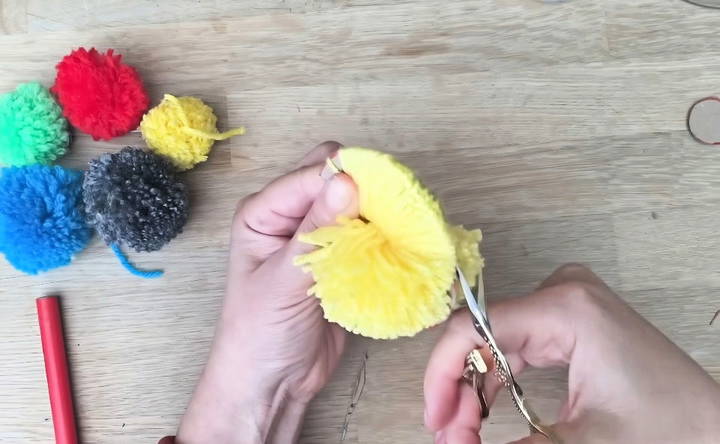
Once your donuts are fully wrapped with yarn and you're happy with the thickness, take the sharp scissors and carefully cut the yarn along the outer edge of the cardboard. Ensure you hold the cardboard pieces firmly together to prevent the yarn from unraveling.
Cutting between the cardboard layers, follow the outer circle all the way around. This step might be a bit fiddly but take your time and make sure each strand is cut.
Step 6: Tying Off the Pom Pom
Now, grab a piece of yarn and slide it between the two cardboard pieces. Pulling it tight, tie the yarn securely around the middle of the pom pom. Knot it a couple of times to ensure it's firmly in place.
Step 7: Finishing Touches
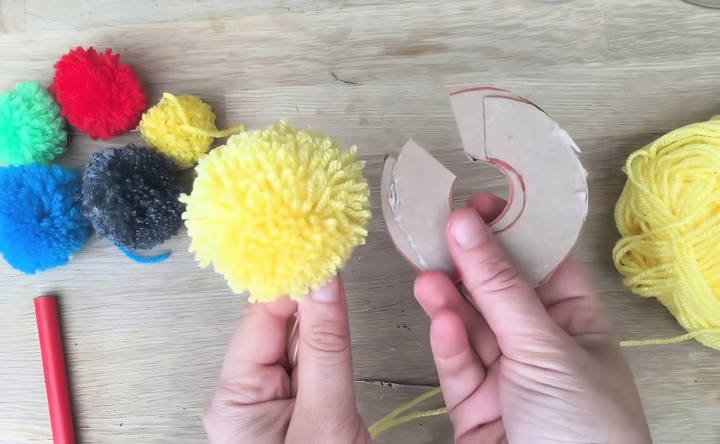
Finally, remove the cardboard templates from your yarn. You might see some stray pieces, so take the scissors and trim them to give your pom pom a neat, round shape.
Congratulations! You've just made your very first pom pom using a homemade pom pom maker. How cool is that?
Additional Tips and Tricks
Discover additional tips and tricks for crochet: experiment with sizes, try different yarn colors, and explore creative uses for your projects.
Experiment with Sizes
The beauty of this craft is its versatility. Try using different sized circular objects to make various pom poms. From tiny ones perfect for decorating presents to larger ones for home décor, the possibilities are endless.
Different Yarn Colors
Mix and match yarn colors to make multi-colored pom poms. Experiment with thick and thin yarns to see the different textures and densities you can achieve.
Creative Uses
Use your pom poms for:
- Keychains or bag charms: Add a fun and colorful touch to your accessories.
- Garlands: String several pom poms together for a festive garland.
- Decorations: Perfect for sprucing up your room or party décor.
Project Ideas
When it comes to DIY pom pom makers, the possibilities for creative projects are endless. Here are some project ideas that can inspire your readers to put their handmade pom poms to good use:
- Home Decor: Pom poms can add a playful touch to any room. Encourage readers to make colorful garlands to drape over curtains or to hang as a mobile over a child's crib. They can also attach pom poms to throw pillows or blankets for a fun, textured look.
- Fashion Accessories: Pom poms make for adorable fashion statements. Suggest making pom pom keychains, attaching them to the edges of scarves, or even making a chic pom pom necklace. These can add a unique flair to any outfit.
- Party Decorations: Whether it's for a birthday, baby shower, or a festive holiday, pom poms can serve as vibrant party decorations. Readers can make pom bunting, centerpieces, or even napkin rings to add a special touch to their events.
- Gift Toppers: Instead of traditional bows, pom poms can be used as a creative and personal gift topper. They're especially perfect for adding a handmade touch to presents during the holiday season.
- Educational Tools: For those with young children, pom poms can be used in educational activities. They can be used for color sorting, counting, or as tactile elements in a homemade sensory bin.
- Pet Toys: Readers with pets might enjoy making pom-pom toys. They can be attached to strings for cats to chase or added to homemade dog toys for an extra element of fun.
- Seasonal Crafts: Pom poms are great for seasonal crafts. Suggest making snowmen or ornaments for winter, or pumpkins and ghosts for Halloween. These can be fun projects for the whole family.
- Personalized Stationery: For those who love paper crafts, pom poms can be glued to the top of pens or pencils or used to decorate handmade cards or bookmarks.
- Wearable Art: Encourage readers to sew pom poms onto hats, bags, or shoes for a pop of color and texture. This can be a simple way to revamp old items.
- Charitable Projects: Lastly, pom poms can be made for a cause. Readers can make pom pom hats for newborns in hospitals or for those undergoing chemotherapy.
Advanced Techniques
For those who have mastered the basics of making pom poms and are looking for a challenge, advanced techniques can take your skills to the next level. Here's a detailed guide on some sophisticated methods to enhance your pom pom crafting:
- Multi-Colored Patterns: Making multi-colored pom poms involves a bit more planning but the results are stunning. Start by deciding on a color pattern or design. Then, carefully layer your yarns in sections on your pom pom maker, following the pattern you've envisioned. Remember to keep tension even so that when you cut and fluff out your pom pom, the colors are distributed as desired.
- Shaping Pom Poms: After mastering the round pom pom, try shaping them into hearts, stars, or even animal faces. This involves trimming the pom pom in specific ways after it's been made. For example, to make a heart-shaped pom pom, you would trim the top into a point and the bottom into a V-shape. It takes a steady hand and a good eye for symmetry.
- Textured Pom Poms: Mixing yarns of different textures can give your pom poms a unique feel. Combine smooth, silky yarns with fluffy, chunky ones to make a pom pom that's interesting to touch. The key is to experiment with different combinations to see what works best.
- Beaded Pom Poms: For a bit of sparkle, incorporate beads into your pom poms. Thread beads onto your yarn before wrapping it around the pom pom maker. As you wrap, space out the beads evenly. When the pom pom is complete, the beads will be scattered throughout, catching the light beautifully.
- Gradient Pom Poms: Make a gradient effect by using yarns that gradually change color. Start with the darkest shade and move to the lightest, or vice versa, to achieve a subtle ombre look. This technique is particularly effective with larger pom poms.
- Embellished Pom Poms: Once you've made your pom pom, consider adding embellishments like sequins, small buttons, or embroidery. This adds an extra layer of detail and can be used to make intricate designs or facial features on character pom poms.
- Layered Pom Poms: Make a layered look by making several small pom poms in different colors and attaching them together. This can make a beautiful, multi-dimensional effect that's perfect for decorative pieces.
- Pom Pom Sculptures: Take your pom pom making to an artistic level by making sculptures. Combine multiple pom poms of various sizes and colors to form animals, flowers, or abstract art pieces.
Using these techniques in your pom pom projects lets you craft unique and detailed designs.
FAQs About DIY Pom Pom Maker
Get answers to FAQs about DIY pom pom makers, and discover tips, tricks, and essential information for making perfect pom poms every time.
A DIY pom pom maker is a tool that helps you create yarn pom poms easily and consistently. It can be as simple as using your fingers, a fork, or cardboard cutouts, or as sophisticated as a plastic pom pom maker. The basic principle involves wrapping yarn around the tool, tying it off, and cutting it to form the fluffy pom pom shape.
Yes, you can! You can use everyday items like your hands, a piece of cardboard, or even a fork to make pom poms. These methods involve wrapping yarn around the chosen item, securing it in the middle, and then cutting the loops to create the pom pom.
The best yarn for pom poms is typically a thicker, worsted weight yarn because it creates a fuller and fluffier pom pom. However, you can use any yarn you have on hand, including wool, acrylic, cotton, or blends. The key is to use sharp scissors for clean cuts to make your pom pom look neat.
To prevent your pom pom from falling apart, make sure to tie the yarn tightly around the middle before cutting the loops. A double knot is recommended. After cutting, give your pom pom a good shake and trim any loose ends to ensure it stays together.
Pom poms can be used in a variety of crafts and decorations. They can be added to hats, scarves, and other knitwear, used to make cute animals or characters, strung together for garlands, or even used as a playful decor element in home accessories like cushions and throws.
Conclusion
Making a DIY pom pom maker from cardboard is not only easy but also immensely satisfying. It's a wonderful activity to do with kids, friends, or even by yourself when you need a little creative therapy. The materials are simple, the steps are straightforward, and the results are delightfully fluffy!


