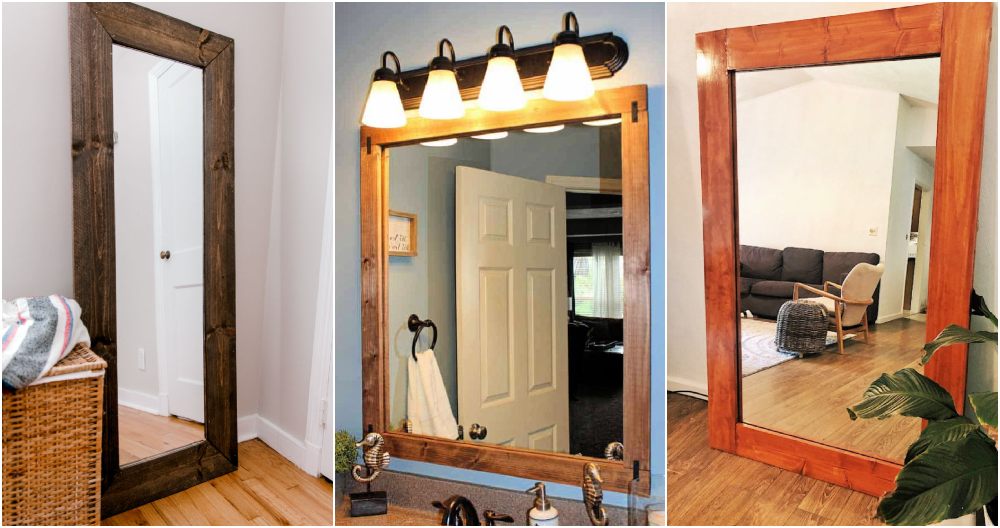
I remember the first time I wanted to build a DIY poster frame. It felt like a huge task, but with simple steps, it became easy. I gathered all my materials: some wood, glue, nails, and a saw. I didn't have any fancy tools, just basic ones. It took a bit of time, but I learned a lot and it was fun!
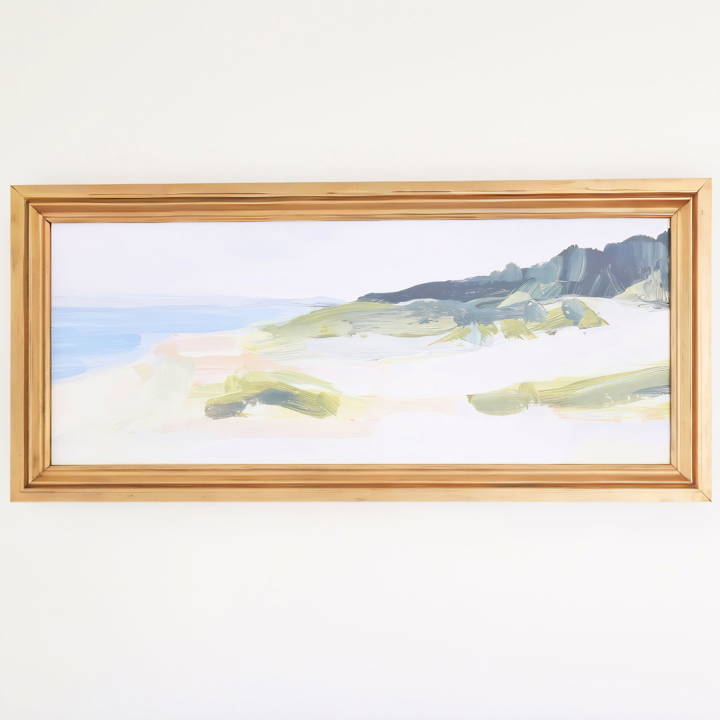
Now, I'll share how you, too, can make a DIY poster frame. This guide will help you understand the process in simple, easy steps. You'll need basic materials and tools, as well as a bit of patience.
By the end, you'll have a beautiful, custom frame to show off your favorite posters. Let me help you get started with these easy and helpful instructions.
Materials Needed:
- Three-Quarter-Inch Thick Molding: I chose this for the outline of the frame, providing a sturdy yet refined edge.
- Quarter-Inch Thick Plywood: This served as the backing for the poster, offering a smooth and secure base.
- Half-Inch Thick Boards: Used for making an inner frame to add depth and structure.
- Wood Glue & Brad Nails: Essential for attaching the pieces securely.
- Wood Filler or Lightweight Spackle: To ensure seamless joints and a polished look.
- Metallic Gold Paint or Rub and Buff: For achieving that vintage gold finish.
- Miscellaneous: Miter saw, clamps, brad nailer, screws, and paintbrushes.
Choosing these materials was pivotal in ensuring the quality and aesthetic appeal of the final product. Now, let me walk you through each step I took.
Step by Step Instructions
Learn how to make a DIY poster frame with our step-by-step guide. Follow easy instructions from cutting materials to attaching your poster for a polished finish.
Step 1: Cutting the Material
I began by cutting the molding and lumber to size, ensuring the dimensions perfectly matched the artwork. Precision here was key to a balanced frame. The angular cuts were critical for that vintage look. A miter saw made these cuts manageable and precise.
Step 2: Assembling the Frame
Using wood glue and brad nails, I delicately attached the molding pieces to form the outer frame. Clamps were lifesavers, holding the pieces in place as they bonded. It was essential to ensure the nails penetrated the thicker part of the molding to avoid any splintering.
Step 3: Constructing the Outer Edge
The half-inch thick boards were next, making an additional layer around the frame for depth. Again, wood glue and brad nails were indispensable. This step required a steady hand and an eye for alignment to maintain the frame's integrity and aesthetic balance.
Step 4: Smoothing Surfaces
With all pieces securely attached, I used wood filler to smooth over the nail holes and any gaps. Achieving a smooth, seamless surface was crucial before applying the finishing touches.
Step 5: Preparing the Poster
Cutting the poster to size was a delicate task. I aimed for a slightly smaller size than the plywood backing, ensuring the edges wouldn't peek out from behind the frame. While scissors were less precise than a craft blade, they provided the control needed for a clean cut.
Step 6: Attaching the Poster
Glue dots proved to be an excellent choice for securing the poster to the plywood. They provided a strong bond without the risk of damaging the poster, allowing for future replacements if desired.
Step 7: The Finishing Touch
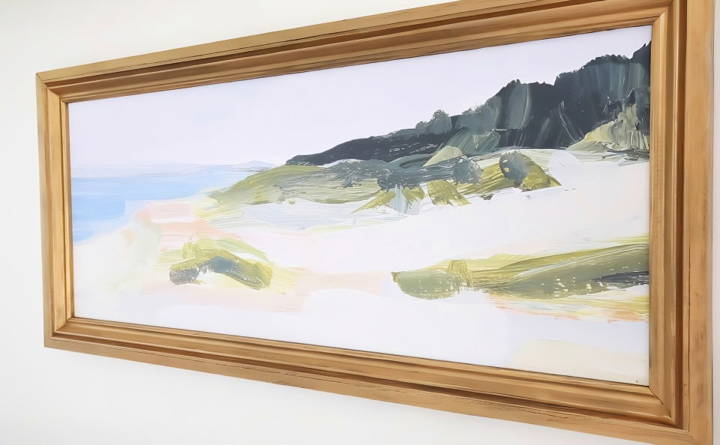
The most exhilarating step was applying the metallic gold finish. After a base coat of flat black spray paint, I employed a combination of gold leaf Rub and Buff, a chip brush, and a lint-free rag for application. This process, albeit messy, was transformative, imbuing the frame with a genuinely vintage aura that exceeded my expectations.
Final Step: Mounting the Masterpiece
With the frame complete and the artwork securely in place, I used screws to attach the plywood backing to the frame, ensuring they were positioned to anchor in the thicker parts of the molding. Then, choosing the perfect spot on my wall, I mounted the frame with drywall anchors for a sturdy display.
Customization Ideas for DIY Poster Frames
When it comes to DIY poster frames, customization is key to making a piece that not only showcases your poster but also reflects your personal style. Here are some ideas to inspire your creativity and help you make a frame that's truly one-of-a-kind.
- Choose Your Theme: Start by deciding on a theme that complements your poster. Whether it's vintage, modern, rustic, or eclectic, your frame can enhance the overall look and feel of the artwork.
- Paint and Finishes: Transform your frame with paint. Go for a solid color that matches elements within your poster, or try techniques like distressing or gold leaf for a more artistic effect. Use non-toxic, environmentally friendly paints for a safer and greener project.
- Decorative Add-Ons: Consider adding embellishments such as decorative molding, stenciling, or even fabric to the frame's border. These add-ons can add texture and depth, making your frame stand out.
- Interactive Elements: If you're framing something like a concert poster, why not attach a set of guitar picks or ticket stubs to the frame? This not only personalizes the frame but also tells a story.
- Light It Up: Adding LED lights or a string of fairy lights around the frame can give it a dramatic effect, especially in a dim room. Ensure the lights are battery-operated or have a hidden power cord for a clean look.
- Mix and Match: Don't be afraid to mix materials. Combine wood with metal accents, or glass with fabric, for a frame that's unexpected and visually interesting.
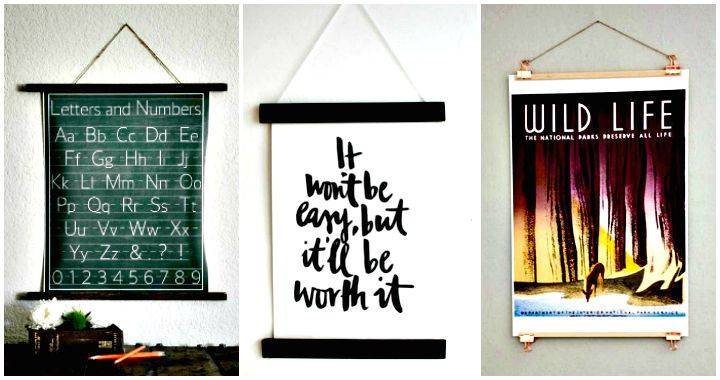
- Magnetic or Clip Frames: For a modern twist, use magnetic or clip frames that allow you to easily switch out posters whenever you like. This is perfect for those who love to update their decor frequently.
- Eco-Friendly Approach: Use reclaimed wood or repurpose old frames for an eco-friendly option. This not only reduces waste but also gives your frame a unique history.
- Protective Coating: Apply a clear protective sealant to your frame to protect it from dust, moisture, and fading. This is particularly important if your poster will be hung in a high-traffic area or exposed to sunlight.
The goal is to enhance your poster and make it a focal point in your space. Keep your design choices aligned with the poster's content and your room's decor for a cohesive and attractive display.
Advanced Techniques for Crafting DIY Poster Frames
For those who have mastered the basics of DIY and are looking to challenge themselves with more complex projects, advanced techniques can take your poster frames from simple to spectacular. Here's how you can elevate your DIY skills with some sophisticated methods.
- Intricate Woodworking: If you're comfortable with woodworking tools, try making frames with detailed carvings or joinery techniques like dovetails or mortise-and-tenon joints. These methods not only enhance the frame's appearance but also its strength and durability.
- Non-Traditional Materials: Experiment with materials beyond wood, such as acrylic, metal, or even concrete. Each material offers a unique texture and weight, giving your poster frame a modern and distinctive look.
- Layering and Depth: Make a multi-layered frame by using different levels or depths. This can add a three-dimensional effect to your poster, making it more eye-catching and dynamic.
- Integrated Lighting: Incorporate lighting within the frame to highlight your poster. LED strips can be embedded along the inner edges to cast a soft glow on the artwork, adding ambiance to the room.
- Digital Elements: For a high-tech approach, install a digital screen behind a transparent or semi-transparent poster. This allows you to change the displayed image without physically replacing the poster.
- Epoxy Resin: Use epoxy resin to encase objects related to your poster's theme directly into the frame. This could include items like seashells for a beach-themed poster or concert memorabilia for a music event poster.
- Interactive Frames: Build frames with interactive elements, such as chalkboard paint areas where viewers can leave messages or magnetic surfaces to attach notes and other small items.
- Sculptural Frames: Turn your frame into a piece of art itself by sculpting it into shapes that complement your poster. This could be as simple as geometric patterns or as complex as nature-inspired forms.
- Protective Features: Consider adding UV-protective glass or acrylic to shield your poster from sunlight damage. This is especially important for preserving the colors and quality of your artwork over time.
Use advanced techniques in your DIY poster frames to make unique displays and enhance your crafting skills.
Troubleshooting Common Issues in DIY Poster Frames
Making your own poster frame can be a rewarding project, but sometimes, you might encounter a few hiccups along the way. Here's a guide to troubleshooting common issues so you can get back to crafting with confidence.
The Frame is Warped or Bent
- Solution: If the wood is slightly warped, you can try wetting it and then clamping it to a flat surface until it dries. For metal frames, gentle bending might help, but be cautious to avoid breaking.
The Corners Don't Align Perfectly
- Solution: Sand down the edges for a smoother finish. If gaps are present, wood filler can be used for wooden frames. Let it dry and sand again for a seamless look.
The Glass Doesn't Fit
- Solution: Measure the glass and the opening of the frame carefully before cutting. If it's too big, you'll need to cut it down to size with a glass cutter. If it's too small, consider adding a border to hide the gap.
The Poster Keeps Slipping
- Solution: Secure the poster with acid-free tape or use a backing board that fits snugly in the frame. This will keep the poster in place without damaging it.
Scratches on the Frame
- Solution: For minor scratches, a bit of touch-up paint or wood stain can work wonders. For deeper scratches, fill them with wood putty and repaint or restain the area.
Difficulty Hanging the Frame
- Solution: Ensure you have the right hardware for the weight of your frame. Use wall anchors for heavy frames and double-check that your hooks are firmly in place.
The Frame Looks Dull
- Solution: A coat of polish or wax can bring back the shine to wooden frames. For metal frames, a gentle cleaner suitable for the material will do the trick.
By addressing these common issues, you'll be able to make a sturdy and beautiful frame that perfectly complements your poster. Remember, patience and careful attention to detail are your best tools in DIY projects.
FAQs About DIY Poster Frame
Find answers to common questions about DIY poster frames, including materials, assembly tips, and best practices for a perfect custom fit.
First, measure your poster. Add a little extra to each dimension for the frame’s overlap. Use a saw to cut the frame pieces to size. For wood, a miter saw will give you clean 45-degree angles for the corners. If you’re using metal strips, a hacksaw or metal cutter will work.
Yes, you can! Use pre-cut wood or metal strips from a hardware store. You can also use a manual miter box and saw for cutting angles. For assembly, simple hand tools like a screwdriver and a manual staple gun are sufficient.
Lay out the frame pieces on a flat surface. Apply adhesive to the corners and join them. Once the frame is assembled, place the glass or acrylic sheet in, followed by the poster and the backing material. Secure everything with clips or small nails. Attach the hanging hardware to the back.
When selecting a cover for your poster frame, consider the following:
Acrylic is lightweight, shatter-resistant, and provides UV protection but can scratch easily.
Glass offers a classic look and is scratch-resistant but is heavier and can break if dropped.
For a balance between protection and clarity, opt for UV-filtering acrylic or museum-quality glass.
Avoid these common pitfalls to ensure a successful DIY frame:
Not measuring correctly: Always double-check your measurements before cutting.
Using the wrong adhesive: Choose an adhesive suitable for the materials you're using.
Skipping the sanding step: Sanding your frame pieces ensures a smooth finish and better paint or stain application.
Forgetting the backing: A sturdy backing will protect your poster and keep it in place.
Conclusion
Wrapping up, building a DIY poster frame in minutes is a simple and rewarding project. Making your own poster frames not only saves you money but also allows you to customize them to fit your style perfectly. This guide on how to make a poster frame will help you add a personal touch to your home décor. Follow these steps, and you'll have beautiful frames in no time!


