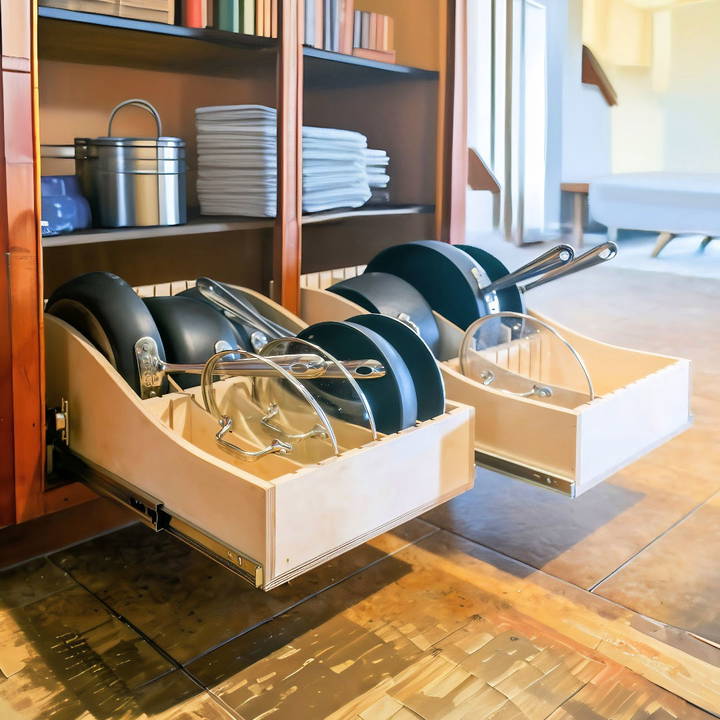
Are your pots and pans taking over your kitchen, stacked on top of each other and hard to reach when you need them? If so, it's time to get organized! This guide will show you how to make a simple DIY organizer with a pull-out drawer for your pots and pans. With this organizer, you'll be able to grab your cookware easily, keep everything neat, and save space in your kitchen.
In this guide, we'll go through every step of the project, from the materials you need to the installation process. Let's jump into this DIY pots and pans organizer project, which you can finish in just one day!
Why Build a DIY Pots and Pans Organizer?
Before we get into the how, let's talk about the why. Storing pots, pans, and lids can be a nightmare in most kitchens. They are bulky, come in various sizes, and are often difficult to organize effectively. A pull-out organizer offers several benefits:
- Maximized Space: A pull-out drawer helps you efficiently use the space in your cabinets.
- Easy Access: No more digging around for the right-sized pot or lid. Everything will be easy to reach.
- Customizable: You can adjust the dividers to accommodate different cookware sizes and shapes.
This project will not only improve your kitchen's functionality but also add a touch of personalization and craftsmanship to your space.
Materials Needed
Here's a breakdown of what you'll need to build your pots and pans organizer:
- Plywood (½ inch and ¾ inch for different sections)
- MDF for templates (optional, but helpful)
- Pocket hole screws for assembly
- Brad nails for securing pieces
- Wood glue (preferably interior grade for cabinetry)
- Drawer slides (full extension recommended)
- Saw (Bandsaw or Jigsaw) for cutting curves
- Router table with flush trim bit for precise shaping
- Sander (Oscillating or Belt) for smoothing edges
- Painter's tape and glue for template attachment
- Pocket hole jig for drilling pocket holes
- Dividers (¼ inch plywood)
Tools Needed
- Table saw
- Router table
- Bandsaw or jigsaw
- Sander
- Clamps
- Measuring tape
- Drill and bits
- Brad nailer
- Screwdriver
With these tools and materials ready, let's begin building your DIY pots and pans organizer!
Step by Step Instructions
Build your own DIY pots and pans organizer with easy step-by-step instructions. Craft and organize efficiently with this simple guide.
Step 1: Making the Sides with Curved Edges
The first step is to make the sides of the drawer, which will house your pots and pans. These sides need to be sturdy but with a slight curve for aesthetic appeal and better storage function. Here's how to build them:
- Build a Template: Begin by clamping two blocks of wood at either end of a piece of MDF. This will act as the base for making the curve. You can then use a flexible material like a thin strip of wood or plastic, clamping it to the blocks to form a subtle curve. With one hand, press down on the material to hold the curve in place and trace it lightly with a pencil.
- Cut the Curve: Once your curve is traced, cut it out with a bandsaw or jigsaw, staying just outside the pencil line. This rough cut will give you a general shape to refine.
- Smooth the Curve: After cutting, sand the edges to achieve a smooth, even curve. A spindle sander or oscillating belt sander works best here. You want the curve to be symmetrical and as smooth as possible. Once satisfied with the curve, you now have a template for the drawer sides.
- Duplicate the Sides: Using your template, trace the curve onto the plywood you'll use for the actual sides of the drawer. To attach the template to your workpiece, use painter's tape and fast-setting glue. This method allows you to secure the template without damaging the wood. Once secured, use a router with a flush trim bit to perfectly replicate the curve onto your plywood pieces.
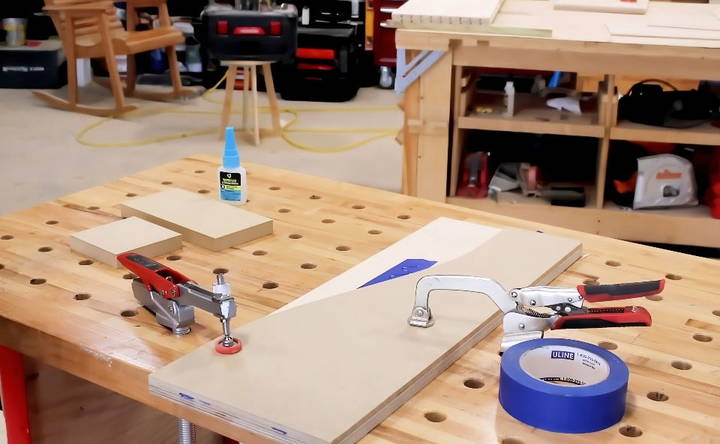
Repeat this process until you have four identical sides — two for each pull-out drawer.
Step 2: Cutting the Slots for Dividers
To give your organizer flexibility, you'll add slots in the sides where dividers can be inserted. These slots will allow you to adjust the compartments based on the size of your pots and pans.
- Prepare the Plywood: Start by cutting your plywood to size. You will need a few long boards of ½-inch plywood for this.
- Cutting the Slots: Use a router with a ¼-inch bit to cut slots into the boards. These slots will hold the dividers. To make this process quicker and more accurate, build a jig that allows you to cut at evenly spaced intervals. The jig ensures that each slot is identical, making it easier to line up dividers later.
- Cut the Boards to Size: Once the slots are cut, trim the boards to the correct height for your drawer. Be sure to label each piece, as they will have different heights for the front, back, and middle sections.
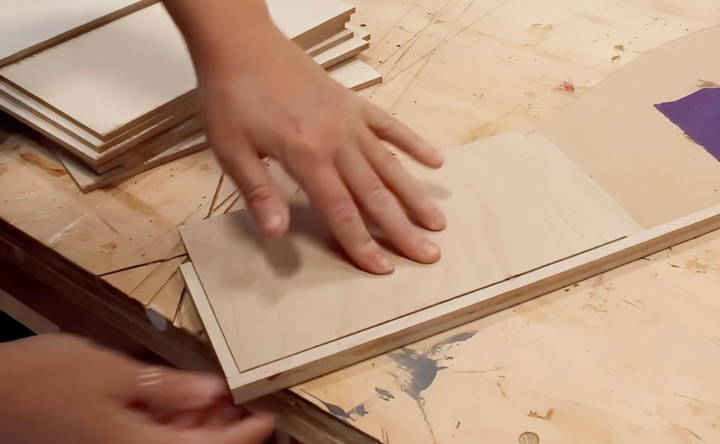
Step 3: Assembling the Drawer Body
Now that you've prepared the sides and the slotted boards, it's time to assemble the drawer body.
- Attach the Sides: Use wood glue and brad nails to attach the front and back slotted boards to the curved sides you've buildd. Make sure everything lines up perfectly, with the top edges flush.
- Insert the Bottom Panel: Once the sides are attached, cut a piece of ¼-inch plywood for the drawer bottom. Glue and nail it into place to secure the structure.
- Insert the Middle Dividers: Now, insert the slotted middle panels that will help support the dividers. These are glued and nailed into position, ensuring they align properly with the slots you've cut in the sides.
This gives you the basic structure of your pull-out drawer. The slotted sides allow you to add dividers, which is the next step.
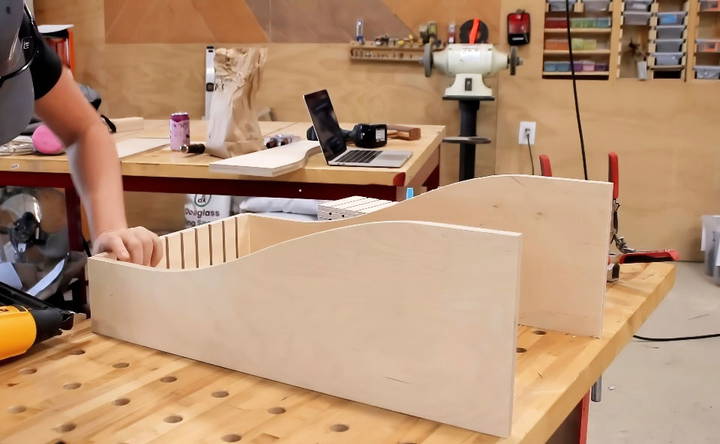
Step 4: Making the Dividers
The dividers are a key part of your DIY pots and pans organizer. They help separate your cookware and prevent them from scratching or damaging each other.
- Cut the Dividers: Start by cutting pieces of ¼-inch plywood for the dividers. You can leave them as simple square pieces, but to match the aesthetic of the drawer sides, you can add a curve.
- Building Curved Dividers: Using the same template that you made for the sides, trace and cut the dividers on your bandsaw. This ensures they fit perfectly inside the drawer and match the overall look.
- Using a Jig for Efficiency: If you're making multiple dividers, consider making a simple jig to help replicate the shape quickly and consistently. Attach sandpaper to the jig using contact cement to help grip the wood pieces in place while you cut and trim.
- Test the Fit: Once all the dividers are cut, insert them into the slots of your drawer to ensure they fit snugly but can still be moved easily. The dividers should be adjustable to accommodate different sizes of cookware.
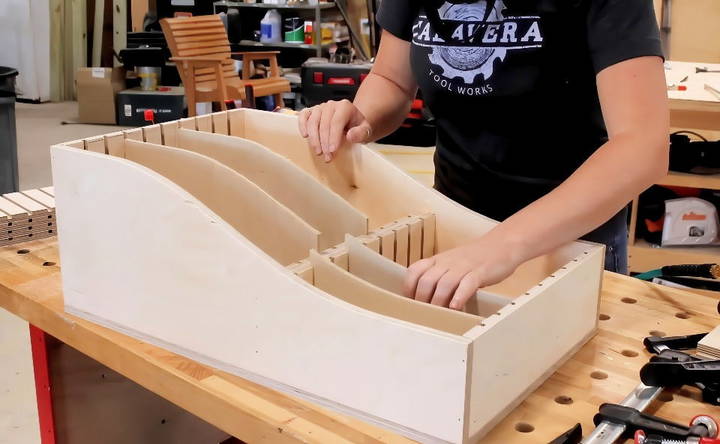
Step 5: Installing the Pull-Out Drawer
Now that the drawer and dividers are ready, it's time to install the pull-out system inside your kitchen cabinet.
- Measure Your Cabinet Opening: Every kitchen cabinet is slightly different, so it's important to measure your specific opening before proceeding. Make sure your drawer dimensions are smaller than the cabinet opening by a comfortable margin to allow for the runners and slides.
- Attach Drawer Runners: To install the pull-out drawer, you'll need to attach runners to the inside of the cabinet. Use ¾-inch plywood scraps to build the runners. Secure them using a pocket hole jig and screws. Make sure the runners are level and aligned with the cabinet door opening.
- Install Drawer Slides: Attach full-extension drawer slides to the runners. Drawer slides ensure your pull-out organizer operates smoothly and can bear the weight of heavy cookware. Use spacers or scrap wood to ensure the slides are installed at the correct height.
- Position the Drawer: With the slides in place, position the drawer inside the cabinet. Attach the slides to the drawer, securing them with screws.
- Test the Drawer: Pull the drawer in and out to ensure it operates smoothly. If it's too tight or misaligned, adjust the slides or runners as needed.
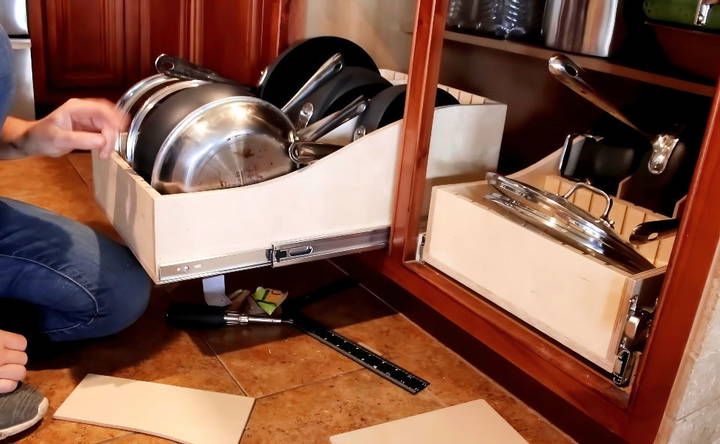
Step 6: Organizing Your Pots and Pans
With the drawer installed, it's time to organize your pots and pans!
- Place Large Items at the Back: Start by placing your largest pots and pans toward the back of the drawer. The dividers will help keep them separated so they don't scratch each other.
- Smaller Items in the Front: For smaller pots, pans, and lids, use the front section of the drawer. Adjust the dividers as needed to build more compartments and ensure everything is accessible.
- Handles Inward: Store your pots and pans with the handles facing inward to maximize space and make it easier to pull them out.
- Utilize Divider Flexibility: Thanks to the adjustable dividers, you can rearrange your storage as needed. This flexibility ensures your drawer can adapt to your evolving kitchen needs.
Conclusion: A Win-Win for Kitchen Organization
In just a day's work, you've transformed your messy, cluttered pots and pans cabinet into a streamlined, easy-to-access pull-out drawer organizer. Not only does this project solve a common kitchen storage issue, but it also adds a touch of DIY craftsmanship to your home.
By following this guide, you've learned how to:
- Design and cut curved sides for aesthetic appeal.
- Build a flexible organizer with adjustable dividers.
- Install a pull-out drawer that works smoothly in any kitchen cabinet.
This DIY organizer is versatile too! While we've focused on pots and pans, you can use this same method to organize other kitchen items like cutting boards, baking sheets, or even food storage containers.
If you're looking for more DIY projects like this, be sure to check out other helpful guides.
FAQs About DIY Pots and Pans Organizer
Explore common queries on DIY pots and pans organizer with tips and tricks for efficient kitchen storage and organization solutions.
If your cabinets aren't as deep, you can still use this system by adjusting the drawer’s depth. Measure your cabinet carefully and modify the dimensions of the drawer. You can either reduce the size of the dividers or create a single-tiered pull-out if space is limited.
You can complete this project with basic tools like a jigsaw, hand saw, or circular saw. It might take longer to cut the curved sections and trim everything precisely, but it’s doable. Consider visiting yard sales or borrowing tools if needed.
Yes, bottom-mounted slides work well, especially if you want a cleaner look without visible hardware. Just ensure they can handle the weight of your pots and pans. Heavy-duty slides with higher weight capacities are recommended for heavier cookware.
For heavy cookware like cast iron, choose heavy-duty drawer slides that can bear the extra weight. Opt for slides rated at 90 lbs or more and reinforce the bottom of the drawer with thicker plywood.
If your cabinet has a center stile, you can either remove it or split the organizer into two smaller sections that fit on either side of the stile. Alternatively, attach the stile to one of the doors and convert it into a wide pull-out organizer.
A water-based polyurethane finish is recommended for the wood, especially in a kitchen environment where moisture is a concern. It provides protection without the need for paint and keeps the wood looking natural.
Store larger pots toward the back of the drawer and place lids in the front or use the dividers to build separate compartments for the lids. You can also consider adding lid holders mounted on the cabinet door for easy access.
Absolutely! The same pull-out design can be modified to store cutting boards, baking sheets, or other flat kitchen items. Adjust the dimensions and divider spacing to suit the specific items you plan to store.
For those with experience and a well-equipped shop, this project can be completed in a single day. If you're using simpler tools or are new to DIY, expect the project to take longer.
Yes, scrap wood can work well for building this organizer, particularly for jigs and templates. Just ensure the main components, such as the drawer sides and base, are made from durable plywood to handle the weight of the cookware.


